
How to Keep Mini Pump Efficient Over Time: Smart Tips
Quick Summary: Keep your mini pump working like new with these simple steps: Clean it regularly to remove dirt and grime. Lubricate moving parts for smooth action. Inspect and replace worn-out O-rings and seals. Store it properly to avoid damage. With regular care, your mini pump will always be ready when you need it!
Is your mini pump starting to feel a bit… blah? You’re not alone! Many cyclists find their trusty mini pumps lose their oomph over time. It’s frustrating when you need to inflate a tire on the road, and your pump isn’t up to the task. The good news is, with a little maintenance, you can keep your mini pump working efficiently for years. This guide will walk you through easy steps to keep your pump in top shape.
We’ll cover everything from cleaning and lubricating to inspecting for wear and tear. Plus, we’ll share some tips on proper storage. By the end of this article, you’ll have the knowledge to keep your mini pump ready for any cycling adventure. Let’s get started!
Why Mini Pump Efficiency Matters
A mini pump is a cyclist’s best friend, especially when you’re miles from home. But a neglected pump can quickly become a source of frustration. Here’s why keeping your mini pump efficient is super important:
- Reliability: A well-maintained pump is more likely to work when you need it most.
- Efficiency: An efficient pump requires less effort to inflate your tires.
- Longevity: Regular maintenance extends the life of your pump, saving you money in the long run.
- Safety: Properly inflated tires improve handling and reduce the risk of flats.
Essential Tools and Materials
Before we dive into the maintenance steps, let’s gather the necessary tools and materials. Having everything on hand will make the process smoother and more efficient.
- Small Brush: An old toothbrush or small cleaning brush.
- Clean Rags: For wiping and cleaning parts.
- Silicone-Based Lubricant: Specifically designed for rubber and plastic components.
- Small Screwdrivers: Both Phillips head and flathead.
- O-Ring Replacement Kit: A selection of O-rings that match your pump model.
- Warm Water and Mild Soap: For cleaning pump components.
- Needle-Nose Pliers: For removing and installing small parts.
- Work Gloves: To keep your hands clean and protected.
Step-by-Step Guide to Maintaining Your Mini Pump

Now, let’s get into the nitty-gritty of maintaining your mini pump. Follow these steps to ensure your pump stays in top condition.
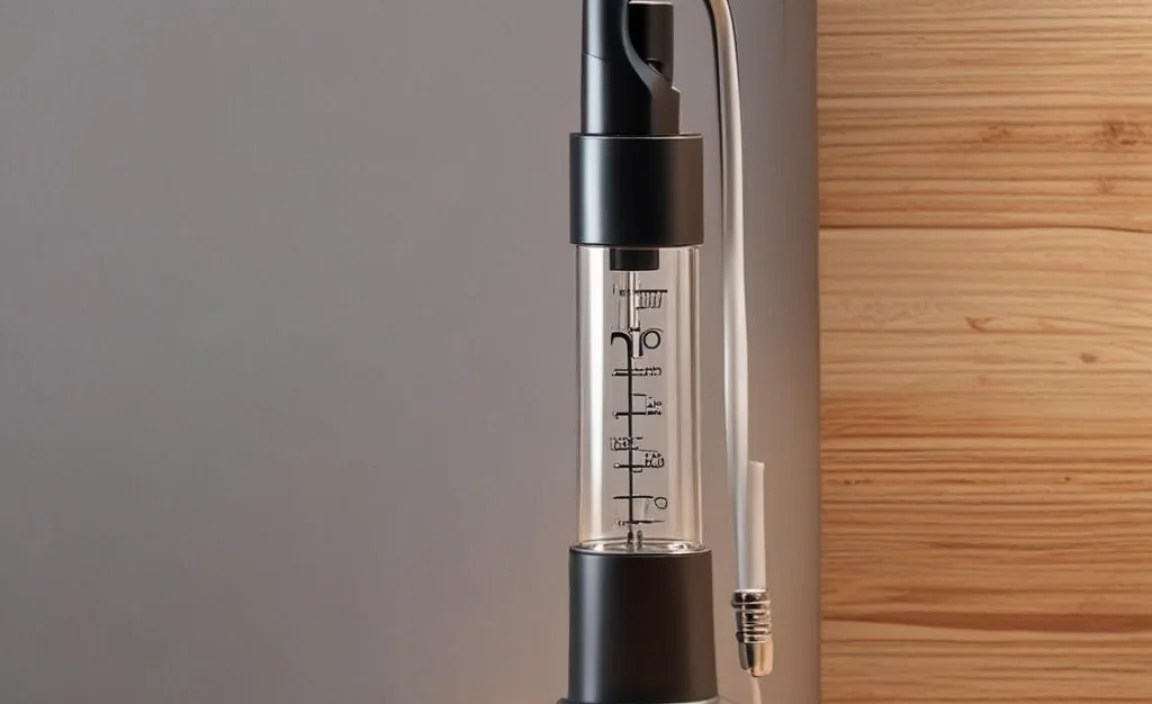
Step 1: Disassembly
Carefully disassemble your mini pump. Most pumps consist of a handle, barrel, piston, and valve head. Take note of how each part fits together. If you’re unsure, take photos as you go. This will help you reassemble it correctly later.
- Remove the Handle: Usually, this involves unscrewing or unclipping the handle from the pump barrel.
- Separate the Piston: Slide the piston out of the barrel. Be gentle to avoid damaging any internal components.
- Detach the Valve Head: Unscrew or unclip the valve head from the barrel.
Step 2: Cleaning
Cleaning is crucial for removing dirt and debris that can hinder your pump’s performance. Use warm, soapy water and a small brush to clean each part thoroughly.
- Wash the Barrel: Use a brush to scrub the inside of the barrel. Rinse with clean water and dry with a clean rag.
- Clean the Piston: Pay close attention to the piston’s O-rings. Remove any dirt or grime with a brush and soapy water.
- Wash the Valve Head: Clean the valve head to ensure proper sealing. Remove any debris that may be blocking the valve.
- Rinse and Dry: Rinse all parts with clean water and allow them to air dry completely before reassembly.
Step 3: Inspection
Inspect each part for wear and tear. Pay special attention to the O-rings, as these are common culprits for air leaks. Look for cracks, tears, or flattening.
- Check O-Rings: Examine the O-rings on the piston and valve head. Replace any that appear damaged or worn.
- Inspect the Piston: Look for any signs of wear or damage on the piston itself.
- Examine the Valve Head: Ensure the valve head is free from cracks or damage. Check the valve core for proper function.
Step 4: Lubrication
Lubrication keeps the pump working smoothly and prevents premature wear. Use a silicone-based lubricant, as it won’t damage rubber or plastic components. Avoid petroleum-based lubricants, which can degrade these materials.
- Lubricate the Piston: Apply a small amount of lubricant to the piston’s O-rings.
- Lubricate the Barrel: Apply a thin layer of lubricant to the inside of the barrel.
- Work the Lubricant: Move the piston in and out of the barrel to distribute the lubricant evenly.
Step 5: Replacing O-Rings
Replacing worn O-rings can significantly improve your pump’s efficiency. Use a small screwdriver or needle-nose pliers to remove the old O-rings and install the new ones.
- Remove Old O-Rings: Carefully remove the old O-rings from the piston and valve head.
- Install New O-Rings: Stretch the new O-rings into place. Ensure they are seated properly in their grooves.
- Apply Lubricant: Apply a small amount of lubricant to the new O-rings to ensure a good seal.
Step 6: Reassembly
Carefully reassemble your mini pump, following the reverse order of disassembly. Make sure all parts fit snugly and securely.
- Reattach the Valve Head: Screw or clip the valve head back onto the barrel.
- Insert the Piston: Slide the piston back into the barrel.
- Reattach the Handle: Screw or clip the handle back onto the pump barrel.
Step 7: Testing
Test your pump to ensure it’s working correctly. Inflate a tire to the recommended pressure and check for any leaks.
- Inflate a Tire: Connect the pump to a tire valve and inflate the tire.
- Check for Leaks: Listen for any hissing sounds that may indicate leaks.
- Verify Pressure: Use a tire pressure gauge to ensure the tire is inflated to the correct pressure.
Troubleshooting Common Issues

Even with regular maintenance, you might encounter some common issues. Here’s how to troubleshoot them:
Problem: Pump is Hard to Push
- Cause: Lack of lubrication or a dirty piston.
- Solution: Disassemble the pump, clean the piston and barrel, and apply fresh lubricant.
Problem: Air Leaks
- Cause: Worn or damaged O-rings.
- Solution: Replace the O-rings on the piston and valve head.
Problem: Valve Head Won’t Seal
- Cause: Debris in the valve head or a damaged valve core.
- Solution: Clean the valve head and replace the valve core if necessary.
Problem: Handle Keeps Slipping
- Cause: Worn handle grip.
- Solution: Replace the handle grip or wrap it with handlebar tape for better grip.
Tips for Proper Storage
Proper storage can significantly extend the life of your mini pump. Here are some tips to keep in mind:
- Keep it Clean: Before storing, clean your pump to remove any dirt or grime.
- Store in a Dry Place: Avoid storing your pump in damp or humid conditions.
- Protect from Extreme Temperatures: Extreme heat or cold can damage the pump’s components.
- Use a Protective Case: If possible, store your pump in a protective case to prevent damage.
Choosing the Right Lubricant
Using the right lubricant is crucial for maintaining your mini pump. Here’s a comparison of different types of lubricants:
| Lubricant Type | Pros | Cons | Best Use |
|---|---|---|---|
| Silicone-Based | Safe for rubber and plastic, excellent lubrication | Can be more expensive | O-rings, pistons, and barrels |
| Petroleum-Based | Inexpensive, readily available | Can damage rubber and plastic | Not recommended for mini pumps |
| Dry Lube | Attracts less dirt, good for dry conditions | May not provide as much lubrication | Pistons and barrels in dry climates |
When to Replace Your Mini Pump
Even with the best maintenance, there comes a time when you might need to replace your mini pump. Here are some signs that it’s time for a new one:
- Cracked or Broken Barrel: If the barrel is cracked, the pump won’t be able to generate pressure.
- Irreparable Damage: If the internal components are severely damaged, it may not be worth repairing.
- Significant Loss of Efficiency: If the pump requires excessive effort to inflate tires, it may be time for a replacement.
- Age: If your pump is several years old, the materials may have degraded over time.
Mini Pump Maintenance Schedule
To keep your mini pump in top condition, follow this maintenance schedule:
| Task | Frequency |
|---|---|
| Cleaning | After every ride in wet or dirty conditions |
| Lubrication | Every month or after heavy use |
| O-Ring Inspection | Every three months |
| O-Ring Replacement | As needed |
FAQ: Keeping Your Mini Pump Efficient
Q: How often should I clean my mini pump?
A: You should clean your mini pump after every ride in wet or dirty conditions. Regular cleaning prevents dirt and grime from damaging the internal components.
Q: What type of lubricant should I use?
A: Use a silicone-based lubricant. It’s safe for rubber and plastic components and provides excellent lubrication.
Q: How do I know if my O-rings need to be replaced?
A: Check your O-rings for cracks, tears, or flattening. If they appear damaged or worn, it’s time to replace them.
Q: Can I use WD-40 to lubricate my mini pump?
A: No, avoid using WD-40. It’s a solvent and can damage rubber and plastic components. Stick to silicone-based lubricants.
Q: How do I store my mini pump properly?
A: Store your mini pump in a dry place, away from extreme temperatures. Use a protective case if possible to prevent damage.
Q: What do I do if my pump is hard to push?
A: Disassemble the pump, clean the piston and barrel, and apply fresh lubricant. This should resolve the issue.
Q: Where can I buy replacement O-rings?
A: You can buy replacement O-rings at most bike shops or online retailers. Make sure to get the correct size for your pump model.
Conclusion
Keeping your mini pump efficient over time is all about regular maintenance and proper care. By following these simple steps—cleaning, lubricating, inspecting, and storing your pump correctly—you’ll ensure it’s always ready when you need it. A well-maintained mini pump not only saves you effort but also provides peace of mind on your cycling adventures. So, grab your tools, get to work, and enjoy the benefits of a reliable, efficient mini pump for years to come! Happy cycling!


