
How to Use Mini Pump for Fat Bike Tires: Easy Guide
Quick Summary:
Using a mini pump for fat bike tires can seem tough, but it’s doable! First, make sure your pump head fits your tire valve (Schrader or Presta). Securely attach the pump, use short, quick strokes, and check the pressure often. Remember, fat bike tires need lower pressure, usually between 5-10 PSI. Be patient, and you’ll be back on the trail in no time!
Fat bike tires are awesome for tackling snow, sand, and rough trails. But, inflating those big tires with a mini pump can feel like a workout! It’s a common struggle for riders. Getting enough air into a fat bike tire with a small pump takes time and effort. But don’t worry, it’s totally possible. With the right technique, you can get your tires inflated and get back to enjoying your ride.
In this guide, I’ll walk you through the steps for using a mini pump effectively on your fat bike tires. We’ll cover everything from choosing the right pump to mastering the pumping technique. Let’s get started and make sure you’re always ready to ride!
Choosing the Right Mini Pump
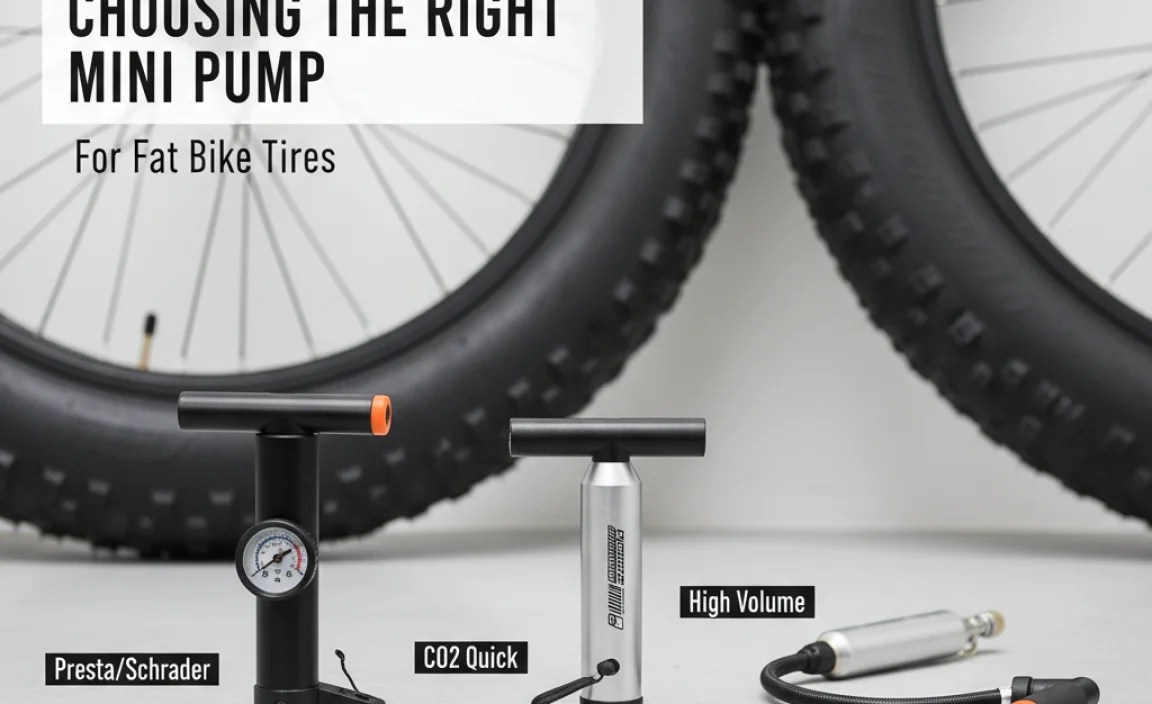
Not all mini pumps are created equal. When it comes to fat bike tires, you need a pump that can deliver enough air volume. Here’s what to look for:
- High Volume: Look for pumps specifically designed for high-volume tires. These pumps move more air per stroke, which is essential for fat bike tires.
- Compatibility: Ensure the pump head is compatible with both Schrader and Presta valves. Some pumps have a switch or adapter for different valve types.
- Durability: A well-built pump will last longer and withstand the rigors of trail use. Look for pumps with aluminum or durable plastic construction.
- Pressure Gauge (Optional): While not essential, a built-in pressure gauge can help you avoid over- or under-inflating your tires.
Recommended Mini Pumps for Fat Bikes
Here are a few mini pumps that are well-suited for fat bike tires:
- Lezyne Micro Floor Drive HVG: A high-volume mini pump with a footrest for added stability.
- Topeak Mountain DA: Designed for mountain bike tires, this pump is also great for fat bikes due to its high-volume output.
- Blackburn Mammoth 2FL: A durable and efficient mini pump with a large barrel for quick inflation.
Understanding Fat Bike Tire Pressure

Fat bike tires require much lower pressure than regular bike tires. This is because the large volume of the tire allows it to conform to the terrain, providing better traction and a smoother ride. Here’s what you need to know:
- Typical Pressure Range: Fat bike tires typically run between 5-10 PSI (pounds per square inch).
- Factors Affecting Pressure:
- Rider Weight: Heavier riders will need slightly higher pressure.
- Terrain: Softer surfaces like snow and sand require lower pressure for maximum floatation.
- Tire Type: Some tires may have a recommended pressure range printed on the sidewall.
- Importance of Low Pressure: Running too high of a pressure can result in a harsh ride and reduced traction.
Finding the Right Tire Pressure
Experiment to find the pressure that works best for you and your riding conditions. A good starting point is 8 PSI, and then adjust up or down based on your experience. Many riders find that they can go even lower on soft surfaces. Use the table below as a guide to finding the ideal tire pressure for your fat bike.
| Rider Weight (lbs) | Terrain | Recommended Tire Pressure (PSI) |
|---|---|---|
| Under 150 | Hardpack | 7-8 |
| Under 150 | Snow/Sand | 5-6 |
| 150-200 | Hardpack | 8-9 |
| 150-200 | Snow/Sand | 6-7 |
| Over 200 | Hardpack | 9-10 |
| Over 200 | Snow/Sand | 7-8 |
Step-by-Step Guide: Inflating Fat Bike Tires with a Mini Pump

Now that you have the right pump and understand tire pressure, let’s get to the actual inflation process. Follow these steps for best results:
Step 1: Prepare Your Tire and Pump
Before you start pumping, make sure everything is ready to go:
- Locate the Valve: Find the valve on your tire (Schrader or Presta).
- Remove the Valve Cap: Unscrew and remove the valve cap. Store it in a safe place so you don’t lose it.
- Check the Valve Core: Ensure the valve core is snug. If it’s loose, you may experience air leaks. You can tighten it with a valve core tool if needed.
- Prepare the Pump: Make sure your pump is set up for the correct valve type (Schrader or Presta). Some pumps have a switch or reversible parts for this.
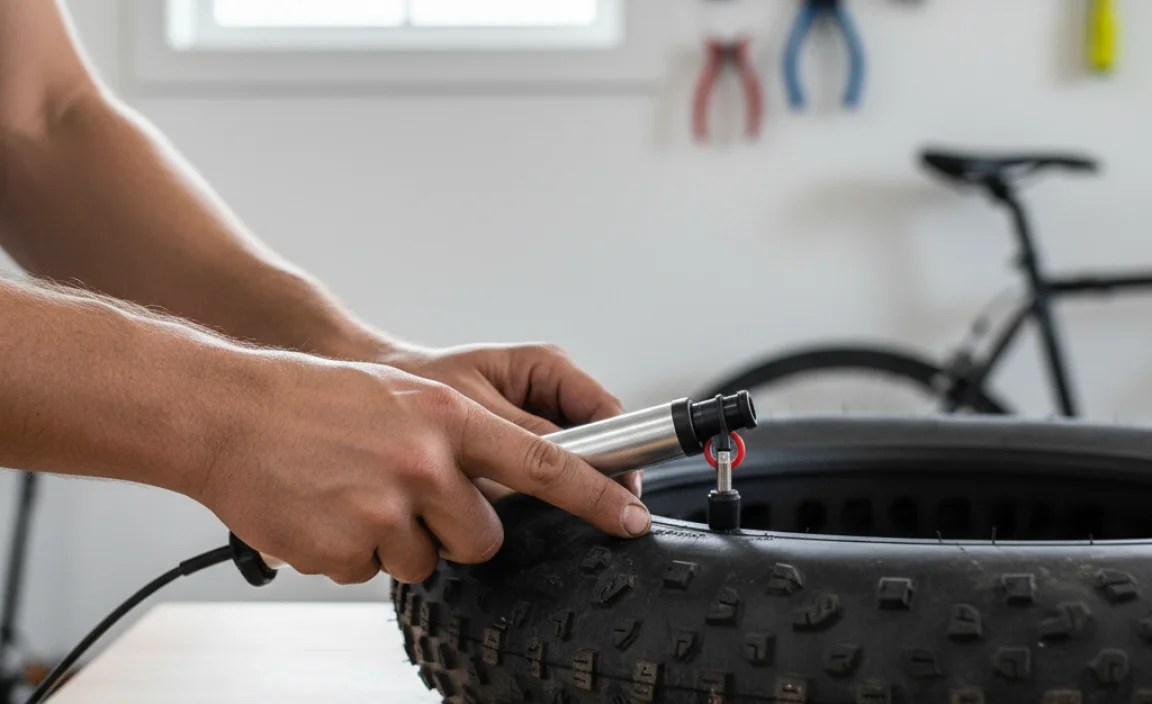
Step 2: Attach the Pump Head
Properly attaching the pump head is crucial to avoid air leaks:
- Position the Pump Head: Place the pump head squarely over the valve.
- Engage the Lever (if applicable): Some pump heads have a lever that you need to engage to create a tight seal. Flip the lever to the locked position.
- Check for Leaks: Listen for any hissing sounds. If you hear air leaking, readjust the pump head and try again.
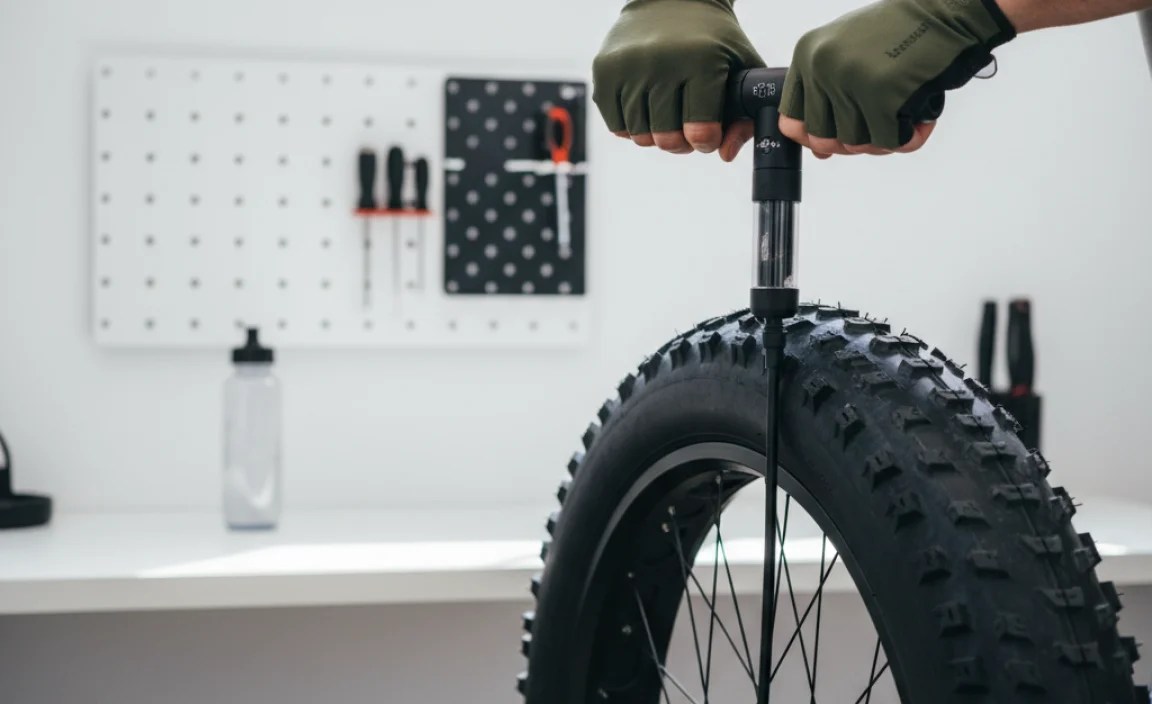
Step 3: Inflate the Tire
This is where the real work begins. Use these tips to make the process easier:
- Use Short, Quick Strokes: Mini pumps have limited air volume, so short, quick strokes are more effective than long, slow ones.
- Maintain a Steady Rhythm: Try to maintain a consistent pumping rhythm. This will help you conserve energy and inflate the tire more efficiently.
- Use Your Body Weight: If your pump has a footrest, use your body weight to stabilize the pump. This will make pumping easier and more efficient.
- Take Breaks: Pumping up a fat bike tire with a mini pump can be tiring. Take breaks as needed to avoid fatigue.
Step 4: Check the Tire Pressure
Regularly check the tire pressure to avoid over- or under-inflation:
- Use a Pressure Gauge: If your pump has a built-in gauge, monitor the pressure as you pump. If not, use a separate tire pressure gauge.
- Squeeze the Tire: You can also get a sense of the tire pressure by squeezing the tire. It should feel firm but not rock hard.
- Adjust as Needed: Add or release air as needed to reach your desired pressure.
Step 5: Detach the Pump and Secure the Valve
Once you’ve reached the desired pressure, finish the job:
- Disengage the Lever (if applicable): If your pump head has a lever, flip it to the unlocked position.
- Remove the Pump Head: Carefully remove the pump head from the valve.
- Replace the Valve Cap: Screw the valve cap back onto the valve. This will protect the valve from dirt and debris.
Troubleshooting Common Issues
Even with the best technique, you may encounter some issues. Here’s how to troubleshoot them:
- Air Leaks:
- Problem: Air is leaking around the pump head.
- Solution: Readjust the pump head and make sure it’s securely attached. Check the valve core to ensure it’s tight.
- Pump Overheating:
- Problem: The pump gets hot after prolonged use.
- Solution: Take breaks to allow the pump to cool down. Overheating can damage the pump.
- Difficulty Pumping:
- Problem: It’s hard to push the pump handle.
- Solution: Make sure you’re using short, quick strokes. Use your body weight to stabilize the pump. If the pump is still difficult to use, it may be time for a new one.
Tips for Easier Inflation
Here are some extra tips to make inflating fat bike tires with a mini pump easier:
- Use a Floor Pump at Home: A floor pump is much more efficient than a mini pump. Use a floor pump at home to set your initial tire pressure.
- Carry a CO2 Inflator: A CO2 inflator can quickly inflate a tire in emergencies. However, CO2 can cause pressure fluctuations, so use it sparingly.
- Practice Makes Perfect: The more you practice, the easier it will become to inflate your tires with a mini pump.
Maintaining Your Mini Pump
Regular maintenance will keep your mini pump in good working condition:
- Clean the Pump: Wipe down the pump with a damp cloth after each use. This will remove dirt and debris.
- Lubricate Moving Parts: Occasionally lubricate the moving parts of the pump with a light oil. This will keep the pump working smoothly.
- Store Properly: Store the pump in a dry place to prevent rust and corrosion.
Fat Bike Tire Pressure Chart
Use this chart as a quick reference guide for fat bike tire pressures based on rider weight and terrain. Remember to adjust based on your own experience and preferences.
| Rider Weight | Terrain Type | Recommended Pressure |
|---|---|---|
| Lightweight (Under 150 lbs) | Packed Snow/Hard Trail | 6-8 PSI |
| Lightweight (Under 150 lbs) | Soft Snow/Sand | 4-6 PSI |
| Average (150-200 lbs) | Packed Snow/Hard Trail | 8-10 PSI |
| Average (150-200 lbs) | Soft Snow/Sand | 6-8 PSI |
| Heavyweight (Over 200 lbs) | Packed Snow/Hard Trail | 10-12 PSI |
| Heavyweight (Over 200 lbs) | Soft Snow/Sand | 8-10 PSI |
Note: These are general recommendations. Always check your tire manufacturer’s specifications for minimum and maximum pressure ratings.
FAQ: Using a Mini Pump for Fat Bike Tires
1. Can I really inflate a fat bike tire with a mini pump?
Yes, you absolutely can! It takes some effort and the right technique, but it’s possible. Look for high-volume mini pumps designed to move more air with each stroke.
2. How long does it take to inflate a fat bike tire with a mini pump?
It varies, but expect it to take 5-10 minutes per tire. It depends on the pump, your tire size, and how much air you need to add. Be patient and take breaks if needed.
3. What’s the ideal PSI for fat bike tires?
Generally, fat bike tires run between 5-10 PSI. It depends on your weight, the terrain, and your personal preference. Experiment to find what works best for you.
4. What if my mini pump doesn’t fit my tire valve?
Most mini pumps are compatible with both Schrader and Presta valves. Check if your pump has a switch or adapter to change between valve types. If not, you may need a different pump.
5. How do I know if my tire is properly inflated without a gauge?
Squeeze the tire! It should feel firm but still have some give. You can also compare it to how it feels when you know it’s properly inflated. A tire pressure gauge is always the most accurate way to check.
6. What should I do if I get a flat tire on the trail?
First, remove the tire and tube. Inspect the tire for any sharp objects and remove them. Patch the tube or replace it with a spare. Inflate the tire with your mini pump, and you’re good to go! Don’t forget to bring a patch kit or spare tube, tire levers, and a multi-tool on your rides.
7. Are CO2 inflators better than mini pumps for fat bike tires?
CO2 inflators are faster, but they have drawbacks. CO2 can cause pressure fluctuations due to temperature changes. Mini pumps are more reliable in the long run and don’t require cartridges. Many riders carry both for different situations.
Conclusion
Inflating fat bike tires with a mini pump can be challenging, but it’s a valuable skill for any rider. By choosing the right pump, understanding tire pressure, and mastering the pumping technique, you can keep your tires properly inflated and enjoy your rides. Remember to take your time, check the pressure regularly, and maintain your pump for optimal performance. Now get out there and explore the trails!


