
How to Use a Mini Pump on a Schrader Valve: Easy Guide
Using a mini pump on a Schrader valve is simple! First, make sure the pump head is compatible with Schrader valves. Remove the valve cap on your tire, firmly press the pump head onto the valve, and lock it in place. Start pumping using smooth, full strokes. Check the tire pressure regularly and stop when you reach the desired PSI.
Ever been stuck on the side of the road with a flat tire and a mini pump, wondering how to get enough air into your tire to get home? It’s a common problem, and it can be frustrating if you’re not sure what to do. Mini pumps are great for their portability, but they can sometimes be tricky to use, especially with Schrader valves. Don’t worry! This guide will walk you through each step, so you can confidently inflate your tires and get back to enjoying your ride. We’ll cover everything from attaching the pump correctly to achieving the right tire pressure. Let’s get started!
Understanding Schrader Valves

Before we dive into using a mini pump, let’s quickly understand what a Schrader valve is and how it differs from other types of valves.
What is a Schrader Valve?
A Schrader valve is a type of tire valve commonly found on car tires and many bicycle tires, especially on mountain bikes, hybrid bikes, and some e-bikes. It’s designed with a spring-loaded core that allows air to be pumped in or released.
- Construction: Features a robust design with a valve core inside a threaded metal stem.
- Usage: Common on bikes with wider tires and those requiring higher air volumes.
- Durability: More resistant to damage and can handle higher pressures compared to Presta valves.
Schrader vs. Presta Valves
It’s important to know the difference between Schrader and Presta valves, as they require different pump attachments.
| Feature | Schrader Valve | Presta Valve |
|---|---|---|
| Appearance | Wider, similar to car tires | Narrower, with a lock nut |
| Common Use | Mountain bikes, hybrid bikes, car tires | Road bikes, high-performance bikes |
| Inflation | Easier to inflate, more common pump interface | Requires unscrewing the lock nut |
| Pressure | Good for high-volume, lower-pressure tires | Suitable for high-pressure tires |
Essential Tools and Preparations
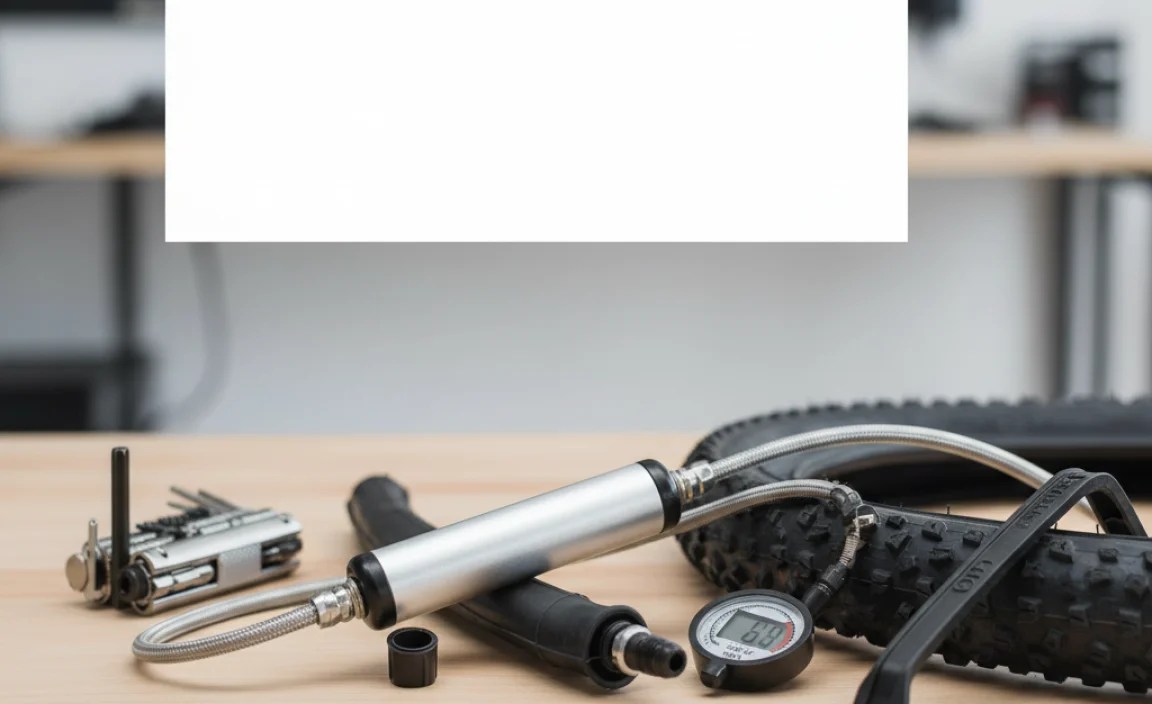
Before you start pumping, make sure you have the right tools and do a quick check of your equipment.
What You’ll Need
- Mini Pump: Choose a mini pump that is compatible with Schrader valves. Some pumps have dual heads for both Schrader and Presta valves.
- Tire Pressure Gauge: A separate gauge or one integrated into the pump to check the tire pressure.
- Valve Cap: The small cap that covers the Schrader valve. Keep it safe, as it protects the valve from dirt and debris.
- Clean Cloth: To wipe off any dirt or grime from the valve.
Pre-Ride Check
- Inspect the Tire: Look for any cuts, bulges, or embedded objects in the tire.
- Check the Valve: Ensure the valve is clean and free of debris.
- Prepare the Pump: Make sure your mini pump is in good working condition and compatible with Schrader valves.
Step-by-Step Guide: Using a Mini Pump on a Schrader Valve

Here’s a detailed guide to help you efficiently use a mini pump on a Schrader valve.
Step 1: Remove the Valve Cap
The first step is to remove the valve cap from the Schrader valve. This cap protects the valve from dirt and damage.
- Unscrew the Cap: Turn the cap counterclockwise until it comes off.
- Keep it Safe: Store the cap in a safe place, like your pocket or a small bag, so you don’t lose it.
Step 2: Prepare the Mini Pump
Next, you need to prepare your mini pump. Most mini pumps have a head that can be adjusted for different valve types.
- Check Compatibility: Ensure your pump head is set for Schrader valves. Some pumps have a switch or reversible parts.
- Open the Pump Head: If your pump has a lever or locking mechanism, make sure it’s open or unlocked.
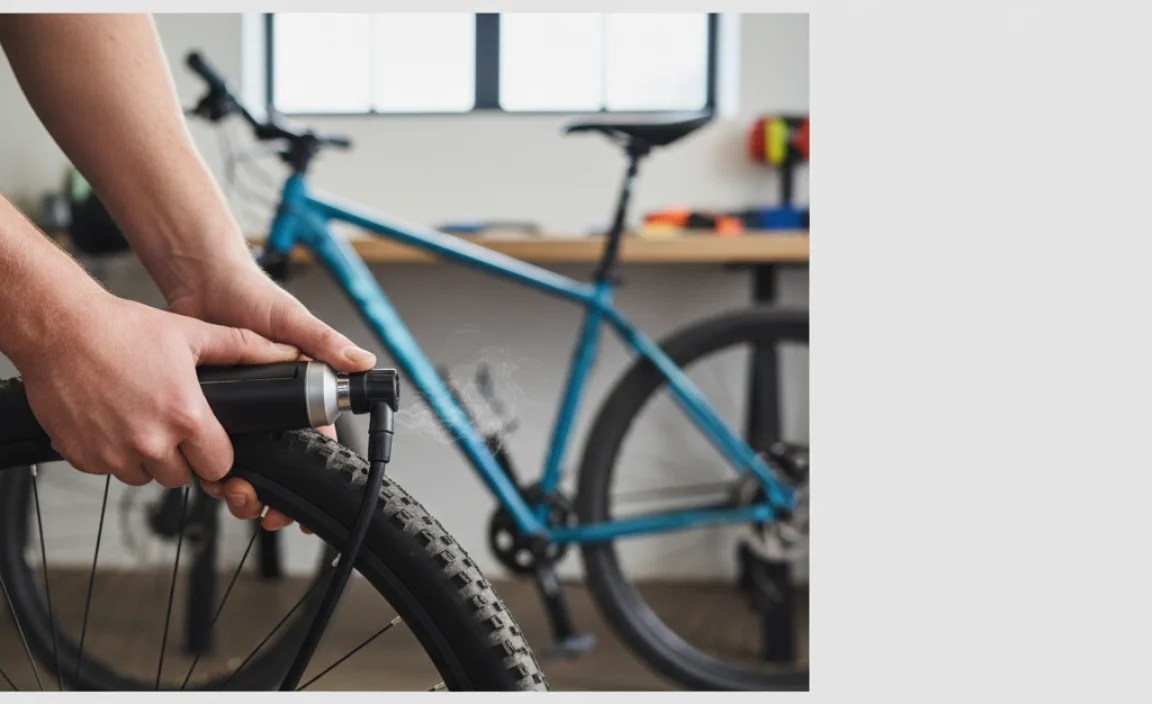
Step 3: Attach the Pump Head to the Valve
Now, carefully attach the pump head to the Schrader valve. This step is crucial for creating a good seal.
- Align the Pump Head: Line up the pump head straight with the valve.
- Press Firmly: Push the pump head onto the valve with a firm, even pressure. You should feel it seat properly.
- Lock the Lever: If your pump has a lever, close it to lock the pump head onto the valve. This ensures an airtight seal.
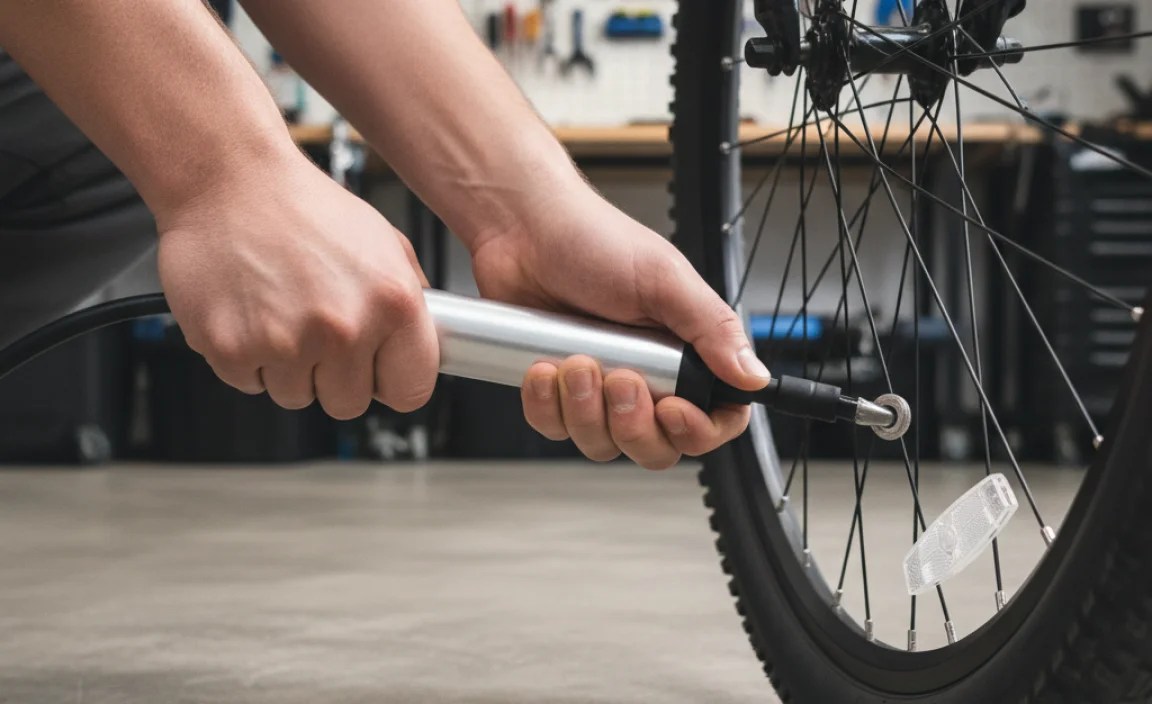
Step 4: Start Pumping
With the pump securely attached, you can start inflating the tire.
- Position Yourself: Place the tire on the ground and stabilize the wheel with one hand.
- Pump Smoothly: Use both hands to pump, keeping your arms straight and using your body weight. Pump in smooth, full strokes.
- Listen for Air Leaks: Pay attention to any hissing sounds, which could indicate a poor seal. If you hear leaks, reattach the pump head.
Step 5: Check the Tire Pressure
It’s important to check the tire pressure regularly while pumping. Overinflating can cause a blowout, while underinflating can lead to a flat or poor handling.
- Use a Pressure Gauge: If your pump doesn’t have a built-in gauge, use a separate tire pressure gauge.
- Find the Recommended PSI: Look for the recommended PSI (pounds per square inch) printed on the sidewall of your tire.
- Inflate Gradually: Inflate the tire in short bursts, checking the pressure after every few pumps.
- Avoid Overinflation: Be careful not to exceed the maximum PSI listed on the tire.
Step 6: Detach the Pump
Once you’ve reached the desired tire pressure, it’s time to detach the pump.
- Unlock the Lever: If your pump has a lever, unlock it.
- Remove the Pump Head: Pull the pump head straight off the valve. Be careful, as some air may escape quickly.
Step 7: Replace the Valve Cap
Finally, replace the valve cap to protect the Schrader valve from dirt and debris.
- Screw on the Cap: Turn the cap clockwise until it’s snug.
- Ensure it’s Secure: Make sure the cap is securely fastened, but don’t overtighten it.
Troubleshooting Common Issues
Sometimes, you might encounter problems while using a mini pump. Here are some common issues and how to troubleshoot them.
Pump Not Sealing Properly
If the pump isn’t sealing properly, you’ll hear air leaking out as you pump.
- Check the Pump Head: Make sure the pump head is correctly aligned and securely attached to the valve.
- Tighten the Connection: If your pump has a lever, ensure it’s fully locked.
- Inspect the Valve: Check the valve for any damage or debris that might be preventing a good seal.
Difficulty Pumping
If you’re finding it hard to pump, it could be due to several reasons.
- Pump Mechanism: Ensure the pump mechanism is lubricated and working smoothly.
- Tire Pressure: As the tire pressure increases, it will become harder to pump. This is normal, but make sure you’re using your body weight to assist.
- Valve Issues: A damaged or clogged valve can make pumping difficult.
Not Reaching Desired Pressure
If you can’t reach the desired tire pressure, consider these factors.
- Pump Capacity: Mini pumps have limited capacity. It may take a while to reach higher pressures.
- Air Leaks: Check for any air leaks in the pump connection or valve.
- Gauge Accuracy: Ensure your pressure gauge is accurate. Test with another gauge if possible.
Tips for Efficient Pumping
To make the most of your mini pump, here are some tips for efficient pumping.
- Use Full Strokes: Use long, smooth strokes to maximize the amount of air pumped with each push.
- Engage Your Body Weight: Use your body weight to help push the pump. This reduces strain on your arms.
- Take Breaks: If you’re pumping a lot of air, take short breaks to avoid overheating the pump.
- Maintain Your Pump: Regularly clean and lubricate your mini pump to keep it in good working condition.
Choosing the Right Mini Pump
Selecting the right mini pump can make a big difference in your cycling experience. Here are some factors to consider.
Pump Type
- Hand Pumps: Compact and lightweight, ideal for carrying on rides.
- Frame-Mounted Pumps: Attach to your bike frame for easy access.
- Hybrid Pumps: Combine features of both hand and frame-mounted pumps.
Valve Compatibility
Ensure the pump is compatible with Schrader valves. Some pumps have dual heads or adapters for both Schrader and Presta valves.
Inflation Power
Consider the pump’s inflation power, measured in PSI. Higher PSI pumps are better for road bikes, while lower PSI pumps are suitable for mountain bikes.
Size and Weight
Choose a pump that is compact and lightweight, so it’s easy to carry on your rides without adding too much bulk.
Additional Features
Look for features like built-in pressure gauges, comfortable handles, and durable construction.
Maintaining Your Bike Tires
Proper tire maintenance is essential for a safe and enjoyable ride. Here are some tips to keep your tires in top condition.
Regular Pressure Checks
Check your tire pressure before each ride to ensure it’s within the recommended range. Consistent pressure helps prevent flats and improves handling.
Inspecting for Damage
Regularly inspect your tires for cuts, bulges, and embedded objects. Remove any debris and replace damaged tires promptly.
Proper Inflation
Inflate your tires to the correct pressure for your riding conditions. Overinflating can lead to a harsh ride and increased risk of blowouts, while underinflating can cause flats and poor handling.
Tire Rotation
Rotate your tires periodically to ensure even wear. This can extend the life of your tires and improve performance.
Storage
Store your bike in a cool, dry place away from direct sunlight. UV rays can degrade the rubber and cause tires to crack.
Safety Tips
When using a mini pump, keep these safety tips in mind.
- Wear Gloves: Protect your hands from abrasion and dirt by wearing gloves.
- Stay Alert: Pay attention to your surroundings and avoid distractions while pumping.
- Avoid Overinflation: Never exceed the maximum PSI listed on your tires.
- Inspect Equipment: Regularly inspect your pump and tires for any signs of damage.
- Seek Assistance: If you’re unsure about any step, seek help from a qualified bike mechanic.
FAQ: Using a Mini Pump on a Schrader Valve
1. Can I use a mini pump on both Schrader and Presta valves?
Yes, some mini pumps come with dual heads or adapters that allow them to be used on both Schrader and Presta valves. Check your pump’s specifications to confirm.
2. How do I know what PSI to inflate my tires to?
The recommended PSI (pounds per square inch) is usually printed on the sidewall of your tire. Always stay within this range to avoid over or under-inflation.
3. What should I do if my mini pump isn’t sealing properly on the Schrader valve?
Ensure the pump head is correctly aligned and firmly pressed onto the valve. If your pump has a lever, make sure it’s fully locked. Also, check the valve for any dirt or damage.
4. Is it normal for a mini pump to take a long time to inflate a tire?
Yes, mini pumps have smaller volumes, so it can take longer to inflate a tire compared to a floor pump. Be patient and use smooth, full strokes to maximize efficiency.
5. How often should I check my tire pressure?
It’s best to check your tire pressure before each ride to ensure it’s within the recommended range. This helps prevent flats and improves handling.
6. What are some signs that my tire is overinflated?
An overinflated tire will feel very hard and rigid. It can also cause a harsh ride and increase the risk of blowouts, especially on bumpy surfaces.
7. Can cold weather affect my tire pressure?
Yes, cold weather can cause your tire pressure to decrease. It’s a good idea to check and adjust your tire pressure more frequently during colder months.
Conclusion
Using a mini pump on a Schrader valve doesn’t have to be a daunting task. With the right tools, a little patience, and the step-by-step instructions we’ve covered, you can confidently inflate your tires and keep your bike in top condition. Remember to always check your tire pressure, inspect your tires for damage, and maintain your equipment regularly. Happy riding!


