
How to Use Mini Pump for Tubeless Tires: Easy Guide
Quick Summary:
Using a mini pump for tubeless tires can be tricky, but it’s definitely doable! First, make sure your tire bead is seated well. Connect the pump securely to the valve, using the correct valve type (Presta or Schrader). Pump quickly and steadily to get enough air in to seal the tire. Patience is key – it might take a few tries!
Dealing with tubeless tires can sometimes feel like wrestling an alligator. You’re out on the trail, enjoying the ride, when suddenly – hiss! A flat tire. Now you need to reseat and inflate a tubeless tire with a tiny mini pump. Sounds fun, right? It can be frustrating, but don’t worry! With a few simple steps and a little know-how, you can get back on your bike and keep rolling. We’ll walk you through the process, step by step, making sure you’re prepared for anything the trail throws your way. Let’s get started!
What You’ll Need

Before you start pumping, make sure you have these essentials:
- Mini Pump: A reliable mini pump designed for higher pressures. Look for one specifically made for tubeless tires.
- Tire Levers: For removing the tire if necessary.
- Spare Tube: Just in case you can’t get the tubeless system working.
- Tire Plugs or Patch Kit: To repair punctures in the tire.
- CO2 Inflator (Optional): For a quick burst of air to seat the bead (more on this later).
Step-by-Step Guide: Inflating Tubeless Tires with a Mini Pump

Okay, let’s get to the main event. Follow these steps to inflate your tubeless tire with a mini pump:
1. Assess the Situation
First, figure out why your tire went flat. Was it a puncture? Did the bead unseat? Knowing the cause helps you choose the right fix.
- Puncture: If it’s a small hole, try a tire plug. For larger cuts, you might need a patch or a tube.
- Unseated Bead: This often happens after a flat. You’ll need to reseat the tire against the rim.
2. Reseat the Tire Bead (If Necessary)
If the tire bead has come off the rim, you’ll need to reseat it. This is crucial for getting a good seal.
- Deflate the Tire: Make sure all the air is out of the tire.
- Inspect the Tire: Check for any debris or sealant buildup on the bead. Clean it off if needed.
- Position the Tire: Push the tire bead back into the rim channel. Work your way around the tire, making sure the bead is evenly seated on both sides.
- Use Your Hands: Sometimes, gently squeezing the tire can help pop the bead back into place.
3. Prepare the Valve
Make sure your valve is clean and working properly. Tubeless valves can sometimes get clogged with sealant.
- Check the Valve Core: Remove the valve core (if it’s removable) and clean it. A small piece of wire or a valve core tool can help.
- Tighten the Valve Nut: Make sure the valve nut is snug against the rim. This helps prevent air leaks.
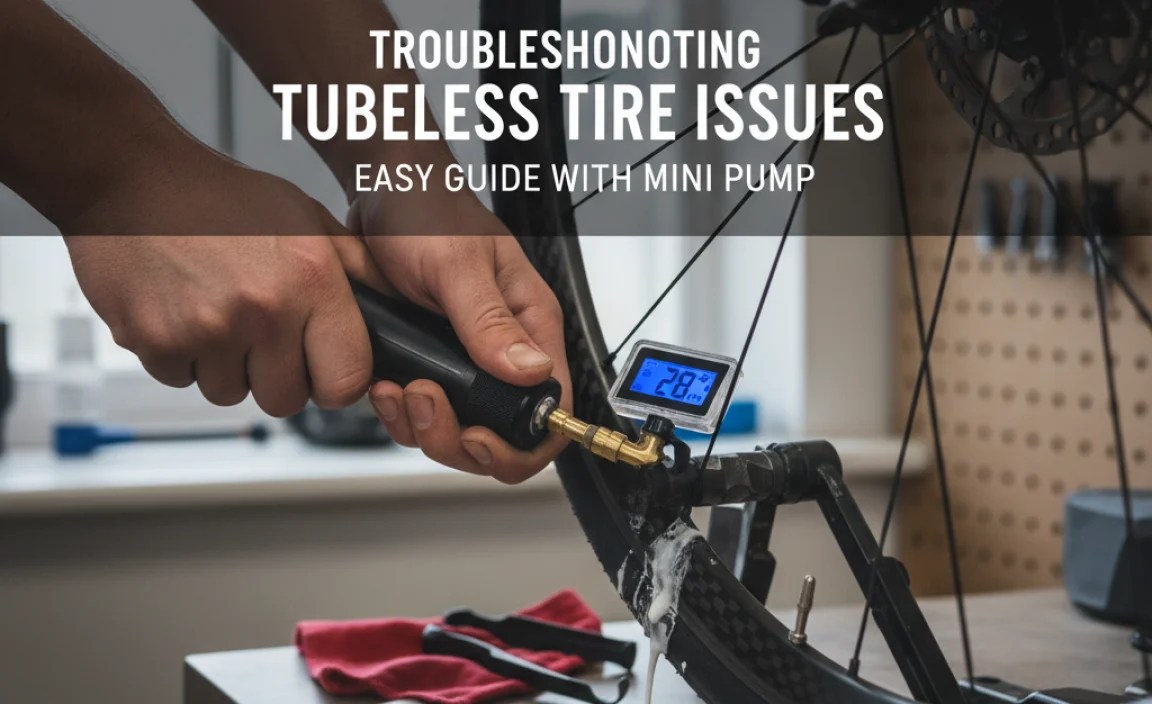
4. Connect the Mini Pump
Now it’s time to connect your mini pump to the valve. This step is critical for getting a good seal and efficient inflation.
- Choose the Right Valve Type: Most mini pumps have adapters for both Presta and Schrader valves. Make sure you’re using the correct one.
- Secure the Connection: Attach the pump head firmly to the valve. Some pumps have a lever or locking mechanism to ensure a tight seal.
5. Start Pumping
This is where the real work begins. Inflating a tubeless tire with a mini pump requires some technique and persistence.
- Pump Quickly: You need to get air into the tire quickly to help seat the bead. Use short, rapid strokes.
- Maintain a Steady Pace: Keep pumping consistently. Stopping and starting can make it harder to seat the bead.
- Listen for the Pop: As the tire seats, you should hear a “pop” as the bead snaps into place on the rim.
- Check the Pressure: Use the gauge on your pump (if it has one) to monitor the pressure. Aim for the recommended pressure for your tires.
6. Check for Leaks
Once the tire is inflated, check for any leaks around the bead and valve.
- Listen for Hissing: If you hear air leaking, try wiggling the tire or valve to help it seal.
- Use Soapy Water: Apply soapy water to the bead and valve. Bubbles will indicate where air is escaping.
- Adjust as Needed: If you find a leak, deflate the tire slightly and try reseating the bead in that area.
7. Final Inflation and Inspection
After addressing any leaks, inflate the tire to the correct pressure and give it a final inspection.
- Inflate to Recommended Pressure: Check the sidewall of your tire for the recommended pressure range.
- Inspect the Tire: Look for any cuts, bulges, or other damage.
- Spin the Wheel: Make sure the tire is running straight and true.
Tips and Tricks for Success

Inflating tubeless tires with a mini pump can be challenging. Here are some tips to increase your chances of success:
- Use a CO2 Inflator: A CO2 inflator can provide a quick burst of air to seat the bead. This is especially helpful for stubborn tires. Be careful not to over-inflate.
- Carry a Spare Tube: If you can’t get the tubeless system working, you can always install a spare tube.
- Use Tire Sealant: Tire sealant helps to seal small punctures and can improve the overall performance of your tubeless system.
- Practice at Home: Before heading out on the trail, practice inflating your tubeless tires at home. This will give you a better feel for the process and help you troubleshoot any issues.
- Choose the Right Pump: Some mini pumps are designed specifically for tubeless tires. These pumps often have features like a larger air chamber or a two-stage inflation system.
Choosing the Right Mini Pump for Tubeless Tires

Not all mini pumps are created equal. When choosing a mini pump for tubeless tires, consider these factors:
- Air Volume: Look for a pump with a large air volume per stroke. This will help you inflate the tire more quickly.
- Pressure Rating: Make sure the pump can reach the recommended pressure for your tires.
- Valve Compatibility: Choose a pump that works with both Presta and Schrader valves.
- Size and Weight: Consider the size and weight of the pump. You’ll want something that’s easy to carry on your bike.
- Durability: Look for a pump made from high-quality materials that can withstand the rigors of the trail.
Troubleshooting Common Issues
Even with the best technique, you might encounter some issues when inflating tubeless tires with a mini pump. Here are some common problems and how to solve them:
Problem: Tire Won’t Seat
Solution:
- Make sure the tire bead is clean and properly positioned in the rim channel.
- Try using a CO2 inflator to provide a quick burst of air.
- Apply soapy water to the bead to help it seal.
Problem: Air Leaks Around the Bead
Solution:
- Deflate the tire slightly and try reseating the bead in the leaking area.
- Check for any damage to the tire or rim.
- Add more tire sealant.
Problem: Valve Leaks
Solution:
- Tighten the valve nut.
- Check the valve core for damage or debris.
- Replace the valve core if necessary.
Problem: Pump Won’t Connect to Valve
Solution:
- Make sure you’re using the correct valve adapter.
- Clean the valve and pump head.
- Check for any damage to the valve or pump head.
Maintenance Tips for Your Mini Pump
To keep your mini pump in good working condition, follow these maintenance tips:
- Clean the Pump Regularly: Wipe down the pump with a clean cloth after each use.
- Lubricate the Piston: Apply a small amount of lubricant to the piston every few months.
- Check the Seals: Inspect the seals for wear and tear. Replace them if necessary.
- Store the Pump Properly: Store the pump in a dry place to prevent corrosion.
Mini Pump vs. CO2 Inflator: Which is Better?
Both mini pumps and CO2 inflators have their pros and cons. Here’s a comparison to help you decide which is right for you:
| Feature | Mini Pump | CO2 Inflator |
|---|---|---|
| Inflation Speed | Slower | Faster |
| Reliability | More reliable (no need for cartridges) | Less reliable (cartridges can run out) |
| Cost | Lower (initial cost) | Higher (requires cartridges) |
| Ease of Use | Requires more effort | Easier to use |
| Environmental Impact | Lower | Higher (cartridges are single-use) |
Best Practices for Tubeless Tire Maintenance
Maintaining your tubeless tires properly can help prevent flats and improve your riding experience. Here are some best practices:
- Check Tire Pressure Regularly: Use a tire pressure gauge to check your tire pressure before each ride.
- Inspect Tires for Damage: Look for cuts, bulges, or other damage. Replace tires as needed.
- Add Sealant Regularly: Tire sealant dries out over time. Add fresh sealant every few months.
- Clean Rims and Tires: Keep your rims and tires clean to ensure a good seal.
Safety First: Important Considerations
When working with tubeless tires and mini pumps, safety should always be your top priority.
- Wear Safety Glasses: Protect your eyes from sealant and debris.
- Don’t Over-Inflate: Over-inflating your tires can cause them to explode.
- Be Careful with CO2 Inflators: CO2 cartridges can get very cold. Wear gloves to protect your hands.
- Inspect Equipment Regularly: Check your pump, tires, and rims for damage before each ride.
Alternative Inflation Methods
While mini pumps are great for on-the-go inflation, you might consider these alternatives:
- Floor Pump: Ideal for home use, offering higher pressure and efficiency.
- Electric Pump: Provides automated inflation, saving effort and time.
- Air Compressor: Suitable for workshops, delivering quick and powerful inflation.
FAQ: Your Tubeless Tire Questions Answered
Q: Can I use any mini pump for tubeless tires?
A: While you *can* use any mini pump, it’s best to use one designed for tubeless tires. These pumps often have a larger air volume per stroke and can reach higher pressures more easily.
Q: How do I know if my tire bead is seated properly?
A: You should hear a “pop” as the bead snaps into place on the rim. Also, look for a uniform gap between the tire and the rim all the way around.
Q: What if I don’t have a CO2 inflator?
A: No problem! A mini pump will work, but it might take more effort. Just be patient and keep pumping.
Q: How much sealant should I use?
A: The amount of sealant you need depends on the size of your tire. Check the sealant manufacturer’s instructions for guidance.
Q: What pressure should I inflate my tubeless tires to?
A: Check the sidewall of your tire for the recommended pressure range. This will vary depending on the tire size and type, as well as your weight and riding style.
Q: Why is my tubeless tire losing air overnight?
A: This could be due to a small puncture, a leaky valve, or a poorly seated bead. Check for leaks and address any issues.
Q: Can I use a tube in my tubeless tire if I can’t get it to inflate?
A: Absolutely! Carrying a spare tube is always a good idea. If you can’t get the tubeless system working, simply install a tube and inflate it as usual.
Conclusion
Inflating tubeless tires with a mini pump might seem daunting at first, but with the right tools, technique, and a little patience, you can master it. Remember to assess the situation, reseat the bead if necessary, and pump quickly and steadily. Don’t be afraid to experiment with different techniques and find what works best for you. And most importantly, don’t forget to practice at home before heading out on the trail. With a little preparation, you’ll be ready to tackle any flat tire situation and keep enjoying your ride. Happy trails!


