
How to Fix Jammed Hand Pump Nozzle: Easy Guide
Quick Summary: A jammed hand pump nozzle is usually caused by dirt, debris, or a bent valve pin. To fix it, start by cleaning the nozzle with a cloth. If that doesn’t work, try using a needle or pin to remove any blockages. For stubborn jams, disassemble the nozzle to clean each part separately. Regular cleaning and maintenance can prevent future jams.
Ever tried inflating your bike tire only to find your hand pump nozzle is stuck tighter than a pickle jar lid? It’s a common problem that can turn a quick top-off into a frustrating delay. Dirt, small bits of grit, or even a slightly bent valve pin can cause your pump nozzle to jam. But don’t worry, you don’t need to toss the pump! With a few simple steps, you can get your pump working smoothly again. This guide will walk you through the process, step by step. We’ll cover everything from basic cleaning to nozzle disassembly. Let’s get your tires inflated and get you back on the road!
Why Your Hand Pump Nozzle Is Jammed

Understanding why your hand pump nozzle is jammed is the first step to fixing it. Here are the most common causes:
- Dirt and Debris: The most frequent culprit. Road grime, dust, and small particles can easily get lodged inside the nozzle.
- Dried Sealant: If you use tire sealant, some of it can dry inside the nozzle, causing stickiness and blockages.
- Bent Valve Pin: The small pin that depresses the valve on your tire can sometimes bend, causing it to stick inside the nozzle.
- Corrosion: Over time, moisture can cause corrosion, especially in metal nozzles.
- Incorrect Attachment: Sometimes, the nozzle isn’t fully or correctly attached to the valve, creating a false sense of a jam.
Tools You’ll Need
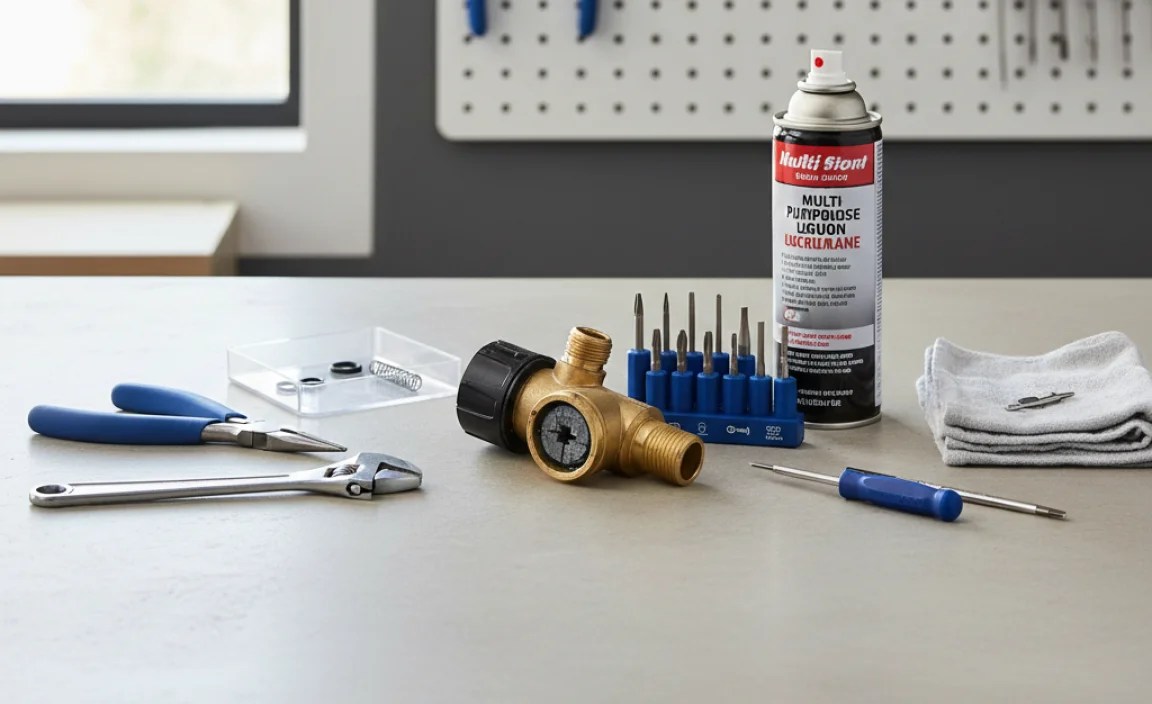
Before you start, gather these tools. Most of them are common household items.
- Clean Cloth or Rag: For wiping down the nozzle and removing surface dirt.
- Small Needle or Pin: To dislodge debris from small openings.
- Small Brush (like a toothbrush): For scrubbing away stubborn dirt.
- Lubricant (like WD-40 or silicone spray): To help loosen stuck parts (use sparingly).
- Small Pliers (optional): For gently gripping and turning small parts.
- Valve Core Tool (optional): If you need to remove the valve core for cleaning.
- Safety Glasses: To protect your eyes from flying debris.
Step-by-Step Guide to Fixing a Jammed Hand Pump Nozzle

Follow these steps to diagnose and fix your jammed hand pump nozzle. Start with the simplest solutions and move to more complex ones if needed.
Step 1: Visual Inspection
Start by carefully examining the nozzle. Look for any obvious signs of dirt, damage, or misalignment.
- Check for Visible Debris: Look closely at the nozzle opening and around the valve attachment point.
- Inspect the Valve Pin: If visible, make sure it’s straight and moves freely.
- Check the Nozzle Connection: Ensure the nozzle is properly seated on the tire valve.
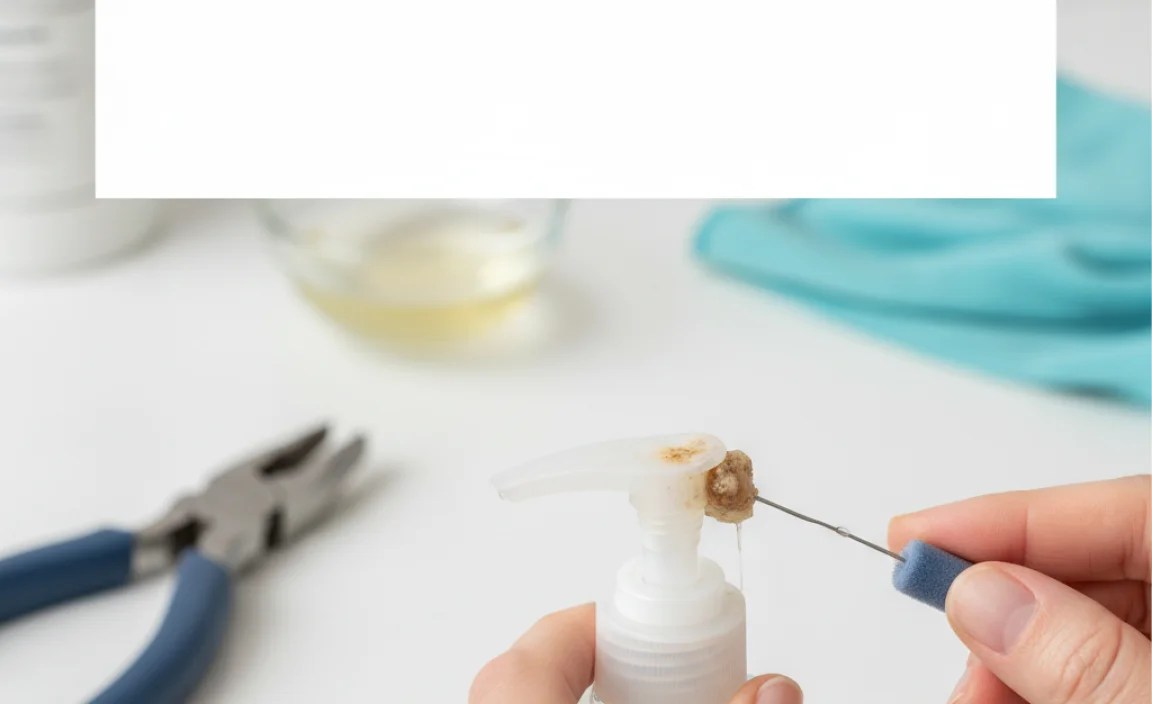
Step 2: Clean the Nozzle
Often, a simple cleaning is all it takes to fix a jammed nozzle.
- Wipe Down the Nozzle: Use a clean cloth to wipe away any surface dirt or grime.
- Use a Needle or Pin: Gently insert a needle or pin into the nozzle opening to dislodge any debris. Be careful not to damage the internal parts.
- Brush the Nozzle: Use a small brush to scrub away stubborn dirt.
Step 3: Lubricate the Nozzle (Use Sparingly)
If cleaning doesn’t work, a little lubrication can help.
- Apply Lubricant: Apply a small amount of lubricant (like WD-40 or silicone spray) to the nozzle opening.
- Work the Lubricant In: Gently work the nozzle back and forth on a valve stem to distribute the lubricant.
- Wipe Away Excess: Wipe away any excess lubricant to prevent attracting more dirt.
Important: Use lubricant sparingly. Too much can attract dirt and make the problem worse.
Step 4: Disassemble the Nozzle (If Possible)
Some hand pump nozzles can be disassembled for more thorough cleaning. Check your pump’s manual or the manufacturer’s website for instructions.
- Identify Disassembly Points: Look for screws, clips, or threaded parts that allow you to take the nozzle apart.
- Disassemble Carefully: Take the nozzle apart carefully, noting the order of the parts.
- Clean Each Part: Clean each part individually with a cloth, brush, and mild soap and water.
- Reassemble the Nozzle: Reassemble the nozzle in the correct order.
Step 5: Check the Valve Core
Sometimes, the problem isn’t the nozzle, but the valve core itself. The valve core is the small, removable part inside the tire valve.
- Remove the Valve Core: Use a valve core tool to remove the valve core.
- Inspect the Valve Core: Look for dirt, damage, or corrosion.
- Clean or Replace: Clean the valve core with a cloth and brush, or replace it if necessary.
- Reinstall the Valve Core: Reinstall the valve core using the valve core tool.
Step 6: Test the Pump
After cleaning or repairing the nozzle, test the pump to make sure it’s working properly.
- Attach the Nozzle to a Tire Valve: Make sure the nozzle is securely attached to the tire valve.
- Pump the Handle: Pump the handle to inflate the tire.
- Check for Leaks: Listen for air leaks around the nozzle and valve.
If the pump still isn’t working, repeat the steps above or consult a professional bike mechanic.
Preventing Future Jams
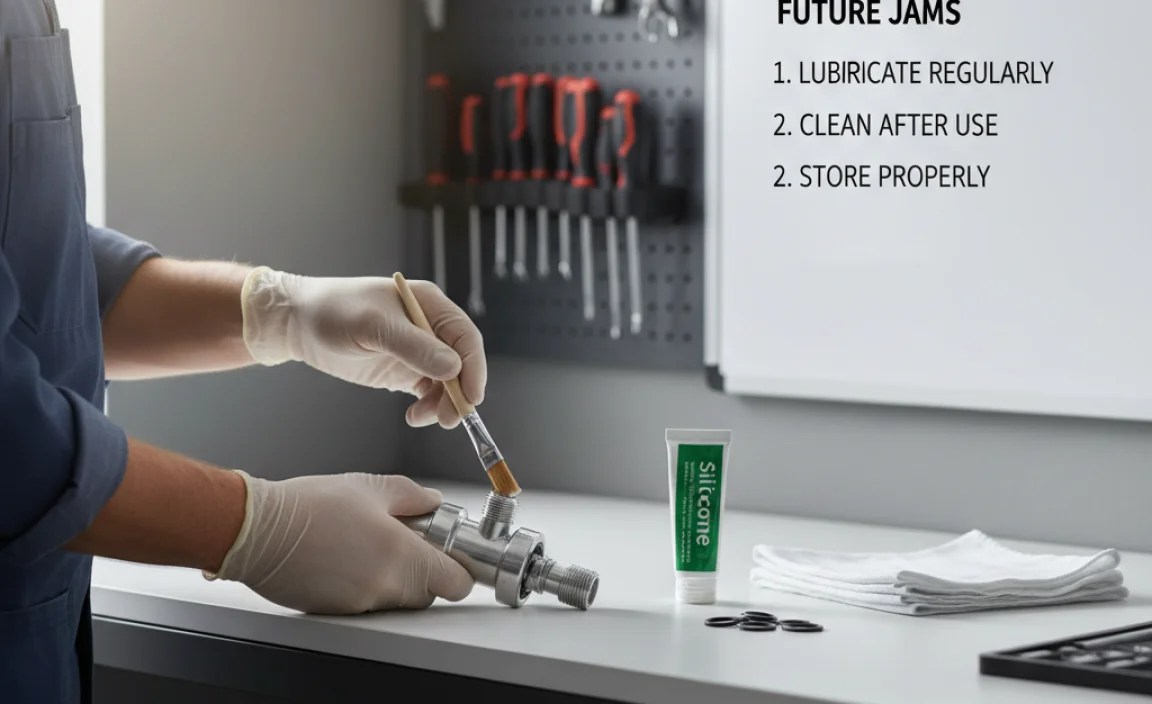
Prevention is key to keeping your hand pump nozzle working smoothly. Here are some tips to prevent future jams:
- Clean Your Nozzle Regularly: Wipe down the nozzle after each use to remove dirt and debris.
- Store Your Pump Properly: Store your pump in a clean, dry place to prevent corrosion.
- Use a Dust Cap: Use a dust cap on your tire valves to prevent dirt from entering.
- Check Your Valve Cores: Periodically check your valve cores for dirt and damage.
- Avoid Over-Lubrication: Use lubricant sparingly, as too much can attract dirt.
Troubleshooting Common Issues
Here are some common issues you might encounter and how to solve them.
| Issue | Possible Cause | Solution |
|---|---|---|
| Nozzle won’t attach to valve | Incorrect nozzle type; Debris in nozzle | Ensure nozzle matches valve type (Presta/Schrader); Clean nozzle thoroughly |
| Air leaks around nozzle | Worn seal; Loose connection | Replace seal; Ensure tight connection |
| Pump feels stiff | Lack of lubrication; Internal damage | Lubricate pump mechanism; Consult professional |
| Nozzle gets stuck on valve | Bent valve pin; Corrosion | Straighten pin; Clean nozzle, apply light lubricant |
| Pump doesn’t inflate tire | Valve core issue; Puncture in tire | Check valve core and tire for damage |
Choosing the Right Hand Pump
Selecting the right hand pump can make a big difference in your cycling experience. Here’s what to consider:
- Pump Type:
- Mini Pumps: Compact and portable, but require more effort.
- Frame-Mounted Pumps: Conveniently attach to your bike frame.
- Floor Pumps (for home use): Offer more leverage and efficiency.
- Valve Compatibility: Ensure the pump is compatible with both Presta and Schrader valves. Some pumps have dual heads, while others require adapters.
- Pressure Gauge: A built-in pressure gauge helps you inflate your tires to the correct pressure.
- Build Quality: Look for a pump made from durable materials like aluminum or steel.
- Ergonomics: Choose a pump with a comfortable handle and easy-to-use design.
Here’s a table comparing different types of hand pumps:
| Pump Type | Pros | Cons | Best For |
|---|---|---|---|
| Mini Pump | Compact, lightweight, portable | Requires more effort, less efficient | Emergency repairs on the road |
| Frame-Mounted Pump | Convenient, always available | Can be bulky, may affect aerodynamics | Everyday riding, commuting |
| Floor Pump | Efficient, easy to use, accurate pressure readings | Not portable, for home use only | Home maintenance, pre-ride inflation |
Hand Pump Maintenance Tips
Regular maintenance will keep your hand pump in top condition and prevent future problems. Here are some tips:
- Clean Regularly: Wipe down the pump after each use to remove dirt and debris.
- Lubricate Moving Parts: Periodically lubricate the pump’s moving parts with a silicone-based lubricant.
- Check for Wear and Tear: Inspect the pump for signs of wear and tear, such as cracks, leaks, or damaged parts.
- Replace Worn Parts: Replace any worn or damaged parts as soon as possible.
- Store Properly: Store the pump in a clean, dry place to prevent corrosion and damage.
FAQ: Fixing Jammed Hand Pump Nozzles
Here are some frequently asked questions about fixing jammed hand pump nozzles:
Q: Why does my hand pump nozzle keep getting stuck?
A: The most common cause is dirt and debris getting lodged in the nozzle. Regular cleaning can prevent this.
Q: Can I use WD-40 to lubricate my hand pump nozzle?
A: Yes, but use it sparingly. WD-40 can attract dirt, so wipe away any excess. Silicone spray is also a good option.
Q: How often should I clean my hand pump nozzle?
A: It’s a good idea to wipe down the nozzle after each use and do a more thorough cleaning every few months.
Q: What if I can’t disassemble my hand pump nozzle?
A: Try flushing the nozzle with water or compressed air to remove any debris. If that doesn’t work, you may need to replace the nozzle.
Q: Is it possible to over-lubricate a hand pump?
A: Yes, too much lubricant can attract dirt and make the problem worse. Use lubricant sparingly and wipe away any excess.
Q: What type of lubricant is best for a hand pump?
A: Silicone-based lubricants are generally best, as they won’t damage rubber or plastic parts.
Q: My pump nozzle works for Schrader valves but not Presta. Why?
A: Some pumps have separate heads or require an adapter for Presta valves. Make sure you’re using the correct setup.
Conclusion
A jammed hand pump nozzle can be a real pain, but it’s usually a simple fix. By following these steps, you can quickly diagnose and resolve the issue, keeping your tires properly inflated and your rides smooth. Remember, regular cleaning and maintenance are key to preventing future jams. So, take a few minutes to care for your pump, and it will be ready to serve you well on all your cycling adventures. Now that you’re armed with this knowledge, you can confidently tackle any nozzle jam and get back to enjoying the ride!


