
How to Stop Air Escaping From Hand Pump: Easy Fix!
Quick Summary:
Stopping air from escaping your hand pump is usually simple! First, check that the pump head is securely attached to your tire valve. Make sure the valve is in good shape and not damaged. If air still leaks, try tightening the pump head or replacing the rubber seal inside. For stubborn leaks, inspect the pump hose and cylinder for damage. A little maintenance goes a long way!
Ever pumped up your bike tire, only to hear that frustrating hiss of air escaping? It’s a common problem that can leave you deflated before you even hit the road. Don’t worry, you’re not alone, and most of the time, it’s an easy fix. Whether you’re dealing with a Presta or Schrader valve, a little troubleshooting can save you time and frustration.
This guide will walk you through the most common causes of air leaks in hand pumps and provide simple, step-by-step solutions. We’ll cover everything from checking your valve connection to inspecting the pump’s internal parts. By the end, you’ll have the knowledge to keep your tires properly inflated and your rides smooth. Let’s get started!
Understanding Why Air Escapes From Your Hand Pump

Before we dive into the fixes, let’s understand why air might be escaping. It usually boils down to a few key issues:
- Poor Connection: The pump head isn’t properly sealed on the valve.
- Valve Issues: The tire valve itself might be damaged or dirty.
- Pump Wear and Tear: Seals inside the pump can degrade over time.
- Hose Problems: The hose might have a leak or crack.
Knowing these common culprits helps you quickly diagnose the problem and apply the right solution.
Tools You’ll Need
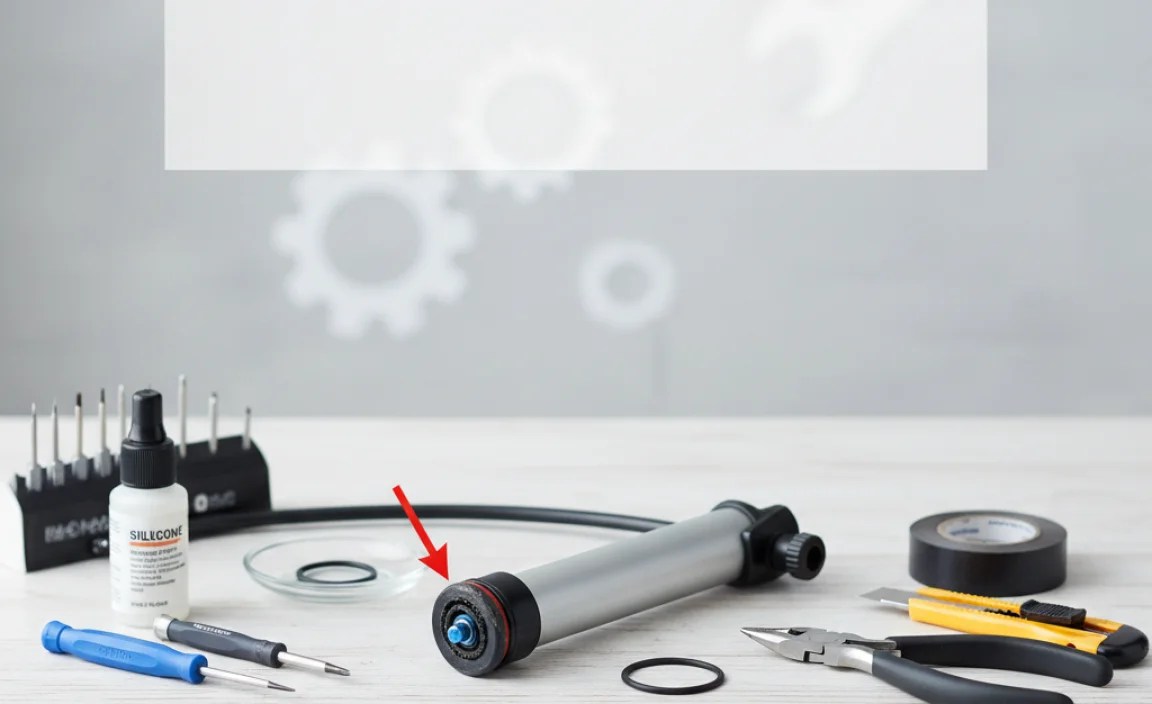
Fortunately, fixing most hand pump issues doesn’t require a fully stocked workshop. Here’s a list of basic tools and materials you might need:
- Spare Pump Head Seals: These rubber orings are often the first thing to wear out.
- Valve Core Tool: Useful for tightening or replacing Presta and Schrader valve cores.
- Silicone Grease: Helps to lubricate and seal pump parts.
- Clean Rags: For wiping down dirty parts.
- Small Adjustable Wrench: For tightening valve cores.
- Soapy Water: To help find leaks.
Having these items on hand will make the repair process much smoother.
Step-by-Step Guide to Stopping Air Leaks

Let’s get to the heart of the matter: fixing that leaky pump. Follow these steps to diagnose and resolve the issue.
Step 1: Check the Pump Head Connection
The most common cause of air leaks is a poor connection between the pump head and the tire valve. Here’s how to check and improve the connection:
- Ensure Proper Attachment: Make sure the pump head is fully seated on the valve. You should feel a secure connection.
- Locking Lever: If your pump has a locking lever, ensure it’s fully engaged. This lever helps create a tighter seal.
- Wiggle Test: Gently wiggle the pump head. If you feel movement or hear air escaping, the connection isn’t tight enough.
- Re-Attach: Remove the pump head and re-attach it, making sure it’s straight and secure.
Step 2: Inspect the Tire Valve
The tire valve itself can be the source of the leak. Here’s what to look for:
- Valve Type: Identify whether you have a Presta or Schrader valve, as their issues differ.
- Presta Valve:
- Check the Core: Make sure the valve core is tightened. Use a valve core tool to gently tighten it.
- Bent Valve: Inspect the valve stem for bends or damage. A bent valve won’t seal properly.
- Cleanliness: Ensure the valve is free from dirt and debris. Wipe it clean with a rag.
- Schrader Valve:
- Depress the Pin: Gently press the center pin to ensure it moves freely and springs back. If it sticks, it might be dirty or damaged.
- Valve Condition: Look for cracks or damage to the valve stem.
- Valve Cap: While not essential for sealing, ensure the valve cap is present and tightened to protect the valve from dirt.
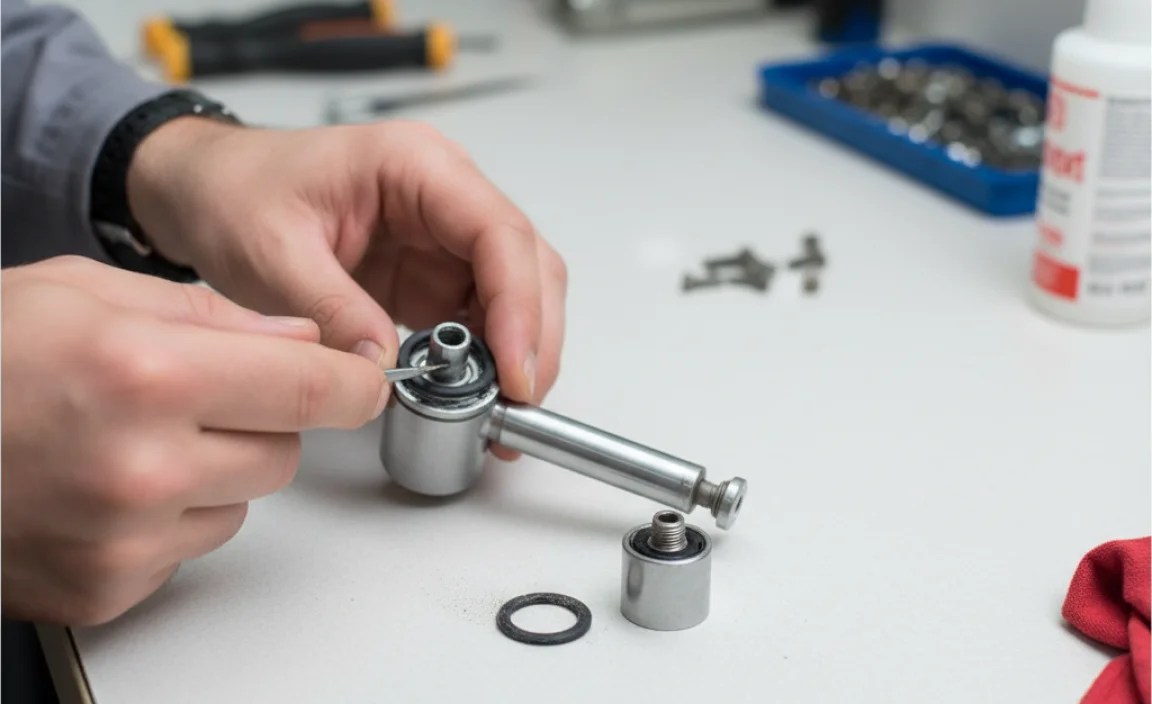
Step 3: Examine the Pump Head Seal
The rubber seal inside the pump head is crucial for creating an airtight connection. Over time, this seal can wear out or become damaged.
- Locate the Seal: Most pump heads have a rubber oring or seal where they connect to the valve.
- Inspect for Damage: Look for cracks, tears, or wear on the seal. If it looks worn, it’s time to replace it.
- Replacement:
- Remove the Old Seal: Use a small tool (like a dental pick or small screwdriver) to carefully remove the old seal.
- Install the New Seal: Lubricate the new seal with a small amount of silicone grease and carefully install it in the pump head.
- Test: Re-attach the pump head to the tire valve and test for leaks.
Step 4: Check the Pump Hose
The hose that connects the pump to the pump head can also develop leaks. Here’s how to check it:
- Visual Inspection: Look for cracks, kinks, or punctures along the length of the hose.
- Soapy Water Test: Mix some dish soap with water and apply it to the hose. Pump the handle and look for bubbles, which indicate a leak.
- Hose Connections: Check the points where the hose connects to the pump body and the pump head. These connections can loosen over time.
If you find a leak in the hose, you’ll likely need to replace the entire hose assembly. Contact the pump manufacturer or a local bike shop for a replacement.
Step 5: Inspect the Pump Cylinder and Piston
The internal components of the pump, such as the cylinder and piston, can also be a source of leaks. This usually requires a bit more disassembly.
- Disassembly: Consult your pump’s manual or search online for instructions on how to disassemble the pump.
- Cylinder Inspection: Look for scratches or damage inside the cylinder. A damaged cylinder won’t seal properly.
- Piston Seal: The piston has a rubber oring that seals against the cylinder wall. Inspect this oring for wear or damage.
- Lubrication: Apply a small amount of silicone grease to the cylinder walls and the piston seal. This helps create a better seal and smoother operation.
- Reassembly: Carefully reassemble the pump, following the disassembly instructions in reverse.
Step 6: Tighten Valve Core (Presta and Schrader)
Sometimes, the valve core itself can loosen, causing a leak. A valve core tool is essential for this step.
- Presta Valves:
- Locate the Core: The valve core is the small, removable part inside the valve stem.
- Insert Tool: Insert the valve core tool into the valve stem and engage it with the core.
- Tighten Gently: Gently tighten the core. Be careful not to overtighten, as this can damage the valve.
- Schrader Valves:
- Locate the Core: The valve core is inside the stem.
- Insert Tool: Use the valve core tool to engage with the core.
- Tighten: Tighten the core gently but firmly.
Step 7: Clean the Valve and Pump Head
Dirt and debris can interfere with the seal between the pump head and the valve. Regular cleaning can prevent leaks.
- Valve Cleaning: Use a clean rag to wipe down the valve stem. You can also use a small brush to remove stubborn dirt.
- Pump Head Cleaning: Use a clean, damp rag to wipe the inside of the pump head. Pay attention to the area where the seal makes contact with the valve.
- Compressed Air: If available, use compressed air to blow out any remaining dirt or debris.
Troubleshooting Common Issues
Sometimes, even after following the steps above, you might still encounter issues. Here are some common problems and their solutions:
Problem: Pump Head Won’t Stay Attached
- Solution: Ensure the pump head is fully seated on the valve. Check the locking lever (if present) and make sure it’s fully engaged. If the pump head is worn out, consider replacing it.
Problem: Air Leaks Only When Pumping
- Solution: This often indicates a worn pump head seal or a loose valve core. Replace the seal or tighten the valve core as described above.
Problem: Difficulty Removing Pump Head After Inflation
- Solution: Gently rock the pump head back and forth while pulling it off the valve. Avoid pulling straight back, as this can damage the valve. Lubricating the valve with a small amount of silicone grease can also help.
Maintaining Your Hand Pump for Longevity

Regular maintenance can significantly extend the life of your hand pump and prevent air leaks. Here are some tips:
- Regular Cleaning: Wipe down the pump with a clean rag after each use. Pay attention to the pump head and hose.
- Lubrication: Periodically lubricate the pump’s internal parts with silicone grease. This helps to keep the seals in good condition and ensures smooth operation.
- Storage: Store your pump in a dry, protected location. Avoid leaving it exposed to the elements.
- Seal Replacement: Replace the pump head seal and other rubber components as needed. These parts are inexpensive and easy to replace.
Choosing the Right Hand Pump
Not all hand pumps are created equal. Investing in a quality pump can make a big difference in terms of performance and durability. Here are some factors to consider when choosing a hand pump:
- Pump Type:
- Mini Pumps: Compact and lightweight, ideal for carrying on rides.
- Frame-Mounted Pumps: Attach to your bike frame for easy access.
- Floor Pumps: Offer greater leverage and efficiency for home use.
- Valve Compatibility: Ensure the pump is compatible with both Presta and Schrader valves, or choose one specifically designed for your valve type.
- Pressure Gauge: A built-in pressure gauge allows you to accurately inflate your tires to the desired pressure.
- Build Quality: Look for pumps made from durable materials like aluminum or steel.
Here’s a comparison of different hand pump types:
| Pump Type | Pros | Cons | Best For |
|---|---|---|---|
| Mini Pump | Compact, lightweight, portable | Requires more effort, less efficient | Emergency repairs on the road |
| Frame-Mounted Pump | Convenient, always available | Can be bulky, may affect aerodynamics | Everyday riding and commuting |
| Floor Pump | Efficient, easy to use, accurate pressure | Not portable, requires storage space | Home use and pre-ride inflation |
Advanced Techniques for Stubborn Leaks
Sometimes, despite your best efforts, a leak persists. Here are some advanced techniques to try:
- Teflon Tape: Wrap Teflon tape around the valve threads to create a tighter seal.
- Valve Extenders: If you have deep-section rims, ensure the valve extender is properly installed and sealed.
- Professional Help: If you’re unable to resolve the leak yourself, take your pump or bike to a local bike shop for professional assistance.
External Resources for Bike Maintenance
For more in-depth information on bike maintenance and repair, consider consulting these resources:
- Park Tool Repair Help: A comprehensive resource with detailed instructions and videos.
- Bicycle Tutor: Offers a wide range of tutorials and guides for bike maintenance.
- REI Expert Advice: Provides helpful articles and tips on bike care and maintenance.
FAQ: Addressing Your Questions About Pump Leaks
Q: Why does my pump leak when I try to inflate my tire?
A: Leaks during inflation usually happen because the pump head isn’t sealed correctly on the valve, the valve core is loose, or the pump head seal is worn out. Check these areas first.
Q: How do I know if my Presta valve core is loose?
A: If your Presta valve leaks air even when closed, the core might be loose. Use a valve core tool to gently tighten it.
Q: Can I use a car tire pump on my bike?
A: Yes, if you have a Schrader valve. However, car pumps often deliver too much air pressure too quickly, so be careful not to overinflate your tires.
Q: How often should I replace the seal in my pump head?
A: It depends on how often you use your pump. Inspect the seal regularly and replace it when you see signs of wear or damage.
Q: What kind of grease should I use on my pump?
A: Use silicone grease, as it’s safe for rubber and plastic parts. Avoid petroleum-based greases, which can damage these materials.
Q: My pump hose has a crack. Can I repair it?
A: It’s generally best to replace the entire hose assembly. Repairing a cracked hose is difficult and may not provide a reliable seal.
Q: Why is it so hard to remove the pump head from my Presta valve?
A: This can happen if the pump head is too tight or the valve is slightly bent. Gently rock the pump head back and forth while pulling it off. Lubricating the valve can also help.
Conclusion
Dealing with a leaky hand pump can be frustrating, but with a little troubleshooting and maintenance, you can keep your tires properly inflated and your rides smooth. Remember to check the pump head connection, inspect the tire valve, examine the pump head seal, and maintain your pump regularly. By following these steps, you’ll be able to identify and resolve most common air leaks. So, grab your tools, get to work, and enjoy the ride!


