
Fixing a Valve Stem Leak at Home: Easy DIY Guide
Quick Summary: Got a hissing tire? A leaky valve stem is a common problem. You can often fix it yourself by tightening the valve core with a valve core tool, cleaning the valve stem, or replacing the valve core. For more serious damage, you might need to replace the tube or tire. This guide shows you how!
A slow leak can turn a fun ride into a frustrating walk home. Valve stems, the little heroes that hold air in your tires, are often the culprit. Whether it’s a Presta or Schrader valve, these parts can loosen, corrode, or get damaged over time. Don’t worry, you don’t need to rush to a bike shop just yet!
This guide will walk you through simple steps to diagnose and fix a leaky valve stem at home. We’ll cover everything from tightening the valve core to replacing the entire tube, so you can get back on the road with confidence. Let’s get started!
Identifying the Leak
Before you start wrenching, pinpointing the exact location of the leak is crucial. This will save you time and effort. Here’s how:
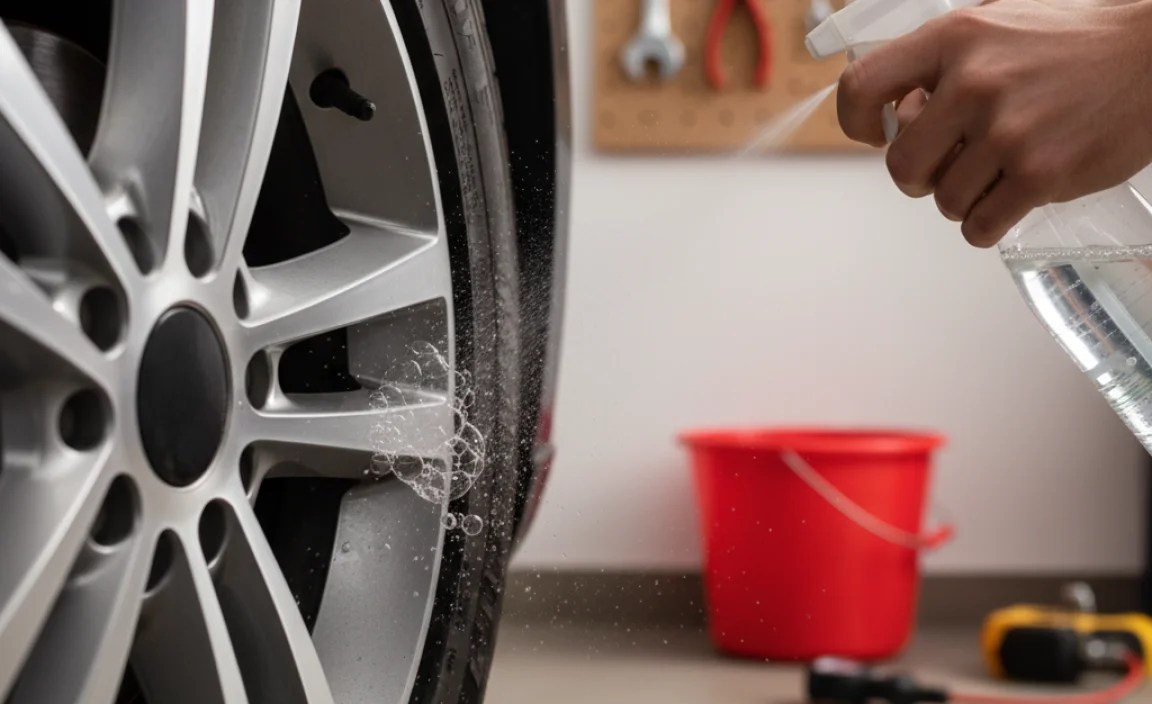
The Soap and Water Test
This is the easiest and most effective way to find a leak:
- Mix soapy water: Combine a few drops of dish soap with water in a spray bottle or small container.
- Inflate the tire: Pump up your tire to its recommended pressure.
- Apply the solution: Spray or brush the soapy water around the valve stem, especially where it meets the rim and around the valve core.
- Watch for bubbles: If there’s a leak, you’ll see bubbles forming. The location of the bubbles indicates where the air is escaping.
Check the Valve Core
The valve core is the small, removable part inside the valve stem. It’s a common source of leaks.
- Tightness: Ensure the valve core is properly tightened. Use a valve core tool (more on that later) to gently tighten it. Don’t overtighten!
- Damage: Inspect the valve core for any visible damage, such as bends or cracks. If it’s damaged, it needs to be replaced.
Inspect the Valve Stem Base
The base of the valve stem, where it joins the inner tube, is another potential leak point.
- Cracks or Tears: Carefully examine the rubber around the base for any signs of cracking or tearing.
- Proper Seating: Make sure the valve stem is seated correctly in the rim. It should be straight and not angled.
Tools You’ll Need
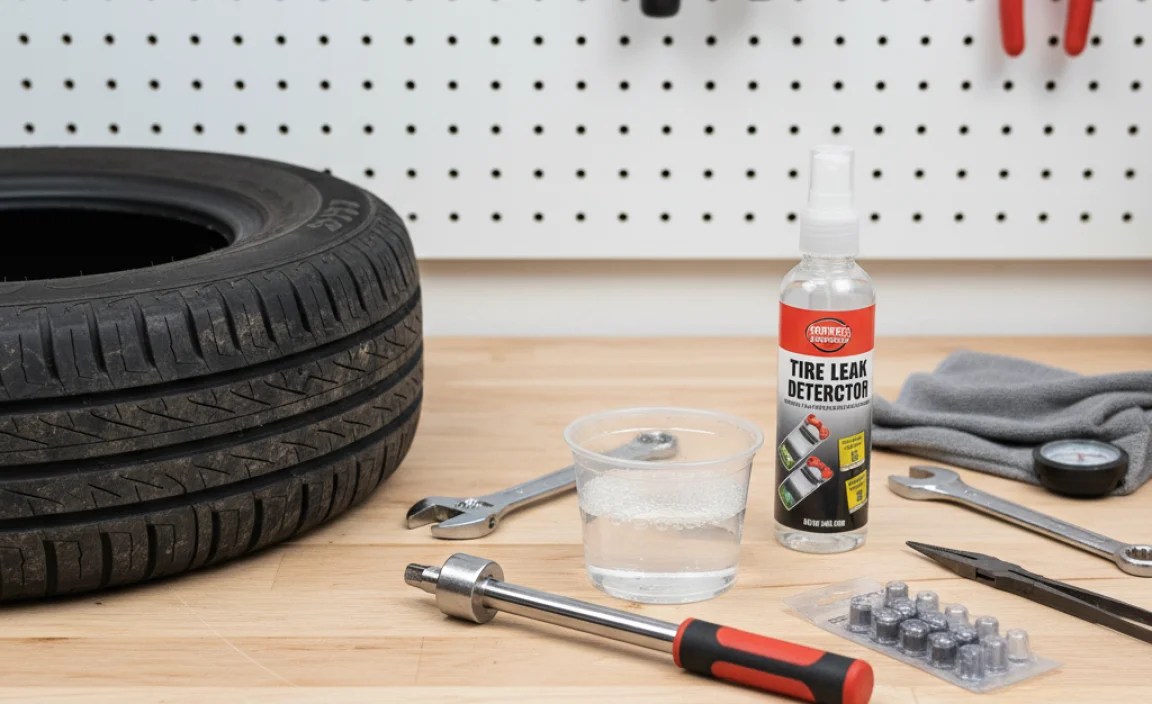
Having the right tools makes the job much easier. Here’s a list of essential items:
- Valve Core Tool: This small tool is used to tighten or remove valve cores. They are inexpensive and a must-have for any cyclist.
- Bike Pump: To inflate your tires after making repairs.
- Soap and Water: For finding the leak.
- Rag or Cloth: For cleaning and drying.
- Spare Valve Cores: In case you need to replace a damaged one.
- Tire Levers: To remove the tire from the rim (if replacing the tube).
- New Inner Tube: If the valve stem is severely damaged.
Fixing a Leaky Valve Core

A loose or slightly damaged valve core is the most common cause of valve stem leaks. Here’s how to address it:
Tightening the Valve Core
Sometimes, all you need is a little tightening.
- Remove the valve cap: Unscrew the cap from the valve stem.
- Insert the valve core tool: Place the correct end of the valve core tool onto the valve core.
- Tighten gently: Turn the tool clockwise to tighten the valve core. Be careful not to overtighten, as this can damage the core.
- Test for leaks: Re-inflate the tire and use the soap and water test to check if the leak is gone.
Replacing the Valve Core
If tightening doesn’t work, the valve core might be damaged and need replacement.
- Deflate the tire: Completely deflate the tire before removing the valve core.
- Remove the old valve core: Use the valve core tool to unscrew and remove the old valve core. Turn the tool counterclockwise.
- Install the new valve core: Screw in the new valve core using the valve core tool. Tighten it gently but firmly.
- Inflate and test: Inflate the tire to the correct pressure and use the soap and water test to check for leaks.
Valve cores are universal and inexpensive. A pack of replacements is a great addition to your repair kit.
Addressing Leaks at the Valve Stem Base

Leaks at the base of the valve stem, where it meets the inner tube, are more serious. These often require replacing the entire inner tube.
Inspecting for Damage
Carefully examine the rubber around the valve stem base for:
- Cracks: Small lines or breaks in the rubber.
- Tears: Larger rips or openings.
- Separation: The valve stem pulling away from the tube.
If you find any of these, replacing the tube is the best course of action.
Replacing the Inner Tube
Here’s a step-by-step guide to replacing your inner tube:
- Deflate the tire: Completely deflate the tire.
- Remove the wheel: Detach the wheel from your bike frame. Consult your bike’s manual for the proper procedure, as it varies depending on the type of bike and brakes.
- Use tire levers: Insert one tire lever under the tire bead and hook it onto a spoke. Insert a second lever a few inches away and pry that section of the tire off the rim. You may need a third lever for stubborn tires.
- Remove the tube: Once one side of the tire is off the rim, you can pull out the inner tube. Start at the valve stem and work your way around.
- Inspect the tire: Before installing the new tube, carefully inspect the inside of the tire for any sharp objects (glass, thorns, etc.) that may have caused the puncture. Remove anything you find.
- Install the new tube: Slightly inflate the new tube to give it some shape. Insert the valve stem into the hole in the rim. Then, carefully tuck the tube inside the tire, working your way around the rim.
- Seat the tire: Use your thumbs to push the tire bead back onto the rim. Start opposite the valve stem and work your way around. Make sure the tube isn’t pinched between the tire and the rim.
- Inflate the tire: Inflate the tire to the recommended pressure (printed on the tire sidewall).
- Check the seating: Ensure the tire is evenly seated around the rim. Look for a consistent gap between the tire and the rim.
- Reinstall the wheel: Reattach the wheel to your bike frame.
Replacing an inner tube is a fundamental bike repair skill. Practice makes perfect!
Presta vs. Schrader Valves

Bicycles use two main types of valves: Presta and Schrader. Understanding the differences is important for proper inflation and maintenance.
| Feature | Presta Valve | Schrader Valve |
|---|---|---|
| Appearance | Narrower, with a locking nut at the tip. | Wider, similar to car tire valves. |
| Inflation | Requires unlocking the nut before inflating. | Inflates directly, like a car tire. |
| Pressure Retention | Generally better at retaining high pressure. | Sufficient for most cycling needs. |
| Common Use | Road bikes, high-performance bikes. | Mountain bikes, hybrid bikes, kids’ bikes. |
Both types of valves can develop leaks, and the repair techniques are similar. However, you’ll need the correct type of pump and valve core tool for each.
Preventing Future Leaks
A little preventative maintenance can go a long way in avoiding future valve stem leaks.
- Regularly check tire pressure: Underinflated tires are more prone to punctures and valve stem damage.
- Inspect valve stems: Look for signs of wear and tear, such as cracks or bends.
- Use valve caps: Valve caps protect the valve core from dirt and debris, which can cause leaks.
- Avoid over-tightening: Overtightening valve cores can damage them.
- Store your bike properly: Avoid storing your bike in direct sunlight or extreme temperatures, as this can degrade the rubber components.
When to See a Professional
While many valve stem leaks can be fixed at home, some situations require professional attention.
- Rim Damage: If the rim around the valve stem hole is damaged, it can cause repeated leaks.
- Persistent Leaks: If you’ve tried all the DIY solutions and the leak persists, there may be an underlying issue.
- Unsure or Uncomfortable: If you’re not comfortable performing the repairs yourself, it’s always best to consult a professional bike mechanic.
FAQ: Fixing a Valve Stem Leak
Here are some frequently asked questions about fixing valve stem leaks:
- Q: Why is my valve stem leaking?
- A: Common causes include a loose or damaged valve core, cracks in the valve stem base, or a poorly seated valve stem in the rim.
- Q: Can I use any valve core tool?
- A: Most valve core tools are universal, but it’s always a good idea to check compatibility with your valve type (Presta or Schrader).
- Q: How tight should I tighten the valve core?
- A: Tighten it gently but firmly. You want it snug, but not so tight that you risk damaging the core.
- Q: What if I don’t have a valve core tool?
- A: You can try using a small pair of pliers, but be very careful not to damage the valve core. A valve core tool is inexpensive and highly recommended.
- Q: Can I patch a leak at the valve stem base?
- A: While it’s possible to patch a small leak at the base, it’s usually not a long-term solution. Replacing the inner tube is generally more reliable.
- Q: How often should I replace my inner tubes?
- A: There’s no set schedule, but it’s a good idea to replace them every year or two, or whenever you notice signs of wear and tear.
- Q: What tire pressure should I use?
- A: The recommended tire pressure is printed on the sidewall of your tire. Use a pump with a gauge to ensure accurate inflation. Bicycle Rolling Resistance is a great resource for understanding how tire pressure affects performance.
Conclusion
Fixing a valve stem leak at home is a manageable task for most cyclists. By following these steps, you can save money and keep your bike in top condition. Remember to identify the leak, use the right tools, and take your time. With a little practice, you’ll be able to handle most common valve stem issues and get back to enjoying your rides. Happy cycling!


