
Pump Gauge Horizontal Mount: Easy Install Guide
Quick Summary: Mounting your pump gauge horizontally makes it easier to read while you’re inflating tires. This guide shows you how to choose the right spot, use proper tools, and securely install your gauge. We’ll cover everything from prepping the area to making sure it stays put, so you can pump with confidence and accuracy.
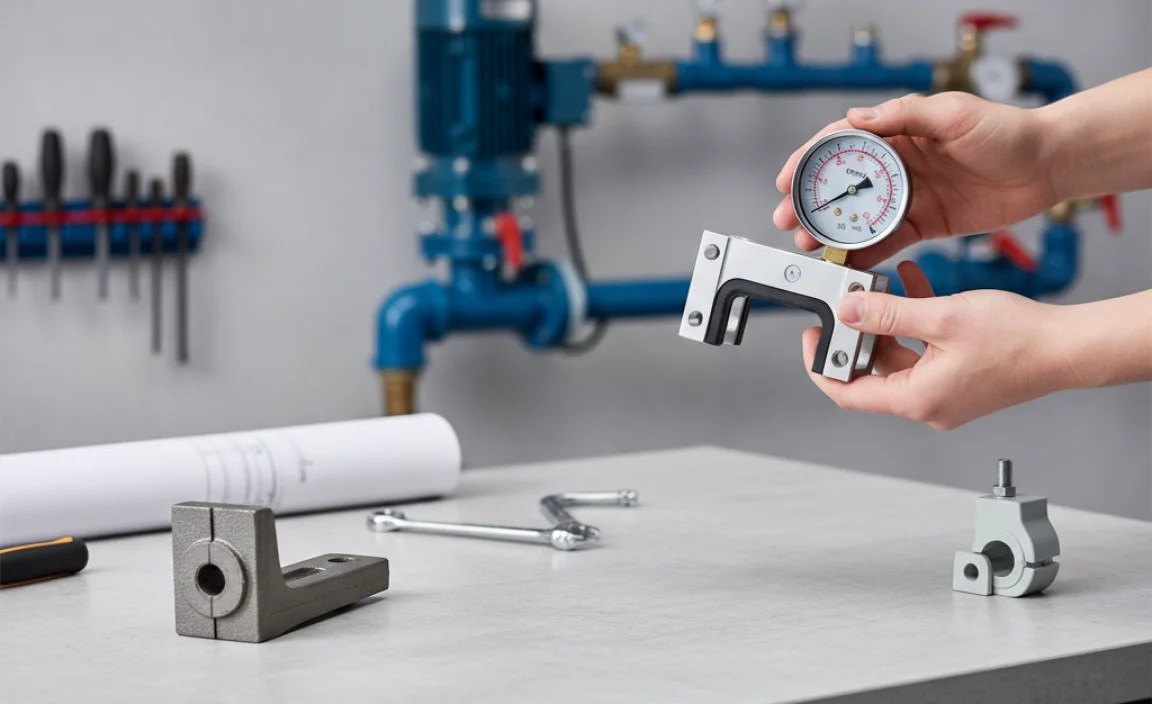
Ever struggled to read your bike pump gauge while trying to inflate a tire? It’s a common problem! Having the gauge at a weird angle can make it hard to get an accurate reading. This can lead to over- or under-inflated tires, affecting your ride quality and safety. Luckily, mounting your pump gauge horizontally can solve this issue. It provides a clear, easy-to-read display, helping you achieve the perfect tire pressure every time. This guide will walk you through the simple steps to get your gauge mounted just right.
Why Mount Your Pump Gauge Horizontally?

Mounting your pump gauge horizontally offers several advantages. Let’s take a look at why this simple adjustment can make a big difference in your cycling experience:
- Improved Visibility: A horizontal mount puts the gauge right in your line of sight. No more bending or squinting to read the pressure.
- Enhanced Accuracy: When you can easily see the gauge, you’re less likely to make errors in inflation. Accurate pressure means better performance and safety.
- Greater Convenience: A horizontal gauge is simply more user-friendly. It makes the inflation process smoother and faster.
- Professional Look: A well-mounted gauge gives your setup a clean, professional appearance.
Choosing the Right Location

Before you start drilling or attaching anything, take some time to find the best spot for your horizontal mount. Consider these factors:
- Accessibility: Make sure the gauge is easy to reach and read while you’re pumping.
- Clearance: Ensure there’s enough space around the gauge so it doesn’t interfere with other parts of your pump or bike.
- Stability: The mounting surface should be sturdy and vibration-free to provide accurate readings.
- Visibility: Check that the gauge is visible in different lighting conditions.
Ideal Mounting Spots
Here are a few common places where you might consider mounting your pump gauge horizontally:
- Pump Body: On the side of the pump cylinder, if there’s a flat, stable area.
- Base of the Pump: Some pumps have a wide base that can accommodate a horizontal mount.
- Wall Mount: If you have a dedicated pumping station, mounting the gauge on the wall can be a great option.
Tools and Materials You’ll Need

Gathering the right tools and materials beforehand will make the mounting process much smoother. Here’s a list of what you’ll likely need:
- Pump Gauge: Obviously! Make sure it’s compatible with your pump.
- Mounting Bracket: Choose a bracket that fits your gauge and mounting surface.
- Drill: If you need to create pilot holes for screws.
- Drill Bits: Select the correct size for your screws.
- Screwdriver: To tighten the screws securely.
- Wrench: For tightening nuts and bolts, if applicable.
- Level: To ensure the gauge is perfectly horizontal.
- Measuring Tape: For accurate placement.
- Pencil or Marker: To mark drilling locations.
- Safety Glasses: To protect your eyes during drilling.
- Gloves: To protect your hands.
Step-by-Step Guide to Horizontal Gauge Mounting

Follow these steps to mount your pump gauge horizontally with precision and care:
- Prepare the Surface: Clean the area where you’ll be mounting the gauge. Remove any dirt, grease, or debris.
- Mark the Mounting Points: Use a measuring tape and pencil to mark the exact locations for your mounting bracket. Double-check your measurements to ensure accuracy.
- Drill Pilot Holes (If Necessary): If you’re mounting on a hard surface, drill pilot holes to prevent the screws from stripping. Use a drill bit that’s slightly smaller than the screw size.
- Attach the Mounting Bracket: Align the mounting bracket with the pilot holes and use a screwdriver to secure it in place. Make sure the bracket is firmly attached.
- Mount the Gauge: Slide the pump gauge into the mounting bracket. Tighten any screws or clamps to hold it securely.
- Level the Gauge: Use a level to ensure the gauge is perfectly horizontal. Adjust the bracket or gauge as needed.
- Test the Setup: Connect your pump to a tire and inflate it to a known pressure. Check the gauge reading against a separate pressure gauge to ensure accuracy.
Choosing the Right Mounting Bracket
The mounting bracket is a critical component of your horizontal gauge setup. Here’s what to consider when selecting one:
- Compatibility: Make sure the bracket is designed to fit your specific pump gauge model.
- Material: Look for a bracket made from durable materials like steel or aluminum.
- Adjustability: An adjustable bracket allows you to fine-tune the gauge’s position.
- Mounting Options: Consider whether you need a bracket that can be screwed, clamped, or adhered to the mounting surface.
Types of Mounting Brackets
Here are a few common types of mounting brackets you might encounter:
- Screw-Mount Brackets: These are the most common type, providing a secure and stable attachment.
- Clamp-On Brackets: These can be attached to a tube or frame without drilling.
- Adhesive Brackets: These use strong adhesives to stick to the mounting surface.
Troubleshooting Common Issues
Even with careful planning, you might run into some challenges during the mounting process. Here are a few common issues and how to address them:
| Issue | Solution |
|---|---|
| Gauge is not level | Adjust the mounting bracket or use shims to level the gauge. |
| Screws are stripping | Use larger screws or drill deeper pilot holes. |
| Gauge is vibrating | Add vibration-dampening material between the gauge and bracket. |
| Bracket is not secure | Use stronger screws or a different mounting method. |
| Gauge reading is inaccurate | Calibrate the gauge or replace it with a new one. |
Maintaining Your Horizontally Mounted Gauge
Once your gauge is mounted, proper maintenance will ensure it stays accurate and reliable for years to come. Here are some tips:
- Regular Cleaning: Wipe down the gauge face with a soft cloth to remove dust and dirt.
- Check for Damage: Inspect the gauge and mounting bracket regularly for any signs of wear or damage.
- Calibrate Periodically: Use a separate pressure gauge to check the accuracy of your mounted gauge. Calibrate as needed.
- Tighten Connections: Make sure all screws and clamps are tight to prevent vibration and movement.
- Protect from the Elements: If your pump is stored outdoors, cover the gauge to protect it from rain and sun.
Advanced Tips and Tricks
Ready to take your horizontal gauge mounting to the next level? Here are some advanced tips and tricks:
- Use Threadlocker: Apply a small amount of threadlocker to the screws to prevent them from loosening over time.
- Add a Backlight: Install a small LED backlight behind the gauge for improved visibility in low-light conditions.
- Customize the Bracket: Modify the mounting bracket to better fit your specific pump and gauge.
- Create a Custom Mount: Design and 3D-print your own custom mounting bracket for a truly unique setup.
Benefits of Accurate Tire Pressure
Maintaining accurate tire pressure is crucial for a safe and enjoyable cycling experience. Here are some key benefits:
- Improved Rolling Resistance: Properly inflated tires roll more efficiently, reducing effort and increasing speed.
- Enhanced Comfort: The right tire pressure can absorb bumps and vibrations, providing a smoother ride.
- Better Handling: Accurate tire pressure improves grip and control, especially in corners and on uneven surfaces.
- Reduced Risk of Flats: Properly inflated tires are less likely to pinch flat or suffer other damage.
- Increased Tire Lifespan: Maintaining the correct pressure helps prevent premature wear and extends the life of your tires.
Alternative Gauge Mounting Options
While horizontal mounting is often the most convenient, there are other options to consider:
- Vertical Mount: Mounting the gauge vertically can work well in some setups, especially if space is limited.
- Remote Mount: Use a flexible hose to mount the gauge away from the pump, providing more flexibility in positioning.
- Integrated Gauge: Some pumps come with built-in gauges that are already optimally positioned.
Common Mistakes to Avoid
To ensure a successful horizontal gauge mount, avoid these common mistakes:
- Ignoring Compatibility: Always check that the gauge and mounting bracket are compatible with your pump.
- Using the Wrong Tools: Using the wrong tools can damage the gauge, bracket, or mounting surface.
- Over-Tightening Screws: Over-tightening can strip the screws or crack the mounting bracket.
- Neglecting Alignment: Failing to properly align the gauge can lead to inaccurate readings.
- Skipping the Test: Always test the setup after mounting to ensure it’s working correctly.
FAQ About Pump Gauge Horizontal Mount
1. Why is horizontal mounting better than vertical mounting?
Horizontal mounting typically offers a more direct line of sight, making it easier to read the gauge without bending or straining.
2. What if my pump doesn’t have a good spot for mounting?
Consider using a remote mounting setup with a flexible hose, or explore wall-mounted options for a dedicated pumping station.
3. Can I use adhesive instead of screws for mounting?
Adhesive can work, but make sure to use a strong, weather-resistant adhesive and clean the surfaces thoroughly beforehand. Screws generally provide a more secure and reliable attachment.
4. How do I know if my gauge is accurate after mounting?
Compare the gauge reading to a separate, known-accurate pressure gauge. If there’s a significant difference, calibrate or replace the gauge.
5. What type of drill bit should I use for pilot holes?
Use a drill bit that’s slightly smaller than the diameter of the screws you’ll be using. High-speed steel (HSS) bits are suitable for most materials.
6. Is it necessary to use a mounting bracket?
While you might be able to mount the gauge directly, a mounting bracket provides a more secure and stable attachment, reducing vibration and improving accuracy.
7. What if my horizontal mounted gauge is still hard to read?
Consider adding a small LED backlight or using a magnifying glass to improve visibility. Also, double-check the gauge’s calibration.
Conclusion
Mounting your pump gauge horizontally is a simple yet effective upgrade that can significantly improve your cycling experience. By following these steps and tips, you can ensure accurate tire pressure, enhanced safety, and greater convenience. Take your time, use the right tools, and double-check your work. Soon, you’ll be enjoying the benefits of a perfectly mounted, easy-to-read pump gauge. Happy pumping!


