
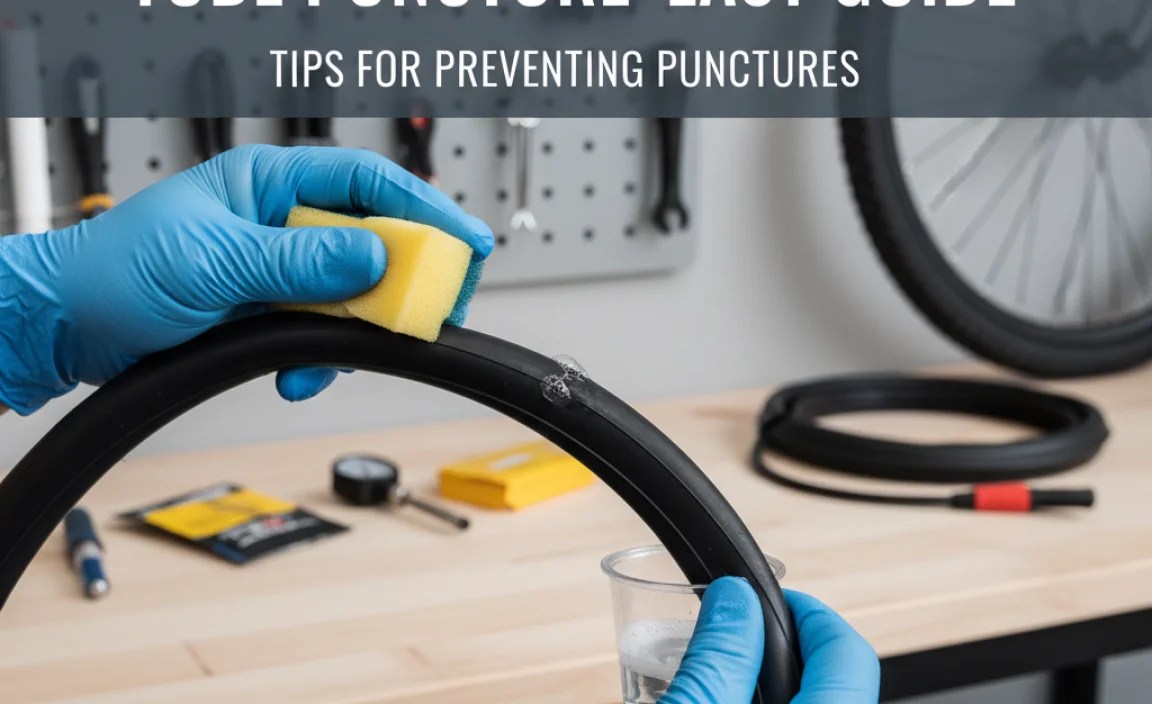
How to Locate a Small Bike Tube Puncture: Easy Guide
Quick Summary:
Finding a tiny puncture in your bike tube can be tricky, but it’s definitely doable! First, inflate the tube and listen closely for hissing. If you can’t hear it, submerge the tube in water to look for bubbles. Mark the hole, let the tube dry, and then patch it up. Easy peasy!
Ever had that sinking feeling when your bike tire goes flat? It’s super common and usually means you’ve got a puncture. While big holes are easy to spot, those sneaky little punctures can be a real pain to find. You pump and pump, but the tire just won’t stay inflated! Don’t worry, you’re not alone.
In this guide, I’ll walk you through simple, step-by-step methods to locate even the tiniest punctures in your bike tube. We’ll cover everything from listening for tell-tale hisses to using the water submersion trick. By the end, you’ll be a puncture-detecting pro, ready to get back on the road in no time. Let’s get started!
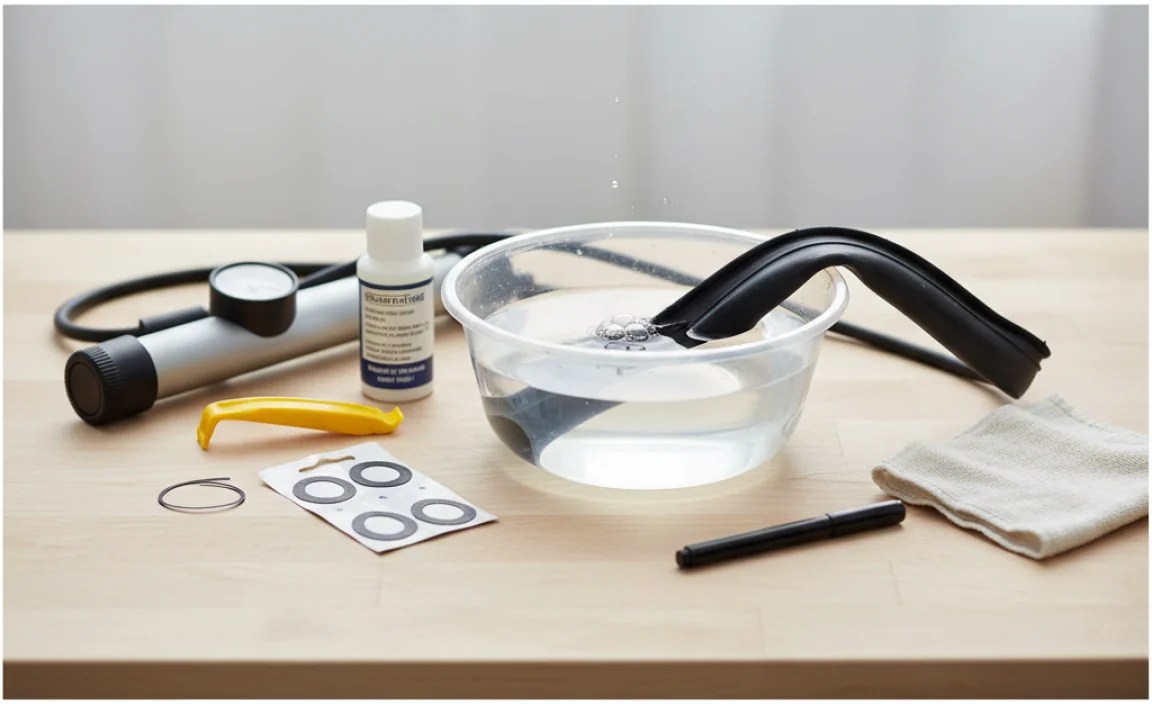
What You’ll Need

Before we dive in, let’s gather the necessary tools. Having these on hand will make the process smoother and faster.
- Bike Pump: A reliable pump to inflate the tube.
- Bucket or Tub of Water: Large enough to submerge sections of the tube.
- Clean Rags: For drying the tube.
- Marker or Pen: To mark the location of the puncture.
- Tire Levers: To remove the tire from the rim (if the tube is still inside).
Step-by-Step Guide to Finding Small Bike Tube Punctures

Step 1: Initial Inspection
Start with a good visual and auditory check. Sometimes, you can spot the culprit right away.
- Inflate the Tube: Pump up the tube until it’s moderately firm. Not too hard, just enough to hold its shape.
- Listen Carefully: Hold the inflated tube close to your ear and slowly rotate it. Listen for any hissing sounds. Even a tiny puncture will make a faint noise.
- Feel for Air: If you can’t hear anything, run your fingers along the surface of the tube. You might be able to feel air escaping from a small hole.
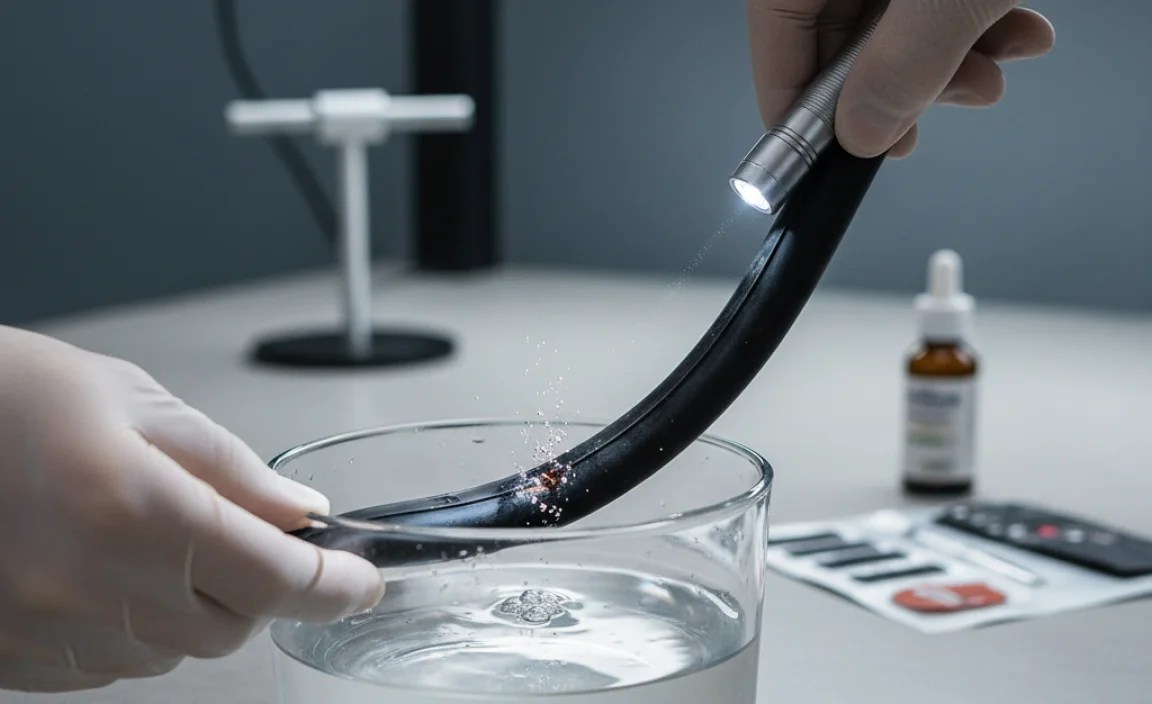
Step 2: The Water Submersion Method
If the initial inspection doesn’t reveal the puncture, it’s time to bring out the water. This is one of the most effective ways to find those super tiny leaks.
- Prepare the Water: Fill a bucket or tub with enough water to fully submerge sections of the tube.
- Inflate the Tube Again: Make sure the tube is inflated enough to hold its shape, but not overinflated.
- Submerge in Sections: Take a section of the tube and slowly submerge it in the water. Watch closely for bubbles. Even the smallest puncture will create a stream of tiny bubbles.
- Mark the Puncture: Once you see bubbles, mark the exact spot with a marker or pen. This will help you find it later when you’re ready to patch the tube.
- Repeat: Continue submerging the tube in sections until you’ve checked the entire circumference.
Step 3: Checking the Tire
Sometimes, the object that caused the puncture is still stuck in the tire. It’s important to remove it to prevent future flats.
- Visually Inspect the Tire: Carefully examine the inside and outside of the tire for any foreign objects like glass, thorns, or small pieces of metal.
- Run Your Fingers Along the Inside: Gently run your fingers along the inside of the tire to feel for anything sharp. Be careful!
- Remove the Object: If you find something, carefully remove it with pliers or tweezers.
Step 4: Drying and Patching the Tube
Now that you’ve found the puncture and removed any debris from the tire, it’s time to dry the tube and prepare it for patching.
- Dry the Tube: Use a clean rag to thoroughly dry the area around the puncture. The patch won’t stick properly if the tube is wet.
- Prepare the Patch Area: Use the sandpaper or scuffer that comes with your patch kit to roughen the area around the puncture. This helps the adhesive bond better.
- Apply the Adhesive: Apply a thin, even layer of adhesive to the roughened area. Let it dry for a few minutes until it becomes tacky.
- Apply the Patch: Remove the backing from the patch and carefully apply it to the adhesive. Press firmly for a minute or two to ensure a good bond.
- Reinstall the Tube and Tire: Carefully reinstall the tube into the tire, making sure it’s seated properly. Then, mount the tire back onto the rim.
- Inflate and Check: Inflate the tire to the recommended pressure and check for any leaks around the patch.
Advanced Techniques for Tricky Punctures
Using Soapy Water
If you’re having trouble spotting the puncture with plain water, try adding a bit of soap. The soap will create larger, more visible bubbles.
- Mix Soapy Water: Add a few drops of dish soap to your bucket of water and mix well.
- Submerge the Tube: Follow the same submersion method as before, watching for bubbles.
The “Feel” Method
Sometimes, you can feel the air escaping even if you can’t hear or see it. This takes a bit of practice, but it can be effective.
- Inflate the Tube: Inflate the tube to a moderate pressure.
- Hold the Tube to Your Face: Slowly rotate the tube, holding it close to your cheek or lips. You might be able to feel the air escaping.
Checking the Valve
Don’t overlook the valve! Sometimes, the leak isn’t in the tube itself, but in the valve.
- Inflate the Tube: Inflate the tube and listen for hissing around the valve.
- Submerge the Valve: Submerge the valve in water and watch for bubbles.
- Tighten the Valve Core: If the valve is leaking, try tightening the valve core with a valve core tool.
Tools That Can Help
Tire Levers
Tire levers are essential for removing the tire from the rim without damaging the tube or tire. Pedro’s Tire Levers are a popular choice for their durability and ease of use. They make quick work of even the tightest tires.
Patch Kits
A good patch kit is a must-have for any cyclist. The Park Tool VP-1 Vulcanizing Patch Kit is a reliable option that includes everything you need to fix a puncture on the road. Make sure your kit includes sandpaper, adhesive, and patches.
Valve Core Tool
A valve core tool allows you to tighten or remove the valve core, which can be helpful if you suspect a leak in the valve. The Genuine Innovations Valve Core Tool is a compact and versatile option that works with both Schrader and Presta valves.
Tips for Preventing Punctures
- Maintain Proper Tire Pressure: Check your tire pressure before each ride and inflate to the recommended pressure. Underinflated tires are more prone to punctures.
- Inspect Your Tires Regularly: Look for cuts, embedded objects, or signs of wear. Replace worn tires promptly.
- Use Tire Liners: Tire liners add an extra layer of protection between the tube and the tire, reducing the risk of punctures.
- Choose the Right Tires: Consider using puncture-resistant tires, especially if you ride in areas with a lot of debris.
Troubleshooting Common Issues
| Issue | Possible Cause | Solution |
|---|---|---|
| Can’t find the puncture | Puncture is very small | Use soapy water or the “feel” method. |
| Patch won’t stick | Tube not properly cleaned or adhesive not dry | Clean the tube thoroughly and let the adhesive dry until tacky. |
| Tire keeps going flat after patching | There may be another puncture or the object is still in the tire | Check the tube and tire again carefully. |
| Difficulty removing the tire | Tire is too tight | Use tire levers and work around the tire gradually. |
Why Proper Inflation Matters
Maintaining the correct tire pressure isn’t just about preventing punctures; it also affects your ride quality, speed, and comfort. Properly inflated tires roll more efficiently, provide better grip, and reduce the risk of pinch flats (snake bites). Check your tire pressure before each ride using a reliable gauge. The recommended pressure is usually printed on the sidewall of the tire. Investing in a good floor pump with a built-in gauge is a worthwhile investment for any cyclist.
- Reduced Rolling Resistance: Properly inflated tires minimize the contact area with the road, reducing friction and allowing you to ride faster with less effort.
- Improved Handling: Correct tire pressure ensures optimal grip and control, especially when cornering or riding on uneven surfaces.
- Increased Comfort: Properly inflated tires absorb bumps and vibrations, providing a smoother and more comfortable ride.
- Puncture Prevention: Maintaining the correct pressure reduces the risk of pinch flats and other types of punctures.
Choosing the Right Tube
Not all bike tubes are created equal. When replacing a tube, it’s important to choose the right size and type for your tires and rims. Consider the following factors:
- Size: Make sure the tube matches the diameter and width of your tire. The size is usually printed on the sidewall of the tire (e.g., 700x25c).
- Valve Type: Choose a tube with the correct valve type for your rims. Schrader valves are similar to car tire valves, while Presta valves are narrower and often used on road bikes.
- Material: Butyl tubes are the most common type and offer a good balance of durability and affordability. Latex tubes are lighter and offer a smoother ride, but they are more prone to punctures.
FAQ: Finding Bike Tube Punctures
Here are some frequently asked questions to help you troubleshoot and maintain your bike tubes effectively:
Q1: How often should I check my tires for punctures?
A1: It’s a good idea to visually inspect your tires before each ride. Look for any cuts, embedded objects, or signs of wear. If you frequently ride on rough roads or trails, you may want to check them more often.
Q2: Can I use a car tire patch on a bike tube?
A2: While it might seem convenient, car tire patches are generally too thick and rigid for bike tubes. They may not conform properly to the tube and can cause discomfort or even damage. It’s best to use a patch kit specifically designed for bike tubes.
Q3: What’s the best way to store spare tubes?
A3: Store spare tubes in a cool, dry place away from direct sunlight and extreme temperatures. You can wrap them in a plastic bag or store them in a saddlebag or tool kit to protect them from damage.
Q4: How do I know when it’s time to replace a tube instead of patching it?
A4: If the tube has multiple punctures close together, or if the puncture is very large or located near the valve, it’s usually best to replace the tube. Patching too many holes can weaken the tube and increase the risk of future flats.
Q5: What’s the difference between a pinch flat and a regular puncture?
A5: A pinch flat (also called a snake bite) occurs when the tube is pinched between the rim and an object on the road, resulting in two small holes that look like snake bites. This is usually caused by riding with underinflated tires. A regular puncture is typically caused by a sharp object piercing the tube.
Q6: Can tubeless tires get punctures?
A6: Yes, even tubeless tires can get punctures. However, they often seal themselves with sealant. For larger punctures, you may need to use a tubeless tire repair kit, which typically includes plugs that can be inserted into the hole.
Q7: Is it safe to ride with a patched tube?
A7: Yes, a properly patched tube is generally safe to ride on. However, it’s always a good idea to inspect the patch regularly and replace the tube if you notice any signs of wear or damage.
Conclusion
Finding a small puncture in your bike tube can be a bit of a detective game, but with these techniques, you’ll be well-equipped to locate and fix those sneaky leaks. Remember to take your time, be thorough, and always double-check your work. With a little practice, you’ll become a puncture-detecting pro, ready to tackle any flat tire that comes your way. So, grab your pump, your bucket of water, and get ready to keep those wheels turning! Happy riding!


