
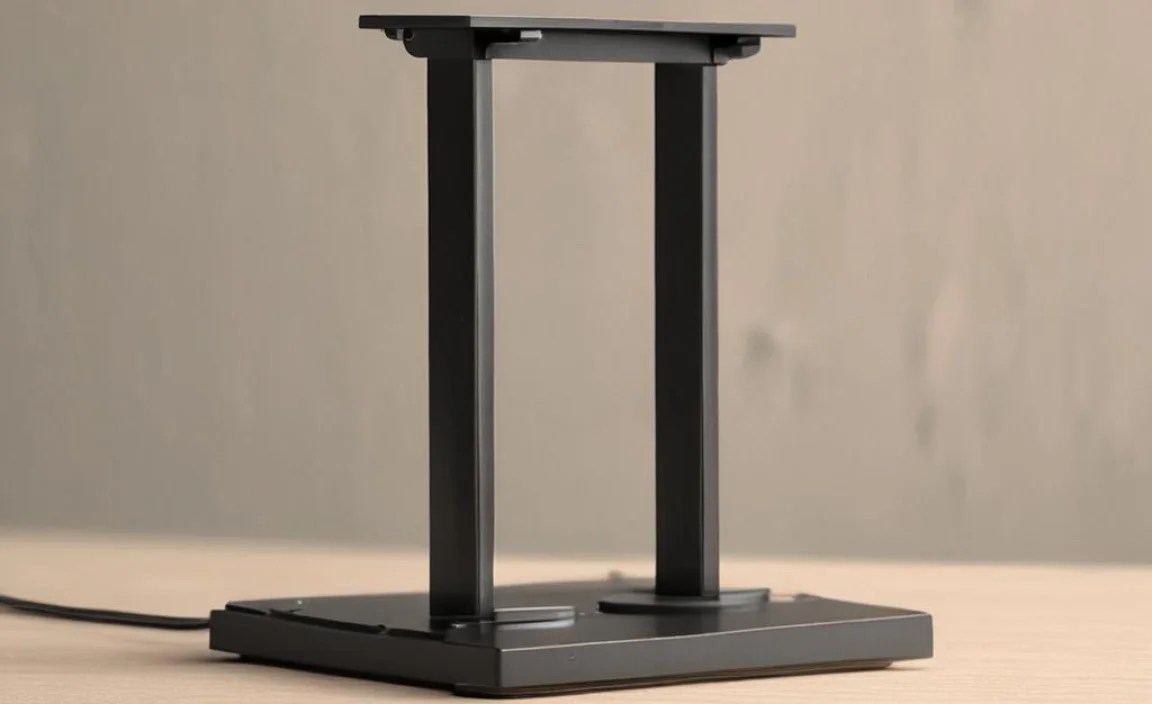
How to Fix Mount Bracket That Creaks: Easy Fix!
Have you ever heard a spooky creak? Does it come from your TV? Maybe it is the mount bracket. Mount brackets hold things up. They can hold TVs or shelves. Sometimes, they start to make noise. This noise can be annoying. You might wonder how to fix a mount bracket that creaks. Let’s find out how to stop that noise!
Did you know that sound travels through walls? A small creak can seem very loud. It can even scare your pets. Fixing it is easier than you think. You just need a few tools. You also need to know what to do. We will show you the steps. Soon, your TV will be quiet again.
A creaking mount bracket is not just annoying. It can also be a sign of a bigger problem. The bracket might be loose. It could even be about to fall. That is why it is important to fix it. We will teach you how to fix mount bracket that creaks safely. Let’s get started!
Key Takeaways
- Knowing how to fix mount bracket that creaks prevents further damage.
- Tighten all screws on the mount bracket to stop creaking sounds.
- Lubricating the bracket can reduce friction and eliminate noise.
- Check the weight capacity to ensure it is not overloaded.
- Regular maintenance helps prevent future creaking and ensures safety.
How to Find Where the Creak Is

Finding where the creak comes from is the first step. Sometimes, it is hard to tell. The sound can travel. It might seem like it is coming from somewhere else. Start by checking the screws. Are they tight? Loose screws can cause movement. This movement makes noise. Push gently on the TV. Does it creak more? If so, the screws are likely the problem. Check the wall. Is the mount secure to the wall? If the wall mount is loose, that can also cause creaking. Have someone help you. One person can push on the TV. The other person can listen closely. Try to find the exact spot where the noise is loudest. This will help you know where to focus your efforts. Pay attention to every detail.
- Check all screws on the mount.
- Push gently on the TV to test.
- Inspect the wall mount connection.
- Listen closely to find the loudest spot.
- Ask someone to help you locate the creak.
Once you find the spot, you can plan your attack. Maybe you just need to tighten a screw. Or maybe you need to add some lubrication. Sometimes, the problem is more serious. The wall might not be strong enough. The mount might be too small for the TV. If you are not sure what to do, ask for help. A professional can help you fix the problem. They can also make sure your TV is safe. Remember, safety is the most important thing. Always be careful when working with heavy objects. Use the right tools. And do not be afraid to ask for help if you need it. Now you know how to fix mount bracket that creaks.
Is the TV Too Heavy?
Is your TV too heavy for the mount? This is a very important question. Every mount has a weight limit. This limit tells you how much weight it can hold. If your TV is heavier than the limit, the mount will struggle. This can cause creaking. It can also be dangerous. The mount could break. Check the mount’s box or instructions. Find the weight limit. Then, find out how much your TV weighs. You can usually find this information online. Look up your TV model. If your TV is too heavy, you need a stronger mount. Do not risk using a mount that is not strong enough. It is better to be safe than sorry. A stronger mount will keep your TV secure.
Are the Screws Tight Enough?
Are your screws as tight as they should be? Loose screws are a common cause of creaking. Over time, screws can loosen. This happens because of vibrations. The TV moves slightly. This loosens the screws. Use a screwdriver to check each screw. Turn it clockwise to tighten it. Be careful not to over-tighten. This can strip the screw. If a screw is stripped, it will not hold. You might need to replace it. A snug screw is all you need. It should be tight enough to hold the TV. But not so tight that it damages the mount. Check the screws regularly. This will help prevent future creaking. This also makes sure that TV will not fall.
Is the Wall Strong Enough?
Is your wall strong enough to hold the TV? Some walls are stronger than others. A stud wall is usually strong. But you need to screw into the studs. Studs are the wooden beams inside the wall. If you screw into drywall only, it will not hold. The TV will pull the screws out. This can cause creaking. It can also cause the TV to fall. Use a stud finder to locate the studs. Then, make sure your mount is attached to the studs. If you cannot find the studs, you might need a different type of mount. A professional can help you install it. They can make sure it is safe and secure. Always be careful when working with walls.
Fun Fact or Stat: Did you know that over 20,000 people are injured each year from falling TVs? Making sure your mount is secure can prevent accidents!
Tightening Screws on the Mount Bracket

Tightening screws is a simple fix. First, find the right screwdriver. You need one that fits the screws on your mount. If the screwdriver is too small, it will strip the screw. If it is too big, it will not fit. Use the right size. Then, turn the screwdriver clockwise. This will tighten the screw. Do not over-tighten the screws. This can damage the mount. Just make them snug. Check all the screws on the bracket. Make sure they are all tight. Sometimes, one loose screw can cause the creaking. Tightening the screws can often solve the problem. If the creaking continues, try the next step. This might mean lubrication or checking the weight. Now you know how to fix mount bracket that creaks.
- Find the right size screwdriver.
- Turn screws clockwise to tighten.
- Do not over-tighten the screws.
- Check all screws on the bracket.
- Make sure all screws are snug.
Tightening screws is not always enough. Sometimes, the screws are already tight. The creaking might be coming from somewhere else. It could be friction between the metal parts. Or it could be the wall. Before you start tightening screws, check the mount. Look for any signs of damage. Cracks or bends can weaken the mount. If you see any damage, replace the mount. Do not try to fix a damaged mount. It is not safe. A new mount is a small price to pay for safety. Always use the right tools for the job. And follow the instructions carefully. If you are not sure what to do, ask for help. A professional can install the mount for you. They will make sure it is safe and secure.
What Type of Screwdriver Do I Need?
What kind of screwdriver do you need? This depends on the screws used in your mount. Most mounts use Phillips head screws. These screws have a cross-shaped slot. You will need a Phillips head screwdriver. Some mounts use flat head screws. These screws have a single slot. You will need a flat head screwdriver. Look at the screws on your mount. Decide what type of screwdriver you need. Make sure the screwdriver fits snugly. If it is too small, it can strip the screw. If it is too big, it will not fit. Use the right size screwdriver. This will make the job easier. It will also prevent damage to the screws.
How Tight Is Too Tight?
How tight should the screws be? You want them snug. But you do not want to over-tighten them. Over-tightening can damage the mount. It can also strip the screws. A stripped screw will not hold. You will need to replace it. Tighten the screw until it stops easily turning. Then, give it a little extra turn. That is usually enough. If you are not sure, err on the side of caution. It is better to have a screw that is slightly too loose. Than one that is too tight. Check the screws regularly. This will help prevent them from loosening over time.
Should I Replace Old Screws?
Should you replace the old screws? Sometimes, old screws can become worn. The threads can get damaged. This makes them less effective. If you are having trouble tightening the screws, replace them. You can buy new screws at a hardware store. Make sure you get the right size and type. Take one of the old screws with you. This will help you find a match. New screws will grip better. They will hold the mount more securely. This can help prevent creaking. It will also make your TV safer. Replacing old screws is a simple and cheap way to improve your mount.
Fun Fact or Stat: Screws were invented over 2000 years ago by the Greeks. They were originally made of wood!
Lubricating the Mount Bracket
Sometimes, screws are not the problem. The creaking comes from friction. Metal parts rub together. This makes noise. Lubrication can help. It reduces friction. This makes the mount quiet. Use a lubricant like WD-40. Spray it on the moving parts. Be careful not to spray too much. You do not want it dripping. Wipe off any excess. Move the TV around. See if the creaking stops. You might need to apply more lubricant. Do this until the noise is gone. Lubrication is a simple way to fix a creaking mount bracket. It can make a big difference. Now you know how to fix mount bracket that creaks.
- Use a lubricant like WD-40.
- Spray on moving parts of the mount.
- Avoid spraying too much lubricant.
- Wipe off any excess lubricant.
- Move the TV to test the lubrication.
Lubricating the mount bracket is a good idea. But you need to use the right lubricant. Some lubricants can damage plastic. Or they can attract dust. WD-40 is a good choice. It is a light oil. It will not damage most materials. You can also use silicone spray. It is also safe for most surfaces. Apply the lubricant carefully. Use a small straw to direct the spray. This will help you avoid getting it on the wall. Or on your TV. After you apply the lubricant, wipe off any excess. This will prevent drips. Test the mount. Move the TV around. Listen for any creaking. If the creaking is gone, you have fixed the problem. If not, try another solution.
What Type of Lubricant Should I Use?
What kind of lubricant is best? You want something that reduces friction. It should also be safe for the mount. WD-40 is a popular choice. It works well on metal parts. Silicone spray is another good option. It is safe for plastic and rubber. Avoid using thick greases. These can attract dirt. They can also make the problem worse. A light oil is best. It will penetrate the moving parts. It will reduce friction. Test the lubricant in a small area first. This will make sure it does not damage the mount. Always follow the instructions on the lubricant.
How Often Should I Lubricate the Mount?
How often should you lubricate the mount? This depends on how often it creaks. If it only creaks occasionally, you do not need to lubricate it often. If it creaks all the time, you might need to lubricate it more often. A good rule of thumb is to lubricate it every few months. Or whenever you hear creaking. Clean the mount before you lubricate it. This will remove any dirt or dust. This will help the lubricant work better. Use a clean cloth to wipe the mount. Then, apply the lubricant. Remember to wipe off any excess.
Can Lubricant Damage My Wall?
Could lubricant hurt your wall? Yes, some lubricants can stain walls. Especially if the walls are painted. Be careful when you spray. Use a small straw to direct the spray. This will help you avoid getting it on the wall. If you do get lubricant on the wall, wipe it off right away. Use a clean, damp cloth. You can also use a mild soap. Test the soap in a small area first. This will make sure it does not damage the paint. Prevent lubricant from dripping. Wipe off excess lubricant. Always protect your walls when you are working with lubricants.
Fun Fact or Stat: WD-40 was invented in 1953 to prevent rust on rockets. It stands for “Water Displacement, 40th attempt.”
Checking the Weight Capacity of the Mount

Every mount has a weight limit. This tells you how much weight it can hold. If your TV is too heavy, the mount will struggle. This can cause creaking. It can also be dangerous. The mount could break. Check the mount’s box or instructions. Find the weight limit. Then, find out how much your TV weighs. You can usually find this information online. Look up your TV model. If your TV is too heavy, you need a stronger mount. Do not risk using a mount that is not strong enough. It is better to be safe than sorry. A stronger mount will keep your TV secure. Now you know how to fix mount bracket that creaks.
- Check the mount’s weight limit.
- Find out how much your TV weighs.
- Do not exceed the weight limit.
- Use a stronger mount if needed.
- Safety is the most important thing.
Checking the weight capacity is crucial. It ensures your TV is safe. An overloaded mount can fail. This can damage your TV. It can also cause injury. Before you install a mount, check the weight limit. Compare it to the weight of your TV. If the TV is close to the limit, choose a stronger mount. It is better to have extra capacity. This gives you a safety margin. Consider the future. You might want to upgrade your TV later. A stronger mount will be able to handle a heavier TV. Always follow the manufacturer’s instructions. This will help you install the mount safely. If you are not sure, ask a professional. They can help you choose the right mount. They can also install it for you.
How Do I Find the Weight Limit?
Where can you find the weight limit? Check the mount’s packaging first. The weight limit is usually printed on the box. It might also be on a sticker on the mount itself. If you do not have the packaging, check the instructions. The weight limit should be listed there. You can also look up the mount online. Find the manufacturer’s website. Search for your mount model. The weight limit should be in the product description. If you still cannot find it, contact the manufacturer. They can tell you the weight limit. Always double-check the weight limit before installing the mount.
Where Can I Find My TV’s Weight?
Where do you find how much your TV weighs? Look on the back of the TV. There might be a sticker with the weight. You can also find this online. Search for your TV model. The weight should be in the product specifications. Check the manufacturer’s website. Or look on retail websites. If you have the TV’s box, the weight might be on there. Be sure to check if the weight includes the stand. You only need the weight of the TV itself. If you are not sure, it is better to overestimate. Choose a mount that can handle a little more weight. Safety is the top priority.
What Happens if I Exceed the Limit?
What happens if you put too much weight on the mount? The mount can fail. It can bend or break. This can cause the TV to fall. This can damage the TV. It can also cause serious injury. Do not exceed the weight limit. It is not worth the risk. If your TV is too heavy, get a stronger mount. Or get a smaller TV. It is better to be safe than sorry. An overloaded mount is a danger. It can fail at any time. Check the weight limit. Make sure your TV is within the limit. This will keep your TV safe. It will also protect you and your family.
Fun Fact or Stat: The largest TV ever made weighs over 1,300 pounds. You would need a very strong mount for that TV!
Checking for Wall Studs
Wall studs are the wooden beams inside your wall. They provide support. Mounts need to be attached to studs. This makes them secure. If you screw into drywall only, it will not hold. The TV will pull the screws out. This can cause creaking. It can also cause the TV to fall. Use a stud finder to locate the studs. Then, make sure your mount is attached to the studs. If you cannot find the studs, you might need a different type of mount. A professional can help you install it. They can make sure it is safe and secure. This will help you how to fix mount bracket that creaks.
- Use a stud finder to locate studs.
- Attach the mount to the studs.
- Drywall alone is not strong enough.
- A professional can help if needed.
- Safety is the most important thing.
Finding wall studs is important for safety. It ensures your TV is securely mounted. Studs provide a solid anchor. Drywall is weak. It cannot support the weight of a TV. Use a stud finder to locate the studs. These tools can detect the studs behind the drywall. Mark the location of the studs. Then, align the mount with the marks. Use long screws to attach the mount to the studs. Make sure the screws are securely fastened. If you are not comfortable finding studs, ask for help. A professional installer can find the studs. They can also install the mount safely. This will give you peace of mind. You will know your TV is secure.
What Is a Stud Finder?
What does a stud finder do? A stud finder is a tool. It helps you find the studs in your wall. Studs are the wooden beams that support the wall. There are two main types of stud finders. Electronic stud finders use sensors. They detect changes in density. This tells you where the studs are. Magnetic stud finders use magnets. They detect the nails or screws in the studs. Both types of stud finders are easy to use. Just follow the instructions. Run the stud finder along the wall. It will beep or light up when it finds a stud. Mark the location of the stud with a pencil.
What If I Can’t Find Any Studs?
What if you cannot locate any studs? This can be tricky. First, make sure you are using the stud finder correctly. Follow the instructions carefully. Try moving the stud finder slowly. Sometimes, it can be hard to find the studs. If you still cannot find them, try another method. You can try tapping on the wall. Listen for a solid sound. Studs sound different than empty drywall. You can also use a small nail. Gently poke holes in the wall. See if you hit wood. If you still cannot find the studs, ask a professional. They have experience finding studs. They can help you install the mount safely.
Are There Alternatives to Stud Mounting?
Are there other ways to mount your TV? Yes, there are. But they are not as secure. You can use drywall anchors. These anchors are designed to hold weight in drywall. But they are not as strong as studs. Only use drywall anchors for small TVs. Make sure the anchors are rated for the weight of your TV. You can also use a special mount. Some mounts are designed to distribute the weight. This allows you to mount the TV without studs. These mounts are more expensive. But they can be a good option if you cannot find studs. Always follow the instructions carefully. Safety is the most important thing.
| Mounting Option | Pros | Cons | Best For |
|---|---|---|---|
| Stud Mounting | Very secure, reliable | Requires finding studs | Most TVs, especially larger ones |
| Drywall Anchors | Easy to install, no stud needed | Less secure, lower weight limit | Small, lightweight TVs |
| No-Stud Mount | Distributes weight, no stud needed | More expensive, can be bulky | Situations where studs are inaccessible |
| Professional Install | Safe, secure, hassle-free | More expensive than DIY | Those unsure about DIY install |
Fun Fact or Stat: Wall studs are usually spaced 16 or 24 inches apart. This spacing helps distribute the weight of the wall.
Adding Padding to Reduce Vibration
Vibration can cause creaking. Adding padding can help. It reduces vibration. This makes the mount quieter. Use felt pads or rubber washers. Place them between the mount and the wall. Place them between the mount and the TV. This will cushion the connection. It will absorb some of the vibration. This can stop the creaking. Padding is a simple and effective solution. It can make a big difference. It is a step to how to fix mount bracket that creaks.
- Use felt pads or rubber washers.
- Place them between mount and wall.
- Place them between mount and TV.
- Cushion the connection points.
- Absorb vibration to stop creaking.
Adding padding is a great idea. It helps to isolate the mount. This reduces the transfer of vibrations. Vibrations can cause noise. They can also loosen screws over time. Felt pads are a good choice. They are soft and inexpensive. Rubber washers are also good. They are more durable than felt. You can find both at a hardware store. Cut the pads to fit the mount. Place them carefully. Make sure they are covering all the contact points. Tighten the screws. But do not over-tighten. The padding will compress. This will create a snug fit. Check the mount regularly. Make sure the padding is still in place. Replace the padding if it becomes worn.
Where Should I Add Padding?
Where should you put the padding? Focus on the contact points. These are the places where the mount touches the wall. They are also the places where the mount touches the TV. Add padding to these areas. This will cushion the connection. It will reduce vibration. You can also add padding behind the screws. This will help to prevent them from loosening. Use small pieces of padding. Cut them to fit around the screws. Make sure the padding is not too thick. It should not prevent the screws from tightening.
What Kind of Padding Works Best?
What type of padding should you use? Felt pads are a good option. They are soft and inexpensive. They are easy to cut to size. Rubber washers are another good choice. They are more durable than felt. They can also absorb more vibration. You can also use foam tape. This is a thin, sticky tape. It can be used to line the mount. This will create a cushion between the mount and the wall. Experiment with different types of padding. See what works best for your mount. The goal is to reduce vibration. This will stop the creaking.
Will Padding Make the Mount Less Secure?
Will padding make the mount less safe? No, padding should not make the mount less safe. As long as you use the right type of padding. And as long as you do not over-tighten the screws. The padding should be thin and compressible. It should not prevent the screws from tightening properly. If you are concerned about safety, ask a professional. They can help you install the mount safely. They can also recommend the best type of padding. Remember, safety is the most important thing. Always follow the instructions carefully.
Fun Fact or Stat: Felt is one of the oldest known textiles. It has been used for thousands of years for padding and insulation.
Regular Maintenance to Prevent Future Creaks
Regular care helps stop future creaks. Check the mount often. Tighten any loose screws. Lubricate moving parts. Make sure the weight is okay. Look for damage. Catch problems early. This will keep your TV safe. It will also keep your house quiet. It is a key to how to fix mount bracket that creaks. Regular care can make a big difference. Do not wait until it creaks. Take action now.
- Check the mount regularly.
- Tighten any loose screws.
- Lubricate moving parts as needed.
- Ensure the weight is within limits.
- Look for any signs of damage.
Maintenance is more than just fixing problems. It is about preventing them. A little bit of care can go a long way. Set a reminder to check your mount every few months. This will help you catch problems early. Before they become serious. Use a checklist. This will help you remember everything. Check the screws. Check the lubrication. Check the weight. Check for damage. If you find any problems, fix them right away. This will keep your TV safe. It will also prevent creaking. A well-maintained mount is a safe mount. It is also a quiet mount. Now you know how to fix mount bracket that creaks.
How Often Should I Check the Mount?
How often should you check the mount? A good rule is every three to six months. This lets you find and fix small issues. Before they become big problems. If you have kids or pets, check more often. They may bump into the TV. This can loosen the mount. Set a reminder on your phone. This will help you remember. Regular checks keep your TV safe. They also prevent annoying creaks.
What Should I Look for During Maintenance?
What should you look for when you check the mount? First, look at the screws. Are they tight? If not, tighten them. Next, look at the mount itself. Is it bent or damaged? If so, replace it. Then, check the lubrication. Are the moving parts moving smoothly? If not, lubricate them. Finally, check the weight. Is the TV still within the weight limit? If not, get a stronger mount. These are the things to look for. This will help you keep your mount in good shape.
What Tools Do I Need for Maintenance?
What tools do you need to keep your mount in good shape? You will need a screwdriver. You will need a lubricant. You might also need a stud finder. And a level. A screwdriver will help you tighten screws. A lubricant will help you keep the moving parts moving smoothly. A stud finder will help you find the studs. And a level will help you make sure the TV is straight. These tools will help you maintain your mount. They will keep it safe and quiet.
Summary
Fixing a creaking mount bracket is not hard. First, find where the creak comes from. Tighten all the screws. Use the right screwdriver. Do not over-tighten. Lubricate the moving parts. Use WD-40 or silicone spray. Check the weight capacity. Make sure the TV is not too heavy. Find the wall studs. Attach the mount to the studs. Add padding to reduce vibration. Felt pads or rubber washers work well. Do regular maintenance. Check the mount every few months. By following these steps, you can easily learn how to fix mount bracket that creaks. A quiet TV is a happy TV.
Conclusion
Now you know how to fix mount bracket that creaks. It involves simple steps. Tighten screws. Add lubricant. Check weight limits. Ensure wall support. Regular checks are important. A secure mount is a safe mount. It also gives peace of mind. Use these tips. Enjoy a quiet, safe TV viewing experience. Taking care of your mount is worth it. You will not have to worry about creaking noises. You will also know that your TV is secure.
Frequently Asked Questions
Question No 1: Why is my TV mount creaking?
Answer: A TV mount might creak for several reasons. Loose screws are a common cause. Friction between metal parts can also create noise. If the TV is too heavy for the mount, it can strain the bracket and cause creaking. Also, the mount might not be properly attached to the wall studs. Understanding these issues will help you know how to fix mount bracket that creaks. Regular maintenance can prevent these problems.
Question No 2: What tools do I need to fix a creaking TV mount?
Answer: You will need a few basic tools. A screwdriver is essential for tightening screws. Make sure you have the right size and type. A lubricant like WD-40 can help reduce friction. A stud finder is useful for locating wall studs. You might also need a level to ensure the TV is straight. Having these tools on hand will make it easier to learn how to fix mount bracket that creaks. Always use the right tools for the job.
Question No 3: How do I know if my TV is too heavy for the mount?
Answer: Check the weight capacity of the TV mount. This information is usually on the box or in the instructions. Find out how much your TV weighs. This is often on the back of the TV or online. If the TV weighs more than the mount’s capacity, it is too heavy. Using a mount that is too weak can cause creaking and is dangerous. It’s important to upgrade to a stronger mount. This is important for safely how to fix mount bracket that creaks.
Question No 4: Can I use any lubricant on my TV mount?
Answer: No, you should use a lubricant that is safe for metal and plastic. WD-40 is a popular choice. Silicone spray is also a good option. Avoid using thick greases. These can attract dirt and make the problem worse. Apply the lubricant sparingly. Wipe off any excess. The right lubricant can significantly help if you are learning how to fix mount bracket that creaks. Test the lubricant in an inconspicuous area first to ensure it does not damage the mount.
Question No 5: How do I find wall studs to secure the TV mount?
Answer: Use a stud finder to locate the wall studs. These tools can detect the studs behind the drywall. Electronic stud finders use sensors. Magnetic stud finders use magnets. Run the stud finder along the wall. Mark the location of the studs with a pencil. Make sure the mount is aligned with the studs before attaching it. Properly securing the mount to studs is crucial. It gives you the knowledge of how to fix mount bracket that creaks.
Question No 6: What if tightening the screws and lubricating the mount doesn’t stop the creaking?
Answer: If tightening screws and lubricating do not work, check the weight capacity. Make sure your TV isn’t too heavy for the mount. Inspect the mount for damage. Cracks or bends can cause creaking. Also, ensure the mount is securely attached to wall studs. If problems persist, consider adding padding between the mount and the wall. If you are still having issues, it might be time to consult a professional. They can help if you are learning how to fix mount bracket that creaks.


