
How to Install Cargo Mount for Long-Tail Bike: Easy!
Do you love bike rides? Do you need to carry more stuff? Long-tail bikes are great for hauling things. But, how to install cargo mount for long-tail bike? It might seem tricky. This article will show you how. We will make it easy and fun!
Key Takeaways
- Installing a cargo mount boosts your long-tail bike’s carrying ability.
- Always check your bike’s manual before you start any installation.
- Using the correct tools makes the installation process much safer.
- Properly securing the mount ensures your cargo stays safe.
- Knowing how to install cargo mount for long-tail bike improves your cycling adventures.
Understanding Cargo Mounts for Long-Tail Bikes

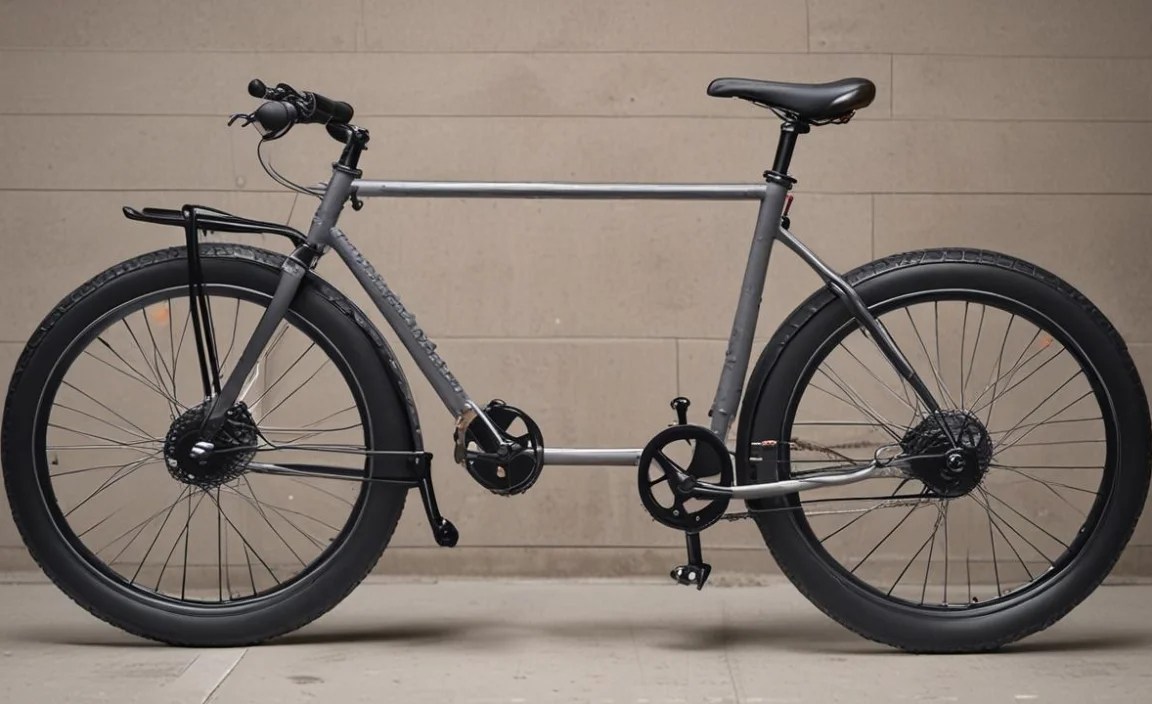
Long-tail bikes are super useful. They let you carry groceries or even kids. But sometimes, you need more space. That is where cargo mounts come in handy. These mounts let you add baskets or platforms to your bike. They make carrying things much easier. Knowing how to install cargo mount for long-tail bike is important. You want to make sure it is done right. A wobbly mount is not safe. We need to think about the type of mount. Some attach to the frame. Others use the rear rack. Each type has its own way to install. It is also important to check the weight limit. You don’t want to overload your bike. This can damage your bike and cause accidents.
- Cargo mounts add extra space.
- They help carry more items.
- Different mounts fit different bikes.
- Check the weight limit.
- Safety is very important.
Before you start, gather your tools. You will likely need wrenches and screwdrivers. An Allen wrench set is also useful. Make sure you have the right size for your bike’s bolts. Read the instructions that came with your cargo mount. They will tell you exactly what to do. If you are not sure about something, ask for help. A bike shop can help you. They can show you how to install cargo mount for long-tail bike the right way. Taking your time is important. Don’t rush the process. Make sure everything is tight and secure. A little extra care now will keep you safe later. Enjoy your rides with your new cargo space!
Fun Fact or Stat: Long-tail bikes can carry up to three times the weight of a regular bicycle!
Why Use a Cargo Mount?
Have you ever tried to carry too many bags on your bike? It’s not fun, right? That’s why cargo mounts are so cool. They give you a safe spot to put your stuff. Imagine carrying groceries without bags hitting your legs. Or bringing a picnic to the park without struggling. Cargo mounts make biking easier and more enjoyable. Plus, they help you use your bike more often. You can run errands or go on adventures. They turn your bike into a super useful machine. Learning how to install cargo mount for long-tail bike opens up a world of possibilities!
Choosing the Right Mount
Picking the right cargo mount is like choosing the right shoes. It has to fit well. There are different kinds of mounts. Some attach to the frame. Others connect to the rear rack. Think about what you want to carry. Do you need a big basket? Or a platform for boxes? Check your bike’s manual. It will tell you what kind of mounts work best. Make sure the mount is strong and sturdy. A good mount will last a long time. It will keep your cargo safe and secure.
Essential Tools for Installation
Imagine building a Lego castle without the instructions. It would be hard, right? Installing a cargo mount is similar. You need the right tools. Wrenches and screwdrivers are a must. An Allen wrench set is also super useful. A measuring tape helps you line things up. A level makes sure everything is straight. Having these tools makes the job easier. It also makes it safer. You don’t want to use the wrong tool and damage your bike. So, gather your tools before you start. Get ready to become a bike mechanic!
Preparing Your Long-Tail Bike for Installation

Before you start, you need to get your bike ready. First, clean the area where you will install the mount. Dirt and grime can get in the way. They can also make it hard to tighten the bolts. Next, check your bike’s frame. Look for any damage or cracks. If you see something, don’t install the mount. Get your bike fixed first. Make sure you have enough space for the mount. Some mounts need more room than others. Read the instructions carefully. They will tell you exactly what to do. How to install cargo mount for long-tail bike starts with good preparation. A clean and safe bike is the best place to start.
- Clean the bike frame.
- Check for damage.
- Ensure enough space.
- Read the instructions.
- Gather all tools.
- Work in a clean area.
Think about the kind of cargo you will be carrying. This will help you choose the right mount. If you plan to carry heavy loads, get a strong mount. If you only need to carry light items, a smaller mount will do. Consider the weather where you live. If it rains a lot, get a mount that is rust-resistant. This will keep it from getting damaged. Also, think about the style of your bike. You want a mount that looks good and works well. Taking the time to prepare will make the installation easier. It will also make your bike safer and more fun to ride.
Fun Fact or Stat: Long-tail bikes are becoming more popular as people look for eco-friendly transportation!
Cleaning the Bike Frame
Imagine trying to paint a dirty wall. The paint wouldn’t stick very well, right? Cleaning your bike frame is similar. You need to get rid of dirt and grime. This helps the mount attach properly. Use a damp cloth and some soap. Wipe down the area where the mount will go. Make sure to dry it completely. This prevents rust. A clean frame makes the installation easier. It also helps the mount last longer. So, take a few minutes to clean your bike. It’s a small step that makes a big difference.
Checking for Frame Damage
What if you found a crack in your favorite toy? You wouldn’t want to play with it, would you? Checking your bike frame for damage is just as important. Look for cracks, dents, or rust. These can weaken the frame. If you find any damage, don’t install the mount. Take your bike to a shop for repairs. Riding with a damaged frame is dangerous. It could break while you are riding. So, always check your bike before installing anything.
Ensuring Adequate Space
Have you ever tried to fit a big puzzle piece into a small space? It just doesn’t work, right? Making sure you have enough space for the cargo mount is important. Check the area around the frame. Make sure there are no cables or other parts in the way. The mount needs to fit properly. If it doesn’t, it could rub against other parts. This can damage your bike. So, measure the space carefully. Choose a mount that fits well.
Step-by-Step Guide: Installing the Cargo Mount

Now, let’s get to the exciting part. We will install the cargo mount. First, read the instructions that came with your mount. Each mount is a little different. The instructions will tell you exactly what to do. Next, gather your tools. You will need wrenches and screwdrivers. An Allen wrench set is also useful. Attach the mount to the frame. Use the bolts that came with the mount. Tighten the bolts carefully. Don’t overtighten them. This can damage the frame. Make sure the mount is secure. It should not wobble or move. How to install cargo mount for long-tail bike is easy if you follow these steps. Always double-check your work. A secure mount is a safe mount.
- Read the instructions.
- Gather your tools.
- Attach the mount to the frame.
- Tighten the bolts carefully.
- Make sure the mount is secure.
If you are having trouble, don’t get discouraged. Ask for help. A bike shop can show you how to install cargo mount for long-tail bike the right way. They can also help you choose the right mount for your bike. Remember, safety is the most important thing. If you are not sure about something, don’t do it. It is better to be safe than sorry. Once you have installed the mount, test it out. Put some weight on it. Make sure it can handle the load. If it feels wobbly, tighten the bolts some more. Enjoy your new cargo space! It will make your bike rides much easier and more fun.
Fun Fact or Stat: Many cities are building more bike lanes to encourage cycling!
Attaching the Mount to the Frame
Imagine building a tower with blocks. You need to put the first block in the right spot, right? Attaching the mount to the frame is similar. Line up the mount with the holes on the frame. Use the bolts that came with the mount. Start by hand-tightening the bolts. This makes sure everything is lined up. Then, use a wrench to tighten them further. Be careful not to overtighten them. This could damage the frame. Make sure the mount is sitting flush against the frame.
Tightening the Bolts Properly
Have you ever opened a jar that was too tight? It’s frustrating, right? Tightening the bolts on the cargo mount is similar. You want them to be tight enough, but not too tight. Use a wrench to tighten the bolts. Turn the wrench until you feel some resistance. Then, give it a little extra turn. This ensures the bolts are secure. If you overtighten them, you could strip the threads. This can damage the frame and the bolts. So, be careful and use the right amount of force.
Ensuring a Secure Fit
What if your shoes were too loose? You would trip and fall, right? Making sure the cargo mount has a secure fit is super important. Once you have tightened the bolts, check the mount. Try to wiggle it with your hands. It should not move or wobble. If it does, tighten the bolts a little more. Keep checking until the mount feels solid. A secure fit keeps your cargo safe. It also makes your bike ride more enjoyable.
Safety Checks After Installation

You have installed the cargo mount. Great job! But, we are not done yet. We need to do some safety checks. First, check all the bolts. Make sure they are still tight. Wiggle the mount again. It should not move. Next, test the mount with some weight. Put some heavy items on it. See how it feels. Does it wobble? Does it feel secure? If everything looks good, take a short ride. See how the bike handles with the extra weight. If you notice anything strange, stop and check the mount again. How to install cargo mount for long-tail bike includes safety checks. They are just as important as the installation itself. A safe bike is a happy bike!
| Check | Description | Action |
|---|---|---|
| Bolts | Ensure all bolts are tightened correctly. | Tighten any loose bolts. |
| Mount Stability | Check if the mount wobbles. | Adjust and tighten until stable. |
| Weight Test | Test with heavy items. | Ensure it handles the load well. |
| Test Ride | Ride with extra weight. | Check for unusual handling. |
- Check all bolts.
- Wiggle the mount.
- Test with weight.
- Take a short ride.
- Look for anything strange.
Remember, safety is always the top priority. If you are not sure about something, ask a professional. A bike shop can inspect your installation. They can make sure everything is safe. Don’t take any chances. It is better to be safe than sorry. Once you are confident that the mount is secure, enjoy your bike rides. The extra cargo space will make your life much easier. You can carry groceries, kids, or anything else you need. Just remember to always ride safely and be aware of your surroundings.
Fun Fact or Stat: Cargo bikes are used in many European cities for deliveries!
Re-Checking Bolt Tightness
Imagine baking cookies and forgetting to set the timer. They would burn, right? Re-checking the bolt tightness is like setting the timer. After your first ride, check the bolts again. They might have loosened up a bit. Use your wrench to tighten them. This ensures the mount stays secure. It’s a quick and easy step. It can prevent problems down the road. So, make it a habit to re-check the bolts regularly.
Performing a Weight Capacity Test
Have you ever tried to lift something that was too heavy? It’s not a good idea, right? Testing the weight capacity of your cargo mount is important. Put some heavy items on the mount. See how it feels. Does it sag or wobble? If it does, you might be exceeding the weight limit. Check the instructions that came with the mount. They will tell you the maximum weight. Don’t exceed this limit. It could damage the mount or the bike.
Conducting a Test Ride
What if you bought a new pair of shoes without trying them on? They might not fit well, right? Taking your bike for a test ride after installing the cargo mount is like trying on those shoes. Go for a short ride around your neighborhood. Pay attention to how the bike handles. Does it feel stable? Does the mount wobble? If you notice anything unusual, stop and check the mount. A test ride helps you identify any problems before they become serious.
Maintaining Your Cargo Mount
Taking care of your cargo mount is important. It will help it last longer. Clean the mount regularly. Use a damp cloth and some soap. This removes dirt and grime. Check the bolts often. Make sure they are still tight. If you see any rust, clean it off. You can use a wire brush or some sandpaper. Then, apply some rust-resistant paint. Store your bike in a dry place. This will prevent rust. How to install cargo mount for long-tail bike also means knowing how to care for it. A well-maintained mount will keep your cargo safe for years to come.
- Clean the mount regularly.
- Check the bolts often.
- Remove any rust.
- Store your bike in a dry place.
- Lubricate moving parts.
Think about the weather where you live. If you live in a rainy area, you might need to take extra care. Water can cause rust. Apply a protective coating to the mount. This will help keep it from rusting. If you live in a hot area, the sun can damage the mount. Keep your bike in the shade when possible. This will help protect the mount from the sun’s rays. Regular maintenance will keep your cargo mount in good condition. It will also make your bike rides safer and more enjoyable. A little care goes a long way.
Fun Fact or Stat: Some cargo bikes have electric motors to help carry heavy loads!
Regular Cleaning Tips
Imagine washing your hands after playing outside. It gets rid of all the dirt, right? Cleaning your cargo mount is similar. It removes dirt and grime. Use a damp cloth and some soap. Wipe down the mount. Pay attention to any hard-to-reach areas. Rinse the mount with clean water. Dry it completely. Regular cleaning keeps your mount looking good. It also prevents rust and corrosion.
Checking and Tightening Bolts
Have you ever noticed a loose screw on a toy? It makes the toy wobbly, right? Checking and tightening the bolts on your cargo mount is important. Use a wrench to check the bolts. Make sure they are tight. If you find any loose bolts, tighten them carefully. Don’t overtighten them. This could damage the frame. Regular bolt checks keep your mount secure. It also prevents accidents.
Rust Prevention Strategies
What if you left your bike outside in the rain? It would get rusty, right? Preventing rust on your cargo mount is important. Store your bike in a dry place. If you live in a rainy area, apply a protective coating to the mount. This will help keep it from rusting. If you see any rust, clean it off with a wire brush. Then, apply some rust-resistant paint. Rust prevention keeps your mount looking good and working well.
Troubleshooting Common Issues
Sometimes, things go wrong. The cargo mount might wobble. The bolts might come loose. Don’t worry! These are common issues. First, check the bolts. Make sure they are tight. If they are loose, tighten them. If the mount still wobbles, check the frame. Make sure there is no damage. If the frame is damaged, get it fixed. If the bolts keep coming loose, use some threadlocker. This will keep them from loosening. How to install cargo mount for long-tail bike also includes knowing how to fix problems. With a little troubleshooting, you can get your mount working perfectly.
- Check the bolts.
- Check the frame.
- Use threadlocker.
- Adjust the mount.
- Ask for help.
If you are still having trouble, don’t give up. Ask a friend or family member for help. A bike shop can also help you. They can diagnose the problem and fix it for you. Remember, safety is always the top priority. If you are not sure about something, don’t do it. It is better to be safe than sorry. With a little patience and effort, you can get your cargo mount working perfectly. Enjoy your bike rides with the extra cargo space!
Fun Fact or Stat: Cargo bikes are becoming more popular for families who want to reduce their carbon footprint!
Mount Wobbles After Installation
Imagine building a tower that keeps falling over. It’s frustrating, right? If your cargo mount wobbles after installation, don’t worry. It’s a common problem. First, check the bolts. Make sure they are tight. If they are loose, tighten them carefully. If the mount still wobbles, check the frame. Make sure there is no damage. If the frame is damaged, get it fixed. A wobbly mount is not safe. So, take the time to fix it properly.
Bolts Keep Coming Loose
Have you ever had a button that kept falling off your shirt? It’s annoying, right? If the bolts on your cargo mount keep coming loose, there’s a solution. Use some threadlocker. This is a special glue that keeps the bolts from loosening. Apply a small amount of threadlocker to the threads of the bolts. Then, tighten them. The threadlocker will keep the bolts in place. This prevents them from coming loose.
Difficulty Aligning the Mount
What if you were trying to put a puzzle together and the pieces didn’t line up? It would be hard, right? If you are having difficulty aligning the cargo mount, try this. Loosen all the bolts slightly. This gives you some wiggle room. Then, try to align the mount. Once you have it in the right position, tighten the bolts. If you are still having trouble, ask a friend for help. Sometimes, a second pair of hands makes the job easier.
Summary
Installing a cargo mount on your long-tail bike can greatly enhance its utility. By following the correct steps, you can safely and securely add extra carrying capacity. This allows you to transport groceries, equipment, or even your children with ease. Understanding how to install cargo mount for long-tail bike involves preparing your bike, attaching the mount properly, and performing thorough safety checks. Regular maintenance ensures the mount remains in good condition, providing reliable service for years.
Remember to always prioritize safety. Read the instructions carefully, use the right tools, and don’t hesitate to seek professional help if needed. With a properly installed cargo mount, your long-tail bike becomes an even more versatile and practical mode of transportation. Enjoy the freedom and convenience of carrying more on your bike!
Conclusion
Learning how to install cargo mount for long-tail bike opens up a world of possibilities. You can carry more, go farther, and enjoy your bike rides even more. Always remember to prioritize safety. Check your work, and don’t hesitate to ask for help. With a little effort, you can transform your long-tail bike into a super-useful machine. Get ready for some awesome adventures!
Frequently Asked Questions
Question No 1: What tools do I need to install a cargo mount on my long-tail bike?
Answer: You will need a few basic tools. These include a set of wrenches, screwdrivers, and Allen wrenches. The specific sizes of the tools will depend on the bolts used on your bike and cargo mount. It’s also a good idea to have a measuring tape and a level. These tools will help you align the mount properly. Having the right tools makes the installation process much easier and safer. Make sure you have everything ready before you start. This will save you time and frustration.
Question No 2: How do I choose the right cargo mount for my long-tail bike?
Answer: Choosing the right cargo mount depends on a few things. Consider the type of cargo you plan to carry. If you need to carry heavy items, get a strong mount. If you only need to carry light items, a smaller mount will do. Check your bike’s manual. It will tell you what kind of mounts are compatible. Measure the space on your bike. Make sure the mount will fit properly. Read reviews from other users. This can help you find a mount that is reliable and durable. How to install cargo mount for long-tail bike also means selecting the correct mount.
Question No 3: How do I make sure the cargo mount is installed safely?
Answer: Safety is super important when installing a cargo mount. First, read the instructions carefully. Follow them step by step. Make sure all the bolts are tightened properly. Don’t overtighten them. This can damage the frame. Wiggle the mount after installation. It should not move. Test the mount with some weight. See how it feels. Take a short test ride. See how the bike handles with the extra weight. If you notice anything strange, stop and check the mount again. If you are not sure about something, ask a professional. A safe installation is a happy installation.
Question No 4: What should I do if the cargo mount wobbles after installation?
Answer: If the cargo mount wobbles after installation, don’t panic. First, check all the bolts. Make sure they are tightened properly. If they are loose, tighten them. If the mount still wobbles, check the frame. Make sure there is no damage. If the frame is damaged, get it fixed. Try adjusting the mount. Sometimes, a slight adjustment can make a big difference. If you are still having trouble, ask a bike shop for help. They can diagnose the problem and fix it for you. A wobbly mount is not safe. So, get it fixed as soon as possible. Knowing how to install cargo mount for long-tail bike also means knowing how to fix a wobble.
Question No 5: How often should I check the cargo mount after installation?
Answer: It’s a good idea to check the cargo mount regularly. Check the bolts after every few rides. Make sure they are still tight. Look for any signs of rust or damage. Clean the mount regularly. This will help prevent rust. If you live in a rainy area, check the mount more often. Water can cause rust. Regular maintenance will keep your mount in good condition. It will also make your bike rides safer. Think of it like checking the oil in a car. It is a simple habit that can prevent bigger problems.
Question No 6: Can I install a cargo mount on any long-tail bike?
Answer: Not all cargo mounts fit all long-tail bikes. Before you buy a mount, check your bike’s manual. See what kind of mounts are compatible. Measure the space on your bike. Make sure the mount will fit properly. Some bikes have special mounting points. Others do not. If your bike does not have mounting points, you might need to use a different type of mount. A bike shop can help you choose the right mount for your bike. Knowing how to install cargo mount for long-tail bike starts with knowing what your bike can handle.


