
How to Use Shock Pump to Get Perfect XC Feel: Secret Trick
Have you ever ridden a bike that felt too bumpy? Or maybe one that felt too soft? It’s like Goldilocks trying to find the perfect porridge! For XC racing, the right bike feel is super important. Do you want to know {how to use shock pump to get perfect feel for XC racing}? This guide will show you how!
Key Takeaways
- Using a shock pump is key to dialing in your suspension for XC racing.
- Adjusting air pressure affects how your bike handles bumps and jumps.
- {How to use shock pump to get perfect feel for XC racing} requires small adjustments.
- Too much air makes the ride harsh; too little makes it mushy.
- Experiment with settings to find what works best for you and your trails.
Understanding Bike Suspension for XC Racing

Bike suspension is like the springs in your bed. It helps soak up bumps. This keeps you comfy and in control. For XC racing, suspension is extra important. It helps you go fast on rough trails. It also helps you climb hills better. There are two main types of suspension: front and rear. Front suspension is in the fork. The fork is what holds your front wheel. Rear suspension is in the back of the bike. Not all bikes have rear suspension. Bikes with both are called full-suspension bikes. Learning about your bike’s suspension is the first step in understanding {how to use shock pump to get perfect feel for XC racing}.
- Front suspension is in the fork.
- Rear suspension is in the back.
- Full-suspension bikes have both.
- Suspension helps with bumps and climbs.
- The right suspension setup is key to speed.
Understanding your bike’s suspension is like learning a new language. At first, it might seem tricky. But with a little practice, you’ll get the hang of it. Think of your suspension as having different settings. You can adjust these settings to change how your bike feels. One of the most important settings is air pressure. Air pressure is how much air is inside your suspension. You can change the air pressure with a special tool called a shock pump. The right air pressure can make a huge difference. It can make your bike feel smoother, faster, and more fun to ride. Knowing how to use your shock pump is the key to unlocking your bike’s full potential. Now, let’s dive deeper into {how to use shock pump to get perfect feel for XC racing}.
Fun Fact or Stat: The first mountain bikes had no suspension at all! Riders had to rely on their arms and legs to absorb all the bumps.
Why Is Suspension Important for XC Racing?
Have you ever tried to run fast on a bumpy field? It’s hard, right? Your feet keep slipping. You can’t get a good push-off. It’s the same with bikes! When your bike hits a bump, it can throw you off balance. This makes it harder to pedal. It also makes it harder to steer. Suspension helps keep your tires on the ground. This gives you more control. It also helps you pedal more efficiently. For XC racing, this can make a big difference. It can help you go faster. It can also help you save energy. So, suspension is like a secret weapon for racing.
How Does Suspension Work?
Imagine a spring. When you push on it, it squishes down. When you let go, it bounces back. Suspension works the same way. When your wheel hits a bump, the suspension squishes down. This absorbs the impact. It keeps the bump from going straight to you. Inside the suspension, there’s usually air or oil. This helps control how fast the suspension squishes and bounces back. By adjusting the air pressure or oil flow, you can change how the suspension feels. This is where the shock pump comes in. It lets you fine-tune the air pressure to get the perfect ride.
Different Types of Suspension
Not all suspension is the same. Some bikes only have front suspension. These are called hardtails. Hardtails are lighter and simpler. They are good for smooth trails and climbing. Full-suspension bikes have suspension in both the front and rear. These bikes are better for rough trails. They offer more comfort and control. The type of suspension you need depends on the type of XC racing you do. If you race on smooth courses, a hardtail might be enough. If you race on rough courses, a full-suspension bike is a better choice. Each type of suspension requires specific adjustments to {how to use shock pump to get perfect feel for XC racing}.
Gathering Your Tools and Gear

Before you start adjusting your suspension, you need to get your tools ready. The most important tool is a shock pump. A shock pump is a special pump that’s made for bike suspension. It has a gauge that shows you how much air pressure is in your suspension. You’ll also need a rag to wipe off your suspension. It’s a good idea to have a notepad and pen. You can use these to write down your settings. This will help you remember what works and what doesn’t. Finally, make sure you have your bike owner’s manual. It will tell you the recommended air pressure for your suspension. Having all these tools ready will make it easier to learn {how to use shock pump to get perfect feel for XC racing}.
- Get a shock pump with a gauge.
- Have a rag to wipe things down.
- Keep a notepad to write settings.
- Use your bike’s owner’s manual.
- Having the right tools makes it easier.
Think of preparing your tools like getting ready to bake a cake. You wouldn’t start without your ingredients and measuring cups, right? The same goes for adjusting your suspension. Having the right tools will help you do the job correctly. A good shock pump is especially important. It lets you add and remove air with precision. The gauge on the pump tells you exactly how much air is in your suspension. This is important for getting the right feel. The rag is useful for keeping things clean. Dirt and grime can damage your suspension. The notepad helps you keep track of your changes. This way, you can easily go back to a setting that you liked. Knowing the right tools is vital to {how to use shock pump to get perfect feel for XC racing}.
Fun Fact or Stat: Shock pumps can measure pressure in both PSI (pounds per square inch) and Bar (a metric unit). Most pumps have both!
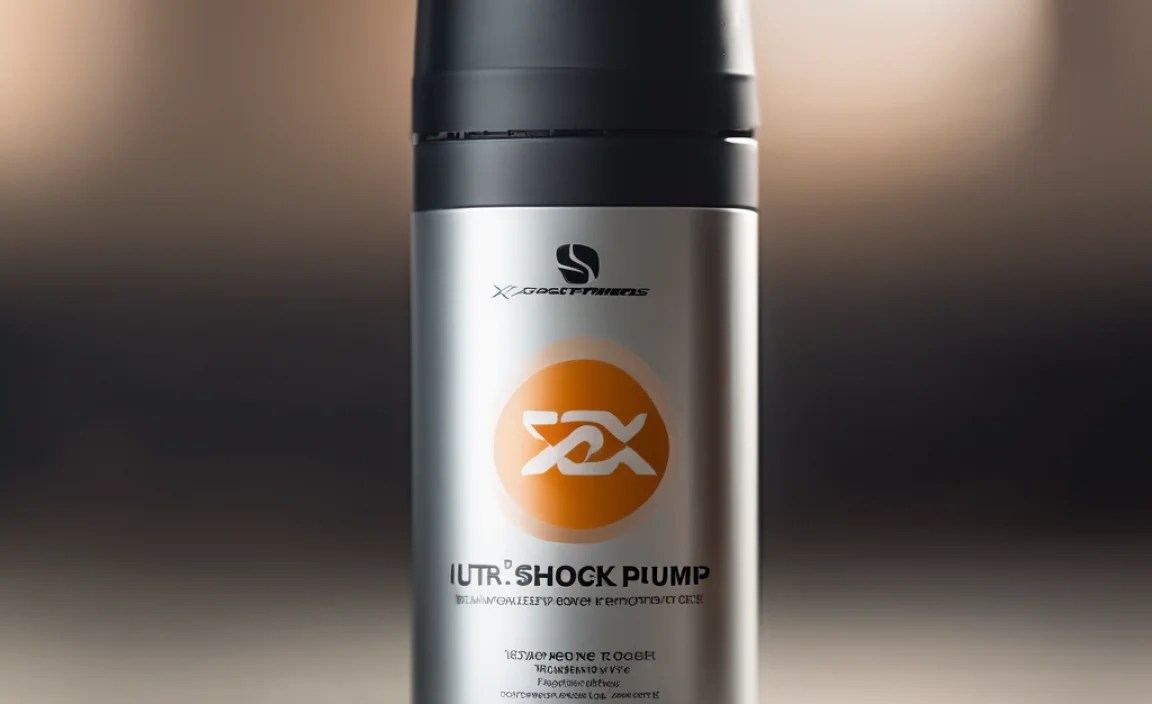
What Is a Shock Pump?
A shock pump is a special pump designed for bike suspension. It’s different from a regular tire pump. A tire pump pushes a lot of air quickly. A shock pump pushes a small amount of air very precisely. This is important because even small changes in air pressure can make a big difference in how your suspension feels. Shock pumps also have a special valve that prevents air from escaping when you disconnect the pump. This helps you get an accurate reading. Using a shock pump is the best way to adjust your suspension for XC racing.
Why Do You Need a Shock Pump?
You can’t use a regular tire pump for your suspension. A tire pump will push too much air too quickly. This can damage your suspension. It also won’t give you an accurate reading. A shock pump is designed to add air in small increments. This gives you more control over the air pressure. The gauge on the shock pump is also much more accurate than the gauge on a tire pump. This is important for getting the perfect feel. So, a shock pump is a must-have tool for any serious XC racer.
Understanding Your Bike’s Manual
Your bike’s owner’s manual is like a treasure map. It tells you everything you need to know about your bike. It includes important information about your suspension. It will tell you the recommended air pressure for your weight. It will also tell you how to adjust other settings, like rebound and compression. The manual is a great starting point for learning about your suspension. It can help you avoid making mistakes. Always read your bike’s manual before you start adjusting your suspension. Understanding your bike’s manual will help you learn {how to use shock pump to get perfect feel for XC racing}.
Finding the Right Air Pressure: Sag

Sag is how much your suspension compresses when you sit on your bike. It’s an important measurement. It helps you find the right air pressure. Too little sag means your suspension is too stiff. It won’t absorb bumps well. Too much sag means your suspension is too soft. It will bottom out easily. The right amount of sag gives you a smooth, controlled ride. To measure sag, you’ll need a friend. Have your friend hold your bike while you sit on it in your normal riding position. Then, measure how much the suspension has compressed. Compare this measurement to the recommended sag in your bike’s manual. Adjust the air pressure with your shock pump until you get the right sag. This is a key step in {how to use shock pump to get perfect feel for XC racing}.
- Sag is how much suspension compresses.
- Too little sag means it’s too stiff.
- Too much sag means it’s too soft.
- Get a friend to help you measure.
- Adjust air pressure to get right sag.
Imagine your suspension is like a seesaw. If you have too much weight on one side, the seesaw will be unbalanced. Sag is like balancing the seesaw. It ensures that your suspension is working properly. Measuring sag is like checking the balance. You want to make sure your suspension is compressing the right amount. Your bike’s manual will tell you the ideal sag range. It’s usually given as a percentage of the total suspension travel. For example, if your suspension has 100mm of travel, the recommended sag might be 20%. That means you want the suspension to compress 20mm when you sit on the bike. Using your shock pump, you can adjust the air pressure to achieve the correct sag. This is a crucial part of {how to use shock pump to get perfect feel for XC racing}.
Fun Fact or Stat: Sag is usually measured in millimeters (mm) or inches. Most bikes have a sag indicator on the suspension stanchion.
How to Measure Sag
To measure sag, you’ll need a friend and a measuring tape. First, find the O-ring on your suspension stanchion. This is a small rubber ring that sits against the seal. Push the O-ring all the way down to the seal. Then, carefully sit on your bike in your normal riding position. Make sure you’re wearing your riding gear. Have your friend hold the bike steady. Once you’re settled, have your friend measure the distance between the O-ring and the seal. This is your sag measurement. Compare this measurement to the recommended sag in your bike’s manual. Adjust the air pressure as needed using your shock pump.
What If You Don’t Have a Friend?
If you don’t have a friend to help you measure sag, don’t worry! There are still ways to do it. You can use a wall or a doorway to support yourself. Lean against the wall while you sit on the bike. Be careful not to put too much weight on the wall. You can also use a trainer stand. A trainer stand holds your bike upright. This allows you to sit on it without having to balance. Once you’re stable, you can measure the sag yourself. It might take a few tries, but you can do it! And remember, always use your shock pump to make those fine adjustments.
Adjusting Air Pressure Based on Sag
Once you’ve measured your sag, you can adjust the air pressure. If you have too little sag, you need to add air. Use your shock pump to add a small amount of air. Check the sag again. Repeat until you get the right measurement. If you have too much sag, you need to remove air. Use the bleed valve on your shock pump to release a small amount of air. Check the sag again. Repeat until you get the right measurement. Remember, small adjustments can make a big difference. Be patient and take your time. Getting the right sag is worth the effort. It’s a key part of {how to use shock pump to get perfect feel for XC racing}.
| Sag Level | Ride Feel | Air Pressure Adjustment | XC Racing Benefit |
|---|---|---|---|
| Too Little Sag | Harsh, Bouncy | Reduce Air Pressure | Better Traction on Small Bumps |
| Too Much Sag | Mushy, Bottoms Out | Increase Air Pressure | Avoid Bottoming Out on Big Hits |
| Correct Sag | Balanced, Controlled | No Adjustment Needed | Optimal Performance and Comfort |
| Adjusting sag is key to {how to use shock pump to get perfect feel for XC racing} | Fine tuning | Small Adjustments | Faster Racing |
Rebound: Controlling the Bounce

Rebound is how quickly your suspension returns to its original position after it compresses. It’s like the bounce of a ball. If the rebound is too fast, your bike will feel bouncy and uncontrolled. If the rebound is too slow, your bike will feel sluggish and pack up on repeated bumps. The right rebound setting gives you a smooth, controlled ride. To adjust rebound, look for a small knob or dial on your suspension. Turn the knob to adjust the rebound speed. Start with the rebound in the middle setting. Then, ride your bike over some bumps. If it feels bouncy, slow down the rebound. If it feels sluggish, speed up the rebound. Finding the right rebound setting is another important step in {how to use shock pump to get perfect feel for XC racing}.
- Rebound is how fast it bounces back.
- Too fast is bouncy and uncontrolled.
- Too slow is sluggish and packs up.
- Adjust with a knob or dial.
- Start in the middle and adjust.
Think of rebound as the speed at which your suspension recovers after hitting a bump. If the rebound is too fast, it’s like a trampoline. You’ll bounce all over the place. If the rebound is too slow, it’s like riding through mud. Your suspension won’t be able to keep up with the bumps. Finding the right rebound setting is like finding the sweet spot on a swing. You want it to swing smoothly and predictably. Most suspension forks and shocks have a rebound adjustment knob. Turning this knob changes the oil flow inside the suspension. This affects how quickly it rebounds. Experiment with different settings until you find what feels best for you. Rebound control is a key component of {how to use shock pump to get perfect feel for XC racing}.
Fun Fact or Stat: Rebound damping is often described as “clicks.” Each click represents a small adjustment to the rebound speed.
What Happens If Rebound Is Too Fast?
If your rebound is too fast, your bike will feel like a pogo stick. It will bounce up and down uncontrollably. This can make it hard to stay in control, especially on rough trails. You might also experience something called “bucking.” This is when the rear of the bike kicks up suddenly after hitting a bump. Fast rebound can also cause you to lose traction. Your tires won’t stay in contact with the ground. To fix this, slow down the rebound by turning the adjustment knob towards the “-” sign.
What Happens If Rebound Is Too Slow?
If your rebound is too slow, your bike will feel sluggish and unresponsive. It will feel like it’s getting stuck in the bumps. This can make it hard to maintain your speed. You might also experience something called “packing up.” This is when the suspension compresses repeatedly without fully extending. Slow rebound can also cause you to lose control. Your suspension won’t be able to react quickly to changes in the terrain. To fix this, speed up the rebound by turning the adjustment knob towards the “+” sign.
Finding the Perfect Rebound
Finding the perfect rebound setting is a matter of personal preference. It depends on your riding style and the type of trails you ride. A good starting point is to set the rebound in the middle. Then, ride your bike over a variety of bumps and jumps. Pay attention to how the suspension feels. Does it feel bouncy? Does it feel sluggish? Adjust the rebound until you find a setting that feels smooth and controlled. Don’t be afraid to experiment. The more you ride, the better you’ll get at dialing in your rebound. And remember to use your shock pump to ensure the air pressure is correct for your weight and riding style. This is all part of {how to use shock pump to get perfect feel for XC racing}.
Compression: Adjusting Firmness
Compression is how much force it takes to compress your suspension. It’s like the firmness of a mattress. If the compression is too soft, your suspension will compress easily. This can cause it to bottom out on big hits. If the compression is too firm, your suspension won’t compress enough. This can make the ride feel harsh. The right compression setting gives you a balance between comfort and control. Some suspension forks and shocks have compression adjustment knobs. These knobs allow you to fine-tune the compression damping. Turning the knob changes the oil flow inside the suspension. This affects how easily it compresses. Adjusting compression is part of {how to use shock pump to get perfect feel for XC racing}.
- Compression is how hard to compress.
- Too soft bottoms out easily.
- Too firm feels harsh.
- Adjust with compression knobs.
- Fine-tune for comfort and control.
Think of compression as the resistance your suspension offers to being compressed. If you’re riding on a smooth trail, you might want a softer compression setting. This will allow your suspension to absorb small bumps and vibrations. If you’re riding on a rough trail with big jumps, you might want a firmer compression setting. This will prevent your suspension from bottoming out. Some suspension systems have different types of compression adjustment. Low-speed compression affects how the suspension feels on slow, gradual compressions. High-speed compression affects how the suspension feels on fast, hard impacts. Experimenting with these settings can help you dial in the perfect ride for any trail. Mastering compression adjustments is a key aspect of {how to use shock pump to get perfect feel for XC racing}.
Fun Fact or Stat: Some high-end forks and shocks have separate adjustments for low-speed and high-speed compression!
What Is Low-Speed Compression?
Low-speed compression affects how your suspension feels on slow, gradual compressions. This includes things like body weight shifts, cornering forces, and small bumps. Increasing low-speed compression will make your suspension feel firmer and more supportive. This can help prevent excessive body roll in corners. Decreasing low-speed compression will make your suspension feel softer and more plush. This can improve comfort on smooth trails. Adjust low-speed compression to fine-tune how your bike handles different types of terrain.
What Is High-Speed Compression?
High-speed compression affects how your suspension feels on fast, hard impacts. This includes things like hitting rocks, roots, and jumps. Increasing high-speed compression will make your suspension feel firmer on big hits. This can help prevent bottoming out. Decreasing high-speed compression will make your suspension feel softer on big hits. This can improve comfort and control on rough trails. Adjust high-speed compression to fine-tune how your bike handles big impacts.
Finding the Right Compression Setting
Finding the right compression setting is a balance between comfort and control. Start by setting the compression in the middle. Then, ride your bike on a variety of trails. Pay attention to how the suspension feels. Does it bottom out easily? Does it feel harsh? Adjust the compression until you find a setting that feels comfortable and controlled. Remember to adjust your air pressure with your shock pump as needed to maintain the correct sag. Experiment with different settings to find what works best for you. Dialing in your compression is a crucial part of {how to use shock pump to get perfect feel for XC racing}.
Trail Testing and Fine-Tuning
The best way to dial in your suspension is to ride your bike! Find a trail that’s similar to the ones you race on. Ride the trail and pay attention to how your suspension feels. Does it feel smooth and controlled? Or does it feel harsh and bouncy? Make small adjustments to your air pressure, rebound, and compression. Ride the trail again. Keep making adjustments until you find a setting that feels perfect. Remember to write down your settings so you can easily go back to them. Trail testing is an essential part of {how to use shock pump to get perfect feel for XC racing}. Remember to bring your shock pump on the trail.
- Ride a trail like your race course.
- Feel how your suspension performs.
- Make small adjustments on the trail.
- Write down your perfect settings.
- Bring your shock pump with you.
Think of trail testing as a science experiment. You’re testing different settings to see what works best. Each time you make an adjustment, you’re changing a variable. You need to keep track of your changes and observe the results. It’s important to make small adjustments. Big changes can make it hard to tell what’s working and what’s not. Ride the same section of trail multiple times to get a consistent feel. Pay attention to how your suspension feels on different types of terrain. How does it handle small bumps? How does it handle big jumps? How does it feel in corners? The more you ride, the better you’ll get at identifying what needs to be adjusted. The more you test, the better you will learn {how to use shock pump to get perfect feel for XC racing}.
Fun Fact or Stat: Professional XC racers often spend hours testing suspension setups on different sections of a race course!
Focusing on Specific Trail Sections
When you’re trail testing, focus on specific sections of the trail. Choose sections that challenge your suspension. This might include a rocky section, a jump line, or a series of corners. Ride these sections repeatedly. Pay attention to how your suspension feels. Make small adjustments to your air pressure, rebound, and compression. Focus on one adjustment at a time. This will help you isolate the effects of each change. By focusing on specific trail sections, you can quickly dial in your suspension for different types of terrain.
Listening to Your Body
Your body is a great sensor. It can tell you a lot about how your suspension is performing. Pay attention to how your body feels when you’re riding. Are you getting beat up on rough trails? Are you losing control in corners? Are you struggling to maintain your speed? These are all signs that your suspension needs to be adjusted. Don’t ignore your body. It’s telling you something important. Listen to your body and adjust your suspension accordingly. The more you ride, the better you’ll get at interpreting the signals your body is sending you.
Documenting Your Settings
It’s important to document your suspension settings. This will help you remember what works and what doesn’t. Write down your air pressure, rebound, and compression settings for different types of trails. Note any other adjustments you make, such as tire pressure or handlebar position. Keep your notes organized and easy to access. This will save you time and effort in the long run. You can use a notebook, a spreadsheet, or a dedicated suspension setup app. The important thing is to have a system for tracking your settings. Good documentation is a key part of {how to use shock pump to get perfect feel for XC racing}.
Maintaining Your Suspension
Your suspension needs regular maintenance to keep it working properly. Clean your suspension after every ride. Use a clean rag to wipe off any dirt or grime. Inspect your suspension for damage. Look for cracks, leaks, or worn parts. Lubricate your suspension regularly. Use a suspension-specific lubricant. Follow the manufacturer’s instructions. Get your suspension serviced regularly. Take it to a qualified bike mechanic. They can inspect it, clean it, and replace any worn parts. Proper maintenance will keep your suspension working smoothly for years to come. Regular maintenance is essential for {how to use shock pump to get perfect feel for XC racing}.
- Clean it after every ride.
- Inspect for damage regularly.
- Lubricate it often.
- Get it serviced by a mechanic.
- Maintenance keeps it working well.
Think of your suspension as a car engine. If you don’t change the oil and keep it clean, it will eventually break down. The same is true for your suspension. Regular cleaning and lubrication will help prevent wear and tear. Inspection will help you catch problems early. Regular servicing will ensure that your suspension is working at its best. A well-maintained suspension will provide a smoother, more controlled ride. It will also last longer. Investing in suspension maintenance is an investment in your riding experience. And knowing how to use your shock pump effectively is part of that maintenance. It is the best way to optimize {how to use shock pump to get perfect feel for XC racing}.
Fun Fact or Stat: Some suspension manufacturers recommend servicing your suspension every 50 hours of riding!
Cleaning Your Suspension
Cleaning your suspension is easy. Use a clean rag to wipe off any dirt or grime. Avoid using harsh chemicals or solvents. These can damage the seals and other parts of your suspension. You can use a mild soap and water solution if needed. Be sure to rinse thoroughly. Dry your suspension with a clean rag. Pay special attention to the stanchions (the shiny part of the fork). These are the most vulnerable to dirt and scratches. Keeping your suspension clean will help it last longer and perform better.
Lubricating Your Suspension
Lubricating your suspension is important for keeping it working smoothly. Use a suspension-specific lubricant. These lubricants are designed to penetrate the seals and reduce friction. Apply the lubricant to the stanchions and the seals. Cycle the suspension a few times to distribute the lubricant. Wipe off any excess lubricant. Avoid using oil-based lubricants. These can attract dirt and grime. Lubricating your suspension regularly will help prevent wear and tear.
Knowing When to Get a Service
Your suspension needs to be serviced regularly. The frequency of service depends on how often you ride and the conditions you ride in. A good rule of thumb is to get your suspension serviced every 50-100 hours of riding. If you ride in muddy or dusty conditions, you may need to get it serviced more often. A qualified bike mechanic can inspect your suspension and determine if it needs to be serviced. They can also replace any worn parts. Regular servicing will keep your suspension working at its best. It will also help prevent costly repairs down the road. Proper servicing is key to ensuring {how to use shock pump to get perfect feel for XC racing}.
Summary
Getting the perfect feel for XC racing takes practice. It starts with understanding your bike’s suspension. You need to gather the right tools, like a shock pump. Measuring sag is important for finding the right air pressure. Adjusting rebound and compression helps control the bounce and firmness. Trail testing is essential for fine-tuning your settings. Regular maintenance keeps your suspension working smoothly. By following these steps, you can dial in your suspension for a faster, more comfortable ride. Learning {how to use shock pump to get perfect feel for XC racing} is a game changer!
Conclusion
Adjusting your bike’s suspension can seem tricky. But with a little practice, you can do it! Understanding sag, rebound, and compression is key. Trail testing helps you fine-tune your settings. Regular maintenance keeps your suspension working well. Taking the time to dial in your suspension is worth it. It will make you faster and more comfortable. So, grab your shock pump and get started! Mastering {how to use shock pump to get perfect feel for XC racing} will improve your performance.
Frequently Asked Questions
Question No 1: What is the first step in adjusting my suspension for XC racing?
Answer: The first step is understanding your bike’s suspension. Learn about the different parts and how they work. Read your bike’s owner’s manual. This will give you important information about your suspension. It will also tell you the recommended air pressure for your weight. Understanding the basics is essential before you start making adjustments. This will help you avoid making mistakes. Use your shock pump to adjust the air pressure to the recommended setting. From there you can start to fine tune {how to use shock pump to get perfect feel for XC racing}.
Question No 2: How often should I check my suspension’s air pressure?
Answer: You should check your suspension’s air pressure before every ride. Air pressure can change over time due to temperature changes and small leaks. Checking it regularly will ensure that your suspension is performing at its best. It will also help you catch any problems early. Use your shock pump to check the air pressure. If it’s low, add air until it reaches the recommended setting. Regular checks are an important part of maintaining your suspension. This ensures you are getting the most out of {how to use shock pump to get perfect feel for XC racing}.
Question No 3: What should I do if my suspension is bottoming out?
Answer: If your suspension is bottoming out, it means it’s compressing too much. This can happen if the air pressure is too low or the compression damping is too soft. The first thing you should do is check your air pressure. Use your shock pump to add air until it reaches the recommended setting. If it’s still bottoming out, you can try increasing the compression damping. This will make the suspension feel firmer and more resistant to compression. If you’re still having problems, take your bike to a qualified mechanic. Using a shock pump will allow you to make small adjustments to prevent bottoming out. That is part of {how to use shock pump to get perfect feel for XC racing}.
Question No 4: How do I know if my rebound is set correctly?
Answer: A properly set rebound will allow your suspension to recover quickly after hitting a bump. If the rebound is too fast, your bike will feel bouncy and uncontrolled. If the rebound is too slow, your bike will feel sluggish and packed up. A good way to test your rebound is to push down on your suspension and release it quickly. Watch how quickly it returns to its original position. It should return smoothly and quickly without bouncing excessively. Adjust the rebound knob until you find a setting that feels smooth and controlled. This is a key part of {how to use shock pump to get perfect feel for XC racing}.
Question No 5: Can I use a regular tire pump to adjust my suspension?
Answer: No, you should not use a regular tire pump to adjust your suspension. Tire pumps push a lot of air quickly, which can damage your suspension. They also don’t have an accurate gauge, so you won’t be able to get the right air pressure. You need to use a shock pump. Shock pumps are designed to push a small amount of air very precisely. They also have an accurate gauge that shows you the air pressure. A shock pump is a must-have tool for any serious XC racer. It’s the only way to properly adjust your suspension. Knowing {how to use shock pump to get perfect feel for XC racing} will improve your performance.
Question No 6: What is the best way to learn about suspension setup?
Answer: The best way to learn about suspension setup is to experiment and practice. Start by reading your bike’s owner’s manual. Then, find a trail that’s similar to the ones you race on. Ride the trail and pay attention to how your suspension feels. Make small adjustments to your air pressure, rebound, and compression. Ride the trail again. Keep making adjustments until you find a setting that feels perfect. Remember to write down your settings so you can easily go back to them. With practice, you’ll become a suspension expert! Don’t be afraid to use your shock pump and get some experience. You’ll find {how to use shock pump to get perfect feel for XC racing} is easier than you think.


