
How to Mount Cycling Light to Fork Leg: Easy Guide
Do you love riding your bike at night? It can be super fun. But, it is also important to stay safe. One way to be safe is to use a good light. You need to know how to mount cycling light to fork leg. This makes sure cars and others can see you. Let’s learn how to do it the right way.
It is important to pick the right light. A bright light helps you see the road. It also helps others see you. Think about where you will be riding. Will it be on a busy street? Or a dark path? The answer helps you choose the best light. Getting ready is the first step to a fun, safe ride.
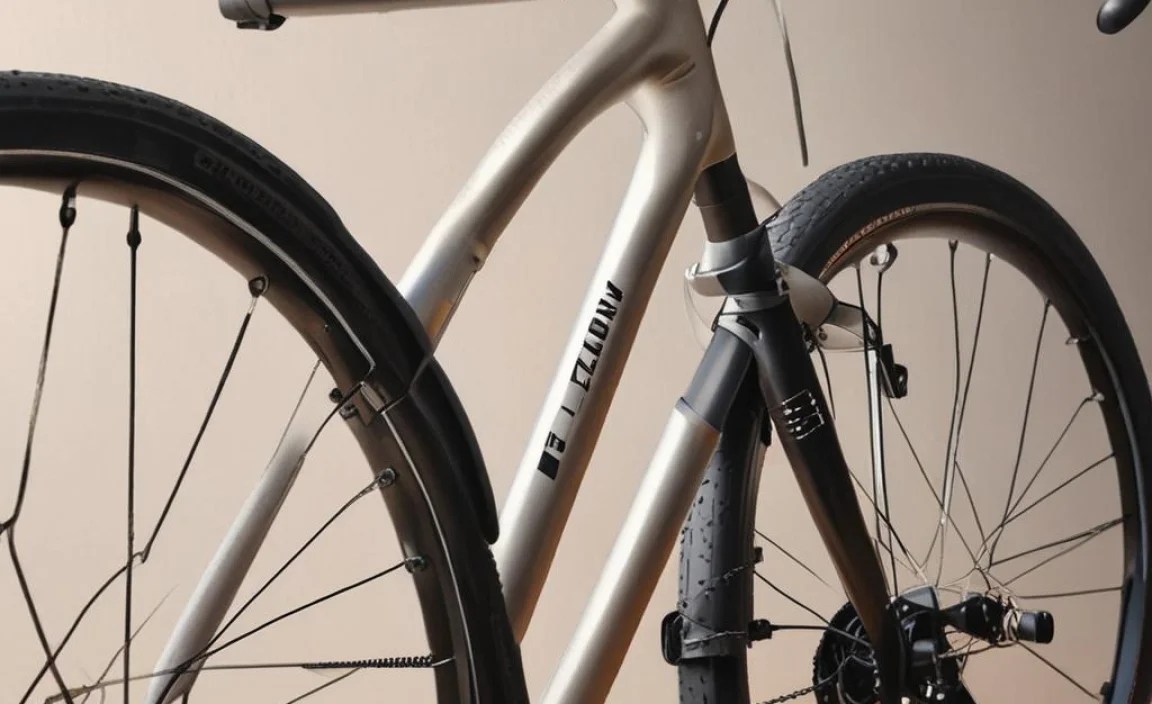
Lights help us see when it is dark. Bikes need lights just like cars do. Some lights attach to your handlebars. But, some attach to the fork leg. The fork leg is part of your bike’s front wheel. Attaching a light there can be very helpful. It shines the light lower to the ground. This helps you see bumps and holes.
Key Takeaways
- Properly knowing how to mount cycling light to fork leg enhances visibility.
- Use quality lights and ensure they are securely attached for safe riding.
- Always check the light’s battery level before each bike ride at night.
- Different mounts work best for different fork leg shapes and sizes.
- Regularly inspect and adjust your lights for optimal beam alignment.
How to Choose a Cycling Light Mount


Choosing the right mount is very important. It keeps your light secure. A good mount stops your light from shaking. This means you can see better. It also stops the light from falling off. Think about the shape of your bike’s fork leg. Is it round or flat? Some mounts work better with round shapes. Other mounts work better with flat shapes. You also need to think about the size. A mount that is too big will not be tight. A mount that is too small will not fit. Check the mount’s size before you buy it. Make sure it is right for your bike. A good mount makes a big difference. It makes riding at night safer and more fun.
* Check the size of your fork leg.
* Think about the shape of your fork leg.
* Read reviews of different mounts.
* Choose a mount made of strong stuff.
* Make sure the mount is easy to adjust.
Picking the right mount is key for your safety. Lights that wobble can distract you. Lights that fall off leave you in the dark. Always pick a mount that fits well and stays put. This way, you can focus on having fun. You can also focus on staying safe during your ride.
What Are the Different Types of Mounts?
Do you know there are many types of mounts? Some use straps to hold the light. Others use screws to tighten it. Strap mounts are easy to move. Screw mounts are usually more secure. Think about how often you will move the light. If you move it a lot, a strap mount might be best. If you want it to stay in one place, use a screw mount. Some mounts also use magnets. These are quick to attach and detach. But, they might not be as strong on bumpy roads. Test the mount before you go on a long ride. This will help you know it will stay in place.
How to Measure Your Fork Leg?
Measuring your fork leg seems hard. But, it is easy to do. All you need is a tape measure. Wrap the tape measure around the fork leg. Make sure it is where you want to put the light. Write down the number you get. This is the size you need for your mount. If you do not have a tape measure, use a piece of string. Wrap the string around the fork leg. Then, measure the string with a ruler. This gives you the same number. Knowing the right size helps you pick the right mount.
What Tools Do You Need?
To put on a bike light, you might need some tools. A screwdriver can help tighten screws. An Allen wrench is for special bolts. Some mounts need no tools at all. They use straps or clips. Read the mount’s instructions to know what to use. Having the right tools makes the job easier. It also makes sure the light is on tight. If you are not sure, ask a grown-up to help. They can show you how to use the tools safely.
Choosing the right mount is important. It is also important to install it right. Read the instructions that come with the mount. Make sure you understand each step. If you don’t, ask someone to help you. Putting the mount on right keeps your light safe. It also keeps you safe. A secure light helps you see and be seen. This makes night riding much better. Always double-check the mount before you ride. Make sure it is tight and the light is shining where you want it to.
Fun Fact or Stat: Did you know that using bike lights at night can reduce accidents by up to 70%?
Steps for Mounting a Light to the Fork Leg

Knowing the steps makes it easy. First, get your tools ready. This might include a screwdriver or wrench. Next, find the right spot on the fork leg. Make sure it is clean and dry. Now, attach the mount to the fork leg. Tighten it so it is snug, but not too tight. You do not want to break anything. Put the light into the mount. Make sure it clicks or locks in place. Test the light to see if it works. Adjust the angle so it shines on the road. Now, you are ready to ride! Remembering these steps makes mounting a cycling light to fork leg simple.
* Gather your tools before you start.
* Find the best spot on the fork leg.
* Attach the mount securely.
* Put the light into the mount.
* Test the light and adjust the angle.
Mounting your light on the fork leg helps you see better. It also helps cars see you. This makes riding at night much safer. Make sure to check the light before each ride. This way, you know it is working. You also know it is pointed in the right direction.
Preparing Your Bike for the Light
Before you start, get your bike ready. Clean the fork leg where the light will go. Dirt can make the mount slip. Make sure the area is dry too. Water can also make it slippery. Check the mount to make sure all the parts are there. Read the directions so you know what to do. Having everything ready makes it easier to put the light on. It also makes sure the light stays on tight. This helps you stay safe when you ride at night.
Attaching the Mount to the Fork Leg
Now it’s time to put on the mount. Wrap it around the fork leg. If it uses screws, line them up. Use your screwdriver or wrench to tighten them. Do not make them too tight. You do not want to break the mount. Make sure it is snug and does not move. Some mounts use straps instead of screws. Pull the straps tight and lock them. Check that the mount is secure. It should not wobble or slide around. A tight mount keeps your light in place.
Securing the Light in the Mount
With the mount on, put the light in. Some lights slide in. Others click into place. Listen for a click to know it is locked. If it slides in, make sure it goes all the way. Check that the light is secure. It should not wiggle or fall out. If it does, take it out and try again. A secure light is important. It helps you see and be seen. Always double-check before you ride.
Once you have put the light on, test it. Turn it on and make sure it shines. Adjust the angle so it points at the road. You want to see what is in front of you. You also want cars to see you coming. If the light is too high, it will not help you see the ground. If it is too low, cars might not see you. Find the right angle for the best safety. Check the light each time before you ride. This way, you know it is ready to go.
Fun Fact or Stat: Studies show that cyclists with front and rear lights are 24% less likely to be involved in an accident at night.
Adjusting the Light Angle
Getting the angle right is key. If the light points too high, it blinds people. If it points too low, you cannot see far enough. The best angle shines on the road ahead. It lights up bumps and holes. Ask a grown-up to help you adjust it. They can stand in front of you. Then, you can see if the light shines in their eyes. If it does, lower the angle a bit. Keep testing until it is just right. Adjusting the angle helps you see and be seen. This makes your night rides safer and more fun.
* Adjust the light on a dark street.
* Ask someone to stand in front of you.
* Make small changes to the angle.
* Check the light on different road surfaces.
* Tighten the mount after adjusting.
The right angle makes a big difference. It helps you spot dangers on the road. It also tells drivers where you are. Take time to adjust your light. It is a small thing that makes a big impact.
Why Is the Light Angle Important?
The angle of your light matters a lot. Too high, and you blind drivers. Too low, and you miss potholes. You want the light to shine where you need it most. This means pointing it at the road. It should light up about 10-20 feet in front of you. This gives you time to see and react. A good angle keeps you safe. It also keeps others safe. Take the time to get it right. It is worth the effort.
How to Test the Light Angle?
Testing your light angle is easy. Go to a dark street or parking lot. Turn on your light. Look at where the light shines. Does it light up the road in front of you? Can you see bumps and cracks? If not, adjust the angle. Make small changes and test again. You might need to adjust it a few times. Keep going until it is perfect. A good test makes sure you are ready for anything.
What to Do if the Light Shakes?
If your light shakes, something is wrong. The mount might be loose. The light might not be in the mount right. Stop and check everything. Tighten the screws or straps. Make sure the light clicks into place. If it still shakes, try a different mount. Some mounts are better than others. A stable light is important for safety. It helps you see clearly. It also keeps you from getting distracted.
Once you have the right angle, make sure it stays that way. Tighten all the screws and straps. Check the light after your first ride. Did it stay in place? Did the angle change? If so, adjust it again. Keep checking it each time you ride. This way, you know your light is always ready. A little bit of care keeps you safe on the road. It also makes riding more fun.
Fun Fact or Stat: A flashing light is more visible to drivers than a steady light, especially in urban areas.
Maintaining Your Cycling Light

Taking care of your light makes it last. Clean it after every ride. Dirt and water can damage it. Check the battery often. A dead battery means no light. Store your light in a safe place. This stops it from getting broken. Also, check the mount. Make sure it is still tight. These simple steps keep your light working well. This helps you stay safe on every ride.
* Clean the light after each ride.
* Check the battery regularly.
* Store the light in a safe place.
* Inspect the mount for damage.
* Replace broken parts right away.
A well-maintained light is a reliable light. It will be there when you need it. This gives you peace of mind on your rides. It also keeps you safer on the road.
Cleaning the Light and Mount
Keeping your light clean is easy. Use a soft cloth to wipe off dirt. You can use a little water if needed. Do not use soap or harsh cleaners. These can damage the light. Also, clean the mount. Dirt on the mount can make it slip. A clean light and mount work better. They also last longer. This saves you money in the long run.
Checking and Replacing Batteries
Batteries are the heart of your light. Check them before each ride. If the light is dim, change the batteries. Some lights use regular batteries. Others use rechargeable batteries. Rechargeable batteries save you money. But, you need to charge them often. Always have extra batteries with you. This way, you are never caught in the dark.
Storing Your Light Properly
How you store your light matters. Do not leave it in the sun. The heat can damage it. Do not leave it in the rain. Water can also hurt it. Keep it in a cool, dry place. A bag or box is a good idea. This protects it from bumps and scratches. Good storage keeps your light working longer.
Taking care of your light is simple. It only takes a few minutes. But, it makes a big difference. A well-maintained light is safer and lasts longer. Make it a habit to check your light. Do this before and after each ride. This way, you can be sure it is always ready. This gives you confidence on the road. It also makes your rides more enjoyable.
Fun Fact or Stat: LED bike lights can last for 50,000 hours, which is much longer than traditional bulbs!
Safety Tips for Night Cycling
Night cycling is fun. But, it is also risky. Always wear bright clothes. This helps drivers see you. Use reflective tape on your bike. This makes it even more visible. Ride where there is light. Stay away from dark roads. Always follow traffic rules. Use hand signals to show where you are going. Be aware of your surroundings. Watch out for cars and other dangers. These tips help you stay safe at night.
* Wear bright and reflective clothing.
* Use reflective tape on your bike.
* Ride in well-lit areas.
* Follow all traffic laws.
* Be aware of your surroundings.
Safety is the most important thing. Lights are just one part of it. Being careful and alert keeps you safe. It also helps you enjoy your ride.
Wearing Reflective Gear
Reflective gear shines when lights hit it. This makes you easier to see. Wear a reflective vest or jacket. Put reflective tape on your helmet. Use reflective ankle bands. The more reflective gear you wear, the better. Drivers will see you from far away. This gives them time to react. Reflective gear is a simple way to stay safe.
Following Traffic Laws
Traffic laws are there to protect you. Stop at red lights and stop signs. Ride on the right side of the road. Use hand signals to turn. Obey all traffic signs. These rules help keep you safe. They also help keep others safe. Knowing and following traffic laws is important. It shows you are a responsible rider.
Staying Alert and Aware
Pay attention to what is around you. Watch out for cars, trucks, and buses. Listen for sounds of traffic. Look for potholes and other dangers. Do not use headphones. They can distract you. Be ready to stop or swerve. Staying alert helps you avoid accidents. It also helps you react quickly.
Night cycling can be a great adventure. But, it is important to be prepared. Use a good light and wear reflective gear. Follow traffic laws and stay alert. These things help you stay safe. They also make your ride more enjoyable. Always tell someone where you are going. This way, they know to expect you back. With the right planning, you can have a safe and fun night ride.
Fun Fact or Stat: White lights should be on the front of your bike and red lights on the back, as required by law in many places.
Troubleshooting Common Light Problems
Sometimes lights do not work right. The light might be dim. It might not turn on at all. The mount might be loose. The light might shake or fall off. These problems can be fixed. Check the battery first. Make sure it is charged or replaced. Tighten the mount. Make sure the light is in the mount right. If these things do not work, try a new light. Solving problems keeps you safe.
* Check the battery if the light is dim.
* Tighten the mount if it is loose.
* Make sure the light is in the mount correctly.
* Try a new light if nothing else works.
* Read the light’s instructions for help.
Fixing problems quickly is important. It keeps your light working well. This gives you peace of mind on your rides.
Light Is Not Turning On
If your light does not turn on, start with the battery. Is it dead? Try a new battery. Make sure the battery is in the right way. Check the switch. Is it turned on? Sometimes the switch is broken. If so, you need a new light. Look for any broken wires. These can stop the light from working.
Light Is Dim
A dim light is not safe. It might mean the battery is low. Try a new battery. Clean the light lens. Dirt can make it dim. Make sure the light is pointed right. If it is pointed too low, it will not shine far. Check the light’s settings. Some lights have different brightness levels.
Mount Keeps Coming Loose
A loose mount is a big problem. It means the light can fall off. Tighten the screws or straps. Make sure they are snug. Use a stronger mount. Some mounts are better than others. Check the mount often. This way, you can catch problems early.
Fixing light problems is part of owning a bike light. Do not get frustrated. Take your time and check each thing. Most problems are easy to fix. If you cannot fix it, ask for help. A bike shop can help you find the problem. They can also fix it for you. Keeping your light working is worth the effort. It keeps you safe and seen on the road.
Fun Fact or Stat: Some bike lights come with a USB charging option, making it easy to recharge them using your computer or a portable power bank.
Comparing Different Cycling Lights
There are many kinds of cycling lights. Some are bright. Some are small. Some are easy to mount. Think about what you need. Do you ride on dark roads? Then, you need a bright light. Do you want something easy to carry? Then, a small light is best. Do you need a light that is easy to put on? Then, look for a simple mount. Comparing lights helps you find the best one.
* Consider brightness (lumens).
* Think about size and weight.
* Check the battery life.
* Look at the mounting system.
* Read reviews from other riders.
The right light makes a big difference. It keeps you safe and helps you see. Take your time to find the perfect one.
Brightness (Lumens)
Lumens measure how bright a light is. More lumens mean a brighter light. For dark roads, you need at least 400 lumens. For city streets, 200 lumens might be enough. Think about where you ride. This will help you choose the right brightness.
Battery Life
Battery life tells you how long the light lasts. Some lights last for hours. Others only last for an hour. If you ride for a long time, you need a long battery life. Check the battery life before you buy. This way, you will not run out of light.
Mounting Systems
Different lights use different mounts. Some use straps. Some use screws. Some use clips. Think about what is easiest for you. A good mount is secure and easy to use. It keeps your light in place.
| Feature | Bright Light | Small Light | Easy Mount Light | Long Battery Life |
|---|---|---|---|---|
| Brightness | High (400+ Lumens) | Medium (200 Lumens) | Medium (200 Lumens) | Medium (200 Lumens) |
| Size | Medium to Large | Small | Medium | Medium |
| Battery Life | Medium (2-3 hours) | Short (1-2 hours) | Medium (2-3 hours) | Long (4+ hours) |
| Mounting | Secure, may require tools | Simple, often tool-free | Very easy, quick-release | Secure, may require tools |
| Best For | Dark Roads | City Riding | Quick Trips | Long Rides |
Choosing the right cycling light is important. Think about where you ride. Think about how long you ride. Think about what is easy for you. Read reviews and compare different lights. A good light makes a big difference. It keeps you safe and helps you see. Take your time and find the perfect one for you.
Fun Fact or Stat: Some cycling lights have smart features like automatic brightness adjustment based on ambient light!
Summary
Riding your bike at night can be a lot of fun. However, it’s very important to stay safe. One crucial aspect of staying safe is knowing how to mount cycling light to fork leg properly. By choosing the right mount, following the steps carefully, and adjusting the light angle correctly, you can ensure that you are visible to others and can see the road ahead.
Remember to maintain your cycling light by cleaning it, checking the batteries, and storing it properly. Follow safety tips such as wearing reflective gear and obeying traffic laws to minimize risks. By addressing common light problems and comparing different cycling lights, you can make informed decisions to enhance your night cycling experience. Knowing how to mount cycling light to fork leg and following these tips will help you stay safe and have more fun on your night rides.
Conclusion
Learning how to mount cycling light to fork leg is a simple yet vital skill for any cyclist. A well-mounted and properly adjusted light significantly improves your visibility and safety during nighttime rides. By taking the time to choose the right equipment and follow the instructions carefully, you can ensure a safer and more enjoyable cycling experience. Always remember to prioritize safety and be aware of your surroundings while riding at night.
Frequently Asked Questions
Question No 1: Why is it important to mount a cycling light to the fork leg?
Answer: Mounting a cycling light to the fork leg is very important for safety. It helps you see the road better. It also helps others see you. When the light is low, it shines on bumps and holes. This gives you time to avoid them. Also, a light on the fork leg is easy for drivers to see. This makes you more visible. It reduces the risk of accidents. So, how to mount cycling light to fork leg is key for safe night riding.
Question No 2: What kind of tools do I need to mount a cycling light to the fork leg?
Answer: The tools you need depend on the mount. Some mounts use screws. You will need a screwdriver for these. Some use Allen wrenches. You will need the right size Allen wrench. Other mounts use straps or clips. These need no tools. Read the mount’s instructions. It will tell you what tools you need. Having the right tools makes the job easier. It also makes sure the light is secure. If you are not sure, ask a grown-up to help you.
Question No 3: How do I choose the right size mount for my bike’s fork leg?
Answer: To choose the right size mount, you need to measure your fork leg. Use a tape measure to wrap around the fork leg. Write down the number. This is the size you need. If you do not have a tape measure, use a string. Wrap the string around the fork leg. Then, measure the string with a ruler. This gives you the size. Choose a mount that matches this size. A mount that is too big will be loose. A mount that is too small will not fit.
Question No 4: How often should I check the light and mount after knowing how to mount cycling light to fork leg?
Answer: You should check your light and mount before every ride. Make sure the light is on tight. Make sure the mount is secure. Turn on the light to make sure it works. Adjust the angle if needed. After your first ride, check it again. Did anything come loose? Did the angle change? If so, fix it. Checking often keeps you safe. It also helps you find problems early. This way, you can fix them before they become big problems. So, always inspect the setup before each ride after understanding how to mount cycling light to fork leg.
Question No 5: What if my cycling light keeps shaking after I mount it?
Answer: If your cycling light shakes, something is wrong. The mount might be loose. Tighten the screws or straps. Make sure the light is in the mount right. It should click or slide in all the way. Try a different mount. Some mounts are better than others. If it still shakes, add some rubber padding. Put the padding between the mount and the fork leg. This can help stop the shaking. A stable light is important for safety.
Question No 6: Can I use any type of light for my bike, or are there specific ones I should use to mount cycling light to fork leg?
Answer: You should use lights made for bikes. These lights are bright and strong. They are made to handle bumps and weather. Car lights are too big and heavy. Flashlights are not bright enough. Look for lights that say “bike light.” Choose one that fits your needs. Think about how bright it is. Think about how long the battery lasts. Think about how to mount cycling light to fork leg. Using the right light keeps you safe.


