
How to Mount GPS & Light Combo on Stem Cap for Aero Bike?
Do you love riding your aero bike? Do you want to see your speed and the road? Many cyclists want to know how to mount GPS & light combo on stem cap for aero bike. It helps them see better and track their rides.
Have you ever wished your bike computer and light were in one place? It can be tricky to find the best spot. Let’s learn how to make your aero bike even better!
This guide will show you how. We will make it easy and safe to add these tools to your bike. Get ready for a smoother, smarter ride!
Key Takeaways
- Mounting a GPS and light combo on your stem cap improves visibility and safety.
- A stem cap mount keeps your handlebars clear and your view unobstructed.
- Make sure the mount is compatible with your bike’s stem and devices.
- Proper installation ensures your devices stay secure, even on bumpy roads.
- Knowing how to mount GPS & light combo on stem cap for aero bike helps you enjoy your ride more.
Understanding Stem Cap Mounting for Aero Bikes

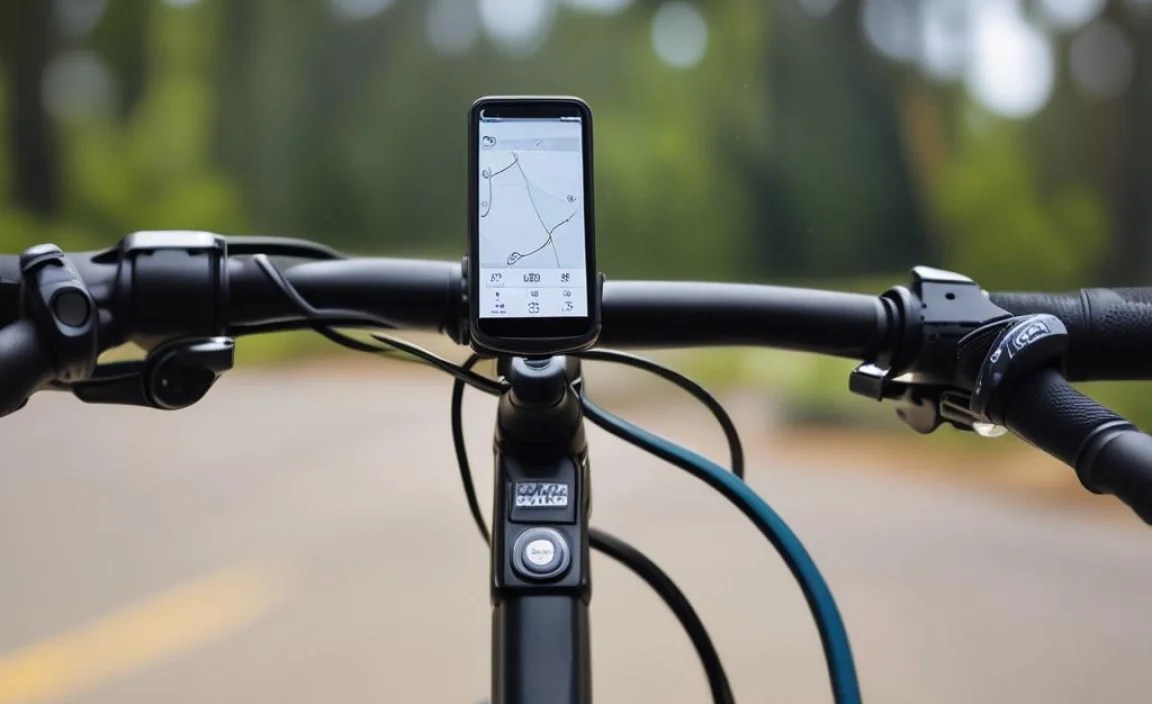
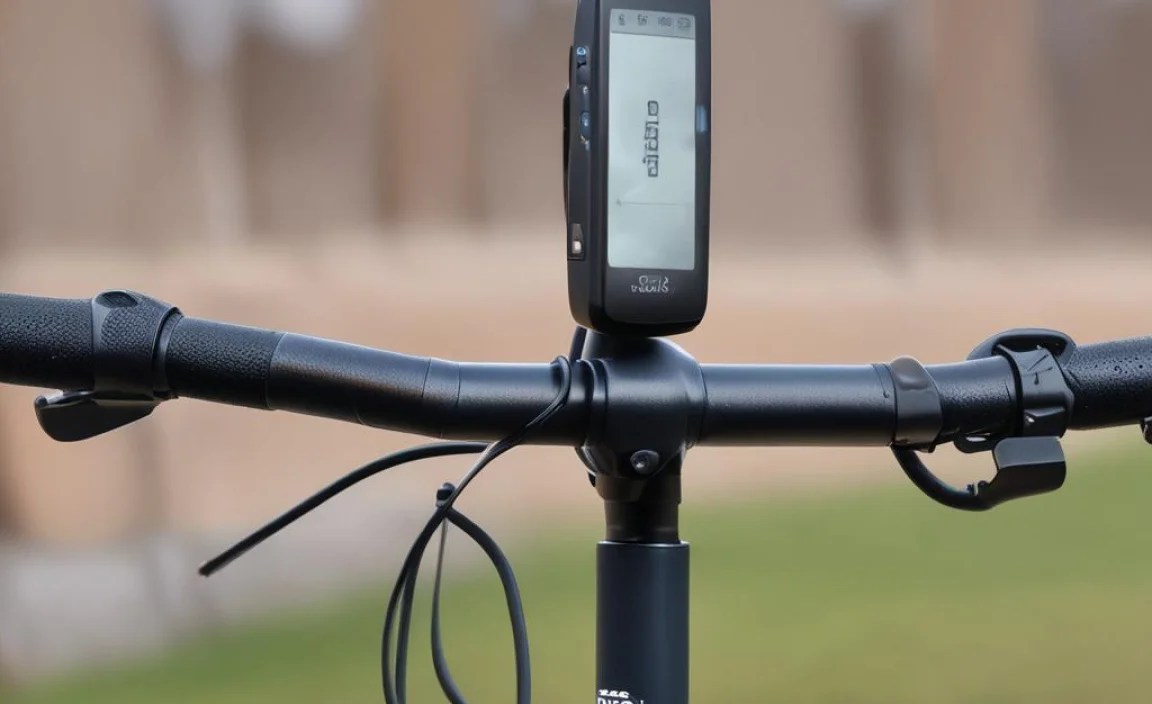
Mounting a GPS and light combo on the stem cap of an aero bike is a smart idea. It keeps your handlebars free. You can see your GPS and the road easily. Aero bikes are made for speed. They often have less space on the handlebars. This makes a stem cap mount a great choice. The stem cap is the top of the steerer tube. It holds the fork in place. A special mount replaces this cap. It gives you a place to put your GPS and light. This keeps everything neat and easy to reach. It also looks very cool! Many riders find this setup more comfortable and safer. It lets them focus on the road ahead without clutter.
- Stem cap mounts free up handlebar space.
- They offer a clean and aerodynamic look.
- GPS and lights are easy to see and reach.
- The mount replaces the original stem cap.
- Proper installation is important for safety.
Think about how often you look at your GPS while riding. It might be for directions or to check your speed. Now, imagine doing that with a clear view. A stem cap mount makes this possible. It puts the screen right where you need it. It also keeps your light shining where it should. This is very important for safety. You want to see and be seen. Mounting on the stem cap is a great way to do both. It is a simple change that makes a big difference. You will love how it cleans up your bike and improves your ride.
Why Choose a Stem Cap Mount?
Have you ever felt like your handlebars were too crowded? Many cyclists do. They have a GPS, a light, and maybe even a bell. All of these things take up space. A stem cap mount can fix this problem. It moves your GPS and light to a new spot. This clears up your handlebars. You will have more room for your hands. You will also have a better view of the road. Some riders say it makes their bike look faster. This is because it is more aerodynamic. A stem cap mount is a small change with big benefits. It can make your rides more comfortable and safer. It is worth thinking about if you want a cleaner bike.
Finding the Right Mount for Your Bike
Picking the right mount can feel tricky. There are many options to choose from. Not all mounts fit all bikes. You need to find one that works with your stem. You also need to make sure it can hold your GPS and light. Look for mounts that are made for aero bikes. These mounts are often designed to be more aerodynamic. Read reviews from other riders. See what they say about different mounts. A good mount will be strong and secure. It will also be easy to install. Take your time and do your research. The right mount will make a big difference in your riding experience.
Safety First: Installation Tips
Installing a stem cap mount is usually easy. But, it is very important to do it right. If the mount is not secure, your GPS or light could fall off. This could be dangerous. Always follow the instructions that come with the mount. Make sure all bolts are tightened correctly. Do not over-tighten them. This can damage the mount or your bike. Check the mount regularly. Make sure it is still secure. If you are not comfortable installing it yourself, ask a bike shop for help. It is better to be safe than sorry. A properly installed mount will give you peace of mind on every ride.
Fun Fact or Stat: Did you know that aerodynamic improvements can save you up to 90 seconds over a 40km time trial? A clean stem cap mount can contribute to these gains!
Choosing the Right GPS and Light Combo

Choosing the right GPS and light combo is key for aero bike riders. You want devices that are easy to see and use. They should also be lightweight and aerodynamic. A good GPS will show your speed, distance, and route. It should have a clear screen that is easy to read in sunlight. The light should be bright enough to see the road at night. It should also be easy to attach to the stem cap mount. Think about how long the battery lasts. You do not want your GPS or light to die in the middle of a ride. Look for combos that are designed to work together. This can make installation easier. It can also ensure that everything works well together. A good GPS and light combo will make your rides safer and more fun.
- Consider screen size and visibility of the GPS.
- Check the brightness and battery life of the light.
- Look for combos designed for aero bikes.
- Make sure the devices are lightweight.
- Read reviews to see what other riders think.
- Think about ease of use while riding.
Imagine riding on a dark road and your light goes out. Or, you are trying to find your way, and your GPS screen is too dim to see. These things can be frustrating and dangerous. That is why it is so important to choose the right GPS and light combo. Think about the types of rides you do. If you ride mostly during the day, you might not need a super bright light. But, if you ride at night, a powerful light is a must. If you go on long rides, battery life is very important. Do your research and choose devices that meet your needs. This will make your rides much more enjoyable.
GPS Features to Consider
What do you want your GPS to do? Some GPS devices just show basic info like speed and distance. Others have advanced features. They can show your heart rate, power, and even give you turn-by-turn directions. Think about what is important to you. If you are training for a race, you might want a GPS with lots of data. If you just want to track your rides, a simpler GPS might be fine. Look for a GPS with a screen that is easy to read. It should also be easy to use while you are riding. Some GPS devices have buttons. Others have touch screens. Choose the one that you find easiest to use.
Light Brightness and Modes
How bright should your bike light be? It depends on where you ride. If you ride in the city, you might not need a super bright light. There are already street lights. But, if you ride on dark roads, you will need a brighter light. Bike lights are measured in lumens. The higher the lumens, the brighter the light. Look for a light with different modes. Some modes are brighter than others. Some modes flash. Flashing lights can help you be seen by cars. Choose a light with a long battery life. You do not want it to die in the middle of your ride. A good bike light is a very important safety tool.
Combo Kits vs. Separate Devices
Should you buy a GPS and light combo kit? Or, should you buy them separately? There are pros and cons to both. Combo kits are often cheaper. They are also designed to work well together. But, you might not be able to choose the exact GPS and light that you want. If you buy them separately, you have more choices. But, it might cost more. Also, you need to make sure they are compatible. Think about your budget and your needs. If you are not sure, ask a bike shop for advice. They can help you choose the best option for you.
Fun Fact or Stat: A study showed that using a bright front light during daytime can reduce accidents by up to 19%!
Step-by-Step Guide: Mounting Your Combo
Mounting your GPS and light combo on the stem cap can seem hard. But, it is usually pretty simple. First, gather your tools. You will need an Allen wrench set. You might also need a torque wrench. This helps you tighten bolts correctly. Start by removing the old stem cap. Loosen the bolts on the side of the stem. Then, unscrew the stem cap bolt. Remove the old cap. Now, install the new stem cap mount. Place it on top of the steerer tube. Tighten the stem cap bolt to the correct torque. Then, tighten the bolts on the side of the stem. Attach your GPS and light to the mount. Make sure they are secure. Test the setup before you go for a ride. Make sure everything is working correctly.
- Gather the necessary tools.
- Remove the old stem cap carefully.
- Install the new stem cap mount.
- Attach the GPS and light securely.
- Test the setup before riding.
Imagine you are all ready for a big ride. You have your new GPS and light combo. You carefully install it on your stem cap. You tighten all the bolts. You think you are ready to go. But, then you hit a bump. Your GPS falls off! This is why it is so important to install everything correctly. Take your time. Follow the instructions. Double-check everything. If you are not sure, ask for help. A little extra care can prevent a lot of problems. It will also keep you safe on your ride.
Removing the Original Stem Cap
Taking off the old stem cap is the first step. It is usually pretty easy. But, you need to be careful. First, loosen the bolts on the side of the stem. These bolts hold the stem to the steerer tube. Do not remove them completely. Just loosen them a little. Then, find the bolt on top of the stem cap. This bolt holds the stem cap in place. Use an Allen wrench to unscrew this bolt. Turn it counter-clockwise. Once the bolt is loose, you can remove the stem cap. Keep all the parts safe. You might need them later. Be careful not to drop anything down the steerer tube.
Installing the New Stem Cap Mount
Now it is time to put on the new stem cap mount. Place the mount on top of the steerer tube. Make sure it is centered. Find the stem cap bolt. Put it through the mount. Then, screw it into the steerer tube. Tighten the bolt. But, do not over-tighten it. Use a torque wrench if you have one. This will help you tighten the bolt to the correct amount. Then, tighten the bolts on the side of the stem. Again, do not over-tighten them. Make sure everything is snug. The stem should not move. The stem cap mount should be secure.
Securing the GPS and Light
The last step is to attach your GPS and light to the mount. Most mounts have a special way to attach devices. It might be a clip or a screw. Follow the instructions that came with the mount. Make sure the GPS and light are secure. They should not wobble or move. Test them before you ride. Turn them on. Make sure they work. Check that you can see the screen easily. Make sure the light is shining where you want it. If everything looks good, you are ready to go. Enjoy your ride!
Fun Fact or Stat: Using a torque wrench can prevent up to 70% of bolt-related bike maintenance issues!
Ensuring Compatibility with Your Aero Bike

Ensuring compatibility is key when mounting a GPS and light combo. Aero bikes have unique designs. Not all mounts fit every bike. Before you buy anything, check if it will work. Look at the stem of your bike. Is it round or shaped? Measure the diameter of the steerer tube. This is important for choosing the right size mount. Read the product descriptions carefully. They should say which bikes the mount is compatible with. If you are not sure, ask the seller. They can help you find the right mount for your bike. A compatible mount will fit properly. It will also be safe and secure. This will make your rides much more enjoyable.
| Bike Type | Stem Shape | Steerer Tube Diameter | Recommended Mount |
|---|---|---|---|
| Aero Bike | Shaped | 1 1/8 inch | Aero Stem Cap Mount |
| Road Bike | Round | 1 1/8 inch | Standard Stem Cap Mount |
| Mountain Bike | Round | 1 1/8 inch or 1.5 inch | Heavy-Duty Stem Cap Mount |
| Hybrid Bike | Round | 1 1/8 inch | Universal Stem Cap Mount |
- Check stem shape and steerer tube diameter.
- Read product descriptions carefully.
- Ask the seller if you are not sure.
- Look for mounts designed for aero bikes.
- Measure your bike before buying anything.
Imagine you buy a new mount online. It looks great in the pictures. But, when it arrives, it does not fit your bike. This can be very frustrating. You have to return it and start over. To avoid this, do your research first. Find out the exact measurements of your bike. Read reviews from other riders with aero bikes. See what mounts they recommend. A little bit of planning can save you a lot of trouble. It will also ensure that you get a mount that fits perfectly.
Measuring Your Steerer Tube
How do you measure your steerer tube? It is not as hard as it sounds. You will need a ruler or a measuring tape. The steerer tube is the part of the fork that goes through the frame. It is where the stem attaches. Measure the outside diameter of the tube. This is the distance across the tube. Most steerer tubes are 1 1/8 inches. But, some are different sizes. Make sure you know the size of your steerer tube before you buy a mount. This will help you choose the right one.
Checking Stem Shape and Angle
What shape is your stem? Some stems are round. Others are shaped in special ways. Aero bikes often have stems that are shaped to be more aerodynamic. This means they are designed to cut through the air more easily. Look at your stem carefully. See what shape it is. Also, check the angle of the stem. Some stems point up. Others point down. The angle of the stem can affect how the mount fits. Choose a mount that is designed for your stem shape and angle. This will ensure a good fit.
Reading Product Specifications
Product specifications are very important. They tell you all about the mount. Read them carefully. They will tell you what bikes the mount is compatible with. They will also tell you the size of the mount. They will tell you what materials it is made of. They will tell you how much weight it can hold. All of this information is important. It will help you choose the right mount for your bike. If you do not understand something, ask the seller. They can explain it to you.
Fun Fact or Stat: Aero bike components can reduce wind resistance by up to 30%, making you faster with the same effort!
Troubleshooting Common Mounting Issues
Sometimes, mounting a GPS and light combo does not go smoothly. You might run into some problems. One common issue is the mount not fitting properly. This can happen if you did not measure your bike correctly. Another problem is the bolts being too tight or too loose. If they are too tight, they can damage the mount or your bike. If they are too loose, the mount can wobble. The GPS or light might fall off. Another issue is the devices not staying secure on the mount. This can happen if the mount is not designed for your devices. Do not worry! Most of these problems can be fixed. Just take your time and be careful.
- Mount does not fit properly.
- Bolts are too tight or too loose.
- Devices do not stay secure.
- Vibrations cause the mount to loosen.
- GPS or light interferes with cables.
Imagine you are on a long ride. Suddenly, your GPS starts wobbling. You stop to check it. The mount is loose! This can be very annoying. It can also be dangerous. To avoid this, check your mount regularly. Make sure all the bolts are tight. If you notice any problems, fix them right away. Carry a small Allen wrench with you. This way, you can tighten bolts on the road. A little bit of maintenance can prevent big problems. It will also keep you safe on your rides.
Dealing with Loose Mounts
What should you do if your mount is loose? First, check the bolts. Are they tight? If not, tighten them. Use a torque wrench if you have one. This will help you tighten the bolts to the correct amount. If the bolts are already tight, the mount might be damaged. Check it for cracks or breaks. If it is damaged, you might need to replace it. You can also try using threadlocker. This is a special glue that helps keep bolts from loosening. Put a small amount of threadlocker on the bolt threads before you tighten them.
Tightening Bolts Correctly
How tight should you tighten the bolts? It is important to get this right. If you tighten them too much, you can damage the mount or your bike. If you do not tighten them enough, the mount will be loose. The best way to tighten bolts correctly is to use a torque wrench. This tool measures how much force you are using to tighten the bolt. The manufacturer of the mount will tell you how much torque to use. Follow their instructions carefully. If you do not have a torque wrench, tighten the bolts until they are snug. Then, give them a little bit more turn. But, do not overdo it.
Preventing Vibrations
Vibrations can cause mounts to loosen over time. This is especially true on rough roads. To prevent vibrations, use a high-quality mount. These mounts are often made of stronger materials. They are also designed to absorb vibrations. You can also use rubber washers. Put them between the mount and the bike frame. This will help to cushion the mount. Check the mount regularly. Make sure all the bolts are tight. If you notice any vibrations, tighten the bolts or add more washers.
Fun Fact or Stat: Regular bike maintenance can extend the life of your components by up to 50%!
Maintaining Your Stem Cap Mount
Maintaining your stem cap mount is important for safety. It will also help your mount last longer. Check the mount regularly for any signs of damage. Look for cracks, breaks, or loose bolts. Clean the mount regularly with a damp cloth. Do not use harsh chemicals. They can damage the mount. Lubricate the bolts with a light oil. This will help prevent them from rusting. If you ride in wet conditions, dry the mount after each ride. This will help prevent corrosion. A little bit of maintenance will keep your mount in good condition. It will also keep you safe on your rides.
- Check for damage regularly.
- Clean the mount with a damp cloth.
- Lubricate the bolts with light oil.
- Dry the mount after riding in wet conditions.
- Replace the mount if it is damaged.
Imagine you are getting ready for a big race. You are checking your bike. You notice a crack in your stem cap mount. You are not sure how it happened. But, you know you cannot ride with it like that. The mount could break during the race. This could be very dangerous. That is why it is so important to check your mount regularly. If you find any damage, replace it right away. It is better to be safe than sorry. A new mount is a small price to pay for your safety.
Regular Inspections
How often should you inspect your stem cap mount? It depends on how much you ride. If you ride every day, you should inspect it every week. If you only ride once a week, you can inspect it once a month. Look for any signs of damage. Check the bolts. Are they tight? Check the mount itself. Is it cracked or broken? If you see anything that does not look right, fix it right away. A quick inspection can prevent big problems.
Cleaning and Lubrication
Cleaning and lubricating your stem cap mount is easy. Just use a damp cloth to wipe off any dirt or grime. Do not use harsh chemicals. They can damage the mount. After cleaning, lubricate the bolts with a light oil. This will help prevent them from rusting. It will also make them easier to tighten and loosen. Just put a small drop of oil on each bolt. Then, tighten and loosen the bolt a few times. This will spread the oil around.
Replacing Damaged Mounts
If your stem cap mount is damaged, you need to replace it. Do not try to ride with a damaged mount. It could break. This could be dangerous. Replacing a mount is usually pretty easy. Just follow the steps in the “Installing the New Stem Cap Mount” section. Make sure you choose a new mount that is compatible with your bike. If you are not sure, ask a bike shop for help. They can help you choose the right mount and install it correctly.
Fun Fact or Stat: Bikes that are regularly maintained have a 60% lower chance of mechanical failure during rides!
The Benefits of a Clean Cockpit Setup
A clean cockpit setup is a great thing to have. It means your handlebars are free from clutter. You have a clear view of the road. Your GPS and light are easy to see and reach. This makes your rides safer and more enjoyable. A stem cap mount is a great way to achieve a clean cockpit. It moves your GPS and light to a new spot. This frees up space on your handlebars. You will have more room for your hands. You will also have a better view of the road. A clean cockpit looks good too! It makes your bike look faster and more professional.
- Improved visibility of the road.
- Easier access to GPS and light.
- More comfortable hand position.
- A more aerodynamic bike profile.
- A cleaner, more professional look.
Imagine you are riding in a race. You need to check your GPS to see how far you have to go. But, your handlebars are so cluttered. It is hard to see the screen. You have to take your eyes off the road. This could be dangerous. With a clean cockpit setup, this would not be a problem. Your GPS would be right in front of you. You could see it easily without taking your eyes off the road. A clean cockpit can help you ride faster and safer.
Enhanced Aerodynamics
A clean cockpit can make your bike more aerodynamic. This means it will cut through the air more easily. This can help you ride faster with less effort. When your handlebars are cluttered, they create more wind resistance. This slows you down. A stem cap mount moves your GPS and light out of the wind. This reduces wind resistance. It makes your bike more aerodynamic. Even small changes can make a big difference. Over a long ride, a more aerodynamic bike can save you a lot of energy.
Improved Safety
A clean cockpit can make your rides safer. When your handlebars are cluttered, it can be hard to reach the brakes. It can also be hard to see the road. This can increase your risk of an accident. A stem cap mount moves your GPS and light to a new spot. This frees up space on your handlebars. You will have more room for your hands. You will also have a better view of the road. This will make it easier to react to hazards. A clean cockpit can help you stay safe on your rides.
Increased Comfort
A clean cockpit can make your rides more comfortable. When your handlebars are cluttered, it can be hard to find a comfortable hand position. You might end up gripping the bars too tightly. This can cause hand fatigue. A stem cap mount moves your GPS and light to a new spot. This frees up space on your handlebars. You will have more room to move your hands around. You can find a more comfortable hand position. This will help you ride longer without getting tired.
Fun Fact or Stat: Professional cyclists often spend hours optimizing their cockpit setup for maximum aerodynamic efficiency!
Summary
Mounting a GPS and light combo on your aero bike’s stem cap is a great upgrade. It improves safety and comfort. This setup keeps your handlebars clear. It also makes your devices easy to see. First, choose the right mount and devices. Ensure they are compatible with your bike. Then, follow the installation steps carefully. Tighten all bolts correctly. Regularly check and maintain the mount. This will ensure it stays secure. Remember, knowing how to mount GPS & light combo on stem cap for aero bike means a cleaner, safer, and more enjoyable ride.
Conclusion
Adding a GPS and light combo to your aero bike can make a big difference. It improves your visibility and helps you track your rides. A stem cap mount is a great way to keep your handlebars clean. It also keeps your devices secure. Follow the steps in this guide. You will be able to how to mount GPS & light combo on stem cap for aero bike. Get ready to enjoy a safer and more organized ride.
Frequently Asked Questions
Question No 1: Why should I mount my GPS and light on the stem cap of my aero bike?
Answer: Mounting your GPS and light on the stem cap of your aero bike has many benefits. It frees up space on your handlebars. This gives you more room for your hands and a better grip. It also improves your view of the road. Your GPS and light are right in front of you. This makes them easy to see and reach. Plus, it looks cool! A clean cockpit gives your bike a more professional look. Knowing how to mount GPS & light combo on stem cap for aero bike makes your rides safer and more enjoyable.
Question No 2: What tools do I need to mount a GPS and light combo on my stem cap?
Answer: To mount a GPS and light combo, you will need a few basic tools. An Allen wrench set is essential for loosening and tightening bolts. A torque wrench is helpful for tightening bolts to the correct specification. This prevents damage. You might also need a screwdriver. A small amount of grease can help prevent bolts from rusting. Having these tools on hand will make the installation process much smoother. Always remember to follow the manufacturer’s instructions for the best results. With the right tools, learning how to mount GPS & light combo on stem cap for aero bike will be a breeze.
Question No 3: How do I make sure the mount is compatible with my aero bike?
Answer: Ensuring compatibility is crucial. First, check the diameter of your bike’s steerer tube. Most aero bikes use a standard size, but it’s always good to measure. Next, consider the shape of your stem. Some mounts are designed for specific stem shapes. Read the product description carefully. It should list compatible bike models. If you’re unsure, ask the seller or a bike shop for advice. They can help you find a mount that fits perfectly. By taking these steps, you can avoid compatibility issues and enjoy a secure and functional setup. This is key to how to mount GPS & light combo on stem cap for aero bike correctly.
Question No 4: What if the stem cap mount keeps coming loose?
Answer: If your stem cap mount keeps coming loose, there are several things you can try. First, make sure you are tightening the bolts to the correct torque. Use a torque wrench if possible. If the bolts are already tight, try using threadlocker. This will help keep them from loosening. Also, check the mount for any signs of damage. If it is cracked or broken, you will need to replace it. Vibrations can also cause mounts to loosen. Try using rubber washers to absorb some of the vibration. By addressing these issues, you can keep your mount secure. This ensures the correct way of how to mount GPS & light combo on stem cap for aero bike is achieved.
Question No 5: Can I use any GPS and light combo with a stem cap mount?
Answer: Not all GPS and light combos are suitable for stem cap mounts. Consider the weight and size of the devices. Heavy or bulky devices might not be stable on a stem cap mount. Check the mounting interface. Make sure your GPS and light are compatible with the mount’s attachment system. Some mounts are designed for specific brands or models. Read the product descriptions carefully. Look for devices that are lightweight and aerodynamic. They should also be easy to attach and detach. Choosing the right devices will ensure a secure and functional setup. This is a key aspect of how to mount GPS & light combo on stem cap for aero bike.
Question No 6: How do I maintain my stem cap mount to ensure it lasts longer?
Answer: Proper maintenance is key to extending the life of your stem cap mount. Regularly inspect the mount for any signs of damage. Look for cracks, breaks, or loose bolts. Clean the mount with a damp cloth to remove dirt and grime. Avoid using harsh chemicals. Lubricate the bolts with a light oil to prevent rusting. If you ride in wet conditions, dry the mount after each ride. This will help prevent corrosion. By following these simple steps, you can keep your stem cap mount in good condition for years to come. Remembering this process is important for how to mount GPS & light combo on stem cap for aero bike safely and for a long time.


