
How to Use Shock Pump Gauge for Smart Suspension Setup
Do you love riding your bike? Does it feel bumpy sometimes? Bikes with suspension can help. They use air to make the ride smooth. But how do you get the air just right? That’s where a shock pump comes in. It has a special gauge to measure the air. Learning how to use shock pump gauge for suspension setup is easy. It will make your rides much better.
Have you ever bounced on a bike seat? That’s the suspension working. It soaks up bumps. The right air pressure is important. Too little air, and it feels soft. Too much air, and it feels hard. A shock pump helps you find the sweet spot. Ready to learn more?
Key Takeaways
- A shock pump gauge helps you set the perfect air pressure in your bike’s suspension.
- Proper suspension setup improves comfort and control while you are riding.
- Always check the manufacturer’s recommendations for air pressure.
- Using a shock pump is easy with a few simple steps.
- Regularly check and adjust your suspension for the best performance. Learn how to use shock pump gauge for suspension setup.
How to Use Shock Pump Gauge for Suspension Setup

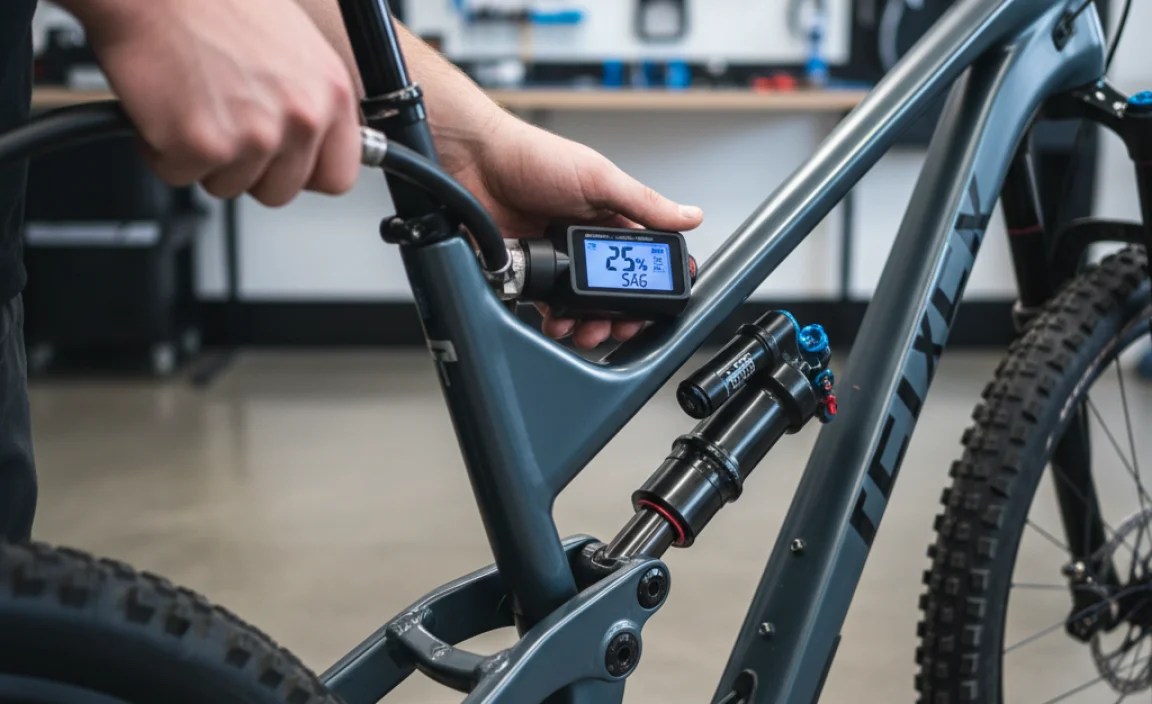
Setting up your bike’s suspension might seem hard. But it is not! A shock pump gauge is your friend. It helps you get the right amount of air. This makes your bike ride smooth and fun. First, find the valve on your fork or shock. It looks like a small hole with a cap. Take off the cap. Now, attach the shock pump. Make sure it is on tight. The gauge will show the air pressure. Add or remove air as needed. Check the bike maker’s guide for the right pressure. Learning how to use shock pump gauge for suspension setup makes a big difference. It gives you more control and comfort on the trail. So, grab your pump and get started. You will be amazed at how much better your bike feels!
- Find the air valve on your suspension fork or shock.
- Remove the valve cap to expose the valve.
- Attach the shock pump securely to the valve.
- Read the pressure gauge to see the current air pressure.
- Add or remove air to reach the recommended pressure.
- Detach the pump carefully, minimizing air loss.
Now you know the basics. But there is more to learn. The right air pressure depends on your weight. It also depends on the type of riding you do. A lighter rider needs less air. A heavier rider needs more. If you ride on smooth trails, you might want less air. If you ride on bumpy trails, you might want more. Experiment to find what feels best. Always start with the recommended pressure. Then, make small changes. A few PSI (pounds per square inch) can make a big difference. Don’t be afraid to try different settings. How to use shock pump gauge for suspension setup is about finding what works for you. It is about making your bike feel like it is part of you.
Fun Fact or Stat: Did you know that proper suspension setup can improve your bike’s climbing ability by up to 15%?
Finding the Right Starting Pressure
Imagine you’re baking a cake. You need the right amount of each ingredient. Too much sugar, and it’s too sweet. Too little flour, and it’s flat. The same is true for your suspension. The right air pressure is key. So, how do you find that sweet spot? Start with the bike maker’s guide. It will tell you the recommended pressure. This is a good starting point. But it’s not the only thing to think about. Your weight matters too. Most guides give a range of pressures. Choose the one that matches your weight. If you’re between sizes, start in the middle. Remember, how to use shock pump gauge for suspension setup is about finding what feels right. It is a starting point, not a rule.
Adjusting for Your Weight
Think of your suspension like a spring. A light person won’t compress it much. A heavy person will compress it more. That’s why you need to adjust for your weight. If you’re light, use less air. If you’re heavy, use more air. Some pumps have a chart to help you. It shows the right pressure for different weights. If your pump doesn’t have a chart, don’t worry. You can find charts online. Just search for “suspension air pressure chart.” Remember, these charts are just a guide. You might need to adjust them based on your riding style. Learning how to use shock pump gauge for suspension setup means understanding how your weight affects the suspension.
Considering Your Riding Style
Do you like to ride fast and jump over things? Or do you prefer a slow, smooth ride? Your riding style matters. If you’re aggressive, you’ll want more air. This will keep the suspension from bottoming out. Bottoming out is when the suspension compresses all the way. It feels harsh and can damage your bike. If you prefer a smooth ride, use less air. This will make the suspension more sensitive to small bumps. It will also give you more traction. Traction is how well your tires grip the ground. More traction means more control. How to use shock pump gauge for suspension setup lets you fine-tune your bike for your style. It helps you ride with confidence.
Understanding Your Shock Pump Gauge Readings

The shock pump gauge is like a speedometer for your suspension. It tells you how much air is inside. It uses PSI, or pounds per square inch, to measure the pressure. Most gauges have two scales. One shows PSI, and the other shows BAR (a different unit of pressure). Pay attention to the PSI scale. That’s what most bike makers use. When you attach the pump, the gauge will show a reading. This is the current pressure in your suspension. As you pump, the reading will go up. When you release air, the reading will go down. The gauge is very sensitive. Even a small amount of air can change the reading. That’s why it’s important to be careful. Learning how to use shock pump gauge for suspension setup means understanding what the numbers mean. It means knowing how much air to add or remove.
- The gauge shows the air pressure in PSI (pounds per square inch).
- Higher PSI means more air and a stiffer suspension.
- Lower PSI means less air and a softer suspension.
- Read the gauge carefully to get an accurate reading.
- Small changes in PSI can make a big difference.
- Always double-check the pressure after making adjustments.
Some gauges are digital. They show the pressure on a screen. Digital gauges are often more accurate. They can also be easier to read. But they need batteries. Analog gauges use a needle to show the pressure. They don’t need batteries. They are also less expensive. Both types of gauges work well. Choose the one you like best. No matter what type of gauge you use, be sure to read it carefully. A small mistake can lead to a big difference in your suspension. How to use shock pump gauge for suspension setup is about precision. It is about paying attention to the details. With practice, you will become a pro!
Fun Fact or Stat: A digital shock pump gauge can be accurate to within 0.5 PSI, providing precise control over your suspension setup.
Reading Analog vs. Digital Gauges
Imagine you’re reading a clock. An analog clock has hands that point to the time. A digital clock shows the time in numbers. Both clocks tell the same time. But they show it in different ways. The same is true for shock pump gauges. An analog gauge has a needle that points to the pressure. A digital gauge shows the pressure on a screen. Analog gauges can be harder to read. You have to look closely at the needle. Digital gauges are easier to read. The numbers are clear and easy to see. But digital gauges need batteries. Analog gauges don’t. Learning how to use shock pump gauge for suspension setup includes knowing how to read both types of gauges.
Understanding PSI and BAR
Have you ever heard of inches and centimeters? They both measure length. But they use different units. The same is true for air pressure. PSI and BAR are both units of pressure. PSI stands for pounds per square inch. BAR is another unit used in some countries. Most bike makers use PSI. So, you should focus on that. But you might see BAR on your gauge. It’s good to know what it means. One BAR is about 14.5 PSI. So, if your gauge shows 2 BAR, that’s about 29 PSI. Understanding PSI and BAR is helpful. But how to use shock pump gauge for suspension setup mainly uses PSI.
Calibrating Your Gauge
Think of your gauge like a scale. If the scale is not accurate, it will give you the wrong weight. The same is true for your gauge. If it’s not accurate, it will give you the wrong pressure. That’s why it’s important to calibrate your gauge. Calibrating means checking it against a known standard. You can take your gauge to a bike shop. They have tools to check its accuracy. If your gauge is off, they can adjust it. Or you can buy a new gauge. A good gauge is an important tool. Learning how to use shock pump gauge for suspension setup starts with having an accurate gauge.
Adding Air to Your Suspension with the Pump

Now you know how to read the gauge. It’s time to add some air! First, make sure the pump is securely attached. If it’s loose, air will leak out. This will give you a false reading. Most pumps have a lever. Flip the lever to lock the pump onto the valve. Then, start pumping. Use smooth, even strokes. Watch the gauge as you pump. Stop when you reach the desired pressure. Don’t over-pump! It’s better to add a little at a time. You can always let some air out if you need to. Learning how to use shock pump gauge for suspension setup means knowing how to add air correctly. It means being patient and careful. With practice, you’ll get it just right.
- Attach the pump securely to the valve.
- Flip the lever to lock the pump in place.
- Pump with smooth, even strokes.
- Watch the gauge as you pump.
- Stop when you reach the desired pressure.
- Remove the pump carefully to minimize air loss.
Sometimes, a little air will leak out when you remove the pump. This is normal. Most pumps are designed to minimize this. But it’s still important to be quick. Remove the pump in one smooth motion. Then, check the pressure again. If it’s too low, add a little more air. If it’s too high, let a little air out. Adjusting the air pressure is like tuning an instrument. You’re trying to get it just right. How to use shock pump gauge for suspension setup is about fine-tuning. It is about making small adjustments to get the perfect ride.
Fun Fact or Stat: Some high-end shock pumps have a “no-loss” chuck that prevents any air from escaping when you detach the pump.
Attaching the Pump Correctly
Imagine you’re connecting a hose to a faucet. If the connection is loose, water will leak out. The same is true for your shock pump. If it’s not attached correctly, air will leak out. This will make it hard to get an accurate reading. So, how do you attach the pump correctly? First, line up the pump head with the valve. Then, push it on firmly. Make sure it’s all the way on. Then, flip the lever to lock it in place. If the pump is still loose, try wiggling it a little. Make sure it’s seated properly. Learning how to use shock pump gauge for suspension setup starts with a good connection.
Using Smooth, Even Strokes
Think of pumping air like riding a bike uphill. If you pedal too fast, you’ll get tired. If you pedal too slow, you’ll lose momentum. The same is true for pumping air. If you pump too fast, you’ll waste energy. If you pump too slow, it will take forever. The best way to pump air is with smooth, even strokes. Use your whole arm, not just your wrist. Keep a steady rhythm. Watch the gauge as you pump. Stop when you reach the desired pressure. How to use shock pump gauge for suspension setup is about being efficient. It’s about using the right technique.
Avoiding Over-Pumping
Have you ever blown up a balloon until it popped? That’s what can happen if you over-pump your suspension. Too much air can damage your fork or shock. It can also make your ride uncomfortable. So, how do you avoid over-pumping? First, know the maximum pressure for your suspension. This is usually printed on the fork or shock. Or you can find it in the bike maker’s guide. Then, watch the gauge carefully as you pump. Stop when you reach the desired pressure. It’s better to under-pump than over-pump. You can always add more air later. Learning how to use shock pump gauge for suspension setup means being cautious.
Removing Air from Your Suspension

Sometimes, you need to remove air from your suspension. Maybe you added too much. Or maybe you want a softer ride. Removing air is easy. Most pumps have a small button or valve. Press the button or open the valve to release air. Do it slowly and carefully. Watch the gauge as you release air. Stop when you reach the desired pressure. It’s better to release a little at a time. You can always release more if you need to. Learning how to use shock pump gauge for suspension setup means knowing how to remove air as well as add it. It’s about having control over your suspension.
- Locate the air release button or valve on the pump.
- Press the button or open the valve slowly.
- Watch the gauge as air is released.
- Stop when you reach the desired pressure.
- Release air in small increments for precise adjustments.
- Recheck the pressure after releasing air.
Be careful not to release too much air. It’s easy to do. Especially if you’re using a small pump. If you release too much air, just add some back in. That’s why it’s important to have a shock pump with you. Especially when you’re experimenting with different settings. How to use shock pump gauge for suspension setup is about trial and error. It’s about finding what works best for you. Don’t be afraid to experiment. Just be careful and patient.
Fun Fact or Stat: Releasing air from your suspension too quickly can cause the seals to dry out, leading to premature wear and tear.
Using the Air Release Button
Imagine you’re letting air out of a tire. You press the valve, and the air hisses out. The same is true for your shock pump. Most pumps have a small button that releases air. Press the button gently. The air will hiss out. Watch the gauge as you release air. Stop when you reach the desired pressure. Be careful not to press the button too hard. You don’t want to release too much air. Learning how to use shock pump gauge for suspension setup includes knowing how to use the air release button.
Releasing Air Slowly and Carefully
Think of releasing air like stirring a pot. If you stir too fast, you’ll make a mess. If you stir too slow, it will take forever. The same is true for releasing air. If you release it too fast, you’ll lose control. If you release it too slow, it will take forever. The best way to release air is slowly and carefully. Use small, controlled movements. Watch the gauge as you release air. Stop when you reach the desired pressure. How to use shock pump gauge for suspension setup is about precision.
Avoiding Over-Releasing
Have you ever accidentally poured too much milk into your cereal? It’s frustrating! The same is true for releasing air. If you release too much, you’ll have to add more back in. This can be time-consuming. So, how do you avoid over-releasing? First, know the desired pressure for your suspension. Then, release air in small increments. Check the gauge after each increment. Stop when you reach the desired pressure. Learning how to use shock pump gauge for suspension setup means being patient.
Checking and Adjusting Sag
Sag is how much your suspension compresses when you sit on the bike. It’s important to set the sag correctly. Too little sag, and the ride will be harsh. Too much sag, and the bike will bottom out. To check the sag, you’ll need a friend. Have your friend hold the bike steady. Then, sit on the bike in your normal riding position. Look at the O-ring on the fork or shock. It will have moved up the stanchion. Measure the distance between the O-ring and the seal. This is your sag. Adjust the air pressure until the sag is correct. Learning how to use shock pump gauge for suspension setup includes understanding and adjusting sag.
| Sag Percentage | Riding Style | Fork Sag (mm) | Shock Sag (mm) |
|---|---|---|---|
| 15-20% | Cross-country | 15-20 | 8-10 |
| 20-25% | Trail riding | 20-25 | 10-12 |
| 25-30% | Enduro | 25-30 | 12-15 |
| 30-35% | Downhill | 30-35 | 15-18 |
- Have a friend help you measure sag.
- Sit on the bike in your normal riding position.
- Measure the distance the suspension compresses.
- Compare the measurement to the recommended sag.
- Adjust the air pressure to achieve the correct sag.
- Recheck the sag after each adjustment.
The recommended sag depends on the type of bike and the riding style. Cross-country bikes usually have less sag. Downhill bikes usually have more sag. The bike maker’s guide will tell you the recommended sag for your bike. If you can’t find the guide, you can search online. Just search for “bike sag settings.” Remember, the sag is just a starting point. You might need to adjust it based on your preferences. How to use shock pump gauge for suspension setup is about finding what feels right. It’s about making your bike work for you.
Fun Fact or Stat: The sag setting affects the bike’s geometry, influencing its handling and stability.
Understanding Sag Percentage
Imagine you’re shrinking a shirt. You want to shrink it just enough, but not too much. Sag percentage is like that. It tells you how much your suspension should compress. It’s a percentage of the total travel. Travel is how far the suspension can move. A sag percentage of 20% means the suspension should compress 20% of its travel. Knowing the sag percentage helps you set the air pressure. It helps you get the right amount of compression. Learning how to use shock pump gauge for suspension setup includes understanding sag percentage.
Using an O-Ring to Measure Sag
Think of an O-ring like a bookmark. It marks your place in a book. An O-ring marks how far your suspension has compressed. It sits on the stanchion, the shiny part of the fork or shock. When you sit on the bike, the suspension compresses. The O-ring moves up the stanchion. When you get off the bike, the O-ring stays in place. You can then measure the distance between the O-ring and the seal. This is your sag. Using an O-ring is an easy way to measure sag. How to use shock pump gauge for suspension setup often involves using an O-ring.
Adjusting Sag for Different Riding Styles
Do you like to climb hills or bomb down mountains? Your riding style affects your sag settings. If you climb hills, you might want less sag. This will make the bike more efficient. If you bomb down mountains, you might want more sag. This will give you more control. The best way to find the right sag is to experiment. Try different settings and see what feels best. How to use shock pump gauge for suspension setup is about personal preference. It’s about finding what works for you.
Maintaining Your Suspension and Pump
Your suspension and pump need love too! Keep them clean and well-cared for. Wipe down your fork and shock after each ride. This will remove dirt and grime. Check the seals for damage. If they’re cracked or worn, replace them. Lubricate the seals regularly. This will keep them smooth and supple. Store your shock pump in a safe place. Keep it away from moisture and extreme temperatures. Check the pump’s hose and fittings. Make sure they’re tight and leak-free. Learning how to use shock pump gauge for suspension setup also means learning how to maintain your equipment. It’s about keeping your bike running smoothly.
- Wipe down your suspension components after each ride.
- Check the seals for damage or wear.
- Lubricate the seals regularly with appropriate lubricant.
- Store your shock pump in a clean, dry place.
- Check the pump’s hose and fittings for leaks.
- Replace worn or damaged parts promptly.
A little maintenance goes a long way. It will keep your suspension working properly. It will also extend its lifespan. Don’t neglect your pump either. A well-maintained pump will give you accurate readings. It will also make it easier to inflate your suspension. How to use shock pump gauge for suspension setup is about more than just setting the air pressure. It’s about taking care of your equipment. It’s about being a responsible rider.
Fun Fact or Stat: Regularly lubricating your suspension seals can reduce friction by up to 50%, improving small bump sensitivity.
Cleaning Your Suspension
Imagine you’re washing your face. You want to remove the dirt and grime. The same is true for your suspension. Cleaning it removes dirt and grime. This keeps it working smoothly. Use a soft cloth and mild soap. Wipe down the fork and shock. Pay attention to the seals. Remove any dirt or debris. Avoid using harsh chemicals. They can damage the seals. Learning how to use shock pump gauge for suspension setup includes cleaning your suspension.
Lubricating Your Suspension Seals
Think of lubrication like oiling a squeaky door hinge. It makes the hinge move smoothly. Lubricating your suspension seals does the same thing. It makes them move smoothly. Use a special suspension lubricant. Apply it to the seals. Cycle the suspension a few times. This will distribute the lubricant. Wipe off any excess lubricant. Learning how to use shock pump gauge for suspension setup involves lubricating your suspension.
Storing Your Shock Pump Properly
Have you ever left your bike out in the rain? It’s not good for it! The same is true for your shock pump. Storing it improperly can damage it. Keep it in a clean, dry place. Avoid extreme temperatures. Don’t leave it in direct sunlight. Don’t leave it in a cold garage. A good place to store your pump is in a toolbox or a closet. Learning how to use shock pump gauge for suspension setup includes storing your pump properly.
Summary
Learning how to use shock pump gauge for suspension setup is easy. It makes your rides better. First, find the air valve. Then, attach the shock pump. Read the gauge. Add or remove air. Check the pressure. Adjust for your weight and riding style. Check the sag. Keep your suspension and pump clean. A shock pump gauge helps you get the right air pressure. This gives you more control and comfort. It makes your bike feel like it’s part of you. Experiment to find what works best. Remember to start with the recommended pressure. Make small changes. A few PSI can make a big difference.
With practice, you will become a pro! Proper suspension setup can improve your bike’s climbing ability. Digital gauges are more accurate than analog. Some pumps have a “no-loss” chuck. Regularly lubricating your suspension seals can reduce friction. The sag setting affects the bike’s geometry. Store your pump in a clean, dry place. A well-maintained pump will give you accurate readings.
Conclusion
You now know how to use shock pump gauge for suspension setup. It is an important skill for any rider with suspension. By following these simple steps, you can improve your bike’s performance. You will also enjoy a more comfortable and controlled ride. Remember to check your suspension regularly. Adjust it as needed. With a little practice, you will be able to dial in your suspension. You will be ripping down the trails in no time!
Frequently Asked Questions
Question No 1: Why is a shock pump gauge important for suspension setup?
Answer: A shock pump gauge is very important. It helps you set the air pressure in your bike’s suspension. The right air pressure makes your ride smooth and comfortable. It also gives you more control. Without a gauge, you can’t accurately measure the air pressure. This can lead to a harsh or soft ride. The gauge lets you fine-tune your suspension. You can adjust it to your weight and riding style. It’s a must-have tool for any serious rider. Learning how to use shock pump gauge for suspension setup is a crucial skill. It ensures optimal performance and safety on the trails.
Question No 2: How often should I check and adjust my suspension?
Answer: You should check your suspension before each ride. This will ensure that the air pressure is correct. It will also allow you to spot any problems early. Adjust your suspension as needed based on your weight and riding style. If you’re riding on rough terrain, you might want to increase the air pressure. If you’re riding on smooth terrain, you might want to decrease the air pressure. It’s also a good idea to have your suspension serviced regularly. This will keep it working properly. A well-maintained suspension will last longer and perform better. Remember, regular checks are key to safe and enjoyable rides. How to use shock pump gauge for suspension setup is a continuous process, not a one-time task.
Question No 3: What happens if I use the wrong air pressure in my suspension?
Answer: Using the wrong air pressure can cause problems. Too little air pressure can cause the suspension to bottom out. This is when the suspension compresses all the way. It feels harsh and can damage your bike. Too much air pressure can make the ride uncomfortable. It can also reduce traction. Traction is how well your tires grip the ground. The wrong air pressure can also affect your bike’s handling. It can make it harder to control. That’s why it’s important to use the correct air pressure. Learning how to use shock pump gauge for suspension setup helps you avoid these issues. It ensures a safe and enjoyable ride.
Question No 4: Can I use a regular tire pump to inflate my suspension?
Answer: No, you should not use a regular tire pump. Tire pumps deliver a high volume of air. They are not precise enough for suspension. They can also damage the suspension seals. A shock pump is designed specifically for suspension. It delivers a low volume of air at high pressure. This allows you to make small, accurate adjustments. It also protects the suspension seals. Always use a shock pump to inflate your suspension. It is the right tool for the job. Learning how to use shock pump gauge for suspension setup requires the right equipment.
Question No 5: How do I know what the correct air pressure is for my suspension?
Answer: The best place to find the correct air pressure is in your bike maker’s guide. This guide will tell you the recommended pressure for your weight and riding style. If you don’t have the guide, you can search online. Just search for “bike suspension air pressure.” You can also ask your local bike shop. They can help you find the right pressure. Remember, the recommended pressure is just a starting point. You might need to adjust it based on your preferences. How to use shock pump gauge for suspension setup is about finding what works best for you.
Question No 6: What is sag, and why is it important?
Answer: Sag is how much your suspension compresses when you sit on the bike. It’s important to set the sag correctly. Too little sag, and the ride will be harsh. Too much sag, and the bike will bottom out. Sag affects your bike’s handling and stability. It also affects your comfort. To check the sag, you’ll need a friend. Have your friend hold the bike steady. Then, sit on the bike in your normal riding position. Measure the distance the suspension compresses. Adjust the air pressure until the sag is correct. Learning how to use shock pump gauge for suspension setup includes understanding sag.


