
How to Use Gauge on Floor Pump: Easy Guide!
Do you know how much air is in your bike tires? Too little air can make biking hard. Too much air can be dangerous. A gauge on a floor pump helps you get it just right. Have you ever seen your parents use one? It’s like a superpower for your bike! Knowing how to use gauge on floor pump means safer and easier rides.
Imagine your tire popping like a balloon! That’s why knowing the right pressure is important. A floor pump with a gauge can help you avoid that. It shows you exactly how much air is going into your tires. Let’s learn how to use gauge on floor pump and keep your tires happy.
Key Takeaways
- Using a floor pump with a gauge ensures your tires have the correct pressure.
- The gauge shows the air pressure in PSI (pounds per square inch) or BAR.
- Knowing how to use gauge on floor pump prevents over or under-inflation.
- Always check the recommended pressure on your tire’s sidewall before pumping.
- Regularly check your tire pressure for a safer and more efficient ride.
Understanding Your Floor Pump Gauge

A floor pump gauge is like a speedometer for your tires. It tells you how much air is inside. The gauge has numbers around it. These numbers show the air pressure. Air pressure is measured in PSI or BAR. PSI means “pounds per square inch.” BAR is another way to measure pressure. Most gauges show both. Knowing how to use gauge on floor pump starts with understanding these units. Look at the numbers while you pump. Stop when you reach the right number for your tire. This keeps your ride smooth and safe. Different tires need different amounts of air. Always check what your tire needs before you start pumping.
- The gauge shows PSI and BAR.
- PSI means pounds per square inch.
- BAR is another unit for measuring pressure.
- The needle moves as you pump.
- Watch the needle to reach the right pressure.
- Different tires need different pressures.
Understanding the units of measurement is key. Knowing what PSI and BAR mean helps you fill your tires correctly. Imagine trying to bake a cake without knowing how to read the measuring cups! It’s the same with your tires. The numbers on the gauge guide you. They tell you when to stop pumping. This prevents your tires from getting too full or not full enough. Both can cause problems when you are riding your bike. This is how to use gauge on floor pump in a smart way.
Why PSI Matters
Have you ever bounced a basketball that was flat? It doesn’t bounce very well. That’s because it needs the right amount of air. PSI tells you exactly how much air to put in. When your bike tires have the right PSI, they roll easier. This means you don’t have to work as hard to pedal. The right PSI also helps your tires last longer. Too little air can wear them out quickly. Too much air can cause them to burst. Using the PSI reading on your floor pump helps you keep your tires in good shape. It makes biking more fun and safer, too.
BAR Explained Simply
BAR is another way to measure air pressure. It is commonly used in Europe. Think of it like kilometers versus miles. Both measure distance, but they use different numbers. Similarly, PSI and BAR both measure pressure. One BAR is about 14.5 PSI. So, if your tire needs 3 BAR, that’s about 43.5 PSI. Some floor pumps only show BAR. If yours does, you can use this conversion to figure out the right pressure. Knowing this helps you use a gauge on a floor pump no matter where you are. It’s a handy trick for any biker!
Reading Both Scales
Most floor pumps show both PSI and BAR on their gauges. This makes it easy to find the right pressure. Look for the scale that matches the numbers on your tire. Your tire will tell you the recommended pressure in either PSI or BAR. Find that number on the gauge. Then, pump until the needle points to it. It’s like matching colors. You find the right number on your tire and the matching number on the pump. Knowing how to use gauge on floor pump with both scales makes you a super biker. You’ll always have the right amount of air.
Fun Fact or Stat: The first bicycle air pump was invented in 1887 and was much harder to use than today’s floor pumps!
Finding the Right Tire Pressure

Finding the right tire pressure is like finding the perfect temperature for your bathwater. Not too hot, not too cold, but just right! Your tires have a recommended pressure range printed on the sidewall. This is usually written as “PSI” or “BAR.” The range might be something like “35-50 PSI.” This means you should pump your tires to somewhere between 35 and 50 PSI. The exact number depends on what kind of riding you’re doing. For smooth roads, you can go closer to the higher number. For bumpy trails, you might want to be closer to the lower number. Knowing how to use gauge on floor pump correctly means you can adjust the pressure for different rides.
- Look for the PSI range on your tire.
- The range tells you the minimum and maximum pressure.
- Higher pressure is good for smooth roads.
- Lower pressure is good for bumpy trails.
- Adjust the pressure based on your ride.
- Check your tire pressure before each ride.
Imagine your tires are like shoes. You wouldn’t wear the same shoes for running a race and swimming in a pool, right? The same goes for tire pressure. Adjusting the pressure for different conditions makes your ride more comfortable. It also helps your tires last longer. If you’re not sure what pressure to use, start in the middle of the recommended range. Then, experiment to see what feels best. This is how to use gauge on floor pump to become a tire pressure expert. You’ll know exactly what your bike needs.
Reading Tire Sidewalls
The sidewall of your tire is like a treasure map. It tells you everything you need to know about your tire. Look closely for the pressure information. It’s usually printed in small numbers. It will say something like “Inflate to 35-50 PSI” or “40-65 PSI.” This is the range you need to stay within when you pump. The sidewall might also tell you the maximum weight the tire can hold. Pay attention to all the information on the sidewall. It’s there to help you have a safe and fun ride. Knowing how to use gauge on floor pump starts with reading your tire.
Considering Rider Weight
Your weight can affect the best tire pressure for you. If you are heavier, you might need to use a higher pressure. This prevents the tire from squishing too much. If you are lighter, you might need a lower pressure. This makes the ride more comfortable. A good rule of thumb is to add a few PSI if you are heavier than average. Subtract a few PSI if you are lighter than average. Experiment to see what feels best. This is how to use gauge on floor pump to customize your ride. Your weight matters when it comes to tire pressure.
Adjusting for Terrain
The type of ground you are riding on makes a big difference. Smooth roads need higher pressure. This makes your bike roll faster and easier. Bumpy trails need lower pressure. This gives you more grip and makes the ride more comfortable. Think of it like this: high pressure is like ice skates, and low pressure is like hiking boots. Choose the right pressure for the terrain. Knowing how to use gauge on floor pump for different terrains makes you a smart rider. You’ll be ready for anything.
Fun Fact or Stat: Mountain bike tires often have lower pressure than road bike tires for better grip on dirt trails.
Connecting the Pump Head Correctly
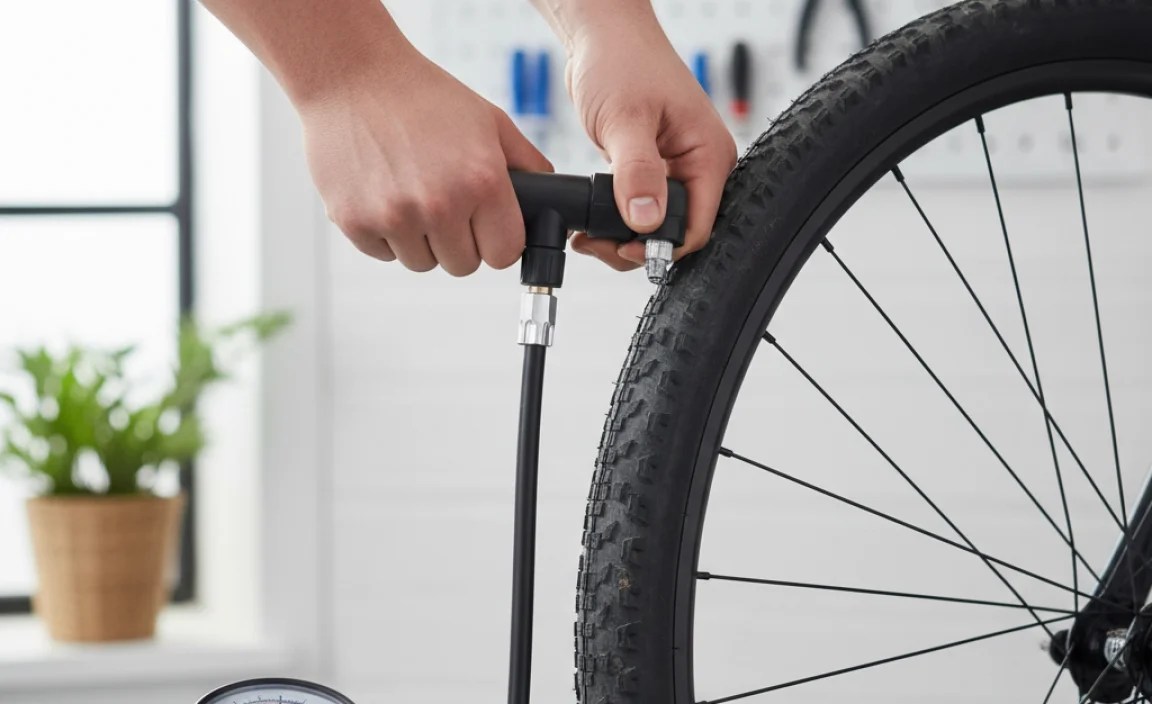
Connecting the pump head correctly is like putting a puzzle piece in the right spot. If it doesn’t fit right, it won’t work. Most floor pumps have two different holes in the pump head. One is for Schrader valves, and the other is for Presta valves. Schrader valves are like the ones on car tires. Presta valves are thinner and have a little nut on the end. Make sure you choose the right hole for your valve. Then, push the pump head onto the valve. Make sure it’s on tight. If it’s not on tight, air will leak out. Knowing how to use gauge on floor pump includes connecting it correctly.
- Identify your valve type (Schrader or Presta).
- Choose the correct hole on the pump head.
- Push the pump head firmly onto the valve.
- Make sure the connection is tight.
- Lock the lever on the pump head.
- Listen for air leaks.
Imagine trying to drink from a straw with a hole in it. You wouldn’t get much liquid, right? The same thing happens if the pump head isn’t connected properly. Air will leak out, and you won’t be able to fill your tire. Make sure the pump head is securely attached to the valve. Most pumps have a lever that you flip to lock the head in place. This creates a tight seal. Knowing how to use gauge on floor pump means knowing how to make a good connection.
Identifying Valve Types
There are two main types of valves on bike tires: Schrader and Presta. Schrader valves are wider and look like the valves on car tires. They have a pin in the middle that you can push down. Presta valves are thinner and have a small nut on the end. You need to unscrew the nut before you can pump air in. Knowing which type of valve you have is the first step. Look closely at your valve to identify it. This will help you choose the right hole on the pump head. How to use gauge on floor pump starts with knowing your valves.
Securing the Pump Head
Once you’ve chosen the right hole, push the pump head onto the valve. Push it on firmly until it’s all the way on. Most floor pumps have a lever that you flip to secure the head. This lever locks the pump head in place and creates a tight seal. Make sure the lever is locked before you start pumping. If the head isn’t secure, air will leak out. This will make it hard to fill your tire to the right pressure. Knowing how to use gauge on floor pump means making sure the connection is tight.
Checking for Leaks
After you connect the pump head, listen for air leaks. If you hear a hissing sound, that means air is escaping. This could be because the pump head isn’t on tight enough. Or, it could be because the lever isn’t locked. Check the connection and make sure everything is secure. If you still hear a leak, try repositioning the pump head. Sometimes, it just needs to be adjusted slightly. Knowing how to use gauge on floor pump includes troubleshooting leaks.
Fun Fact or Stat: Presta valves were invented in France and are often found on high-performance road bikes.
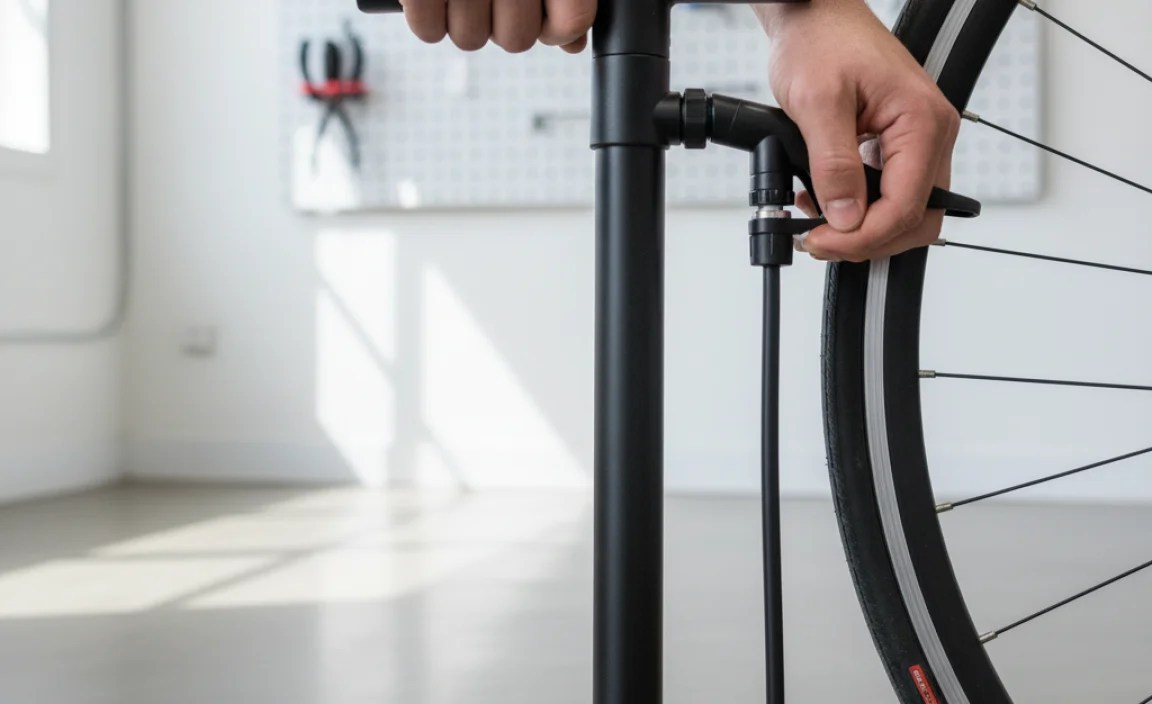
Pumping Air and Watching the Gauge

Now comes the fun part: pumping air! Place your feet on the base of the floor pump to hold it steady. Grip the handle firmly. Then, pump up and down. As you pump, watch the gauge. The needle will move as air fills the tire. Keep pumping until the needle reaches the desired pressure. Remember to look at the recommended pressure on your tire’s sidewall. Don’t over-inflate the tire. This can cause it to burst. Knowing how to use gauge on floor pump means watching the gauge carefully.
| Tire Type | Recommended PSI | Benefits of Correct PSI |
|---|---|---|
| Road Bike | 80-130 PSI | Faster speed, lower rolling resistance |
| Mountain Bike | 25-35 PSI | Better grip, more comfortable ride |
| Hybrid Bike | 40-70 PSI | Good balance of speed and comfort |
| Kids’ Bike | 30-50 PSI | Easy rolling, safe riding |
- Place your feet on the pump base.
- Grip the handle firmly.
- Pump up and down smoothly.
- Watch the gauge as you pump.
- Stop when the needle reaches the right pressure.
- Don’t over-inflate the tire.
Imagine you’re filling a balloon with water. You keep filling it until it’s just the right size. You don’t want to fill it too much, or it will pop! It’s the same with your bike tires. You want to fill them to the right pressure. The gauge helps you do this. It shows you exactly how much air is going in. Keep an eye on the needle and stop when you reach the recommended pressure. This keeps your tires safe and your ride smooth. This is how to use gauge on floor pump like a pro.
Steady Pumping Motion
A smooth, steady pumping motion is key. Don’t pump too fast or too hard. This can make it harder to control the pressure. Instead, use long, even strokes. This will help you fill the tire evenly. It will also make it easier to watch the gauge. Think of it like playing an instrument. You want to be smooth and controlled. Knowing how to use gauge on floor pump includes using the right pumping technique.
Monitoring the Gauge
The gauge is your best friend when you’re pumping air. Keep your eyes on it. Watch the needle as it moves. Pay attention to the numbers. This will help you stop at the right pressure. If you’re not sure what pressure to use, start with a lower number. You can always add more air if you need to. It’s better to under-inflate than over-inflate. Knowing how to use gauge on floor pump means being a gauge watcher.
Avoiding Over-Inflation
Over-inflating your tires can be dangerous. It can cause the tire to burst. This can lead to a crash. Always check the recommended pressure on your tire’s sidewall. Never pump beyond that number. If you accidentally over-inflate, let some air out. You can do this by pressing the valve stem. Knowing how to use gauge on floor pump includes knowing how to avoid over-inflation.
Fun Fact or Stat: Over-inflated tires can reduce your grip on the road and make your ride less comfortable.
Removing the Pump Head Safely
Removing the pump head safely is like taking off your shoes without tripping. You want to do it carefully and smoothly. After you’ve reached the right pressure, unlock the lever on the pump head. Then, gently pull the pump head straight off the valve. Be careful not to bend or damage the valve. Some air might escape when you remove the pump head. This is normal. Don’t worry if you hear a little hiss. Knowing how to use gauge on floor pump includes removing the head safely.
- Unlock the lever on the pump head.
- Gently pull the pump head straight off.
- Avoid bending or damaging the valve.
- Expect a small hiss of air.
- Store the pump properly after use.
- Check the tire pressure again before riding.
Imagine you’re removing a bandage. You wouldn’t rip it off quickly, right? You’d peel it off gently. It’s the same with the pump head. You want to remove it smoothly to avoid damaging the valve. Unlock the lever, and then pull the head straight off. A little air will escape, but that’s okay. The important thing is to avoid bending the valve. Knowing how to use gauge on floor pump means doing it with care.
Unlocking the Lever
The first step is to unlock the lever on the pump head. This releases the seal between the pump head and the valve. The lever is usually located on the side of the pump head. Flip it back to its original position. This will allow you to remove the pump head easily. Always unlock the lever before you try to remove the head. Knowing how to use gauge on floor pump includes knowing how to unlock the lever.
Pulling Straight Off
Once the lever is unlocked, gently pull the pump head straight off the valve. Avoid twisting or bending the head. This can damage the valve. Pull it straight off in one smooth motion. If it’s stuck, try wiggling it slightly. But don’t force it. You want to remove the head without causing any damage. Knowing how to use gauge on floor pump means pulling straight off.
Storing the Pump
After you’ve removed the pump head, store the pump properly. This will help it last longer. Most floor pumps have a clip or strap to hold the handle in place. This prevents the pump from flopping around. Store the pump in a dry place. This will prevent rust and corrosion. Taking care of your pump will ensure it’s ready to use next time. Knowing how to use gauge on floor pump includes storing it properly.
Fun Fact or Stat: Some high-end floor pumps have magnetic pump heads for even easier attachment and removal.
Regular Tire Pressure Checks
Checking your tire pressure regularly is like brushing your teeth. It’s a simple habit that keeps things in good shape. You should check your tire pressure before every ride. This ensures that your tires are properly inflated. Properly inflated tires make your ride safer and more efficient. They also help your tires last longer. Get into the habit of checking your tire pressure regularly. Knowing how to use gauge on floor pump is just the first step. The next step is using it often.
- Check your tire pressure before every ride.
- Use a floor pump with a gauge.
- Maintain the recommended pressure.
- Adjust pressure for different conditions.
- Look for signs of damage or wear.
- Replace tires when needed.
Imagine your tires are like a basketball. If you don’t add air regularly, it will slowly deflate. The same thing happens with your bike tires. They lose air over time. This is why it’s important to check them regularly. A quick check before each ride can make a big difference. It can prevent flats and make your ride more enjoyable. Knowing how to use gauge on floor pump is a valuable skill. Make it a habit to use it often.
Why Regular Checks Matter
Regular tire pressure checks matter because they keep you safe. Under-inflated tires can make it harder to control your bike. They can also lead to flats. Over-inflated tires can burst. Checking your pressure regularly helps you avoid these problems. It also makes your ride more efficient. Properly inflated tires roll easier. This means you don’t have to work as hard to pedal. Knowing how to use gauge on floor pump keeps you safe and makes biking more fun.
When to Check Pressure
You should check your tire pressure before every ride. This is especially important if you haven’t ridden your bike in a while. Tires lose air over time, even when they’re not being used. A quick check before each ride ensures that your tires are ready to go. It only takes a few minutes. It’s a small investment of time that can make a big difference. Knowing how to use gauge on floor pump is a skill you should use regularly.
Signs of Low Pressure
There are several signs that your tires might be low on air. The most obvious sign is that the tire looks flat. It might also feel soft when you squeeze it. Another sign is that your bike feels harder to pedal. If you notice any of these signs, check your tire pressure immediately. Under-inflated tires can be dangerous. Knowing how to use gauge on floor pump helps you identify and fix low pressure.
Fun Fact or Stat: Tires can lose 1-2 PSI per day, even if they are not being used.
Summary
Learning how to use gauge on floor pump is easy and important. A floor pump with a gauge helps you keep your tires at the right pressure. Find the recommended pressure on your tire’s sidewall. Connect the pump head correctly to the valve. Then, pump air while watching the gauge. Stop when the needle reaches the right number. Remove the pump head carefully. Check your tire pressure before every ride. This keeps you safe and makes biking more fun. Understanding PSI and BAR makes the process easier. Regular checks extend the life of your tires. Keep your tires properly inflated for the best biking experience.
Conclusion
Using a floor pump with a gauge is simple. It makes a big difference for your bike rides. You can easily maintain the correct tire pressure. This ensures a safer and more enjoyable experience. Remember to check your tire pressure regularly. Adjust it based on your riding conditions. Knowing how to use gauge on floor pump empowers you to take care of your bike. Happy riding!
Frequently Asked Questions
Question No 1: What does PSI mean on a floor pump gauge?
Answer: PSI stands for “pounds per square inch.” It’s a unit of measurement that tells you how much air is pressing against each square inch of your tire. The higher the PSI, the more air is in the tire, and the harder it will feel. Different tires need different PSI levels. Road bike tires usually need higher PSI than mountain bike tires. The right PSI makes your ride smoother and more efficient. You can find the recommended PSI for your tires printed on the sidewall of the tire. Always stay within that range to avoid problems.
Question No 2: How do I know what PSI to put in my bike tires?
Answer: Look at the sidewall of your tire. You’ll see a range of numbers followed by “PSI.” For example, it might say “35-50 PSI.” This means you should inflate your tires to somewhere between 35 and 50 PSI. The exact number depends on your weight and the type of riding you’re doing. If you’re heavier, you might want to use a higher PSI. If you’re riding on bumpy trails, you might want to use a lower PSI. Experiment to see what feels best. Just make sure you stay within the recommended range. Knowing how to use gauge on floor pump involves understanding these numbers.
Question No 3: What’s the difference between Schrader and Presta valves?
Answer: Schrader and Presta valves are two different types of valves used on bike tires. Schrader valves are wider and look like the valves on car tires. They have a pin in the middle that you can push down. Presta valves are thinner and have a small nut on the end. You need to unscrew the nut before you can inflate the tire. Most floor pumps have two different holes in the pump head. One is for Schrader valves, and the other is for Presta valves. Make sure you use the right hole for your valve. How to use gauge on floor pump depends on connecting to the right valve type.
Question No 4: Can I use a car tire pump for my bike tires?
Answer: You can use a car tire pump for your bike tires if you have a Schrader valve. However, most car tire pumps don’t have a gauge. This makes it hard to know how much air you’re putting in your tires. It’s best to use a floor pump with a gauge. This allows you to accurately inflate your tires to the recommended pressure. Over-inflating your tires can be dangerous. It can cause them to burst. A floor pump with a gauge gives you more control.
Question No 5: How often should I check my bike tire pressure?
Answer: You should check your bike tire pressure before every ride. Tires lose air over time, even when they’re not being used. A quick check before each ride ensures that your tires are properly inflated. This makes your ride safer and more efficient. It also helps your tires last longer. It only takes a few minutes to check your tire pressure. Knowing how to use gauge on floor pump and doing it regularly is a good habit.
Question No 6: What happens if I over-inflate my bike tires?
Answer: Over-inflating your bike tires can be dangerous. It can cause the tire to burst. This can lead to a crash. Always check the recommended pressure on your tire’s sidewall. Never pump beyond that number. If you accidentally over-inflate your tires, let some air out. You can do this by pressing the valve stem. Knowing how to use gauge on floor pump includes knowing how to avoid over-inflation. It also means knowing what to do if you make a mistake.


