
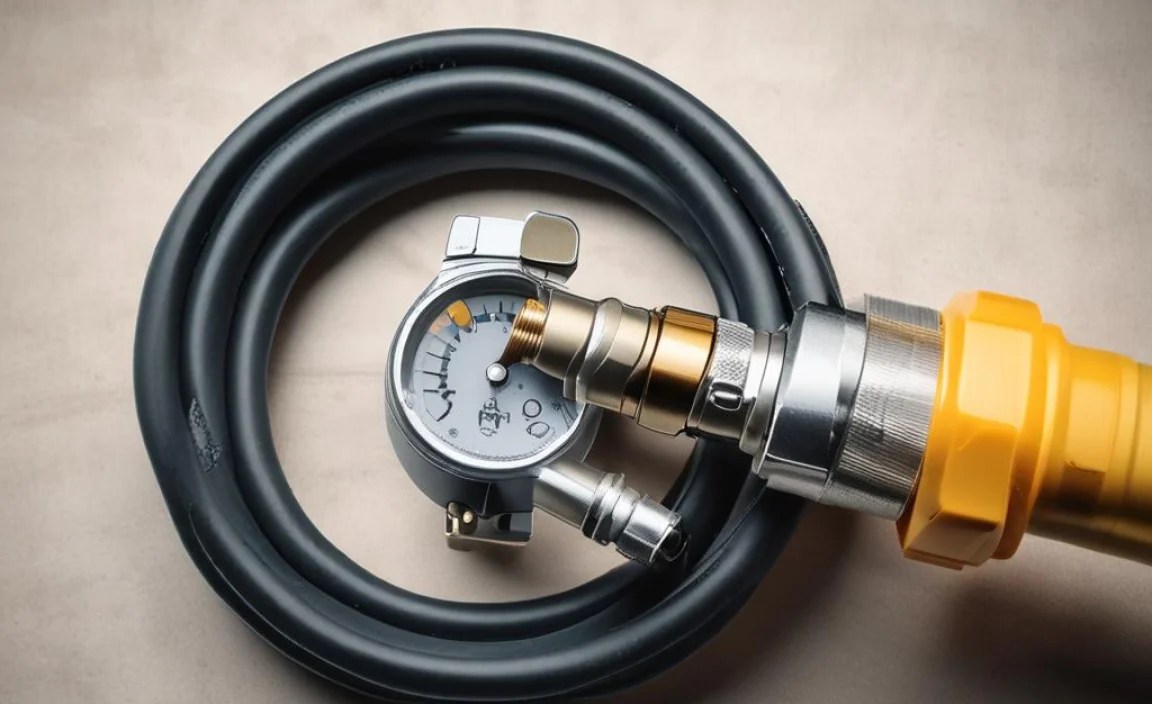
How to Fix Gauge Hose Connection: Easy DIY Guide
Have you ever seen a wobbly gauge hose connection? It can be scary. Maybe your tire pressure gauge isn’t working right. Or perhaps your AC isn’t as cold as it should be. A loose gauge hose connection can cause problems. But don’t worry! Fixing it is often easier than you think.
Sometimes, a simple twist or a new part is all you need. We will show you how to check and fix it. This guide will help you understand how to fix gauge hose connection issues. Let’s get started and make things right!
Key Takeaways
- Regularly inspect your gauge hoses for wear and tear to prevent leaks.
- Tighten loose gauge hose connections by hand first, then with tools.
- Use thread seal tape to ensure an airtight seal on threaded connections.
- Replace damaged O-rings and fittings to maintain accurate gauge readings.
- Knowing how to fix gauge hose connection issues saves time and money.
How to Check Gauge Hose Connection

Checking your gauge hose connection is the first step. It helps find the problem. Look for loose fittings. Are there any cracks in the hose? Sometimes, the connection just needs tightening. Other times, parts may need replacing. Start by visually inspecting the hose and connections. Feel for any air leaks around the fittings. Use soapy water to find small leaks. Bubbles will form where air escapes. Make sure the hose is properly seated. It should be snug. Wiggle the hose gently. Is there any movement? Movement means it’s likely loose. A regular check can prevent bigger problems later. This simple step can save you time and money.
- Look for cracks in the hose.
- Check for loose fittings.
- Feel for air leaks.
- Use soapy water to find leaks.
- Wiggle the hose gently.
Once you find a problem, you can decide what to do. Maybe it’s just a loose nut. Tightening it might solve the issue. If the hose is cracked, it needs to be replaced. Sometimes the O-rings are worn out. Replacing them is also a good idea. Make sure you have the right tools. A wrench and some thread seal tape can be helpful. By checking the gauge hose connection regularly, you keep things working well. This keeps your tools and machines running smoothly. Remember, safety first. Always disconnect power or air before working on any connections.
Fun Fact or Stat: Did you know that a loose gauge connection can cause up to 20% inaccurate readings on your instruments?
Why is My Gauge Leaking?
Have you ever wondered why your gauge is leaking? Leaks often happen at the gauge hose connection. This could be due to several reasons. The fitting might be loose. The hose could have a crack. Sometimes, the O-ring is old and worn out. The threads could be damaged. Dirt can also cause leaks. Start by cleaning the area. Then, tighten the connection. If that doesn’t work, check the O-ring. Replace it if it looks worn. Use thread seal tape on the threads. This helps create a better seal. Remember to check the hose itself. Cracks need to be fixed quickly. A small leak can become a big problem.
What Tools Do I Need?
To fix a gauge hose connection, you need the right tools. A wrench is important for tightening fittings. You might need different sizes. An O-ring pick helps remove old O-rings. Thread seal tape is great for sealing threads. A hose cutter makes clean cuts. Safety glasses protect your eyes. Gloves protect your hands. A small brush helps clean dirt. A torque wrench ensures proper tightness. Having these tools makes the job easier. They also help prevent damage. Always use the right tool for the job. This keeps you safe and ensures a good fix.
How Often to Check Connections?
How often should you check your gauge hose connection? It depends on how often you use it. If you use it daily, check it weekly. If you use it less, check it monthly. Look for leaks and damage. Tighten any loose fittings. Replace worn parts. Regular checks prevent big problems. They also keep your equipment working well. Think of it like checking the oil in your car. Regular maintenance is important. It keeps everything running smoothly. Set a reminder to check your connections. This simple habit can save you time and money in the long run.
Tightening a Loose Gauge Hose

Tightening a loose gauge hose connection is usually the first fix. Start by using a wrench. Gently tighten the fitting. Don’t overtighten. This can damage the threads. Feel for resistance. Once snug, stop turning. If the connection is still loose, try thread seal tape. Wrap the tape around the threads. Then, tighten the fitting again. Make sure the hose is properly seated. Sometimes, dirt can prevent a tight seal. Clean the connection before tightening. If the fitting is damaged, replace it. A new fitting can solve the problem. Tightening a loose connection is a simple fix. It can save you from bigger issues later.
- Use a wrench to tighten the fitting.
- Don’t overtighten the connection.
- Apply thread seal tape for a better seal.
- Clean the connection before tightening.
- Replace damaged fittings.
- Ensure the hose is properly seated.
Sometimes, you might need two wrenches. Use one to hold the hose fitting. Use the other to tighten the connection. This prevents the hose from twisting. Twisting can damage the hose. It can also loosen the connection. If you’re working with air or gas, be extra careful. Make sure the system is depressurized. This keeps you safe. Always wear safety glasses. This protects your eyes from debris. Tightening a loose gauge hose connection is a common task. With the right steps, you can do it safely and effectively. Remember to check for leaks after tightening.
Fun Fact or Stat: Overtightening a gauge hose connection is a common mistake that leads to thread damage and future leaks.
How Much to Tighten?
How much should you tighten the gauge hose connection? It’s a good question. You want it snug, not too tight. Overtightening can damage the threads. Use a torque wrench if possible. This helps measure the tightness. Check the manufacturer’s instructions. They often have torque specifications. If you don’t have a torque wrench, go by feel. Tighten until you feel resistance. Then, stop. Check for leaks after tightening. If it leaks, tighten a little more. Be careful not to overtighten. Finding the right balance is key. This prevents damage and ensures a good seal.
Using Two Wrenches
Why use two wrenches when tightening a gauge hose connection? One wrench holds the hose fitting. The other tightens the connection. This prevents twisting. Twisting can damage the hose. It can also loosen the connection. Place one wrench on the hose fitting. Hold it steady. Use the other wrench to tighten the connection. Apply even pressure. This technique is especially helpful. It works on older or more fragile hoses. It also works on connections in tight spaces. Using two wrenches helps protect your equipment. It ensures a secure and lasting fix.
Checking for Leaks After Tightening
After tightening the gauge hose connection, check for leaks. Use soapy water. Spray it on the connection. Look for bubbles. Bubbles mean there’s a leak. If you see bubbles, tighten the connection more. Be careful not to overtighten. If it still leaks, try thread seal tape. Wrap the tape around the threads. Then, tighten the fitting again. If the leak continues, the fitting may be damaged. Consider replacing it. Checking for leaks is important. It ensures a good seal. It also prevents wasted air or fluid. This simple step can save you money and trouble.
Replacing Worn O-Rings
Replacing worn O-rings is a common part of how to fix gauge hose connection issues. O-rings create a seal. They prevent leaks. Over time, they can dry out and crack. This causes leaks. To replace an O-ring, first disconnect the hose. Use an O-ring pick to remove the old O-ring. Be careful not to scratch the fitting. Clean the area. Then, install the new O-ring. Make sure it fits properly. Lubricate the O-ring with silicone grease. This helps it seal better. Reconnect the hose. Tighten the fitting. Check for leaks. Replacing O-rings is a simple way to fix leaks. It keeps your gauges working well.
- Disconnect the hose first.
- Use an O-ring pick to remove the old O-ring.
- Clean the area thoroughly.
- Lubricate the new O-ring with silicone grease.
- Reconnect the hose and tighten the fitting.
- Check for leaks after replacing the O-ring.
Make sure you have the right size O-ring. Measure the old O-ring. Or check the gauge’s manual. Using the wrong size can cause leaks. Silicone grease helps the O-ring slide into place. It also protects it from damage. When tightening the fitting, don’t overtighten. This can damage the O-ring. Always check for leaks after replacing the O-ring. This ensures a good seal. Replacing O-rings is a small task. But it can make a big difference. It keeps your gauges accurate and leak-free. This helps your work go smoothly. Remember to keep extra O-rings on hand.
Fun Fact or Stat: Silicone grease extends the life of O-rings by up to 50% by preventing drying and cracking.
Finding the Right Size O-Ring
Finding the right size O-ring is important. The wrong size won’t seal properly. This can cause leaks. Measure the old O-ring if you have it. Use calipers for accuracy. If you don’t have the old O-ring, check the gauge’s manual. The manual should list the O-ring size. You can also use an O-ring sizing chart. These charts are available online. They help you find the right size. Match the O-ring’s inner diameter and thickness. Take your measurements to a hardware store. They can help you find the right O-ring. Getting the right size ensures a good seal. It also prevents leaks.
Using Silicone Grease
Why use silicone grease on O-rings? Silicone grease helps the O-ring seal better. It also protects it from damage. It lubricates the O-ring. This allows it to slide into place easily. It also prevents drying and cracking. Apply a thin layer of silicone grease. Use your finger or a small brush. Don’t use too much grease. Too much grease can attract dirt. This can damage the O-ring. Silicone grease is safe for rubber and plastic. Other greases can damage these materials. Using silicone grease extends the life of the O-ring. It also ensures a good seal.
Checking for Leaks After Replacement
After replacing the O-ring, check for leaks. Use soapy water. Spray it on the connection. Look for bubbles. Bubbles mean there’s still a leak. If you see bubbles, tighten the connection more. Be careful not to overtighten. If it still leaks, check the O-ring. Make sure it’s seated properly. It might be pinched or twisted. If the O-ring looks damaged, replace it again. Checking for leaks is important. It ensures a good seal. It also prevents wasted air or fluid. This simple step can save you money and trouble. A leak-free connection is a happy connection.
Applying Thread Seal Tape Correctly
Applying thread seal tape is key. It helps fix a gauge hose connection. Thread seal tape fills gaps. It creates a tight seal. First, clean the threads. Remove any dirt or old tape. Wrap the tape around the threads. Go in the direction the fitting will turn. Overlap the tape slightly. Use two or three layers. Smooth the tape down. This prevents it from unraveling. Tighten the fitting. The tape will compress. This creates a leak-proof seal. Thread seal tape is an easy way to fix leaks. It keeps your gauges working well.
- Clean the threads before applying tape.
- Wrap the tape in the direction of tightening.
- Overlap the tape slightly for full coverage.
- Use two to three layers of tape.
- Smooth the tape down to prevent unraveling.
- Tighten the fitting to compress the tape.
Make sure you use the right type of thread seal tape. There are different types. Some are for water. Others are for gas. Use the right one for your application. Don’t use too much tape. Too much tape can make it hard to tighten the fitting. It can also damage the threads. If the fitting is still leaking, remove the tape. Start over with fresh tape. Applying thread seal tape correctly takes practice. But it’s a valuable skill. It can save you time and money. It keeps your gauges working properly. Remember to check for leaks after tightening.
Fun Fact or Stat: Thread seal tape, also known as PTFE tape, can withstand temperatures from -200°C to +260°C.
Choosing the Right Type of Tape
Choosing the right type of thread seal tape is important. Different tapes are for different uses. White tape is for water. Yellow tape is for gas. Pink tape is for propane. Green tape is for oxygen. Use the right tape for your application. This ensures a safe and effective seal. Check the tape’s packaging. It will tell you what it’s for. Using the wrong tape can be dangerous. It can cause leaks or even explosions. Always follow safety guidelines. This keeps you safe and prevents problems. The right tape makes all the difference.
How Many Layers to Use?
How many layers of thread seal tape should you use? Two or three layers are usually enough. Too few layers won’t seal properly. Too many layers can make it hard to tighten. Start with two layers. Wrap the tape around the threads. Overlap the tape slightly. Smooth it down. Tighten the fitting. Check for leaks. If it leaks, add another layer of tape. Be careful not to use too much tape. This can damage the threads. Finding the right balance is key. This ensures a good seal and prevents damage.
Avoiding Common Mistakes
Avoid common mistakes when using thread seal tape. Don’t wrap the tape in the wrong direction. Wrap it in the direction the fitting will turn. Don’t use too much tape. This can make it hard to tighten. Don’t use the wrong type of tape. Use the right tape for your application. Don’t forget to clean the threads first. Dirt can prevent a good seal. Don’t overtighten the fitting. This can damage the threads. Avoiding these mistakes ensures a good seal. It also prevents damage. Take your time and do it right.
Replacing a Damaged Hose
Replacing a damaged hose is sometimes needed. A damaged hose can leak. It can also affect gauge readings. Look for cracks, cuts, or bulges. If you see any of these, replace the hose. First, disconnect the old hose. Use a wrench if needed. Make sure to relieve any pressure. Then, connect the new hose. Tighten the fittings. Make sure they are snug. Don’t overtighten. Check for leaks after replacing the hose. Replacing a damaged hose is a simple fix. It keeps your gauges working properly. It also prevents bigger problems.
- Look for cracks, cuts, or bulges in the hose.
- Disconnect the old hose carefully.
- Relieve any pressure before disconnecting.
- Connect the new hose and tighten the fittings.
- Ensure the fittings are snug, but not overtightened.
- Check for leaks after replacing the hose.
When buying a new hose, make sure it’s the right size. Check the length and diameter. Use the same type of hose as the old one. This ensures it will work properly. Sometimes, the fittings on the old hose can be reused. If they are in good condition, you can save money. Just remove them carefully. Clean them. Then, install them on the new hose. Always check for leaks after replacing a hose. This ensures a good seal. Replacing a damaged hose is a common repair. With the right steps, you can do it yourself.
Fun Fact or Stat: Hoses made of reinforced rubber last longer and are more resistant to damage than standard rubber hoses.
Choosing the Right Replacement Hose
Choosing the right replacement hose is important. The wrong hose can cause problems. Check the hose’s size. It should match the old hose. Check the hose’s material. It should be the same as the old hose. Rubber hoses are common. But there are also plastic and metal hoses. Choose the right material for your application. Check the hose’s pressure rating. It should be high enough for your system. Buy a hose from a reputable supplier. This ensures it’s good quality. The right hose will work properly. It will also last longer. This saves you time and money.
Properly Connecting the New Hose
Properly connecting the new hose is key. First, clean the fittings. Remove any dirt or debris. Apply thread seal tape. Wrap it around the threads. Go in the right direction. Tighten the fittings. Use a wrench. Make sure they are snug. Don’t overtighten. This can damage the threads. Check for leaks. Use soapy water. Look for bubbles. If you see bubbles, tighten the fittings more. Be careful not to overtighten. A properly connected hose will work well. It will also last longer. This keeps your gauges working properly.
Testing for Leaks After Replacement
After replacing the hose, test for leaks. Use soapy water. Spray it on the connections. Look for bubbles. Bubbles mean there’s a leak. If you see bubbles, tighten the fittings more. Be careful not to overtighten. If it still leaks, check the fittings. Make sure they are clean. Make sure the thread seal tape is applied correctly. If the fittings are damaged, replace them. Testing for leaks is important. It ensures a good seal. It also prevents wasted air or fluid. This simple step can save you money and trouble.
Understanding Different Gauge Types
Understanding different gauge types helps. It makes fixing a gauge hose connection easier. There are pressure gauges. These measure pressure. There are temperature gauges. These measure temperature. There are flow gauges. These measure flow. Each type has different connections. Pressure gauges often have threaded connections. Temperature gauges may have compression fittings. Flow gauges can have flanged connections. Knowing the type of gauge helps you choose the right tools. It also helps you fix the connection properly. This keeps your gauges working accurately.
| Gauge Type | What It Measures | Common Connection Type | Typical Use |
|---|---|---|---|
| Pressure Gauge | Pressure | Threaded | Tire inflation, HVAC systems |
| Temperature Gauge | Temperature | Compression fitting | Ovens, refrigerators |
| Flow Gauge | Flow Rate | Flanged | Water systems, chemical processing |
| Vacuum Gauge | Vacuum Pressure | Threaded or compression | Automotive diagnostics, lab equipment |
- Pressure gauges measure pressure.
- Temperature gauges measure temperature.
- Flow gauges measure flow rate.
- Each gauge type has different connections.
- Knowing the gauge type helps with repairs.
- Use the right tools for each connection type.
Some gauges are digital. Others are analog. Digital gauges show a number. Analog gauges have a needle. The connections are usually the same. But the internal parts are different. When fixing a gauge hose connection, be gentle. Gauges are sensitive. Overtightening can damage them. Always check the gauge’s manual. It will tell you the correct way to connect and disconnect the hose. Understanding different gauge types is important. It helps you keep your equipment working well. This saves you time and money.
Fun Fact or Stat: The first pressure gauge was invented in the 1600s and used a column of mercury to measure pressure.
Pressure Gauge Connections
Pressure gauge connections are often threaded. This means they have screw-like threads. These threads allow you to tighten the connection. Common thread types include NPT and BSP. NPT is a tapered thread. BSP is a parallel thread. Use the right thread type for your gauge. Using the wrong thread type can cause leaks. Apply thread seal tape to the threads. This helps create a tight seal. Tighten the connection with a wrench. Be careful not to overtighten. Overtightening can damage the gauge. Pressure gauge connections need to be secure. This ensures accurate readings.
Temperature Gauge Fittings
Temperature gauge fittings can be different. Some use compression fittings. These fittings have a nut and a ferrule. The ferrule compresses onto the hose. This creates a tight seal. Other temperature gauges use threaded connections. These are similar to pressure gauge connections. Apply thread seal tape to threaded connections. Make sure the fittings are clean. Dirt can prevent a good seal. Tighten the fittings with a wrench. Be careful not to overtighten. Temperature gauge fittings need to be secure. This ensures accurate temperature readings.
Flow Gauge Connections
Flow gauge connections often use flanges. Flanges are flat, round pieces with holes. Bolts go through the holes. This holds the connection together. Gaskets are placed between the flanges. Gaskets create a seal. Make sure the flanges are clean. Dirt can prevent a good seal. Tighten the bolts evenly. This ensures the connection is tight. Check the gasket. Replace it if it’s damaged. Flow gauge connections need to be strong. This ensures accurate flow measurements. Proper connections are important for reliable performance.
Summary
A loose gauge hose connection can lead to inaccurate readings and potential leaks. Regularly checking and maintaining these connections is crucial for ensuring the proper functioning of your equipment. This guide has covered essential steps. These include checking for leaks, tightening loose connections, replacing worn O-rings, and applying thread seal tape correctly. You also learned about replacing damaged hoses and understanding different gauge types. These simple maintenance tasks can save time and prevent costly repairs.
Conclusion
Knowing how to fix gauge hose connection issues empowers you to maintain your equipment. Simple steps like tightening connections, replacing O-rings, and using thread seal tape can solve common problems. Regular checks and timely repairs keep your gauges accurate and prevent leaks. With the knowledge from this guide, you can confidently tackle these tasks and ensure your equipment works reliably. This saves you time, money, and frustration.
Frequently Asked Questions
Question No 1: Why is my gauge hose leaking at the connection?
Answer: A gauge hose might leak at the connection for several reasons. The fitting could be loose. The O-ring might be worn or damaged. The threads could be dirty or damaged. Or the hose itself could be cracked near the connection. Start by tightening the fitting. If that doesn’t work, inspect the O-ring and threads. Replace the O-ring if needed. Clean the threads and apply thread seal tape. If the hose is cracked, replace the entire hose. Addressing these issues should stop the leak and restore a secure connection. Remember, safety is key. Always relieve pressure before working on any connections. Knowing how to fix gauge hose connection leaks can save you time and money.
Question No 2: What tools do I need to fix a gauge hose connection?
Answer: To fix a gauge hose connection, you’ll need a few essential tools. A wrench is necessary for tightening or loosening fittings. You might need different sizes of wrenches. An O-ring pick helps remove old O-rings. Thread seal tape is great for sealing threads. A hose cutter ensures clean cuts if you need to shorten or replace a hose. Safety glasses protect your eyes from debris. Gloves protect your hands from dirt and chemicals. A small brush helps clean the connection area. Having these tools on hand makes the job easier and safer. With the right tools, how to fix gauge hose connection problems becomes much simpler.
Question No 3: How do I know if my O-ring needs replacing?
Answer: You can tell if an O-ring needs replacing by inspecting it closely. Look for signs of wear and tear. Cracks, cuts, or flat spots indicate it’s time for a new O-ring. If the O-ring feels hard or brittle instead of soft and pliable, it’s likely dried out and needs replacement. Also, if you notice leaks around the connection even after tightening, a worn O-ring is probably the culprit. Compare the old O-ring to a new one. This helps you see the difference. Replacing O-rings regularly prevents leaks. It also ensures a good seal. This is a key part of knowing how to fix gauge hose connection issues.
Question No 4: Can I reuse thread seal tape?
Answer: No, you should not reuse thread seal tape. Once thread seal tape has been compressed in a connection, it loses its ability to seal effectively. Removing the fitting will damage the tape. This makes it less effective. Always use fresh thread seal tape when reassembling a connection. This ensures a tight, leak-proof seal. Reusing old tape can lead to leaks. This wastes time and resources. Fresh tape is inexpensive. It’s worth using new tape every time. Proper application of new tape is important when learning how to fix gauge hose connection problems.
Question No 5: What type of thread seal tape should I use?
Answer: The type of thread seal tape you should use depends on the application. White tape is generally for water lines. Yellow tape is for gas lines. Pink tape is for propane. Green tape is for oxygen. Using the correct tape ensures a safe and effective seal. Check the packaging for the tape’s intended use. Using the wrong tape can lead to leaks. It can also create safety hazards. Always follow the manufacturer’s recommendations. This helps prevent problems. Choosing the right tape is important. It’s a key part of how to fix gauge hose connection issues safely.
Question No 6: How do I prevent gauge hose connections from loosening?
Answer: To prevent gauge hose connections from loosening, start by ensuring proper installation. Tighten the fittings to the correct torque. Use a torque wrench if possible. This prevents overtightening or undertightening. Apply thread seal tape to threaded connections. This helps create a secure seal. Regularly inspect the connections for looseness. Tighten them as needed. Avoid excessive vibration or movement of the hose. This can loosen the connections over time. Use hose clamps or supports to secure the hose. This reduces stress on the connections. Regular maintenance and proper installation prevent loosening. It ensures reliable performance. Knowing how to fix gauge hose connection issues also helps you prevent them.


