
How to Easily Connect Pressure Gauge to Presta Valve
Have you ever wondered how much air is in your bike tires? Knowing the right pressure is super important. It makes biking easier and safer. But how do you connect a pressure gauge to a Presta valve? It might seem tricky, but it’s actually quite simple. Let’s learn how to do it!
Getting the right tire pressure helps you ride smoothly. Too little air, and your bike feels slow. Too much air, and the ride is bumpy. A pressure gauge helps you get it just right. This guide will show you how to connect a pressure gauge to a Presta valve. You’ll be biking like a pro in no time!
Key Takeaways
- Connecting a pressure gauge to a Presta valve is easy with the right steps.
- Knowing your bike’s ideal tire pressure ensures a smoother and safer ride.
- You must first unscrew the Presta valve to allow air flow.
- Make sure the pressure gauge is securely attached to the valve.
- Regularly checking tire pressure extends tire life and improves performance. Knowing how to connect pressure gauge to presta valve is the first step!
Understanding Presta Valves

Presta valves are commonly found on road bikes and some mountain bikes. They are different from the Schrader valves you see on car tires. Presta valves are narrower and have a small nut at the top. This nut needs to be unscrewed before you can inflate the tire or check the pressure. Many bikers like Presta valves because they hold high pressure well. They also look sleek. If you’re new to Presta valves, don’t worry! Connecting a pressure gauge is simple once you know the basics. Make sure you handle the valve gently. It can bend or break if you are too rough. Always double-check that the nut is tightened after you inflate your tires. This prevents air from leaking out while you ride.
- Presta valves are narrower than Schrader valves.
- They have a small nut at the top that needs to be unscrewed.
- Presta valves are great for high-pressure tires.
- Handle the valve gently to avoid damage.
- Always tighten the nut after inflating your tires.
Understanding Presta valves helps you maintain your bike tires properly. Knowing how to connect pressure gauge to presta valve is just one part. You also need to know how to take care of the valve itself. Keep the valve clean and free from dirt. Use a valve cap to protect it from damage. If you notice any leaks, replace the valve core. Regular maintenance will keep your tires in good shape. This makes your rides safer and more enjoyable. Remember, a little care goes a long way. A well-maintained Presta valve will serve you well for many miles.
Why are Presta Valves Popular?
Have you ever wondered why many cyclists choose Presta valves? Well, there are a few good reasons! Presta valves are lighter than Schrader valves. This might not seem like a big deal, but every little bit helps when you’re racing. They also work better with narrow rims. Road bikes often have very thin rims, and Presta valves fit perfectly. Another advantage is that they seal very well at high pressures. This is important for road bikes, where tires are often inflated to 100 psi or more. So, if you see a cyclist with Presta valves, now you know why! These small valves offer several benefits for serious riders.
How Do Presta Valves Differ?
Presta valves might all look the same, but there are some differences to know. Some Presta valves have removable valve cores. This makes it easy to add sealant to your tires if you get a flat. Other Presta valves have different lengths. This is important if you have deep rims. A longer valve will stick out far enough for you to attach a pump. Also, some valves are made of brass, while others are aluminum. Aluminum valves are lighter, but brass valves are more durable. Knowing these differences can help you choose the right valve for your bike. Always check the valve length before buying new tubes.
Can You Convert to Schrader Valves?
Sometimes, people wonder if they can switch from Presta to Schrader valves. While it’s technically possible, it’s not usually a good idea. Schrader valves are wider than Presta valves. This means you would need to drill a larger hole in your rim. This can weaken the rim and make it unsafe. Also, Schrader valves are heavier and don’t work as well at high pressures. It’s better to stick with Presta valves if your bike came with them. If you’re having trouble with Presta valves, ask a bike shop for help. They can show you the best way to use and maintain them.
Fun Fact or Stat: Presta valves were invented in the late 1800s by a French inventor named Camille Presta!
Preparing to Connect the Gauge

Before you connect the pressure gauge to the Presta valve, you need to get ready. First, find the valve on your bike tire. It’s usually covered by a small cap. Unscrew the cap and set it aside. Next, find the small nut at the top of the valve. Turn it counterclockwise to loosen it. Don’t take it all the way off! Just loosen it enough so you can press down on the valve. This will let a little air out. This step is important because it makes sure the valve isn’t stuck. Now you’re ready to attach the pressure gauge. Make sure your gauge is clean and in good working order. This will give you an accurate reading.
- Remove the valve cap from the Presta valve.
- Loosen the nut at the top of the valve.
- Press down on the valve to release a little air.
- Make sure your pressure gauge is clean.
- Check that your gauge is working properly.
Preparing properly makes connecting the pressure gauge easier. Knowing how to connect pressure gauge to presta valve also means knowing how to prep the valve. A little preparation saves time and frustration. If the valve is stuck, use a small tool to gently loosen it. Be careful not to damage the valve. Once the valve is prepped, the gauge will attach easily. This gives you a quick and accurate pressure reading. Remember to always tighten the nut after checking the pressure. This prevents air from leaking out. Proper preparation is key to keeping your tires in top condition.
Why Release a Little Air?
Have you ever wondered why you need to release a little air before checking the pressure? It’s a good question! Releasing a bit of air makes sure the valve isn’t stuck. Sometimes, the valve can get stuck closed, especially if it hasn’t been used in a while. Releasing a little air helps to free it up. This ensures that the pressure gauge can get an accurate reading. It also helps to prevent the valve from breaking when you attach the gauge. So, a quick press to release a little air can save you a lot of trouble.
What Tools Might You Need?
Besides the pressure gauge, what other tools might you need? Well, sometimes the valve can be a bit stubborn. A small pair of pliers can help you loosen the nut if it’s stuck. Be very gentle, though! You don’t want to damage the valve. A valve core tool can be useful if you need to remove or replace the valve core. This is the inner part of the valve that lets air in and out. Also, a good bike pump is essential for inflating your tires after checking the pressure. Having these tools on hand makes tire maintenance much easier.
How Often Should You Check?
How often should you check your bike tire pressure? That depends on how often you ride. If you ride every day, you should check the pressure at least once a week. If you only ride occasionally, check it before each ride. Tire pressure can change over time, even when the bike is just sitting. Temperature changes can also affect the pressure. Checking regularly ensures that your tires are always properly inflated. This makes your rides safer and more enjoyable. It also helps to prevent flats and extend the life of your tires.
Fun Fact or Stat: Bike tires can lose up to 1-2 psi (pounds per square inch) of pressure per day!
Attaching the Pressure Gauge Correctly

Now it’s time to connect the pressure gauge to the Presta valve. Hold the gauge firmly in one hand. With your other hand, carefully push the gauge onto the valve. Make sure it goes on straight. You should feel it click or snap into place. If it doesn’t fit right, try again. Don’t force it! A good connection is important for an accurate reading. Some gauges have a lever that you need to flip. This locks the gauge onto the valve. Check your gauge to see if it has this feature. Once the gauge is attached, look at the reading. This tells you how much air is in your tire. Remember, a secure connection is key to getting a correct measurement.
- Hold the pressure gauge firmly.
- Push the gauge straight onto the valve.
- Listen for a click or snap.
- Check for a locking lever on the gauge.
- Read the pressure on the gauge.
Attaching the pressure gauge correctly ensures an accurate reading. Knowing how to connect pressure gauge to presta valve also means knowing how to attach it properly. A loose connection will give you a false reading. This can lead to over- or under-inflating your tires. Take your time and make sure the gauge is secure. If you’re not sure, ask a bike shop for help. They can show you the proper technique. Remember, accurate tire pressure is important for safety and performance. A little extra care when attaching the gauge can make a big difference. This helps you enjoy a smooth and safe ride.
What If the Gauge Doesn’t Fit?
What should you do if the pressure gauge doesn’t fit the Presta valve? First, make sure you’re using the right type of gauge. Some gauges are designed specifically for Presta valves. Others are for Schrader valves. If you’re using the correct gauge, check for any debris or dirt on the valve. Clean it off with a cloth. If the gauge still doesn’t fit, the valve might be damaged. Take your bike to a shop. They can inspect the valve and replace it if needed. Don’t force the gauge onto the valve, or you could damage both.
How Do Locking Levers Work?
Some pressure gauges have a locking lever. How does this lever work? The lever helps to create a tight seal between the gauge and the valve. When you flip the lever, it clamps down on the valve. This prevents air from leaking out while you’re taking a reading. Make sure the lever is fully engaged before you check the pressure. If the lever is loose, you won’t get an accurate reading. Also, be careful not to over-tighten the lever. This could damage the valve. A properly engaged locking lever ensures a reliable pressure reading.
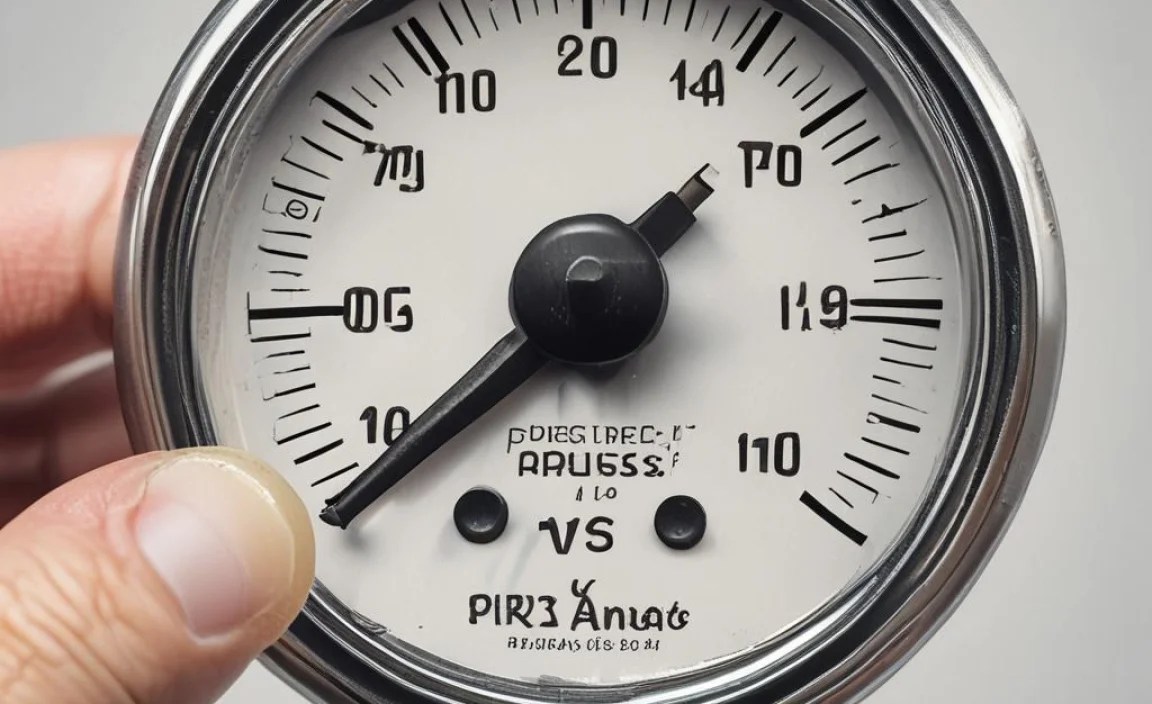
Reading the Gauge Accurately
How do you read the pressure gauge accurately? Most gauges have a needle that points to a number. This number tells you the tire pressure in psi (pounds per square inch). Look closely at the gauge to find the correct reading. Some gauges have both psi and bar measurements. Make sure you’re reading the correct scale. Also, try to look at the gauge straight on. Looking at it from an angle can distort the reading. If you’re not sure what the correct pressure should be, check the sidewall of your tire. It will usually have a recommended pressure range. Always stay within this range for optimal performance and safety.
Fun Fact or Stat: A digital pressure gauge provides a more precise reading than an analog gauge!
Reading the Pressure Correctly
Once you connect the pressure gauge to the Presta valve, it’s time to read the pressure. Look at the gauge carefully. Most gauges show the pressure in psi (pounds per square inch). Some also show it in bar. Find the number that the needle is pointing to. This is your tire pressure. Compare this number to the recommended pressure for your tires. You can find this information on the sidewall of your tire. It usually gives a range, like 80-130 psi. If your tire pressure is too low, you need to add air. If it’s too high, you need to let some air out. Getting the right pressure is important for a smooth and safe ride.
- Find the pressure reading on the gauge.
- Read the pressure in psi or bar.
- Compare the reading to the recommended pressure.
- Add air if the pressure is too low.
- Let air out if the pressure is too high.
Reading the pressure correctly is crucial for maintaining your bike tires. Knowing how to connect pressure gauge to presta valve is useless if you can’t read the gauge. An accurate reading helps you adjust the tire pressure to the ideal level. This improves your bike’s performance and handling. It also reduces the risk of flats. If you’re not sure how to read the gauge, ask a bike shop for help. They can show you the basics. Regular pressure checks will keep your tires in good condition. This ensures a comfortable and safe riding experience. Always aim for the recommended pressure range.
Understanding PSI and Bar
What’s the difference between psi and bar? Psi stands for pounds per square inch. It’s a common unit for measuring pressure in the United States. Bar is another unit of pressure, often used in Europe and other parts of the world. One bar is equal to about 14.5 psi. Some pressure gauges show both psi and bar readings. This can be helpful if you’re used to one unit or the other. Knowing the difference between these units can help you understand your tire pressure better. Always make sure you’re using the correct unit when comparing the reading to the recommended pressure.
What is the Ideal Tire Pressure?
What is the ideal tire pressure for your bike? The ideal pressure depends on several factors. These include the type of bike, the type of tires, and your weight. Road bikes usually require higher tire pressures than mountain bikes. Narrow tires also need higher pressures than wider tires. The recommended pressure range is usually printed on the sidewall of the tire. Start with the lower end of the range if you’re lighter. Use the higher end if you’re heavier. Experiment to find the pressure that feels best for you. A comfortable and efficient ride is the goal.
How Does Temperature Affect Pressure?
Did you know that temperature can affect your tire pressure? When the temperature goes up, the air inside your tires expands. This increases the pressure. When the temperature goes down, the air contracts. This decreases the pressure. This means that you might need to adjust your tire pressure depending on the weather. Check your tires more often during hot or cold weather. A few psi can make a big difference in how your bike rides. Keep an eye on the temperature and adjust your tire pressure accordingly.
Fun Fact or Stat: Tire pressure can change by about 1 psi for every 10 degrees Fahrenheit change in temperature!
Inflating or Deflating the Tire

After reading the pressure, you might need to inflate or deflate the tire. If the pressure is too low, you’ll need a bike pump. Attach the pump to the Presta valve. Make sure it’s secure. Then, start pumping. Watch the pressure gauge as you pump. Stop when you reach the recommended pressure. If the pressure is too high, you’ll need to let some air out. Gently press down on the valve core. This will release air. Check the pressure gauge as you release air. Stop when you reach the recommended pressure. Remember, small adjustments can make a big difference in your ride quality.
- Attach the bike pump to the Presta valve.
- Pump air into the tire if the pressure is low.
- Watch the pressure gauge as you pump.
- Press the valve core to release air if the pressure is high.
- Make small adjustments to reach the correct pressure.
Inflating or deflating the tire is a key part of bike maintenance. Knowing how to connect pressure gauge to presta valve is just the beginning. You also need to know how to adjust the pressure. The right pressure makes your bike faster and more comfortable. It also helps prevent flats. Always use a good quality bike pump. A pump with a built-in gauge is very helpful. Take your time and make small adjustments. Over-inflating or under-inflating can damage your tires. Proper inflation is essential for a safe and enjoyable ride. Keep your tires properly inflated, and you’ll be ready for any adventure.
Choosing the Right Bike Pump
Choosing the right bike pump can make a big difference. There are two main types of bike pumps: floor pumps and hand pumps. Floor pumps are larger and more efficient. They make it easier to inflate tires to high pressures. Hand pumps are smaller and more portable. They’re great for carrying with you on rides in case of a flat. When choosing a pump, look for one that’s compatible with Presta valves. Some pumps have a switch that allows you to use them with both Presta and Schrader valves. A good pump will make tire inflation much easier.
How to Use a Bike Pump Correctly
How do you use a bike pump correctly? First, make sure the pump head is securely attached to the valve. If it’s loose, air will leak out. For floor pumps, place your feet on the base of the pump. Then, pump the handle up and down. Use smooth, steady strokes. Watch the pressure gauge as you pump. For hand pumps, hold the pump firmly and pump the handle in and out. It can take a bit longer to inflate a tire with a hand pump. Always double-check the pressure after you’re done pumping.
What to Do If the Pump Leaks
What should you do if the bike pump leaks air? First, check the connection between the pump head and the valve. Make sure it’s tight and secure. If it’s still leaking, the pump head might be worn out. Some pumps have replaceable parts. You can buy a new pump head and install it. If the pump itself is damaged, you might need to replace the entire pump. A leaking pump can make it difficult to inflate your tires properly. It’s important to have a pump that works well for safe and efficient riding.
Fun Fact or Stat: Some high-end bike pumps can inflate tires to over 200 psi!
Removing the Pressure Gauge
Once you’ve inflated or deflated your tire to the correct pressure, it’s time to remove the pressure gauge. If your gauge has a locking lever, flip it to release the connection. Then, gently pull the gauge straight off the valve. Be careful not to bend or damage the valve. After removing the gauge, tighten the small nut on the Presta valve. Turn it clockwise until it’s snug. This prevents air from leaking out. Finally, replace the valve cap. This protects the valve from dirt and damage. Now your tire is properly inflated and ready to go!
- Flip the locking lever if your gauge has one.
- Gently pull the gauge straight off the valve.
- Tighten the nut on the Presta valve.
- Replace the valve cap.
- Double-check the tire pressure.
Removing the pressure gauge properly is the final step. Knowing how to connect pressure gauge to presta valve also means knowing how to disconnect it safely. A gentle touch prevents damage to the valve. Tightening the nut is crucial to prevent air leaks. The valve cap keeps the valve clean and protected. A well-maintained valve will last longer and perform better. Always double-check the tire pressure after removing the gauge. This ensures that you’ve reached the correct pressure. Proper care and attention to detail will keep your tires in top condition. This makes your rides safer and more enjoyable.
Why Tighten the Valve Nut?
Why is it so important to tighten the valve nut after checking the pressure? The nut helps to seal the valve and prevent air from leaking out. If the nut is loose, air can escape, and your tire will slowly deflate. This can lead to a flat tire or a dangerous riding situation. Tightening the nut ensures that the valve is properly sealed. It also helps to protect the valve core from damage. A snug nut keeps your tires inflated and ready to ride. Always remember to tighten it after checking the pressure.
Why Use a Valve Cap?
Why should you use a valve cap on your Presta valve? The valve cap protects the valve from dirt, dust, and debris. These things can get into the valve and cause it to leak or malfunction. The cap also helps to prevent the valve core from being damaged. A simple plastic cap can extend the life of your valve and keep your tires properly inflated. Valve caps are inexpensive and easy to replace. It’s a small investment that can save you a lot of trouble in the long run. Always keep a valve cap on your Presta valve.
Checking Pressure After Removal
Should you check the tire pressure again after removing the gauge? It’s always a good idea to double-check. Sometimes, removing the gauge can cause a small amount of air to escape. This can lower the tire pressure slightly. Checking again ensures that you’ve reached the correct pressure. If the pressure is still too low, add a little more air. If it’s too high, release a bit more. A quick double-check can give you peace of mind. It also ensures that your tires are properly inflated for a safe and comfortable ride.
Fun Fact or Stat: Valve caps also come in different colors and materials, allowing you to personalize your bike!
Troubleshooting Common Issues
Sometimes, you might have trouble when you connect the pressure gauge to the Presta valve. The gauge might not fit properly. The valve might be stuck. You might not be able to get an accurate reading. Don’t worry! These problems are common and easy to fix. If the gauge doesn’t fit, make sure you’re using the right type. If the valve is stuck, gently use pliers to loosen it. If you can’t get an accurate reading, check the gauge for damage. With a little patience, you can overcome these issues. Keep practicing, and you’ll become a pro at checking your tire pressure.
- Make sure you’re using the correct gauge type.
- Gently use pliers to loosen a stuck valve.
- Check the gauge for damage if you can’t get a reading.
- Clean the valve and gauge if they’re dirty.
- Ask a bike shop for help if you’re stuck.
Troubleshooting common issues helps you maintain your bike tires effectively. Knowing how to connect pressure gauge to presta valve is important, but so is knowing how to solve problems. A little troubleshooting can save you time and frustration. If you encounter a problem, take a deep breath and try to identify the cause. Consult online resources or ask a bike shop for advice. With a little effort, you can overcome any challenge. Proper maintenance keeps your tires in good condition. This ensures a safe and enjoyable riding experience. Don’t be afraid to experiment and learn from your mistakes.
The Gauge Shows No Reading
What should you do if the pressure gauge shows no reading? First, make sure the gauge is properly attached to the valve. It should be snug and secure. If it’s loose, air might be leaking out. Next, check the gauge itself. Is the needle stuck? Does the gauge look damaged? If the gauge is broken, you’ll need to replace it. If the gauge seems to be working, the valve might be clogged. Try releasing some air to clear the clog. If none of these things work, take your bike to a shop for help.
The Gauge Shows an Incorrect Reading
What if the pressure gauge shows an incorrect reading? An incorrect reading can be caused by several things. The gauge might be faulty. The valve might be leaking. Or you might not be attaching the gauge properly. Try using a different gauge to see if you get the same reading. If the readings are different, the first gauge is probably faulty. If the valve is leaking, you’ll need to replace it. Make sure you’re attaching the gauge straight and tight to get an accurate reading. A reliable gauge is essential for proper tire maintenance.
The Valve is Bent or Damaged
What should you do if the Presta valve is bent or damaged? A bent valve can be difficult to use. It might be hard to attach a pump or gauge. A damaged valve can leak air. If the valve is slightly bent, you might be able to straighten it gently with pliers. Be very careful not to break it. If the valve is severely damaged, you’ll need to replace it. This involves replacing the entire inner tube. A damaged valve can be a safety hazard. It’s important to address it promptly.
| Issue | Possible Cause | Solution |
|---|---|---|
| Gauge Doesn’t Fit | Wrong Gauge Type | Use a Presta-Specific Gauge |
| Valve is Stuck | Inactivity | Gently Loosen with Pliers |
| No Gauge Reading | Faulty Gauge | Replace the Gauge |
| Incorrect Reading | Leaking Valve | Replace the Valve Core |
| Bent Valve | Accidental Damage | Replace the Inner Tube |
Fun Fact or Stat: Some modern bikes use tubeless tires, which require special valves and sealants!
Summary
Learning how to connect pressure gauge to presta valve is a simple yet important skill for any cyclist. Presta valves are common on many bikes, and understanding how to use them ensures proper tire inflation. This guide covered the steps from preparing the valve to attaching the gauge and reading the pressure. It also addressed common issues and troubleshooting tips. By following these instructions, you can maintain your bike tires effectively. This results in a smoother, safer, and more enjoyable riding experience.
Regularly checking your tire pressure extends the life of your tires and improves your bike’s performance. Remember to always tighten the valve nut and replace the valve cap after checking the pressure. With a little practice, you’ll become confident in your ability to maintain your bike tires. This knowledge empowers you to take care of your bike and enjoy countless miles of happy riding.
Conclusion
Knowing how to connect pressure gauge to presta valve is a key skill for bike owners. It helps keep tires at the right pressure. This makes rides safer and more fun. Follow the steps in this guide. You will easily check and adjust your tire pressure. Remember to take care of your valves and gauges. Happy biking!
Frequently Asked Questions
Question No 1: Why are Presta valves used on road bikes?
Answer: Presta valves are often used on road bikes because they are narrow and work well with thin rims. Road bikes often have high-pressure tires, and Presta valves seal very well at these high pressures. They are also lighter than Schrader valves, which can be an advantage for racing. Presta valves help road bikes maintain optimal performance and efficiency. Knowing how to connect pressure gauge to presta valve is important for keeping these tires in top shape.
Question No 2: Can I use a Schrader pump on a Presta valve?
Answer: No, you cannot directly use a Schrader pump on a Presta valve without an adapter. Schrader and Presta valves have different sizes and designs. An adapter allows you to connect a Schrader pump to a Presta valve. These adapters are small and inexpensive. They can be found at most bike shops. If you have both types of valves, consider getting a pump that works with both. This eliminates the need for an adapter. Remember, proper inflation is key to a smooth and safe ride.
Question No 3: How do I know what the correct tire pressure should be?
Answer: The correct tire pressure is usually printed on the sidewall of the tire. Look for a range in psi (pounds per square inch). This range tells you the minimum and maximum pressure for that tire. The ideal pressure depends on your weight, riding style, and the type of terrain. Start with the recommended range and adjust to your preference. Checking your tire pressure regularly ensures optimal performance and safety. Make sure you know how to connect pressure gauge to presta valve so you can easily check your tire pressure.
Question No 4: What happens if I over-inflate my tires?
Answer: Over-inflating your tires can be dangerous. It can make the ride harsh and uncomfortable. It can also increase the risk of a blowout. A blowout is when the tire suddenly bursts. This can cause you to lose control of the bike. Always stay within the recommended pressure range. Use a pressure gauge to check the pressure. If you accidentally over-inflate, release some air until you reach the correct pressure. Safety should always be your top priority.
Question No 5: What happens if I under-inflate my tires?
Answer: Under-inflating your tires can also be problematic. It can make the bike feel slow and sluggish. It can also increase the risk of a flat tire. When the tire is under-inflated, it’s more likely to pinch the inner tube against the rim. This is called a pinch flat. Under-inflation can also damage the tire itself. Always keep your tires inflated to the recommended pressure. Regularly checking your tire pressure is crucial for avoiding these problems. Using a pressure gauge is the best way to ensure correct inflation. Knowing how to connect pressure gauge to presta valve helps prevent under-inflation.
Question No 6: How often should I check my tire pressure?
Answer: You should check your tire pressure at least once a week if you ride regularly. If you only ride occasionally, check it before each ride. Tire pressure can change over time, even when the bike is not in use. Temperature changes can also affect the pressure. Regularly checking ensures that your tires are properly inflated. This keeps you safe and your bike working well. Knowing how to connect pressure gauge to presta valve makes it easy to check regularly.


