
Easy: How to Use Hand Pump for Tubeless Mountain Bike
Using a hand pump for a mountain bike tubeless setup is totally doable! It might take a bit more effort than using a compressor, but with the right technique, you can seat those tubeless tires. Make sure your tire bead is prepped, insert the valve core, and pump quickly and steadily. You’ll hear that satisfying pop when the tire seats!
Setting up tubeless tires on your mountain bike can feel like a big step up in bike maintenance. Many people think you absolutely need an air compressor, but that’s not always true! A good hand pump, some patience, and the right technique can get the job done. It might take a little more elbow grease, but it’s a great way to save money and learn a new skill.
In this guide, I’ll walk you through each step of setting up your mountain bike tubeless tires with a hand pump. We’ll cover everything from prepping your rims and tires to getting that perfect seal. Plus, I’ll share some tips and tricks I’ve learned over the years to make the process smoother. Let’s get started!
What You’ll Need
Before we dive into the steps, let’s make sure you have everything you need. Having all your tools and supplies ready will make the process much smoother.
- Mountain bike wheels and tubeless-ready tires: Ensure both are compatible for tubeless setups.
- Tubeless sealant: This liquid fills small punctures and creates an airtight seal.
- Tubeless valves: These replace your standard tube valves.
- Rim tape: To seal the spoke holes and create an airtight rim bed.
- Hand pump: A high-volume pump is preferable for seating tubeless tires.
- Tire levers: For mounting and removing tires.
- Valve core removal tool: To remove the valve core for faster inflation.
- Soap and water or tire sealant lubricant: Helps the tire bead seat properly.
- Rag or paper towels: For cleanup.
Step-by-Step Guide: Tubeless Setup with a Hand Pump

Follow these steps to successfully set up your mountain bike tubeless tires using a hand pump. Each step is broken down to make it easy to follow, even if you’re new to tubeless setups.
Step 1: Prepare the Rim
First, you need to prep your rim. This involves making sure the rim bed is clean and properly sealed with rim tape.
- Clean the rim: Use a clean rag to wipe down the inside of the rim. Remove any dirt, debris, or old adhesive.
- Apply rim tape:
- Start opposite the valve hole.
- Apply the tape carefully, ensuring it’s centered and smooth.
- Overlap the tape by a few inches when you get back to the starting point.
- Press the tape firmly onto the rim, making sure there are no air bubbles or creases.
- Use a sharp object (like a small screwdriver or awl) to poke a hole through the tape at the valve hole.
Step 2: Install the Tubeless Valve
Next, you’ll install the tubeless valve. This creates an airtight connection between the tire and the rim.
- Insert the valve: Place the valve through the hole in the rim tape.
- Secure the valve: Tighten the valve nut by hand until it’s snug. Avoid overtightening, which can damage the rim.
Step 3: Mount One Side of the Tire
Now, mount one side of the tire onto the rim. This is similar to mounting a regular tube tire.
- Mount the first bead: Use your hands to work one side of the tire bead over the rim. Start opposite the valve and work your way around.
- Use tire levers if needed: If the tire is tight, use tire levers to carefully pry the last section of the bead over the rim. Be careful not to pinch the rim tape or tube (if you were using one).
Step 4: Add Tubeless Sealant
With one side of the tire mounted, it’s time to add the tubeless sealant. This is what seals small punctures and keeps your tires inflated.
- Shake the sealant: Make sure the sealant is well mixed by shaking the bottle thoroughly.
- Add sealant through the valve:
- Remove the valve core using the valve core removal tool.
- Attach the sealant bottle or syringe to the valve stem.
- Add the recommended amount of sealant (usually between 60-120ml for mountain bike tires, but check the sealant instructions).
- Reinstall the valve core: Screw the valve core back into the valve stem and tighten it with the valve core removal tool.
Step 5: Mount the Second Side of the Tire
Now, mount the second side of the tire. This can be a bit tricky, but patience is key.
- Mount the second bead: Start opposite the valve and use your hands to work the tire bead over the rim.
- Use tire levers carefully: If the tire is tight, use tire levers to carefully pry the last section of the bead over the rim. Be extra careful not to pinch the rim tape or damage the valve.
- Check the tire seating: Make sure the tire bead is evenly seated around the rim.
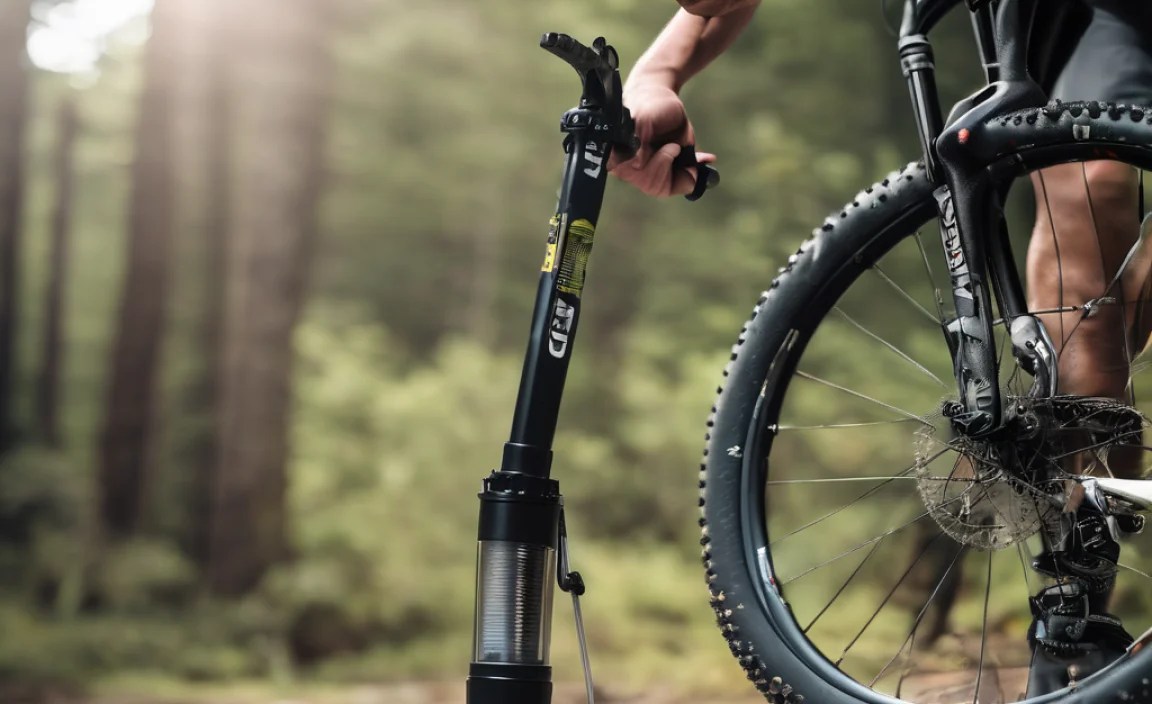
Step 6: Inflate the Tire with a Hand Pump
This is where the hand pump comes in. You’ll need to pump quickly and steadily to seat the tire beads against the rim.
- Position the wheel: Place the wheel on the ground with the valve at the top.
- Pump vigorously: Start pumping quickly and steadily. The goal is to get a quick burst of air into the tire to push the beads against the rim.
- Listen for the “pop”: As you pump, listen for the “pop” sound as the tire beads seat against the rim. You might hear several pops as the tire seats completely.
- If it doesn’t seat:
- If the tire doesn’t seat, try applying soapy water or tire sealant lubricant to the tire beads. This can help them slide into place.
- You can also try using a strap around the circumference of the tire to push the beads outward.
- Remove the valve core for increased airflow, and reinstall once seated.
Step 7: Check the Seal and Adjust Pressure
Once the tire is seated, check for any leaks and adjust the tire pressure.
- Check for leaks: Inspect the tire and rim for any leaks. Pay close attention to the valve area and the tire beads.
- Shake the wheel: Shake the wheel to distribute the sealant and help seal any small leaks.
- Adjust tire pressure: Use your hand pump to adjust the tire pressure to your desired level. Mountain bike tire pressure typically ranges from 20-35 PSI, depending on your weight, riding style, and the terrain.
Step 8: Final Inspection and Ride
Before you hit the trails, give everything one last check.
- Inspect the tire: Look for any cuts, bulges, or other damage.
- Check the rim tape: Ensure the rim tape is still properly seated and there are no air bubbles.
- Go for a short ride: Test the tires on a short ride to make sure everything is working properly. Listen for any unusual noises or vibrations.
Troubleshooting Tips
Sometimes, things don’t go as planned. Here are some common issues and how to fix them:
- Tire won’t seat:
- Apply soapy water or tire sealant lubricant to the tire beads.
- Use a strap around the circumference of the tire.
- Remove the valve core for increased airflow.
- Make sure the rim tape is properly installed and sealing the spoke holes.
- Air leaking from the valve:
- Make sure the valve core is tightened properly.
- Check the valve stem for damage.
- Ensure the valve is compatible with your rim.
- Air leaking from the tire bead:
- Shake the wheel to distribute the sealant.
- Add more sealant if necessary.
- Check the tire for cuts or damage.
Choosing the Right Hand Pump

Not all hand pumps are created equal. For tubeless setups, you’ll want a pump that can deliver a high volume of air quickly.
| Type of Pump | Pros | Cons |
|---|---|---|
| High-Volume Floor Pump | Efficient, stable, and designed to move a lot of air. | Can be expensive and not very portable. |
| Standard Floor Pump | More affordable and versatile for everyday use. | May require more effort to seat tubeless tires. |
| Mini Pump | Compact and portable for on-the-trail use. | Not ideal for seating tubeless tires due to low air volume. |
Look for pumps with features like a large barrel, a stable base, and a pressure gauge. Some pumps are specifically designed for tubeless setups and have a “boost” feature that delivers a large burst of air.
Why Tubeless? Benefits of Tubeless Tires

Switching to tubeless tires offers several advantages for mountain bikers. Here are some key benefits:
- Fewer flats: Tubeless tires are less prone to pinch flats because there’s no tube to get pinched between the tire and the rim.
- Lower tire pressure: You can run lower tire pressures with tubeless tires, which improves traction and comfort.
- Better rolling resistance: Tubeless tires can have lower rolling resistance compared to tube-type tires, which can make you faster.
- Self-sealing: The sealant inside tubeless tires can seal small punctures automatically, so you can keep riding without having to stop and fix a flat.
Essential Tips for Success
Here are a few extra tips to help you succeed with your tubeless setup:
- Start with clean components: Make sure your rims and tires are clean and free of debris before you start.
- Use fresh sealant: Old sealant can dry out and become ineffective. Replace your sealant every few months for optimal performance.
- Check your rim tape regularly: Inspect your rim tape for damage or air bubbles. Replace it if necessary.
- Practice makes perfect: Don’t get discouraged if you don’t get it right the first time. Keep practicing, and you’ll get the hang of it.
Maintaining Your Tubeless Setup
Once you’ve set up your tubeless tires, it’s important to maintain them properly to ensure they continue to perform well.
- Check tire pressure regularly: Use a reliable pressure gauge to check your tire pressure before each ride.
- Inspect tires for damage: Look for cuts, bulges, or other damage. Replace your tires if necessary.
- Replenish sealant: Add sealant every few months to maintain the proper level and ensure it remains effective.
- Clean and inspect valves: Check your tubeless valves for clogs or damage. Clean them as needed and replace them if necessary.
Common Mistakes to Avoid
Here are some common mistakes people make when setting up tubeless tires, and how to avoid them:
| Mistake | Solution |
|---|---|
| Using the wrong rim tape | Use tubeless-specific rim tape that is the correct width for your rims. |
| Not cleaning the rim properly | Clean the rim thoroughly with a clean rag and degreaser before applying rim tape. |
| Using old or dried-out sealant | Use fresh sealant and replace it every few months. |
| Overtightening the valve nut | Tighten the valve nut by hand until it’s snug, but avoid overtightening. |
| Using too much or too little sealant | Follow the sealant manufacturer’s recommendations for the correct amount. |
FAQ: Tubeless Setup with a Hand Pump
Here are some frequently asked questions about setting up tubeless tires with a hand pump.
Can I really use a hand pump for tubeless setup?
Yes, you absolutely can! While an air compressor makes it easier, a high-volume hand pump combined with the right technique will get the job done. It might require a bit more effort and pumping speed, but it’s a viable option.
What kind of hand pump is best for tubeless tires?
A high-volume floor pump is your best bet. Look for a pump designed to move a lot of air quickly. Some pumps even have a “tubeless” setting for a quick burst of air to help seat the tire beads.
How much sealant should I use?
The amount of sealant depends on your tire size. For mountain bike tires, typically 60-120ml is recommended, but always check the sealant manufacturer’s instructions for the most accurate amount.
What if the tire won’t seat on the rim?
If the tire won’t seat, try these tips:
- Apply soapy water or tire sealant lubricant to the tire beads.
- Remove the valve core for increased airflow.
- Use a strap around the circumference of the tire to push the beads outward.
How often should I replace the sealant?
You should replace the sealant every 3-6 months, depending on the climate and how often you ride. If you notice the sealant drying out or not sealing punctures as well, it’s time for a refresh.
Can I use regular rim tape for tubeless?
No, you should use tubeless-specific rim tape. Regular rim tape may not create an airtight seal and can lead to leaks. Tubeless rim tape is designed to be airtight and durable.
What pressure should I run in my tubeless tires?
Tire pressure depends on your weight, riding style, and the terrain. A good starting point for mountain bike tires is between 20-35 PSI. Experiment to find the pressure that works best for you.
Conclusion
Setting up tubeless tires with a hand pump might seem challenging at first, but with the right tools, a little patience, and these step-by-step instructions, you can definitely do it yourself. Not only will you save money, but you’ll also gain a valuable skill that will help you maintain your bike and enjoy your rides even more. Remember to take your time, follow the steps carefully, and don’t be afraid to experiment. Happy trails!


