
How to Repair Stuck Piston in Hand Pump: Easy Fix!
Quick Summary:
A stuck piston in your hand pump is usually due to dried-up grease or debris. To fix it, start by disassembling the pump. Clean the piston and cylinder with a degreaser, then apply fresh grease. Reassemble the pump carefully, making sure all parts are aligned. This should restore smooth pumping action.
Is your trusty hand pump giving you grief? A stuck piston can turn a simple tire inflation into a frustrating workout. Don’t worry; you’re not alone! This is a common problem for cyclists, whether you’re a daily commuter or a weekend warrior. The good news is, you can often fix it yourself with a few simple steps.
In this guide, I’ll walk you through the process of diagnosing and repairing a stuck piston in your hand pump. We’ll cover everything from identifying the problem to cleaning, lubricating, and reassembling your pump. With a little patience and some basic tools, you can get your pump working like new again. Let’s get started!
What You’ll Need

Before we dive into the repair process, let’s gather the necessary tools and materials. Having everything on hand will make the job smoother and more efficient.
- Wrench or Pliers: For disassembling the pump.
- Screwdrivers: Both Phillips head and flathead may be needed.
- Degreaser: To clean the piston and cylinder.
- Grease: Specifically, a bicycle-specific grease is ideal.
- Clean Rags: For wiping away dirt and excess grease.
- Small Brush: An old toothbrush works great for cleaning tight spaces.
- Safety Glasses: To protect your eyes from debris.
- Gloves: To keep your hands clean.
Step-by-Step Guide to Repairing a Stuck Piston

Now that you have your tools and materials ready, let’s get to work. Follow these steps carefully to diagnose and repair your hand pump.
Step 1: Identify the Problem
First, confirm that the piston is indeed stuck. Try pumping the handle. If it moves with excessive resistance or not at all, the piston is likely the culprit. Listen for any unusual sounds, such as grinding or squeaking, which can indicate a lack of lubrication or debris.
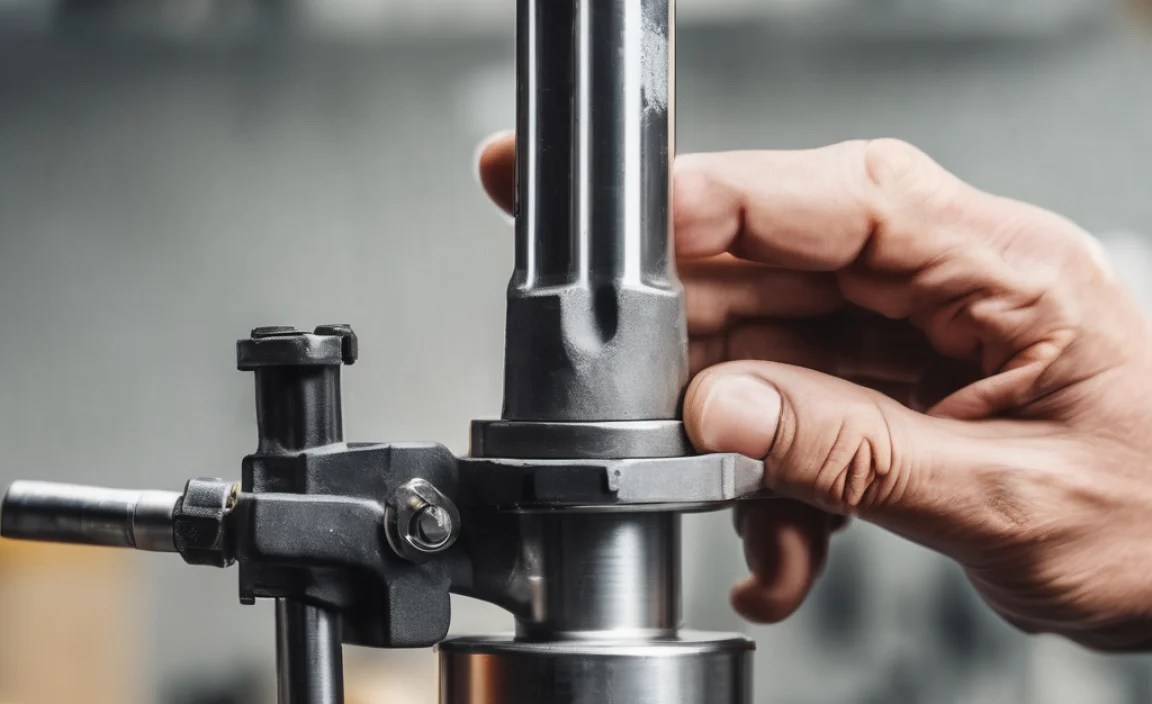
Step 2: Disassemble the Pump
Carefully disassemble the pump. This usually involves removing screws or bolts that hold the pump body together. Pay attention to the order in which you remove the parts, as this will help with reassembly. It’s a good idea to take pictures as you go, especially if you’re not familiar with the pump’s construction.
Safety Note: Be careful when disassembling the pump, as some parts may be under pressure. Wear safety glasses to protect your eyes from any flying debris.
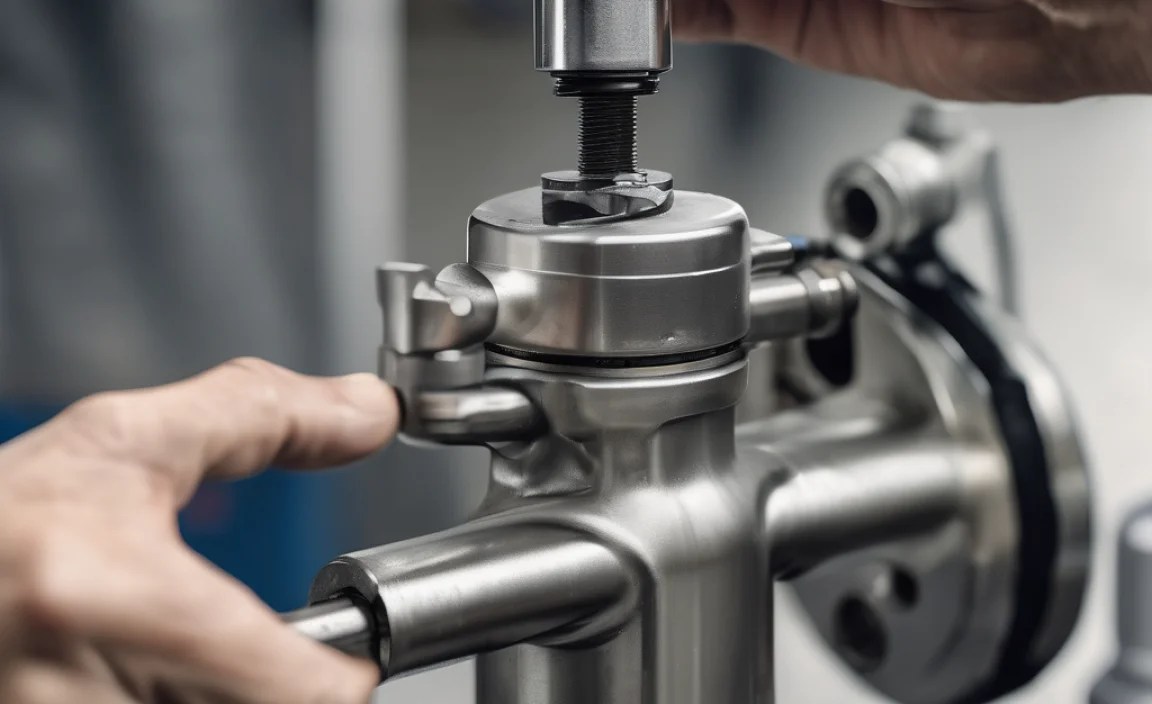
Step 3: Inspect the Piston and Cylinder
Once the pump is disassembled, examine the piston and cylinder for signs of dirt, grime, or damage. Look for scratches, cracks, or excessive wear. If you find any significant damage, the piston or cylinder may need to be replaced. However, in most cases, cleaning and lubrication will solve the problem.
Step 4: Clean the Piston and Cylinder
Use a degreaser and a small brush to thoroughly clean the piston and cylinder. Remove all traces of old grease, dirt, and debris. Pay particular attention to any grooves or channels in the piston, as these can accumulate dirt. Rinse the parts with water and dry them thoroughly with a clean rag.
Step 5: Lubricate the Piston and Cylinder
Apply a thin, even layer of bicycle-specific grease to the piston and the inside of the cylinder. Be careful not to use too much grease, as this can attract dirt and cause the problem to recur. A little goes a long way. Make sure the grease is evenly distributed to ensure smooth operation.
Step 6: Reassemble the Pump
Carefully reassemble the pump in the reverse order of disassembly. Make sure all parts are properly aligned and securely fastened. If you took pictures during disassembly, use them as a reference. Tighten all screws and bolts to the correct torque to prevent leaks or damage.
Step 7: Test the Pump
After reassembly, test the pump to make sure the piston moves smoothly and freely. If the pump still feels stiff or sticky, double-check that all parts are properly aligned and lubricated. You may need to disassemble and reassemble the pump again to correct any issues.
Troubleshooting Common Issues
Even after following these steps, you might encounter some problems. Here are a few common issues and how to address them:
- Pump Still Feels Stiff: This could be due to insufficient lubrication or misalignment of parts. Disassemble the pump again, apply more grease, and ensure all parts are properly aligned.
- Pump Leaks Air: This could be due to worn-out seals or loose connections. Inspect the seals for damage and replace them if necessary. Tighten all connections to prevent air leaks.
- Piston is Damaged: If the piston is cracked or severely worn, it will need to be replaced. Contact the pump manufacturer or a local bike shop to purchase a replacement piston.
Preventive Maintenance Tips
To prevent the piston from sticking in the future, follow these preventive maintenance tips:
- Regular Cleaning: Clean your pump regularly to remove dirt and debris.
- Proper Lubrication: Apply fresh grease to the piston and cylinder every few months.
- Proper Storage: Store your pump in a clean, dry place to prevent corrosion and damage.
Choosing the Right Grease

Using the right type of grease is crucial for maintaining your hand pump. Here’s a comparison of different types of grease and their suitability for pump maintenance:
| Type of Grease | Pros | Cons | Suitability for Hand Pumps |
|---|---|---|---|
| Lithium Grease | Good water resistance, widely available | Can attract dirt, not ideal for high-pressure applications | Acceptable for general use |
| Silicone Grease | Excellent water resistance, safe for rubber and plastic | May not provide the best lubrication for metal parts | Good for pumps with rubber seals |
| Bicycle-Specific Grease | Formulated for bicycle components, excellent lubrication and water resistance | Can be more expensive than other types of grease | Best choice for hand pumps |
| Teflon Grease | Low friction, good for high-pressure applications | Can be expensive | Suitable for high-end pumps |
Hand Pump Types and Their Maintenance Needs
Different types of hand pumps may have slightly different maintenance needs. Here’s a quick overview:
- Floor Pumps: These pumps are generally more durable and require less frequent maintenance. However, the piston can still become stuck due to dirt or lack of lubrication.
- Mini Pumps: These pumps are more compact and portable but may be more prone to dirt and damage. Regular cleaning and lubrication are essential.
- Frame-Mounted Pumps: These pumps are attached to the bike frame and can be exposed to the elements. Regular maintenance is crucial to prevent corrosion and damage.
Advanced Techniques for Stubborn Pistons
Sometimes, a stuck piston may require more than just cleaning and lubrication. Here are some advanced techniques to try:
- Heat Treatment: Applying gentle heat to the pump body can help loosen a stuck piston. Use a heat gun or hair dryer, but be careful not to overheat the pump.
- Penetrating Oil: Apply a small amount of penetrating oil to the piston and let it soak for a few hours. This can help loosen stubborn dirt and grime.
- Mechanical Assistance: Use a rubber mallet or a block of wood to gently tap the piston from the outside. Be careful not to damage the pump.
When to Replace Your Hand Pump
In some cases, the damage to your hand pump may be too severe to repair. Here are some signs that it’s time to replace your pump:
- Cracked or Broken Parts: If the pump body or piston is cracked or broken, it’s usually more cost-effective to replace the pump.
- Excessive Wear: If the piston or cylinder is severely worn, the pump will not function properly.
- Repeated Failures: If you’re constantly repairing the same pump, it may be time to invest in a new one.
Recommended Hand Pumps
If you decide to replace your hand pump, here are a few highly recommended models:
- Lezyne Floor Drive: Known for its durability and efficiency.
- Topeak Road Morph G: A versatile mini-pump with a built-in gauge.
- Park Tool PMP-5: A reliable and affordable mini-pump.
Where to Buy Bike Pumps and Repair Kits
You can find bike pumps, repair kits, and replacement parts at most local bike shops or online retailers. Here are a few popular options:
- REI: Offers a wide selection of bike pumps and accessories.
- Amazon: A convenient online marketplace with a variety of options.
- BikeTiresDirect: Specializes in bike tires, pumps, and accessories.
FAQ: Repairing a Stuck Piston in a Hand Pump
Here are some frequently asked questions about repairing a stuck piston in a hand pump:
Q: Why is my hand pump piston stuck?
A: A stuck piston is usually caused by dried-up grease, dirt, or debris inside the pump cylinder. Over time, these contaminants can accumulate and cause the piston to bind.
Q: Can I use any type of grease for my hand pump?
A: It’s best to use bicycle-specific grease, as it’s formulated to provide excellent lubrication and water resistance. Lithium grease or silicone grease can also be used, but they may not be as effective.
Q: How often should I lubricate my hand pump?
A: You should lubricate your hand pump every few months, or whenever you notice the piston becoming stiff or difficult to move. Regular lubrication will help prevent the piston from sticking.
Q: What if cleaning and lubrication don’t fix the problem?
A: If cleaning and lubrication don’t solve the issue, the piston or cylinder may be damaged and need to be replaced. Contact the pump manufacturer or a local bike shop for assistance.
Q: Is it worth repairing a hand pump, or should I just buy a new one?
A: In many cases, repairing a hand pump is a simple and cost-effective solution. However, if the pump is severely damaged or worn, it may be more practical to replace it.
Q: Can I prevent my hand pump from getting stuck in the first place?
A: Yes, regular maintenance, including cleaning and lubrication, can help prevent the piston from sticking. Storing the pump in a clean, dry place will also help prolong its lifespan.
Q: What tools do I need to repair a stuck piston?
A: You’ll typically need a wrench or pliers, screwdrivers, degreaser, grease, clean rags, a small brush, safety glasses, and gloves. Having these tools on hand will make the repair process smoother.
Conclusion
Repairing a stuck piston in a hand pump is a straightforward task that can save you money and keep your tires properly inflated. By following these steps, you can diagnose the problem, clean and lubricate the piston, and reassemble your pump with confidence. Remember to perform regular maintenance to prevent future issues and keep your pump working like new. Happy cycling!


