
How to Replace Leather Cup in Hand Pump: Easy Guide
Replacing the leather cup in your hand pump is a straightforward way to restore its pumping power. This involves disassembling the pump, removing the old, worn-out leather cup, and installing a new one. With a few simple tools and these instructions, you can easily get your pump working like new again!
Is your trusty hand pump struggling to inflate your tires? Don’t toss it out just yet! A common culprit for a weak or ineffective pump is a worn-out leather cup. This small part is essential for creating the pressure needed to pump air. Over time, the leather can dry out, crack, or simply wear down. The good news is that replacing it is a simple and cost-effective fix. This guide will walk you through each step, so you can breathe new life into your pump and get back on the road quickly. Let’s get started!
Understanding the Leather Cup in Your Hand Pump

The leather cup is the heart of many hand pumps, especially older or high-quality models. It acts as a piston, creating a seal against the pump cylinder wall. As you move the pump handle, the leather cup slides up and down, drawing air in and forcing it into your tire. Understanding its function helps you appreciate why replacement is sometimes necessary.
Why Leather Cups Wear Out
Several factors contribute to the wear and tear of leather cups:
- Friction: Constant sliding against the cylinder wall causes friction, gradually wearing down the leather.
- Drying Out: Leather needs moisture to stay supple. Over time, it can dry out and become brittle, leading to cracks and loss of sealing ability.
- Dirt and Debris: Small particles can get trapped between the leather and the cylinder wall, accelerating wear and tear.
- Infrequent Use: Ironically, pumps that sit unused for long periods can also suffer, as the leather dries out and loses its shape.
Signs You Need to Replace Your Leather Cup
Here are some telltale signs that your leather cup needs replacing:
- Reduced Pumping Efficiency: You have to pump more times to reach the desired pressure.
- Loss of Pressure: The pump loses pressure between strokes, making it difficult to inflate the tire.
- Slipping Sensation: You feel a noticeable slip or lack of resistance as you push the pump handle.
- Visible Damage: You can see cracks, tears, or excessive wear on the leather cup itself.
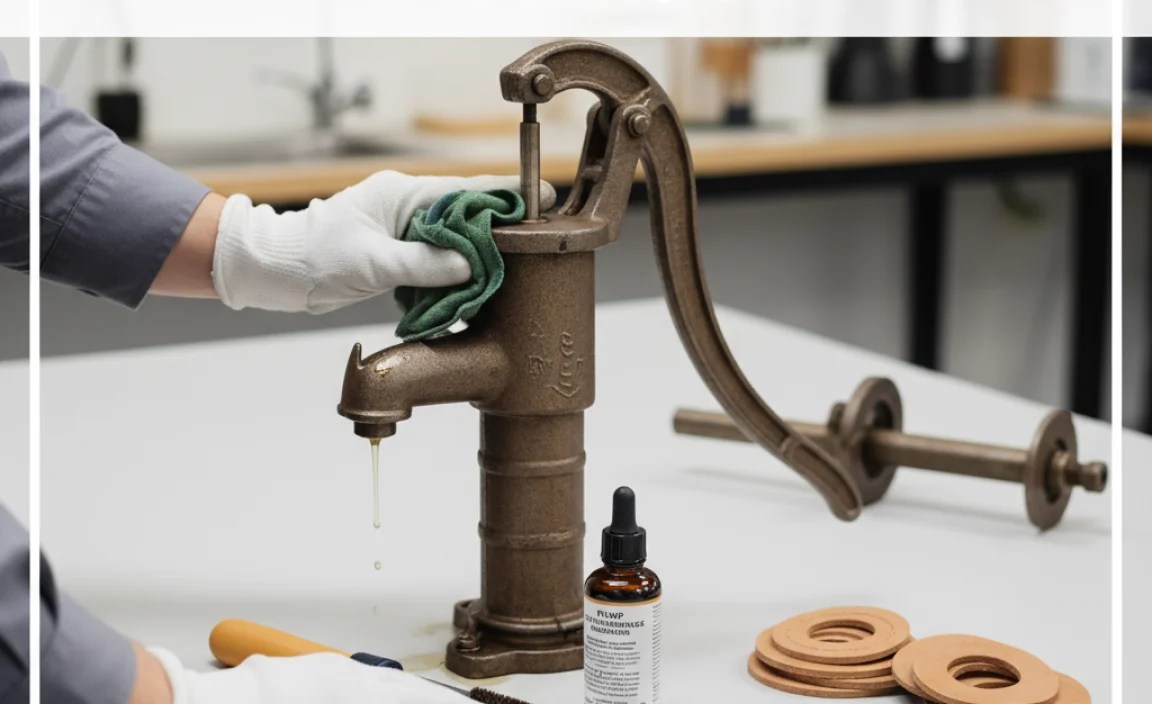
Tools and Materials You’ll Need

Before you begin, gather the necessary tools and materials. Having everything on hand will make the process smoother and more efficient.
- New Leather Cup: Purchase a replacement leather cup that is the correct size for your pump. You can usually find these at bike shops or online retailers.
- Pump Oil or Leather Conditioner: This will help to keep the new leather cup supple and extend its lifespan. Neatsfoot oil is a popular choice.
- Wrench or Pliers: You’ll need these to disassemble the pump. The size will depend on your specific pump model.
- Screwdrivers: Both flathead and Phillips head screwdrivers may be needed, depending on the pump’s construction.
- Rag or Shop Towel: For cleaning parts and wiping away excess oil.
- Small Container: To soak the leather cup in oil.
- Optional: Pick or small flat tool: To remove the old leather cup if it is stuck.
Step-by-Step Guide to Replacing the Leather Cup

Now, let’s dive into the step-by-step process of replacing the leather cup. Follow these instructions carefully, and you’ll have your pump working like new in no time.
Step 1: Disassemble the Pump
Carefully take apart your hand pump. This usually involves unscrewing the base, handle, and any other connecting parts. Pay attention to how the parts fit together, as you’ll need to reassemble them later. It can be helpful to take photos as you disassemble the pump.
- Remove the Handle: Most pumps have a handle that unscrews or is held in place by a bolt or screw. Remove this first.
- Detach the Cylinder: The cylinder is the main body of the pump. It may be threaded or held in place by screws. Unscrew or remove the screws to detach it from the base.
- Expose the Piston Assembly: Once the cylinder is removed, you should see the piston assembly, which includes the leather cup.
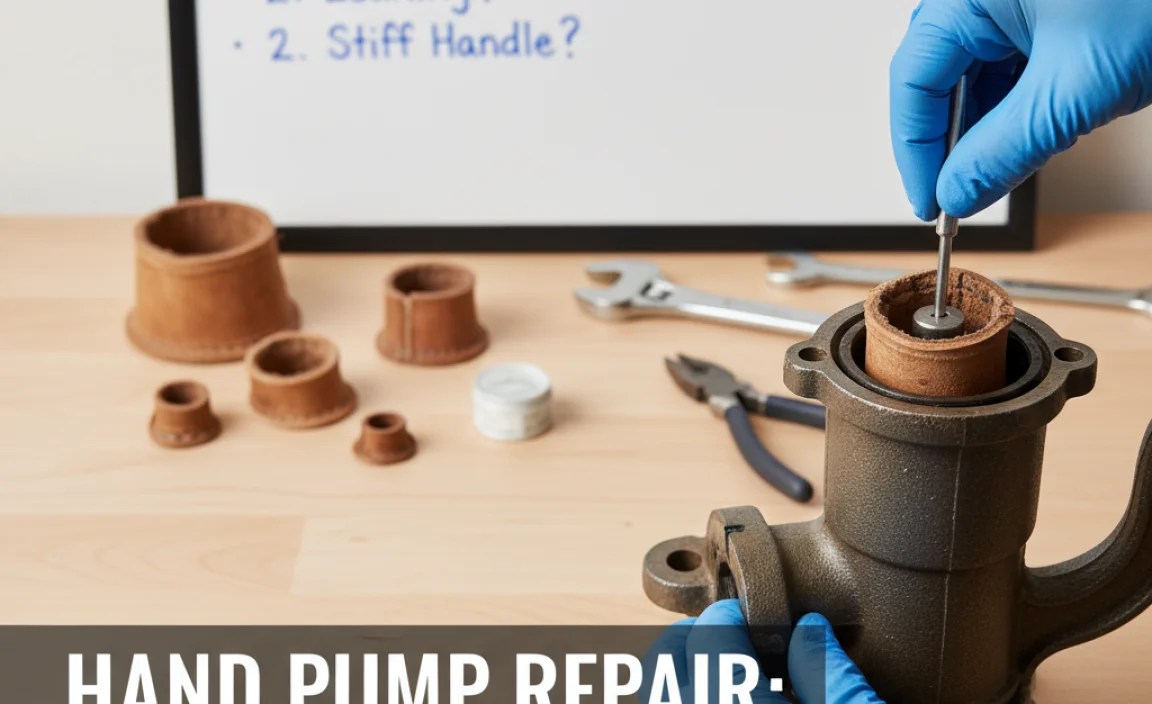
Step 2: Remove the Old Leather Cup
Once you’ve disassembled the pump and located the leather cup, carefully remove the old one. Depending on how it’s attached, this may involve unscrewing a nut or simply pulling it off.
- Identify the Attachment Method: The leather cup is usually held in place by a nut, screw, or a retaining clip. Examine the assembly to determine how it’s attached.
- Loosen or Remove the Fastener: Use the appropriate wrench or screwdriver to loosen or remove the fastener holding the leather cup in place.
- Remove the Old Cup: Gently pull the old leather cup off the piston. If it’s stuck, use a small pick or flathead screwdriver to carefully pry it loose. Be careful not to damage the piston.
- Clean the Piston: Once the old cup is removed, clean the piston with a rag to remove any dirt or debris.
Step 3: Prepare the New Leather Cup
Before installing the new leather cup, it’s essential to prepare it properly. Soaking it in oil will make it more supple and ensure a good seal.
- Soak the Leather Cup: Place the new leather cup in a small container and cover it with pump oil or leather conditioner. Let it soak for at least 15-30 minutes. This will soften the leather and help it conform to the cylinder wall.
- Wipe Off Excess Oil: After soaking, remove the leather cup from the oil and wipe off any excess with a clean rag. You want it to be lubricated, but not dripping.
Step 4: Install the New Leather Cup
Now, it’s time to install the new leather cup onto the piston. Make sure it’s properly seated and securely fastened.
- Position the Cup: Place the new leather cup onto the piston, ensuring it’s facing the correct direction. The open side of the cup should face towards the direction of air flow (usually towards the valve).
- Secure the Cup: Reattach the nut, screw, or retaining clip that holds the leather cup in place. Tighten it securely, but be careful not to overtighten and damage the leather.
- Check the Fit: Make sure the leather cup is properly seated and moves freely on the piston.
Step 5: Reassemble the Pump
With the new leather cup installed, it’s time to reassemble the pump. Carefully put all the parts back together in the reverse order of disassembly.
- Reattach the Cylinder: Slide the cylinder back onto the piston assembly and secure it with the screws or threads. Make sure it’s properly aligned.
- Reattach the Handle: Screw or bolt the handle back onto the pump. Tighten it securely.
- Test the Pump: Before using the pump, test it to make sure it’s working properly. You should feel a good amount of resistance as you push the handle.
Step 6: Test and Adjust
After reassembling the pump, test it to ensure it’s working correctly. If you notice any issues, make necessary adjustments.
- Inflate a Tire: Connect the pump to a tire and try inflating it. Check for leaks or loss of pressure.
- Listen for Air Leaks: Pay attention to any hissing sounds that might indicate air leaks. If you hear any, check the connections and make sure everything is properly tightened.
- Adjust as Needed: If the pump is not working efficiently, you may need to adjust the tension of the leather cup or lubricate the cylinder wall.
Tips for Maintaining Your Hand Pump
To keep your hand pump in good working condition and extend the life of the leather cup, follow these maintenance tips:
- Regularly Lubricate the Leather Cup: Apply a few drops of pump oil or leather conditioner to the leather cup every few months. This will keep it supple and prevent it from drying out.
- Store the Pump Properly: Store the pump in a cool, dry place away from direct sunlight. This will help prevent the leather from drying out and cracking.
- Clean the Pump Regularly: Wipe down the pump with a clean rag to remove any dirt or debris. This will prevent particles from getting trapped between the leather and the cylinder wall.
- Replace the Leather Cup as Needed: Even with proper maintenance, the leather cup will eventually wear out. Replace it when you notice a decrease in pumping efficiency or visible damage.
Troubleshooting Common Issues
Even with careful attention, you might encounter some issues during the replacement process. Here are some common problems and how to troubleshoot them:
| Issue | Possible Cause | Solution |
|---|---|---|
| Pump loses pressure quickly | Leather cup not sealing properly | Ensure the leather cup is properly soaked in oil, correctly installed, and the right size. |
| Pump is hard to push | Leather cup too tight or dry | Apply more lubricant to the leather cup and cylinder wall. Make sure the cup is not overtightened. |
| Air leaks from the pump | Loose connections | Check all connections and tighten them securely. |
| New leather cup doesn’t fit | Incorrect size | Ensure the replacement leather cup matches the original size and specifications for your pump model. |
Choosing the Right Replacement Leather Cup
Selecting the correct replacement leather cup is crucial for ensuring your pump works efficiently. Here’s what to consider:
- Size: Measure the diameter of the old leather cup or consult your pump’s manual to determine the correct size.
- Material: Opt for high-quality leather that is durable and resistant to wear and tear.
- Compatibility: Ensure the replacement cup is compatible with your specific pump model. Some pumps require specialized leather cups.
Benefits of Replacing the Leather Cup Yourself
While you could take your pump to a bike shop for repair, there are several benefits to replacing the leather cup yourself:
- Cost Savings: Replacing the leather cup yourself is much cheaper than paying a bike shop for labor.
- Convenience: You can do it at your own pace and on your own schedule.
- Familiarity with Your Pump: You’ll gain a better understanding of how your pump works, making future maintenance easier.
- Satisfaction: There’s a sense of accomplishment that comes with fixing something yourself.
Alternatives to Leather Cups
While leather cups are common, some pumps use alternative materials for their piston seals. These include:
- Rubber: Rubber seals are less prone to drying out but may not last as long as leather.
- Synthetic Materials: Some pumps use synthetic materials that offer a balance of durability and flexibility.
If your pump originally came with a non-leather seal, consider replacing it with the same type of material.
Cost Comparison: DIY vs. Professional Repair
Let’s break down the cost comparison between replacing the leather cup yourself and taking it to a professional:
| Option | Cost | Pros | Cons |
|---|---|---|---|
| DIY Replacement | $5-$20 (for the leather cup and oil) | Cost-effective, convenient, learn about your pump | Requires some mechanical skill, potential for mistakes |
| Professional Repair | $20-$50 (labor and parts) | Guaranteed quality, saves time and effort | More expensive, less convenient |
External Resources for Bike Pump Maintenance
For more in-depth information on bike pump maintenance and repair, check out these external resources:
- Park Tool: Park Tool Repair Help – Offers detailed guides and videos on various bike maintenance topics.
- REI Expert Advice: REI Bike Maintenance Tips – Provides helpful articles and tips for keeping your bike in top condition.
FAQ: Replacing Leather Cup in Hand Pump
Q1: How often should I replace the leather cup in my hand pump?
A1: It depends on how frequently you use your pump and the conditions it’s exposed to. As a general rule, inspect the leather cup every 6-12 months and replace it when you notice a decrease in pumping efficiency or visible damage.
Q2: Can I use any type of oil to lubricate the leather cup?
A2: No, it’s best to use pump oil or leather conditioner specifically designed for this purpose. Avoid using petroleum-based oils, as they can damage the leather.
Q3: What if I can’t find a replacement leather cup for my specific pump model?
A3: Try contacting the pump manufacturer or a specialized bike parts supplier. You may also be able to find a generic leather cup that is the correct size and can be adapted to fit your pump.
Q4: Is it necessary to soak the new leather cup in oil before installing it?
A4: Yes, soaking the leather cup in oil is highly recommended. It softens the leather, making it more supple and ensuring a good seal. This will improve the pump’s efficiency and extend the life of the leather cup.
Q5: What should I do if I overtighten the nut holding the leather cup in place?
A5: Overtightening the nut can damage the leather cup and prevent it from sealing properly. If you suspect you’ve overtightened it, loosen the nut slightly and check the pump’s performance. If the leather cup is damaged, you may need to replace it.
Q6: Can I use a rubber or synthetic cup instead of a leather cup?
A6: If your pump was originally designed for a leather cup, it’s generally best to stick with a leather replacement. However, if you’re having trouble finding a leather cup, you may be able to use a rubber or synthetic cup of the same size. Just be aware that it may not perform as well or last as long.
Q7: My pump still isn’t working after replacing the leather cup. What else could be the problem?
A7: If your pump isn’t working after replacing the leather cup, there could be other issues, such as a clogged valve, a damaged hose, or a leak in the cylinder. Inspect these parts carefully and replace them as needed.
Conclusion
Replacing the leather cup in your hand pump is a simple yet effective way to restore its performance and extend its lifespan. By following these step-by-step instructions and maintenance tips, you can keep your pump working like new for years to come. Don’t be intimidated by the process – with a little patience and the right tools, you can easily tackle this repair yourself. Now you can get back to enjoying your rides, knowing your trusty hand pump is ready to inflate your tires whenever you need it. Happy cycling!


