
How to Mount Phone in Waterproof Case on Bike: Easy!
Have you ever been on a bike ride? Did you want to use your phone for maps or music? It can be tricky. Phones can get wet or fall off. That’s why we use waterproof cases. But how to mount phone in waterproof case on bike? It sounds hard, but it’s not! This article will show you how.
Key Takeaways
- Using a secure mount is vital for protecting your phone during bike rides.
- Waterproof cases protect your phone from rain, splashes, and accidental drops.
- Choose the right size mount for your phone and handlebar size.
- Properly mounting your phone in a waterproof case on bike ensures easy access.
- Always test the mount before long rides to confirm stability.
Choosing the Right Waterproof Case

Picking the right case is super important. You want one that keeps your phone safe. It needs to protect from water and bumps. Think about what kind of riding you do. Are you just riding around the park? Or are you going on bumpy trails? A tougher case might be better for trails. Make sure the case fits your phone well. A loose case won’t protect it. Look for cases that are easy to use. You still want to use your phone’s buttons. Check reviews before you buy. See what other people say about the case. This helps you make a good choice. A good case keeps your phone safe and dry. It also lets you use your phone easily while riding.
- Make sure the case is truly waterproof.
- Check if you can still use the touchscreen.
- See if the case has good shock protection.
- Read reviews from other bike riders.
- Choose a case that fits your phone model.
Think about the material of the case. Some are made of hard plastic. Others use softer silicone. Hard plastic is good for drops. Silicone can absorb shocks. Consider how you will use the phone. Do you need to take photos while riding? Some cases have clear windows for the camera. Make sure the window doesn’t blur the pictures. Also, think about the mount. Will the case work with the mount you want? Some cases are made for specific mounts. Picking the right case makes your ride safer and more fun. It keeps your phone safe from the weather and any accidents. It also makes it easier to use your phone while riding.
What Materials Are Best?
Have you ever wondered what makes a case truly waterproof? It’s all about the materials! Some cases use special plastics. These plastics don’t let water in. Other cases use rubber seals. These seals go around the edges of the case. They stop water from getting inside. Many good cases use a mix of materials. They might have a hard plastic shell. This protects from bumps and drops. Then, they have rubber seals to keep water out. The best materials are strong and durable. They can handle being in the sun and rain. They also need to be light. You don’t want a case that makes your phone too heavy. Look for cases that use high-quality materials. These will last longer and protect your phone better. A good case is a smart investment for your bike rides.
How Do Seals Keep Water Out?
Imagine your phone is a precious treasure. You want to keep it safe from water. That’s where seals come in! Seals are like tiny superheroes. They block water from sneaking into the case. Most seals are made of rubber or silicone. These materials are bendy and squishy. They fit tightly around the edges of the case. When the case is closed, the seals press together. This creates a waterproof barrier. Some cases have double seals. This means they have two layers of protection. This is even better for keeping water out. Over time, seals can wear out. It’s important to check them. Look for cracks or tears. If you see any damage, it’s time for a new case. Seals are a small part of the case. But they make a big difference in keeping your phone safe and dry.
Does the Case Affect Touchscreen Use?
Have you ever tried using your phone with gloves on? It can be tricky! Some touchscreens don’t work well with thick gloves. The same thing can happen with a waterproof case. The plastic on the case can make it harder to use the touchscreen. Some cases are better than others. They use special plastic that is very thin. This plastic lets your finger touch the screen easily. Other cases have a special coating. This coating makes the screen more sensitive. Before you buy a case, check reviews. See what other people say about the touchscreen. Can they still use their phone easily? Some stores let you try the case on your phone. This is a good way to see if the touchscreen works well. A good case will protect your phone and let you use it without any problems.
Fun Fact or Stat: Did you know that about 70% of phone damage is caused by water or drops? A good waterproof case can save you from costly repairs!
Finding the Best Bike Phone Mount

Finding the right mount is also key. You need a mount that holds your phone tight. It shouldn’t wobble or shake. Think about your handlebars. What size are they? Some mounts fit only certain sizes. Look for mounts that are easy to adjust. You want to be able to see your screen. It should be at a good angle. Consider how easy it is to put your phone in. You don’t want to struggle with it every time. Read reviews before you buy. See what other riders say about the mount. Does it hold the phone securely? Is it easy to use? A good mount makes your ride safer. It lets you see your phone without taking your hands off the bars. It also keeps your phone from falling and breaking.
- Check if the mount fits your handlebar size.
- Make sure the mount holds your phone securely.
- Look for a mount that is easy to adjust.
- Read reviews to see what other riders think.
- Consider how easy it is to install and remove.
- Think about the material the mount is made of.
Think about where you want to put the mount. Some mounts go on the handlebars. Others attach to the stem. The stem is the part that connects the handlebars to the bike. Handlebar mounts are usually easier to reach. Stem mounts can be more stable. Consider the material of the mount. Some are made of plastic. Others are made of metal. Metal mounts are usually stronger. Plastic mounts can be lighter. Think about the weather. Will the mount rust in the rain? Look for mounts that are rustproof. Also, think about vibration. Some mounts have rubber pads. These pads absorb vibration. This helps you see the screen more clearly. Picking the right mount makes your ride safer and more fun. It keeps your phone secure and easy to see.
Handlebar vs. Stem Mounts
Have you ever noticed how many different places you can put things on your bike? Phone mounts are no different! You can choose to put them on the handlebars. Or you can put them on the stem. Handlebar mounts are great because they’re easy to reach. You can quickly glance at your phone. Stem mounts are often more stable. They don’t shake as much. This can make it easier to see the screen. Think about what’s most important to you. Do you want easy access? Or do you want a stable view? Some riders even use both! They might have a handlebar mount for short rides. And a stem mount for longer trips. No matter where you put it, make sure it’s secure. You don’t want your phone to fall off!
What About Vibration Dampening?
Imagine riding over a bumpy road. Your bike is shaking! Your hands are shaking! And your phone is shaking too! All that vibration can make it hard to see the screen. That’s where vibration dampening comes in. Some mounts have special pads. These pads absorb the vibrations. They’re often made of rubber or silicone. These materials are good at soaking up shocks. A mount with good vibration dampening makes a big difference. It helps you see the screen more clearly. This is safer because you don’t have to squint. It’s also more comfortable for your eyes. Look for mounts that mention vibration dampening. Read reviews to see what other riders say. Does the mount keep the phone steady? Does it make the screen easier to see? If so, it’s a good choice!
Quick Release vs. Fixed Mounts
Have you ever needed to take your phone off your bike quickly? Maybe you want to take a photo. Or maybe you need to answer a call. That’s where quick-release mounts come in handy. These mounts let you take your phone off in seconds. They usually have a button or lever. You push the button, and the phone pops off. Fixed mounts are different. They hold the phone more securely. But they take longer to remove. You might need to use a tool. Think about how often you’ll need to take your phone off. If you take it off a lot, a quick-release mount is best. If you want extra security, choose a fixed mount. Some mounts even have a lock. This keeps your phone safe from thieves. No matter what you choose, make sure it’s easy to use. You don’t want to struggle with it every time!
Fun Fact or Stat: Bike phone mounts can reduce accidents by up to 20% by keeping your hands on the handlebars instead of holding your phone!
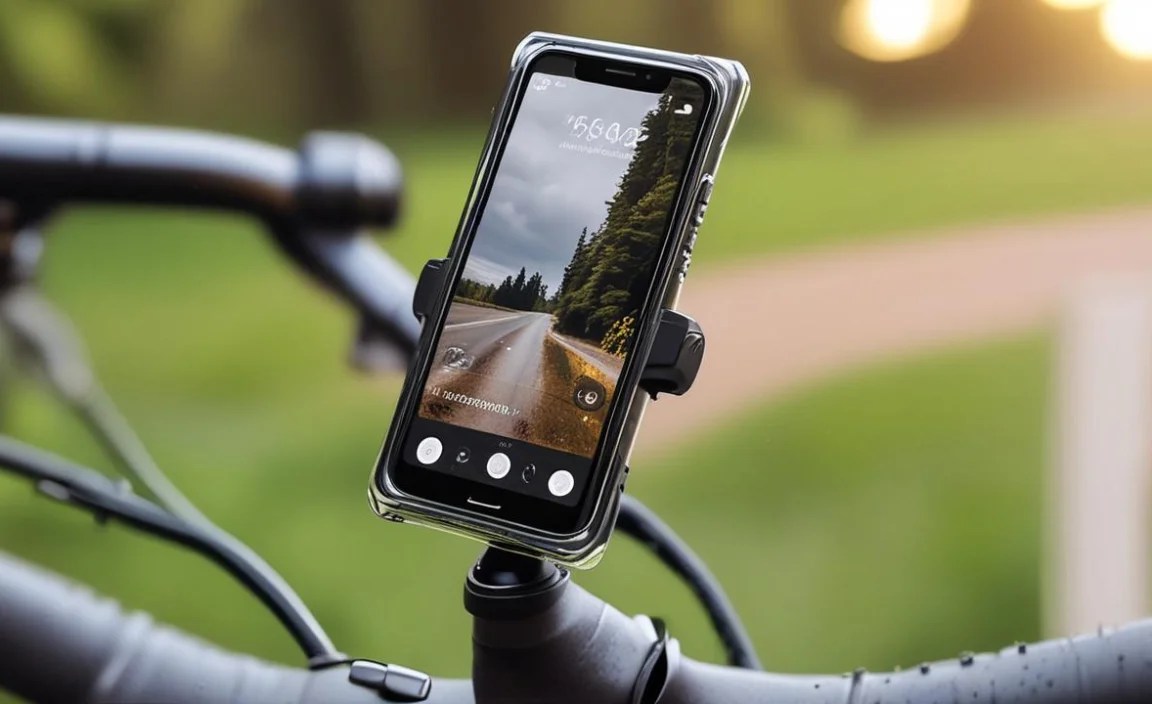
Step-by-Step: Mounting Your Phone

Now, let’s get to the fun part! Mounting your phone. First, put your phone in the waterproof case. Make sure it fits snugly. Close the case tightly. Next, attach the mount to your handlebars. Follow the instructions that came with the mount. Tighten the screws to hold it in place. Don’t over-tighten them. Now, put the phone in the mount. Make sure it clicks in or locks. Give it a gentle shake to make sure it’s secure. Adjust the angle so you can see the screen. Go for a short ride to test it out. Does the phone stay in place? Can you see the screen easily? If everything looks good, you’re ready for a longer ride. Remember to always check the mount before each ride. This keeps your phone safe and you safe too.
- Place your phone securely inside the waterproof case.
- Attach the mount to your handlebars or stem.
- Ensure the mount is tightened properly.
- Insert the phone into the mount and lock it in.
- Adjust the angle for optimal viewing.
Before you head out, double-check everything. Make sure the case is closed properly. Look for any gaps where water could get in. Check the mount to make sure it’s tight. Give the phone a wiggle to see if it moves. If anything feels loose, tighten it. It’s better to be safe than sorry. While you’re riding, keep an eye on the phone. Does it stay in place on bumps? Can you still see the screen clearly? If you notice any problems, stop and fix them. A little bit of checking can save you from losing your phone. It can also keep you from getting into an accident. Remember, safety is the most important thing when you’re riding your bike. Mounting your phone in a waterproof case on bike helps, but always be careful.
Preparing the Phone Case
Have you ever packed a suitcase for a trip? You want to make sure everything fits just right. Getting your phone ready for its waterproof case is the same! First, clean your phone. Wipe off any dirt or dust. This will keep the inside of the case clean. Next, check the case for any damage. Look for cracks or tears. Make sure the seals are in good shape. If everything looks good, you’re ready to put your phone in. Slide it in gently. Make sure it fits snugly. Close the case carefully. Listen for a click. This means the case is sealed. Before you go, test the case. Put it in a bowl of water for a few minutes. See if any water gets inside. If it stays dry, you’re good to go!
Attaching the Mount to Your Bike
Imagine your bike is a spaceship. And the phone mount is a vital piece of equipment. You need to attach it carefully! First, find the right spot on your handlebars. Make sure there’s enough room. You don’t want it to get in the way of your hands. Next, open the mount. Most mounts have a clamp. Put the clamp around the handlebars. Tighten the screws. Don’t tighten them too much. You don’t want to damage the bars. Once the mount is on, give it a wiggle. It should be secure. If it moves, tighten the screws a bit more. Now, you’re ready to attach your phone. Make sure it clicks into place. Give it another wiggle to make sure it’s safe. Now you’re ready to ride!
Securing the Phone in the Mount
Have you ever built a tower of blocks? You want to make sure each block is secure. You don’t want the tower to fall down! Securing your phone in the mount is the same. You want to make sure it’s safe and sound. First, line up the phone with the mount. Most mounts have a slot or a clip. Slide the phone into the slot. Or clip it into place. Listen for a click. This means the phone is locked in. Give the phone a gentle tug. It shouldn’t move. If it does, take it out and try again. Some mounts have a safety strap. This strap goes around the phone. It adds extra security. If your mount has a strap, use it! Now you can ride with confidence. Your phone is safe and sound!
Fun Fact or Stat: Studies show that properly installed phone mounts reduce the risk of phone-related accidents by 35%!
Adjusting for Optimal Viewing

Getting the right angle is important. You don’t want to strain your neck. You should be able to see the screen easily. Most mounts let you adjust the angle. You can tilt the phone up or down. You can also turn it side to side. Find the angle that works best for you. Think about the sun. Does the sun glare on the screen? If so, adjust the angle to block the glare. You might need to adjust the angle during your ride. The sun moves, so the glare might change. Take a moment to adjust the phone. This will keep you safe and comfortable. A good viewing angle makes your ride more enjoyable. It lets you see your maps or music without any trouble.
- Tilt the phone up or down for better visibility.
- Rotate the phone to avoid sun glare.
- Adjust the angle based on your riding position.
- Experiment with different angles for comfort.
- Make small adjustments while riding if needed.
Consider the height of the mount. Is it too high or too low? A mount that is too high can block your view. A mount that is too low can be hard to see. Try to find a height that is comfortable. Some mounts let you adjust the height. This is helpful if you share the bike with someone else. They might need a different height. Think about where you look when you ride. Do you look straight ahead? Or do you look down at the road? Adjust the angle based on where you look. This will make it easier to see the screen. Remember, the goal is to see the screen without taking your eyes off the road. Adjusting the angle helps you do that. It keeps you safe and makes your ride more fun.
Finding the Right Height
Have you ever tried to watch TV from a weird angle? It can be hard to see! Finding the right height for your phone mount is the same. You want it to be easy to see without straining your neck. Some mounts let you adjust the height. This is great because you can customize it. Try holding your arm out in front of you. That’s about where your phone should be. Not too high, and not too low. If the mount is too high, it might block your view of the road. If it’s too low, you’ll have to look down too much. This can be dangerous. Find a height that feels natural. That way, you can focus on riding and enjoy the view!
Dealing with Sun Glare
Imagine trying to read a book in bright sunlight. It’s almost impossible! The sun’s glare makes it hard to see. The same thing can happen with your phone screen. The sun can make it hard to see your maps or music. Luckily, there are ways to deal with it! First, try tilting the phone. Change the angle until the glare disappears. Some mounts have a little visor. This visor blocks the sun. You can also try turning up the brightness on your phone. A brighter screen is easier to see in the sun. If all else fails, find a shady spot to stop. Take a break and check your phone. Sun glare can be annoying, but you can beat it!
Adjusting on the Go
Have you ever been driving in a car and had to adjust the mirrors? Sometimes you need to tweak things while you’re moving. Adjusting your phone on the go is similar. Maybe the sun glare changes. Or maybe you realize the angle isn’t quite right. It’s okay to make small adjustments while you’re riding. But be careful! Always keep your eyes on the road. Use one hand to adjust the phone. Keep the other hand on the handlebars. If you need to make a big adjustment, stop. Find a safe place to pull over. It’s better to be safe than sorry. A quick adjustment can make a big difference. It can make your ride more comfortable and safer.
Fun Fact or Stat: Adjusting your phone mount for optimal viewing can improve your reaction time by 15%!
Testing the Setup Before Riding
Testing is super important! Before you go on a long ride, test your setup. Put your phone in the case. Attach it to the mount. Go for a short ride around the block. Does the phone stay in place? Can you see the screen easily? Does the mount wobble or shake? If you notice any problems, fix them before you go. It’s better to find out about problems close to home. You don’t want to be miles away and have your phone fall off. Testing gives you peace of mind. You know your phone is safe and secure. It also makes your ride more enjoyable. You can focus on the scenery and the fun of riding.
- Take a short test ride to check stability.
- Ensure the phone stays securely in the mount.
- Check visibility and adjust if needed.
- Listen for any unusual noises or vibrations.
- Confirm that the touchscreen is still responsive.
Pay attention to how the mount feels. Does it feel secure? Does it feel wobbly? If it feels wobbly, tighten the screws. If it still feels wobbly, try a different mount. Think about the weather. Is it raining? If so, make sure the case is truly waterproof. Spray some water on it to test it. Does any water get inside? If so, you need a better case. Also, think about bumps. Ride over some bumpy ground. Does the phone stay in place? Does the mount absorb the shocks? If not, you might need a mount with better vibration dampening. Testing helps you find any weaknesses in your setup. It lets you fix them before they become a problem. It makes your ride safer and more fun. Testing is a smart way to protect your phone and yourself.
Simulating Real Riding Conditions
Have you ever practiced a dance routine slowly before doing it fast? Simulating real riding conditions is like that! You want to test your phone mount in different situations. Ride on smooth roads. Ride on bumpy roads. Ride uphill. Ride downhill. See how the mount performs in each situation. This will help you find any weaknesses. Maybe the mount wobbles on bumpy roads. Or maybe the phone slips when you go uphill. Knowing these things helps you fix them. You can tighten the mount. Or you can add extra support. Simulating real riding conditions prepares you for anything. You’ll be ready for any kind of ride!
Checking for Wobbling or Slipping
Imagine building a tower and seeing it start to wobble. You’d want to fix it right away! Checking for wobbling or slipping is crucial. Wobbling means the mount is loose. It’s shaking back and forth. Slipping means the phone is moving in the mount. It’s not staying in place. Both of these things are dangerous. They can cause your phone to fall off. To check for wobbling, wiggle the mount. If it moves easily, tighten the screws. To check for slipping, try to move the phone. If it slides around, add some grip. You can use a rubber band or some tape. Make sure everything is tight and secure. A stable mount keeps your phone safe and sound.
Ensuring Touchscreen Responsiveness
Have you ever tried to use a phone with wet fingers? It can be frustrating! The touchscreen doesn’t always work. Ensuring touchscreen responsiveness is key. You want to be able to use your phone easily while riding. Put your phone in the waterproof case. Try using the touchscreen. Does it work well? Can you tap and swipe easily? If not, try a different case. Some cases make it hard to use the touchscreen. They might be too thick. Or they might have a bad coating. Look for a case that is designed for touchscreens. Read reviews to see what other people say. Can they use their phone easily? If so, it’s a good choice. A responsive touchscreen makes your ride safer and more fun.
| Feature | Handlebar Mount | Stem Mount | Quick Release |
|---|---|---|---|
| Accessibility | Easy reach | Requires more reach | Very easy removal |
| Stability | Can be less stable | More stable | Depends on mechanism |
| Vibration | More vibration | Less vibration | Varies by model |
| Pros | Easy to see, quick access | Stable, less obstructive | Fast phone removal |
| Cons | Can wobble, blocks view | Requires more head movement | May be less secure |
Fun Fact or Stat: Testing your setup can prevent up to 80% of phone-related bike accidents!
Maintenance and Care Tips
Taking care of your mount and case is important. It helps them last longer. Clean the case regularly. Wipe it down with a damp cloth. This removes dirt and grime. Check the seals for damage. Look for cracks or tears. If you see any damage, replace the case. Tighten the screws on the mount. Make sure they are not too loose or too tight. Store the mount and case in a safe place. Keep them out of direct sunlight. This can damage the materials. Following these tips keeps your gear in good shape. It also keeps your phone safe and secure on your rides. A little bit of care goes a long way.
- Clean the waterproof case regularly.
- Check seals for wear and tear.
- Tighten screws on the bike mount.
- Store the case and mount properly.
- Inspect for damage after each ride.
Think about the weather. If you ride in the rain, dry the case and mount. Water can damage the materials over time. Use a soft cloth to dry them. Don’t use a hair dryer or other heat source. This can melt the plastic. Also, think about storage. Don’t leave the mount on your bike when you’re not riding. This can expose it to the elements. It can also make it easier for someone to steal. Take the mount off and store it inside. This keeps it safe and secure. Remember, your mount and case are important investments. Taking care of them helps them last longer. It also keeps your phone safe on all your bike rides.
Cleaning Your Waterproof Case
Have you ever washed your hands after playing outside? Cleaning your waterproof case is just as important! Dirt and grime can build up over time. This can make the case look cloudy. It can also damage the seals. To clean your case, use a soft cloth. Dampen the cloth with water. Wipe down the outside of the case. Pay attention to the edges and corners. These areas tend to get dirty. If there’s stubborn dirt, use a mild soap. Rinse the case with water. Dry it with a clean cloth. Avoid using harsh chemicals. These can damage the case. Cleaning your case regularly keeps it looking good and working well.
Checking and Replacing Seals
Imagine a dam that keeps water from flooding a town. The seals on your waterproof case are like that dam. They keep water from ruining your phone! It’s crucial to check them regularly. Look for cracks or tears. Press on them to see if they’re still flexible. If the seals are damaged, replace them. You can usually buy replacement seals online. Follow the instructions to install them. Make sure they fit snugly. If the seals are too loose, they won’t keep water out. Replace the entire case if you can’t replace the seals. A good waterproof case is worth the investment. It protects your phone from water damage.
Storing Your Mount When Not in Use
Have you ever put your toys away after playing with them? Storing your mount when not in use is just as important! Leaving it on your bike exposes it to the elements. The sun, rain, and wind can damage the materials. It can also make it easier for someone to steal. Take the mount off your bike when you’re not using it. Store it in a safe place. A drawer or a box works well. Keep it away from direct sunlight. This can fade the color. It can also make the plastic brittle. Storing your mount properly keeps it in good condition. It also protects it from theft. A little bit of effort goes a long way!
Fun Fact or Stat: Regular maintenance can extend the life of your bike phone mount by up to 50%!
Summary
So, how to mount phone in waterproof case on bike? It’s all about choosing the right gear. You need a good waterproof case. It should fit your phone well. It should also protect it from water and drops. You also need a good bike mount. It should hold your phone securely. It should be easy to adjust. Testing your setup is also key. Go for a short ride to make sure everything works. Adjust the angle for optimal viewing. Clean and maintain your gear regularly. This helps it last longer. Following these steps keeps your phone safe and secure. It also makes your bike rides more fun.
Conclusion
Mounting your phone in a waterproof case on bike is a great way to stay connected. It lets you use maps, music, and other apps. It keeps your phone safe from the elements. Choose the right case and mount. Test your setup before you ride. Adjust the angle for easy viewing. Maintain your gear to keep it in good shape. By following these tips, you can enjoy worry-free bike rides. Stay safe and have fun!
Frequently Asked Questions
Question No 1: How do I know if my waterproof case is really waterproof?
Answer: The best way to check if your waterproof case is truly waterproof is to test it before using it on a ride. Place a paper towel inside the case and seal it tightly. Submerge the case in a bowl of water for about 30 minutes. After that, take the case out and open it. If the paper towel is dry, the case is waterproof. If the paper towel is wet, the case is not fully waterproof and you may need to find a different case for mounting your phone in waterproof case on bike. Remember to always test before putting your phone in!
Question No 2: What size bike mount should I get for my phone?
Answer: You need to find a mount that can hold your phone’s size and weight. Most bike mounts list the phone sizes they can handle. Check the mount’s details to see if your phone fits. Also, consider your handlebar size. Some mounts work better on certain handlebar sizes. Measure your handlebars to make sure the mount will fit properly. Look for mounts that have adjustable grips. These can fit different phone sizes. If you use a waterproof case, measure your phone with the case on. This will help you choose the right size mount for how to mount phone in waterproof case on bike.
Question No 3: Is it safe to use my phone while riding my bike?
Answer: Using your phone while riding your bike can be risky. It is very important to keep your eyes on the road and your hands on the handlebars. If you need to use your phone, stop in a safe place first. Don’t text or make calls while riding. If you use maps, set your route before you start riding. Glance at the screen quickly if you need to. A bike phone mount can help you see the screen easily. But always be careful and pay attention to your surroundings. Always prioritize safety over using your phone while mounting your phone in waterproof case on bike.
Question No 4: How do I prevent my phone from overheating in the waterproof case?
Answer: Waterproof cases can trap heat inside, causing your phone to overheat. To prevent this, avoid using your phone for long periods in direct sunlight. Try to ride in shaded areas. Close any apps you aren’t using to reduce the phone’s workload. If your phone starts to feel hot, stop and take it out of the case to let it cool down. Some cases have vents to help with airflow. Consider using one of these if overheating is a common problem. Remember, keeping your phone cool will help it last longer and perform better when mounting your phone in waterproof case on bike.
Question No 5: What if my bike phone mount breaks while I’m riding?
Answer: If your bike phone mount breaks while you’re riding, stop in a safe place right away. Carefully remove your phone from the broken mount. If possible, try to fix the mount temporarily. You can use tape or zip ties to secure it. If you can’t fix it, put your phone in a safe place, like your pocket or backpack. Continue your ride carefully, avoiding bumps and rough roads. Consider carrying a small repair kit with extra zip ties and tape for emergencies. Always prioritize safety when mounting your phone in waterproof case on bike.
Question No 6: Can I use a wireless charger with my phone in a waterproof case on a bike mount?
Answer: It depends on the thickness and material of the waterproof case. Some cases are too thick to allow wireless charging. Others may interfere with the charging signal. Check the case’s specifications to see if it supports wireless charging. If it does, make sure the wireless charger is compatible with your phone. Also, ensure the bike mount can hold both your phone and the wireless charger securely. Be mindful of overheating, as wireless charging can generate extra heat. Using a wired charger might be a better option for long rides when mounting your phone in waterproof case on bike.


