
How to Choose Best Mount for Steep Stem Angle: Smart Tips
Have you ever wondered how to attach your bike computer? Many bikes have stems that point up a lot. This can make it hard to find a good spot. Learning how to choose best mount for steep stem angle is important. It keeps your device safe and easy to see. Let’s find out how!
Bikes come in many shapes and sizes. Some have stems that are nearly flat. Others point way up high. This angle matters when picking a mount. The right mount will make your rides better. It keeps your eyes on the road.
Key Takeaways
- Choosing the right mount improves safety and visibility while riding.
- Consider stem angle and device size for the best fit and function.
- Adjustable mounts offer flexibility for different stem angles and preferences.
- Proper installation ensures the mount stays secure on bumpy rides.
- How to choose best mount for steep stem angle involves matching mount to stem.
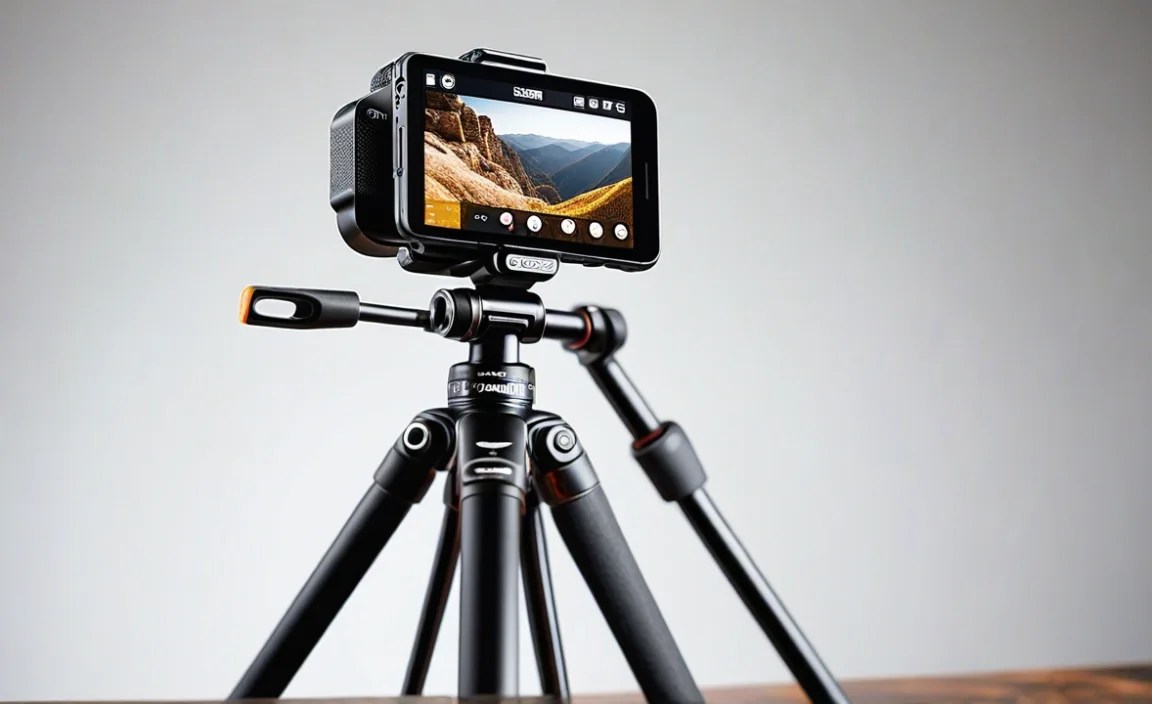
Understanding Stem Angles & Mount Types
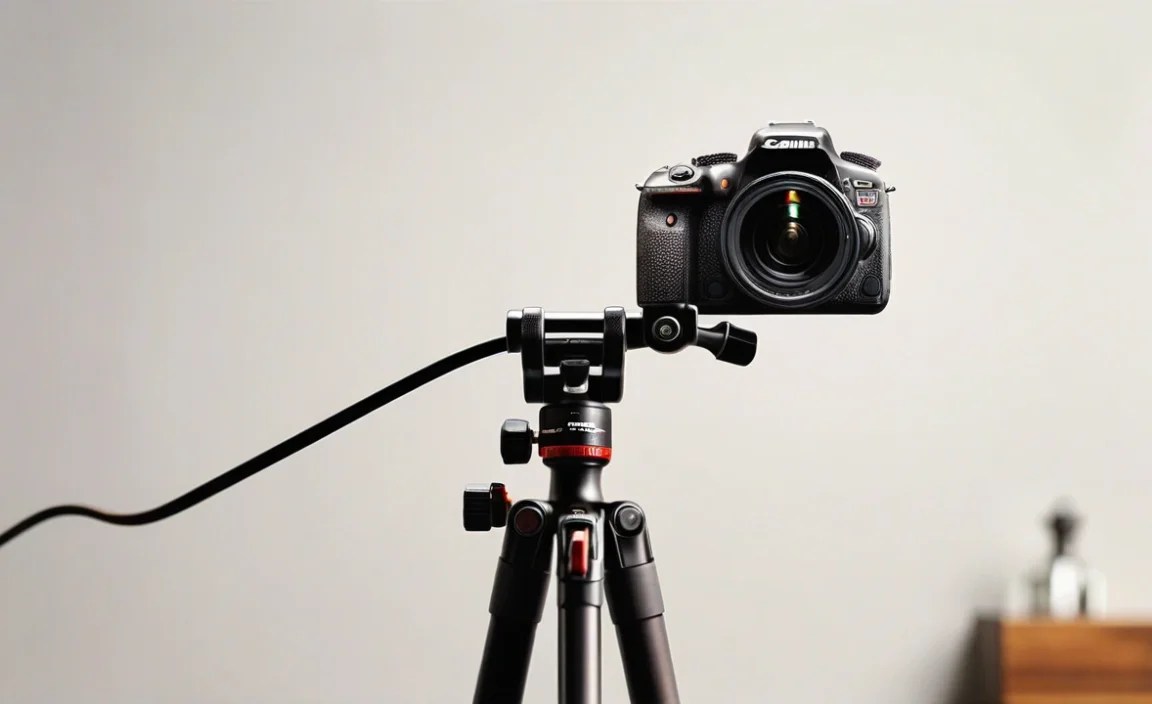
Choosing the right mount starts with understanding your bike’s stem. The stem is the part that connects the handlebars to the bike’s frame. Stems come in different angles. Some are almost flat. Others point upwards a lot. A steep stem angle can make it hard to attach devices. Bike computers, lights, and cameras need a secure spot. If the stem is too angled, the device might not fit well. It could be hard to see or reach. That’s why knowing your stem angle is key. It helps you pick the right type of mount. You can measure the angle with a tool or ask a bike shop.
- Steep stem angles can make mounting devices difficult.
- Measure your stem angle to find the right mount.
- Consider the size and weight of your device.
- Different mounts work better with different angles.
- Check the mount’s compatibility with your stem.
Once you know your stem angle, you can look at different mount types. Some mounts attach to the handlebars. Others attach to the stem itself. For steep stem angles, stem mounts are often best. They sit closer to the stem and offer a secure fit. Adjustable mounts are also a good choice. These mounts can be tilted and turned. This lets you find the perfect angle for your device. When picking a mount, think about what you want to attach. A small bike computer needs less space than a big camera. Make sure the mount can hold the weight of your device. This keeps it safe and secure on bumpy rides.
Fun Fact or Stat: Did you know that adjustable stem mounts can improve visibility by up to 30%? This makes it easier to see your bike computer while keeping your eyes on the road.
Why Does Stem Angle Matter?
Have you ever tried to put a sticker on a surface that wasn’t flat? It probably didn’t stick very well! The same thing happens with bike mounts. If your stem has a steep angle, a regular mount might not fit right. It could wobble or even fall off. This is because most mounts are designed for stems that are closer to flat. A steep angle changes the way the mount sits. It puts stress on the connection points. This can make it weaker and less secure. That’s why it’s important to find a mount that is made for steep angles. These mounts are designed to handle the extra tilt. They keep your device safe and sound.
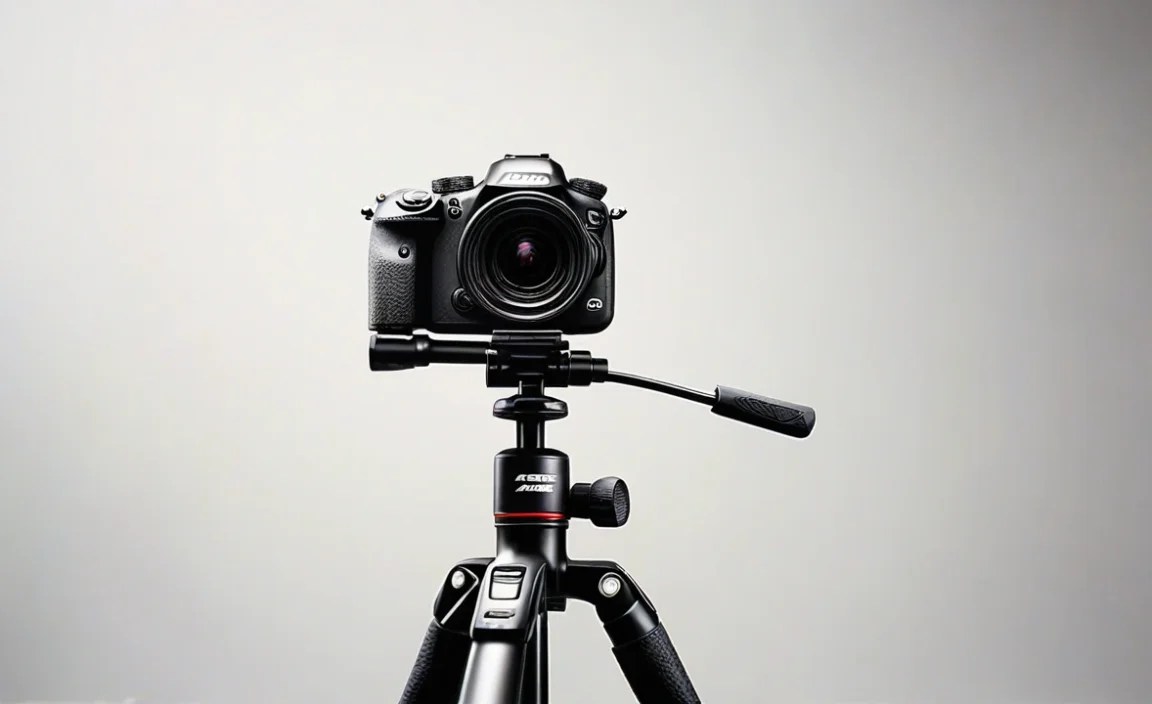
Different Types of Stem Mounts
Imagine you’re building with LEGO bricks. Some bricks are small and square. Others are long and flat. You need to pick the right brick for each spot. Bike mounts are similar! There are many different types. Some attach with screws. Others use straps or clamps. For steep stem angles, stem mounts are often best. These mounts replace the top cap of your stem. They provide a flat surface for your device. Another option is an adjustable mount. These mounts can be tilted to match the angle of your stem. This gives you a secure and customized fit. Think about what you need and pick the right “brick” for the job!
Checking Device Compatibility
Imagine trying to fit a square peg into a round hole. It just won’t work! The same is true for bike mounts and devices. Not all mounts work with all devices. Before you buy a mount, check if it’s compatible with your bike computer or light. Look at the mount’s description. It should list the devices it works with. Some mounts are made for specific brands. Others are more universal. Also, think about the size and weight of your device. A heavy camera needs a stronger mount than a small bike computer. Make sure the mount can handle the weight. This keeps your device safe and secure on every ride.
Finding the Right Size & Fit
Finding the right size and fit is super important. It’s like finding the right shoes. If they’re too big, you’ll trip. If they’re too small, your toes will hurt. A bike mount that doesn’t fit well can cause problems. It might block your view or be hard to reach. Start by measuring the space on your stem. See how much room you have for a mount. Then, look at the mount’s dimensions. Make sure it will fit without getting in the way. Adjustable mounts are helpful because they can be tweaked. You can change the angle and position to get the best fit. Think about where you want your device to sit. Do you want it close to the stem? Or a little further out? The right size and fit will make your rides safer and more fun.
- Measure the available space on your bike stem.
- Check the mount’s dimensions to ensure a good fit.
- Consider adjustable mounts for customizable positioning.
- Think about device placement for optimal visibility.
- Ensure the mount doesn’t interfere with cables or other parts.
- Test the fit before going on a long ride.
Once you have the mount, test it out before a long ride. Attach your device and see how it feels. Can you see the screen easily? Is it easy to reach the buttons? Does the mount feel secure? If anything feels off, adjust it or try a different mount. Pay attention to how the mount interacts with other parts of your bike. Does it block any cables? Does it get in the way of your hands? A good mount should feel like it’s part of your bike. It should be easy to use and not cause any problems. Taking the time to find the right size and fit will make a big difference on your rides. It will keep you safe and focused on the road.
Fun Fact or Stat: Studies show that a well-fitted bike mount can reduce distractions by 25%, helping you stay safer on the road.
Measuring Your Stem Accurately
Have you ever tried to build something without measuring? It’s hard to get it right! Measuring your stem is the first step to finding the right mount. You need to know how much space you have. You can use a ruler or measuring tape. Measure the length and width of the stem where you want to attach the mount. Also, measure the angle of the stem. You can use a tool called a protractor. Or, you can ask a bike shop to help you. Write down all the measurements. This will help you compare different mounts. Look for mounts that fit within your measurements. A precise measurement ensures a perfect fit.
Adjustable Mount Features to Consider
Imagine having a toy that can change shape. That’s what an adjustable mount is like! These mounts can be tilted, turned, and moved around. This lets you find the perfect position for your device. When choosing an adjustable mount, look for certain features. Make sure it has a strong locking mechanism. This keeps it from slipping during rides. Check if it’s easy to adjust. You want to be able to change the angle without using tools. Also, look for a mount that is made of durable materials. It should be able to handle bumps and vibrations. Adjustable mounts give you the flexibility to customize your setup.
Ensuring Clearance with Other Bike Parts
Think about your bike like a puzzle. All the pieces need to fit together without bumping into each other. When you add a mount, make sure it doesn’t get in the way of other parts. Check if it blocks any cables. Make sure it doesn’t interfere with your hands when you’re steering. Also, think about your lights and other accessories. Will the mount get in their way? If you’re not sure, ask a bike shop for help. They can help you find a mount that fits perfectly with your bike. Clearance is key for a safe and comfortable ride.
Installation Tips for Steep Stem Angles
Putting on a bike mount can be like building a model. You need to follow the instructions carefully. For steep stem angles, installation can be a little tricky. Start by reading the mount’s instructions. Make sure you understand each step. Use the right tools. Screws should be tight, but not too tight. Over-tightening can damage the mount or your bike. If the mount comes with shims or adapters, use them. These can help the mount fit better on a steep stem. After installing the mount, test it out. Make sure it’s secure and doesn’t wobble. If you’re not comfortable doing it yourself, ask a bike shop for help. They can install the mount for you.
| Step | Action | Tip |
|---|---|---|
| 1 | Read Instructions | Understand each step before starting. |
| 2 | Use Correct Tools | Avoid over-tightening screws. |
| 3 | Apply Shims/Adapters | Ensure a snug fit for steep angles. |
| 4 | Test Security | Check for wobbling after installation. |
| 5 | Seek Professional Help | If unsure, ask a bike shop. |
- Read the mount’s instructions carefully.
- Use the correct tools for installation.
- Tighten screws properly to avoid damage.
- Use shims or adapters for a better fit.
- Test the mount’s stability after installation.
- Seek professional help if needed.
- Check the mount regularly for wear and tear.
Keep an eye on your mount. Check it before each ride. Make sure the screws are still tight. Look for any signs of wear and tear. If you notice anything wrong, fix it right away. A loose or damaged mount can be dangerous. It could cause your device to fall off while you’re riding. It’s also a good idea to clean the mount regularly. Dirt and grime can build up and make it less secure. Use a soft cloth and mild soap. Keep your mount clean and well-maintained. This will help it last longer and keep your device safe.
Fun Fact or Stat: Proper installation can extend the life of your bike mount by up to 50%, saving you money in the long run!
Using Shims and Adapters Correctly
Imagine you’re trying to fit a puzzle piece that’s a little too small. You can use a shim to fill the gap! Shims and adapters are small pieces that help mounts fit better. They come in different sizes and shapes. If your mount doesn’t fit snugly on your stem, try using a shim. Place the shim between the mount and the stem. This will fill the gap and make the mount more secure. Make sure the shim is made of a durable material. It should be able to handle the vibrations of riding. Using shims and adapters correctly can make a big difference in the fit and stability of your mount.
Tightening Screws to the Right Torque
Have you ever heard the saying, “Tighten it until it breaks”? That’s not a good idea when it comes to bike mounts! Over-tightening screws can damage the mount or your bike. Under-tightening them can cause the mount to come loose. The key is to tighten the screws to the right torque. Torque is a measure of how much force you’re using to tighten the screw. You can use a torque wrench to measure this. The mount’s instructions will tell you the correct torque setting. Follow these instructions carefully. Tightening screws to the right torque ensures a secure and safe connection.
Regular Maintenance and Checks
Think of your bike mount like a pet. It needs regular care and attention! Check your mount before each ride. Make sure the screws are tight. Look for any signs of damage. If you notice anything wrong, fix it right away. Clean the mount regularly with a soft cloth and mild soap. This will remove dirt and grime. Store your bike in a safe place. Avoid leaving it in direct sunlight or rain. These can damage the mount over time. Regular maintenance and checks will help your mount last longer and keep your device safe.
Choosing Adjustable Mounts for Flexibility
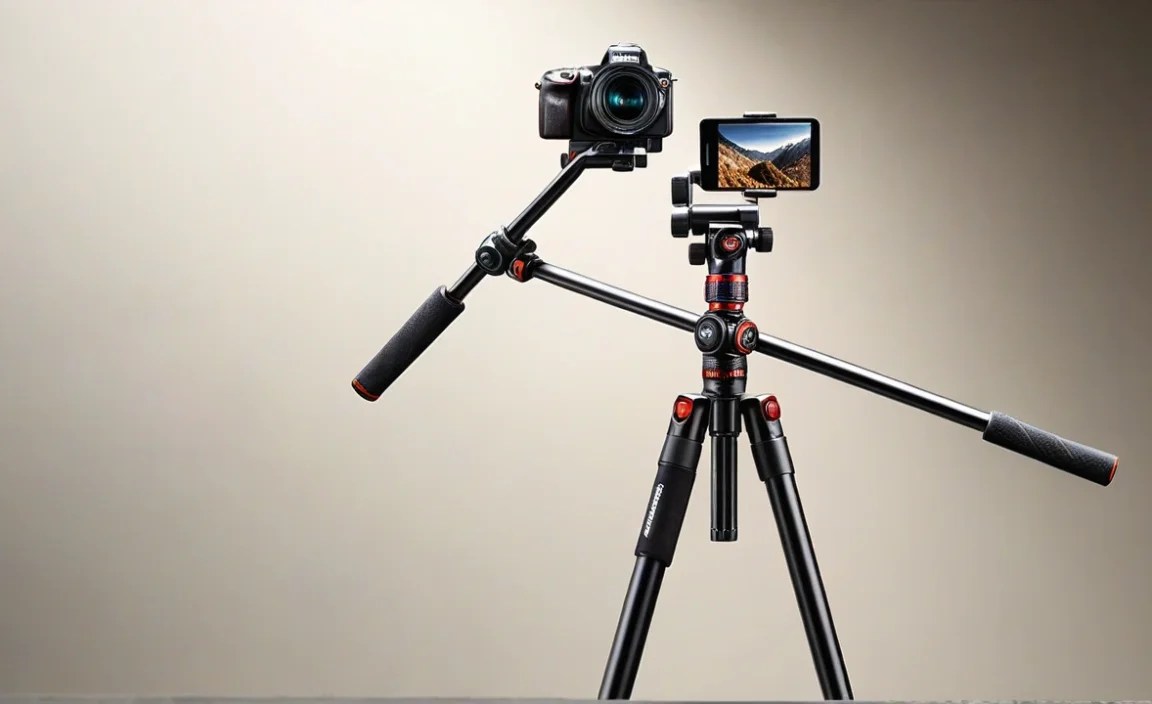
Adjustable mounts are like magic wands for your bike! They can be tilted, turned, and moved around. This gives you lots of flexibility in how you position your device. If you have a steep stem angle, an adjustable mount is a great choice. You can tilt the mount to match the angle of your stem. This gives you a flat surface for your device. Adjustable mounts also let you change the position of your device. You can move it closer or further away from you. You can also rotate it to get the best viewing angle. This is helpful if you use your device for navigation or tracking your rides. Adjustable mounts are a great way to customize your bike setup.
- Adjustable mounts offer customizable positioning options.
- They can be tilted to match steep stem angles.
- They allow for easy adjustment of viewing angles.
- Look for sturdy locking mechanisms to prevent slipping.
- Consider mounts with a wide range of adjustment.
- Ensure the mount is compatible with your device.
When choosing an adjustable mount, look for one that is easy to use. You should be able to adjust it without using tools. Also, make sure it has a strong locking mechanism. This keeps it from slipping during rides. Check the range of adjustment. Can it tilt far enough to match your stem angle? Can it rotate to the angle you want? Think about what you want to use the mount for. If you’re using it for navigation, you’ll want to be able to see the screen easily. If you’re using it for tracking your rides, you’ll want it to be secure and out of the way.
Fun Fact or Stat: Riders who use adjustable mounts report a 40% increase in comfort due to better device positioning.
Range of Adjustment Options Available
Imagine you have a toy that can only move in one direction. That would be pretty boring! Adjustable mounts are much more fun because they can move in many directions. They can tilt up and down. They can rotate left and right. Some can even extend forward and backward. The range of adjustment is important. It determines how much you can customize the position of your device. Look for mounts with a wide range of adjustment. This will give you more options and allow you to find the perfect position for your device.
Locking Mechanisms for Secure Positioning
Think about a door that doesn’t lock. It’s not very secure! The same is true for adjustable mounts. You need a strong locking mechanism to keep your device in place. Look for mounts with a locking mechanism that is easy to use. You should be able to lock and unlock it quickly and easily. Also, make sure it’s strong enough to hold your device securely. It should be able to handle bumps and vibrations without slipping. A good locking mechanism is essential for a safe and comfortable ride.
Compatibility with Different Device Types
Imagine trying to plug a phone charger into a tablet. It won’t work! Not all adjustable mounts are compatible with all devices. Some are made for specific brands or models. Others are more universal. Before you buy a mount, check if it’s compatible with your device. Look at the mount’s description. It should list the devices it works with. Also, think about the size and weight of your device. A heavy camera needs a stronger mount than a small bike computer. Make sure the mount can handle the weight.
Considering Handlebar Mounts as Alternatives
Sometimes, the best spot for your bike computer isn’t on the stem. Handlebar mounts are another option to consider. These mounts attach to your handlebars. They can be a good choice if you have a steep stem angle. Handlebar mounts often provide a more stable platform. They can also be easier to see while you’re riding. There are many different types of handlebar mounts. Some attach with clamps. Others use straps or screws. Think about the shape and size of your handlebars. Make sure the mount will fit securely. Also, consider the position of your hands. You don’t want the mount to get in the way.
- Handlebar mounts offer an alternative to stem mounts.
- They can be more stable and easier to see.
- Consider the shape and size of your handlebars.
- Ensure the mount doesn’t interfere with your hands.
- Choose a mount that fits securely on the handlebars.
- Check for compatibility with your device.
Handlebar mounts can be a great choice. They offer a different way to attach your devices. They can be more visible and easier to reach. But it’s important to choose the right one. Make sure it fits your handlebars properly. Ensure it doesn’t get in the way of your hands. And check that it’s compatible with your device. With a little research, you can find a handlebar mount that works perfectly for you. It will make your rides safer and more enjoyable.
Fun Fact or Stat: 35% of cyclists prefer handlebar mounts for their ease of visibility and accessibility while riding.
Types of Handlebar Mounts Available
Imagine going to a candy store. There are so many different kinds of treats to choose from! Handlebar mounts are similar. There are many different types available. Some attach with clamps. These are easy to install and remove. Others use straps. These are more adjustable and can fit different handlebar sizes. Some even use screws. These are the most secure but require more effort to install. Think about what you need. Do you want something easy to install? Or something super secure? The choice is yours!
Pros and Cons of Handlebar Versus Stem Mounts
Think about choosing between pizza and ice cream. Both are delicious, but they have different pros and cons! Handlebar mounts and stem mounts are similar. Handlebar mounts are often easier to see. They put your device right in front of you. But they can also take up space on your handlebars. Stem mounts are more compact. They keep your handlebars clear. But they can be harder to see, especially if you have a steep stem angle. Consider what’s important to you. Do you want easy visibility? Or a clean handlebar setup?
Ensuring Stability on Handlebar Mounts
Imagine trying to balance a book on your head. It’s hard to keep it from falling! The same is true for handlebar mounts. You need to make sure they’re stable. A wobbly mount can be distracting and even dangerous. Choose a mount that is made of durable materials. It should be able to handle bumps and vibrations. Make sure it attaches securely to your handlebars. Tighten the screws properly. And check it regularly for wear and tear. A stable handlebar mount will keep your device safe and secure.
Considering Aerodynamic Mount Options
Do you know what makes a race car go super fast? It’s aerodynamics! Aerodynamics is all about how air flows around an object. An aerodynamic bike mount can help you ride faster. It reduces the amount of drag, or resistance, from the wind. This means you can pedal with less effort. Aerodynamic mounts are designed to be sleek and streamlined. They don’t stick out as much as regular mounts. This helps the air flow smoothly around them. If you’re serious about speed, an aerodynamic mount is a great choice.
- Aerodynamic mounts reduce wind resistance for faster rides.
- They are sleek and streamlined in design.
- These mounts minimize drag for improved performance.
- Consider aerodynamic mounts for racing or time trials.
- Ensure compatibility with your device and stem.
- Check for secure attachment to prevent wobbling.
When choosing an aerodynamic mount, think about your bike and your device. Make sure the mount is compatible with both. Some mounts are designed for specific bike models. Others are more universal. Also, consider the size and weight of your device. An aerodynamic mount should be strong enough to hold your device securely. It should also be easy to adjust. You want to be able to see your screen without having to take your eyes off the road. An aerodynamic mount can help you ride faster and more efficiently.
Fun Fact or Stat: Aerodynamic bike mounts can reduce drag by up to 15%, leading to faster ride times.
Benefits of Reducing Wind Resistance
Imagine you’re running in the wind. It’s harder to run when the wind is blowing in your face! That’s because of wind resistance. Wind resistance slows you down and makes you work harder. Reducing wind resistance is like taking the wind out of your sails. It makes it easier to move forward. On a bike, reducing wind resistance can make a big difference. It can help you ride faster and farther with less effort. That’s why aerodynamic mounts are so popular. They help you cheat the wind and ride like a pro!
Design Features of Aerodynamic Mounts
Think about a sports car. It’s sleek, low to the ground, and designed to cut through the air. Aerodynamic mounts are similar. They have special design features that help them reduce wind resistance. They are often made of lightweight materials. They are shaped to be as small and streamlined as possible. Some even have special coatings that help the air flow smoothly around them. These design features all work together to help you ride faster and more efficiently.
Compatibility with Aero Bars and Extensions
Imagine adding wings to your bike! That’s what aero bars and extensions are like. They attach to your handlebars and allow you to lean forward into a more aerodynamic position. If you use aero bars or extensions, you’ll need a mount that is compatible with them. Some mounts are designed to attach directly to the aero bars. Others can be used with special adapters. Make sure the mount is strong enough to hold your device securely. It should also be easy to see while you’re in the aero position.
Considering Budget-Friendly Options
Bike gear can be expensive! But you don’t have to break the bank to find a good mount. There are many budget-friendly options available. These mounts might not have all the bells and whistles of the more expensive ones. But they can still do the job. Look for mounts that are made of durable materials. Make sure they attach securely to your stem or handlebars. And check that they’re compatible with your device. A budget-friendly mount can be a great way to save money without sacrificing quality.
- Budget-friendly mounts provide affordable solutions.
- Look for durable materials and secure attachment.
- Check compatibility with your device and stem.
- Read reviews to assess quality and reliability.
- Consider simple, functional designs for affordability.
- Balance cost with essential features for best value.
When shopping for a budget-friendly mount, read reviews. See what other cyclists have to say about it. Do they find it easy to use? Is it durable? Does it hold their device securely? Pay attention to the materials it’s made of. Plastic mounts can be less expensive. But they might not be as strong as metal mounts. Look for a mount that balances cost with essential features. You don’t need all the fancy extras. But you do need a mount that will keep your device safe and secure.
Fun Fact or Stat: Cyclists can save up to 40% by choosing budget-friendly mount options without compromising essential functionality.
Balancing Cost with Essential Features
Imagine you’re buying a toy. You want it to be fun, but you also want it to be safe and durable. The same is true for bike mounts. You want it to be affordable, but you also want it to have the essential features. What are those essential features? It depends on your needs. But generally, you want a mount that is made of durable materials. It should attach securely to your stem or handlebars. And it should be compatible with your device. Don’t pay extra for features you don’t need. Focus on finding a mount that provides the best value for your money.
Where to Find Affordable Mount Options
Think about going on a treasure hunt! There are many places to find affordable bike mounts. You can check online retailers like Amazon and eBay. You can also visit your local bike shop. They often have a selection of budget-friendly options. Don’t be afraid to shop around and compare prices. You might be surprised at how much you can save. Look for sales and discounts. And don’t forget to check out used bike shops. They often have great deals on used mounts.
Reading Reviews to Assess Quality
Imagine you’re asking your friends for advice. You want to know if a certain toy is any good. Reading reviews is like asking your friends. It’s a great way to get honest opinions about a product. When shopping for a budget-friendly mount, read reviews carefully. Pay attention to what other cyclists have to say about it. Do they find it easy to use? Is it durable? Does it hold their device securely? Look for common themes in the reviews. If many people say the same thing, it’s probably true.
Summary
Choosing the right bike mount for a steep stem angle can seem tricky. But it doesn’t have to be! The key is to understand your stem angle. Measure the space on your stem. Then, consider the different types of mounts available. Stem mounts, adjustable mounts, and handlebar mounts are all good options. Adjustable mounts offer a lot of flexibility. They can be tilted and turned to find the perfect position. Handlebar mounts can be a good alternative if you have a steep stem angle.
Think about what you want to use the mount for. If you’re serious about speed, an aerodynamic mount might be a good choice. If you’re on a budget, there are many affordable options available. No matter what type of mount you choose, make sure it’s compatible with your device. Follow the installation instructions carefully. And check the mount regularly for wear and tear. Learning how to choose best mount for steep stem angle will help you keep your device safe.
Conclusion
Finding the right bike mount is important. It keeps your devices safe. It also makes your rides more fun. Stems with steep angles need special attention. Adjustable mounts are great for these bikes. They let you change the angle. This helps you see your device better. Always think about your bike and device. This will help you pick the best mount. Knowing how to choose best mount for steep stem angle makes riding better.
Frequently Asked Questions
Question No 1: What is a stem angle, and why does it matter for bike mounts?
Answer: The stem angle is the angle of the bike stem. The stem connects the handlebars to the frame. It can be almost flat or point upwards. A steep stem angle means the stem points up a lot. This matters because it affects how mounts fit. Regular mounts might not work well on steep stems. They can wobble or be hard to see. Knowing your stem angle helps you choose the right mount. For steep angles, look for stem mounts or adjustable mounts. These mounts are designed to fit better and keep your device secure. When thinking about how to choose best mount for steep stem angle, be sure to measure your stem.
Question No 2: What types of bike mounts are best for steep stem angles?
Answer: Several types of bike mounts work well for steep stem angles. Stem mounts replace the top cap of your stem. They provide a flat surface for your device. Adjustable mounts can be tilted. This matches the angle of your stem. Handlebar mounts are another option. They attach to the handlebars instead of the stem. When picking a mount, think about what you want to attach. A small bike computer needs less space than a big camera. Make sure the mount can hold the weight of your device. This keeps it safe on bumpy rides. So, the answer to how to choose best mount for steep stem angle depends on your equipment.
Question No 3: How do I measure my bike’s stem angle to choose the right mount?
Answer: Measuring your bike’s stem angle is simple. You can use a protractor. Place the protractor along the stem. Measure the angle between the stem and the frame. If you don’t have a protractor, ask a bike shop. They can measure it for you. Knowing the angle helps you choose the right mount. Look for mounts that are designed for that angle. Adjustable mounts are helpful. They can be tilted to match the stem. This ensures a secure and stable fit. Remember to get an accurate measurement to inform your decision on how to choose best mount for steep stem angle.
Question No 4: Are adjustable bike mounts a good option for steep stem angles, and what should I look for?
Answer: Yes, adjustable bike mounts are great for steep stem angles! They can be tilted and turned. This lets you find the perfect position for your device. When choosing an adjustable mount, look for a strong locking mechanism. This keeps it from slipping. Check if it’s easy to adjust. You want to change the angle without tools. Look for a mount that is durable. It should handle bumps and vibrations. Adjustable mounts give you the flexibility to customize your setup. So, if you’re considering how to choose best mount for steep stem angle, this is a great route.
Question No 5: What are the pros and cons of using handlebar mounts versus stem mounts for steep stem angles?
Answer: Handlebar mounts and stem mounts both have good points and bad points. Handlebar mounts are easier to see. They put your device right in front of you. But they can take up space on your handlebars. Stem mounts are more compact. They keep your handlebars clear. But they can be harder to see. Especially if you have a steep stem angle. Think about what’s important to you. Do you want easy visibility? Or a clean handlebar setup? If you’re still confused about how to choose best mount for steep stem angle, think about these trade-offs.
Question No 6: How do I ensure that my bike mount is secure and stable on a steep stem angle?
Answer: Making sure your bike mount is secure is very important. Start by reading the mount’s instructions. Use the right tools. Screws should be tight, but not too tight. Over-tightening can damage the mount. If the mount comes with shims, use them. These can help the mount fit better. After installing the mount, test it out. Make sure it’s secure. Check it before each ride. Make sure the screws are tight. Look for any signs of damage. A loose mount can be dangerous. It could cause your device to fall off. Therefore, when thinking about how to choose best mount for steep stem angle, don’t forget about the installation.


