
How to Create Custom Length Air Hose: Easy DIY
Quick Summary: Making a custom-length air hose is easier than you think! First, gather your hose, fittings, hose cutter, and heat gun. Measure and cut the hose to your desired length. Heat the hose end, insert the fitting, and secure it with a clamp. Repeat on the other end, and you’ve got a perfectly sized air hose for your needs.
Ever felt frustrated with air hoses that are either too long and tangled or too short to reach your project? You’re not alone! Many cyclists and DIY enthusiasts face this issue when inflating tires or using air tools. A custom-length air hose solves this problem, giving you the perfect reach without the hassle.
In this guide, I’ll walk you through each step, from choosing the right materials to making the final connections. By the end, you’ll have the confidence to create air hoses tailored to your specific needs. Let’s get started and make those pumping tasks a breeze!
Choosing the Right Air Hose and Fittings

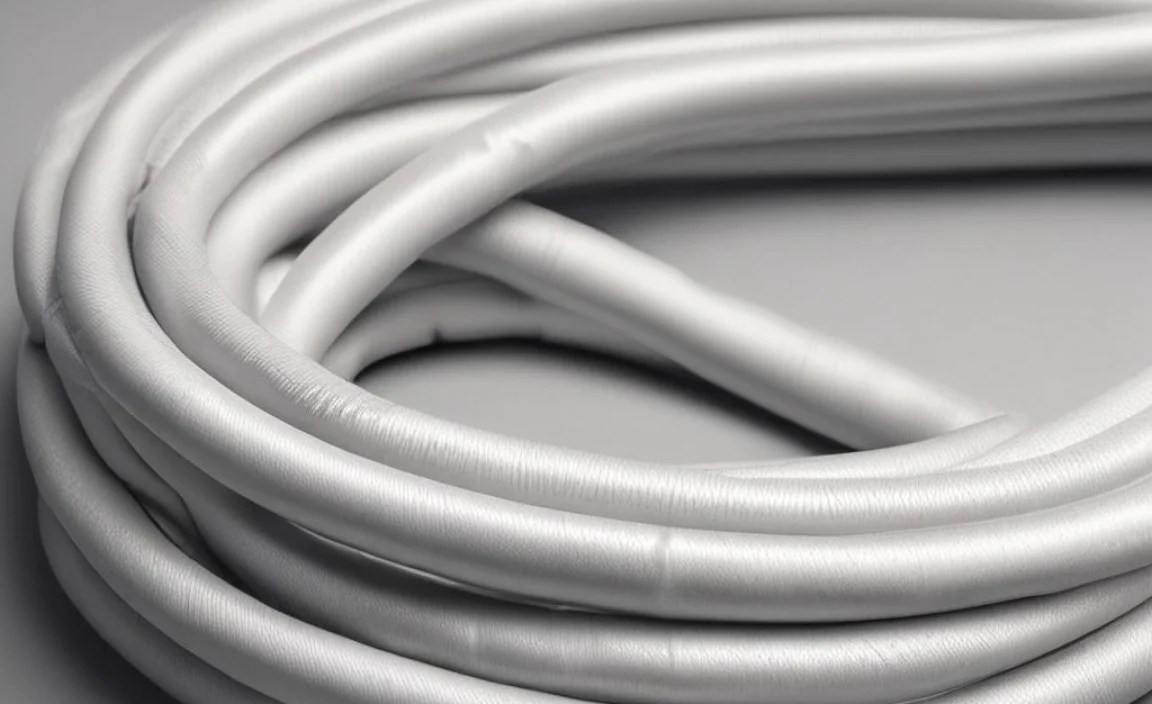
Before diving into the process, it’s important to select the right air hose and fittings. The type you choose will depend on your specific needs, such as the pressure requirements and the environment in which you’ll be using the hose.
Types of Air Hoses
There are several types of air hoses available, each with its own set of pros and cons. Here are a few common types:
- Rubber Air Hoses: These are durable and flexible, even in cold weather. They are a good choice for general use and can withstand high pressure.
- PVC Air Hoses: PVC hoses are lightweight and inexpensive. They are suitable for light-duty applications but may become stiff in cold temperatures and are less durable than rubber hoses.
- Polyurethane Air Hoses: These hoses are very flexible and resistant to kinks. They are also lightweight and abrasion-resistant, making them a good choice for demanding environments.
- Hybrid Air Hoses: Hybrid hoses combine the best features of rubber and PVC. They are lightweight, flexible, and durable, offering a good balance of performance and cost.
Selecting the Right Fittings
Fittings are essential for connecting your air hose to your air compressor and tools. It’s important to choose fittings that are compatible with your hose and can handle the pressure you’ll be using.
- Material: Fittings are typically made of brass, steel, or aluminum. Brass fittings are corrosion-resistant and suitable for general use. Steel fittings are stronger and more durable, while aluminum fittings are lightweight.
- Size: Make sure the fittings match the inner diameter of your air hose. Common sizes include 1/4 inch, 3/8 inch, and 1/2 inch.
- Type: There are various types of fittings, including:
- NPT (National Pipe Thread): These are tapered threads that create a tight seal.
- Quick-Connect Fittings: These allow for quick and easy connection and disconnection of hoses and tools.
Tools and Materials You’ll Need
Gathering the necessary tools and materials beforehand will make the process smoother. Here’s a list of what you’ll need:
- Air Hose: Choose the type and length based on your needs.
- Fittings: Two fittings that match your hose size and thread type.
- Hose Cutter or Utility Knife: For making clean cuts on the hose.
- Heat Gun or Hair Dryer: To soften the hose for easy fitting insertion.
- Hose Clamps: To secure the fittings to the hose.
- Screwdriver or Wrench: To tighten the hose clamps.
- Measuring Tape: To measure the desired hose length.
- Safety Glasses: To protect your eyes.
Step-by-Step Guide to Creating a Custom Length Air Hose

Now that you have all the necessary materials and tools, let’s get started with the step-by-step guide to creating your custom length air hose.
Step 1: Measure and Cut the Air Hose
First, determine the length of air hose you need. Measure the distance from your air compressor to the area where you’ll be using your air tools. Add a few extra feet to allow for flexibility and movement. It’s always better to have a little extra length than to come up short.
Once you have the measurement, use a hose cutter or a sharp utility knife to cut the hose. A hose cutter provides a cleaner, more precise cut, but a utility knife can work if you’re careful. Here’s how to do it:
- Mark the Hose: Use a measuring tape and a marker to mark the desired length on the air hose.
- Cut the Hose:
- With a Hose Cutter: Place the hose in the cutter and rotate the cutter until it slices through the hose.
- With a Utility Knife: Place the hose on a flat surface and carefully cut through the hose, using a sawing motion. Make sure to keep the cut straight and clean.
- Inspect the Cut: Check the cut end to ensure it’s clean and even. Remove any burrs or rough edges with a knife or file.
Step 2: Prepare the Hose End for Fitting Insertion
To make it easier to insert the fittings, you’ll need to soften the end of the air hose. This can be done using a heat gun or a hair dryer. The goal is to make the hose pliable without melting or damaging it.
- Heat the Hose End:
- With a Heat Gun: Set the heat gun to a low setting and gently heat the end of the hose for about 30-60 seconds. Rotate the hose to ensure even heating.
- With a Hair Dryer: Use the high setting and heat the end of the hose for about 1-2 minutes, rotating it continuously.
- Check the Softness: The hose end should be soft and pliable. Be careful not to overheat it, as this can cause the hose to melt or become brittle.
Step 3: Insert the Fitting
Now that the hose end is softened, it’s time to insert the fitting. Push the fitting into the hose, using a twisting motion if necessary. Make sure the fitting is fully inserted and seated properly.
- Position the Fitting: Hold the fitting in one hand and the heated hose end in the other.
- Insert the Fitting: Push the fitting into the hose with a firm, steady motion. If it’s difficult to insert, try twisting the fitting as you push.
- Ensure Full Insertion: Make sure the fitting is fully inserted into the hose until it reaches the base.
Step 4: Secure the Fitting with a Hose Clamp
To ensure a secure and leak-proof connection, you’ll need to use a hose clamp. Slide the clamp over the hose and position it so that it’s centered over the fitting. Then, tighten the clamp using a screwdriver or wrench.
- Position the Clamp: Slide the hose clamp over the hose and position it so that it’s centered over the fitting.
- Tighten the Clamp: Use a screwdriver or wrench to tighten the clamp. Be careful not to overtighten, as this can damage the hose. The clamp should be snug enough to hold the fitting securely in place.
Step 5: Repeat on the Other End
Repeat steps 2 through 4 on the other end of the air hose. This will ensure that both ends are properly fitted and secured.
- Heat the Other End: Use the heat gun or hair dryer to soften the other end of the hose.
- Insert the Fitting: Push the fitting into the hose until it’s fully inserted.
- Secure with a Clamp: Slide the hose clamp over the hose and tighten it securely.
Step 6: Test for Leaks
Once you’ve attached the fittings to both ends of the hose, it’s important to test for leaks. Connect the hose to your air compressor and inflate it to the recommended pressure. Then, check the fittings and hose for any signs of air leaks. You can use a soapy water solution to help identify leaks – bubbles will form where air is escaping.
- Connect to Air Compressor: Attach one end of the hose to your air compressor.
- Inflate the Hose: Inflate the hose to the recommended pressure.
- Check for Leaks: Apply a soapy water solution to the fittings and hose. Look for bubbles, which indicate a leak.
- Address Leaks: If you find any leaks, tighten the hose clamps or re-apply the fittings as needed.
Tips for a Professional Finish

To ensure your custom air hose is durable and performs well, consider these tips:
- Use Quality Materials: Invest in high-quality air hoses and fittings. They may cost more upfront, but they will last longer and provide better performance.
- Properly Size the Hose: Choose the correct inner diameter for your air tools. Using the wrong size can reduce the efficiency of your tools.
- Protect the Hose: Avoid exposing the hose to sharp objects, extreme temperatures, and corrosive chemicals. Store the hose properly when not in use to prolong its life.
- Regularly Inspect the Hose: Check the hose for any signs of wear and tear, such as cracks, cuts, or abrasions. Replace the hose if you notice any damage.
Troubleshooting Common Issues
Even with careful preparation, you might encounter some common issues. Here’s how to troubleshoot them:
- Air Leaks: If you experience air leaks, check the hose clamps and fittings. Make sure the clamps are tightened properly and the fittings are fully inserted. If the leaks persist, try replacing the fittings or using Teflon tape on the threads.
- Difficulty Inserting Fittings: If you’re having trouble inserting the fittings, make sure the hose end is properly heated. You can also try using a small amount of lubricant, such as silicone grease, to help the fitting slide in.
- Hose Kinking: To prevent hose kinking, choose a flexible hose material, such as polyurethane or hybrid. When storing the hose, coil it loosely and avoid sharp bends.
Table: Comparing Air Hose Materials

| Material | Pros | Cons | Best Use |
|---|---|---|---|
| Rubber | Durable, flexible, high-pressure resistance | Heavier, more expensive | General use, heavy-duty applications |
| PVC | Lightweight, inexpensive | Less durable, stiff in cold weather | Light-duty applications |
| Polyurethane | Very flexible, kink-resistant, abrasion-resistant | Can be more expensive | Demanding environments, applications requiring high flexibility |
| Hybrid (Rubber/PVC) | Lightweight, flexible, durable, good balance of performance and cost | May not be as durable as pure rubber | General use, DIY projects |
Table: Common Air Hose Fitting Types
| Fitting Type | Description | Pros | Cons |
|---|---|---|---|
| NPT (National Pipe Thread) | Tapered threads that create a tight seal | Reliable, leak-proof seal | Requires wrench for tightening, not ideal for frequent changes |
| Quick-Connect | Allows for quick and easy connection and disconnection | Fast and convenient, ideal for frequent changes | Can be more prone to leaks if not properly maintained |
| Barbed | Used with hose clamps to secure the hose to the fitting | Simple and inexpensive | Requires hose clamps, may not be as secure as other types |
FAQ: Creating Custom Length Air Hose
Here are some frequently asked questions about creating custom length air hoses:
What is the best material for an air hose?
The best material depends on your needs. Rubber hoses are durable and flexible, while polyurethane hoses are lightweight and kink-resistant. Hybrid hoses offer a good balance of both.
What size air hose do I need?
The size depends on your air tools. Common sizes are 1/4 inch, 3/8 inch, and 1/2 inch. Check your tool’s requirements to determine the correct size.
How do I prevent air leaks in my hose?
Ensure the fittings are properly inserted and secured with hose clamps. Use Teflon tape on the threads for a tighter seal. Regularly inspect the hose for damage.
Can I use a regular knife to cut the air hose?
While you can use a utility knife, a hose cutter is recommended for a cleaner, more precise cut. This helps prevent leaks and ensures a better connection.
How often should I replace my air hose?
Replace your air hose if you notice any signs of wear and tear, such as cracks, cuts, or abrasions. Regular inspection will help you identify when it’s time for a replacement.
What type of fittings should I use for my air hose?
Choose fittings made of brass, steel, or aluminum. Brass is corrosion-resistant, steel is stronger, and aluminum is lightweight. Ensure the fittings match the hose size and thread type.
Is it safe to use a heat gun on an air hose?
Yes, but use it on a low setting and heat the hose gently to avoid melting or damaging it. A hair dryer can also be used as a safer alternative.
Conclusion
Creating a custom-length air hose is a simple and rewarding project that can save you time and frustration. By following these steps and tips, you can create a durable, leak-free air hose that perfectly meets your needs. Whether you’re inflating tires, powering air tools, or tackling other DIY projects, a custom air hose will make the job easier and more efficient.
Remember to choose the right materials, take your time with each step, and always prioritize safety. With a little practice, you’ll be able to create custom air hoses for all your projects. Happy pumping!


