
How to Clean Hand Pump Nozzle: Easy Guide!
Quick Summary: Keeping your hand pump nozzle clean is easy! Simply unscrew the nozzle, use a small brush or cloth to remove dirt and debris, and clear any blockage with a needle or pin. Regular cleaning ensures a tight seal, preventing air leaks and making inflating your tires much easier.
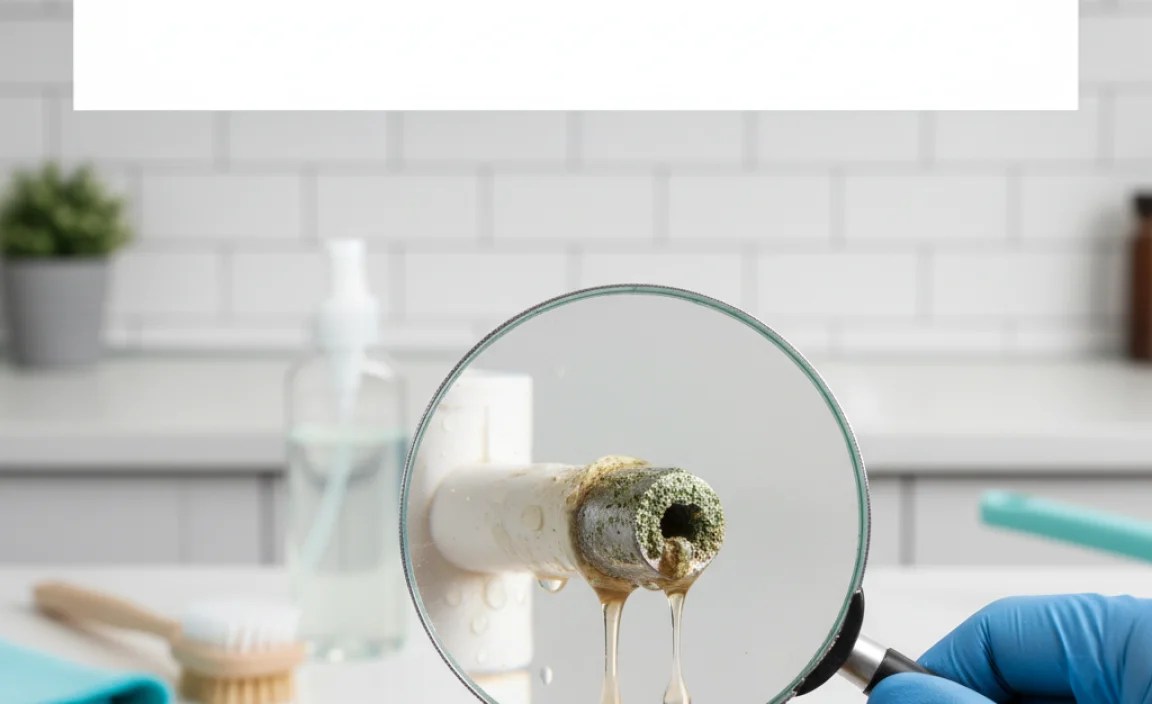
Ever struggled to pump up your bike tires, only to find air leaking everywhere? A dirty hand pump nozzle is often the culprit. Dirt, grime, and old sealant can build up, preventing a proper seal between the pump and valve. Don’t worry; cleaning it is a simple task that anyone can do. This guide will walk you through each step, helping you keep your tires inflated and your rides smooth. Let’s get started!
Why Clean Your Hand Pump Nozzle?
A clean hand pump nozzle is essential for efficient and reliable tire inflation. Here’s why:
- Proper Seal: A clean nozzle creates a tight seal with the tire valve, preventing air leaks.
- Efficient Inflation: A good seal means more air goes into the tire with each pump, saving you time and effort.
- Prevents Damage: Debris can damage the valve stem on your tires, leading to slow leaks or flats.
- Extends Pump Life: Regular cleaning prevents the buildup of grime that can damage the pump’s internal components.
Tools and Materials You’ll Need

Before you start, gather these simple tools and materials:
- Small Brush: An old toothbrush or small cleaning brush works perfectly.
- Clean Cloth or Rag: For wiping away dirt and grime.
- Needle or Pin: To clear any blockages in the nozzle.
- Lubricant (Optional): A small amount of silicone-based lubricant can help maintain the seal.
- Warm, Soapy Water (Optional): For a more thorough cleaning.
- Gloves (Optional): To keep your hands clean.
Step-by-Step Guide to Cleaning Your Hand Pump Nozzle

Follow these steps to clean your hand pump nozzle effectively:
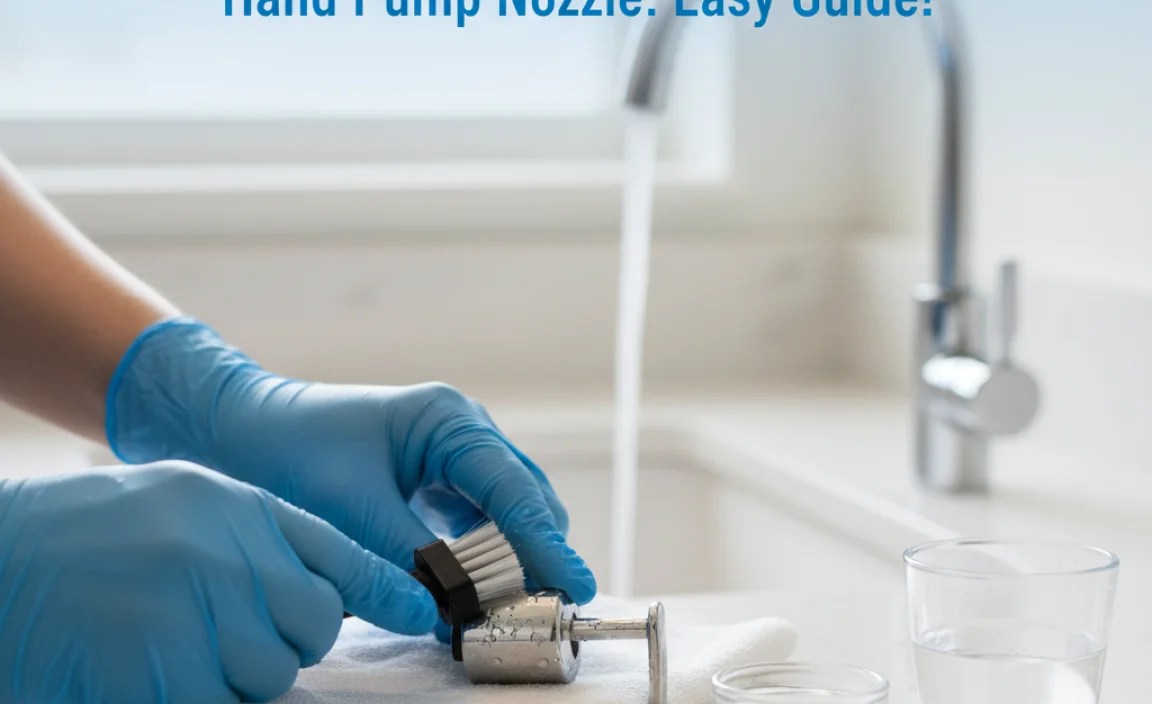
Step 1: Disassemble the Nozzle
Most hand pump nozzles can be easily disassembled. Here’s how:
- Locate the Nozzle: Find the end of the pump that attaches to your tire valve.
- Unscrew the Nozzle: Gently unscrew the nozzle from the pump hose or body. Some nozzles may have a lever or locking mechanism; release this before unscrewing.
- Disassemble Further (If Possible): Some nozzles can be further disassembled into smaller parts. Take note of how the parts fit together before taking them apart.
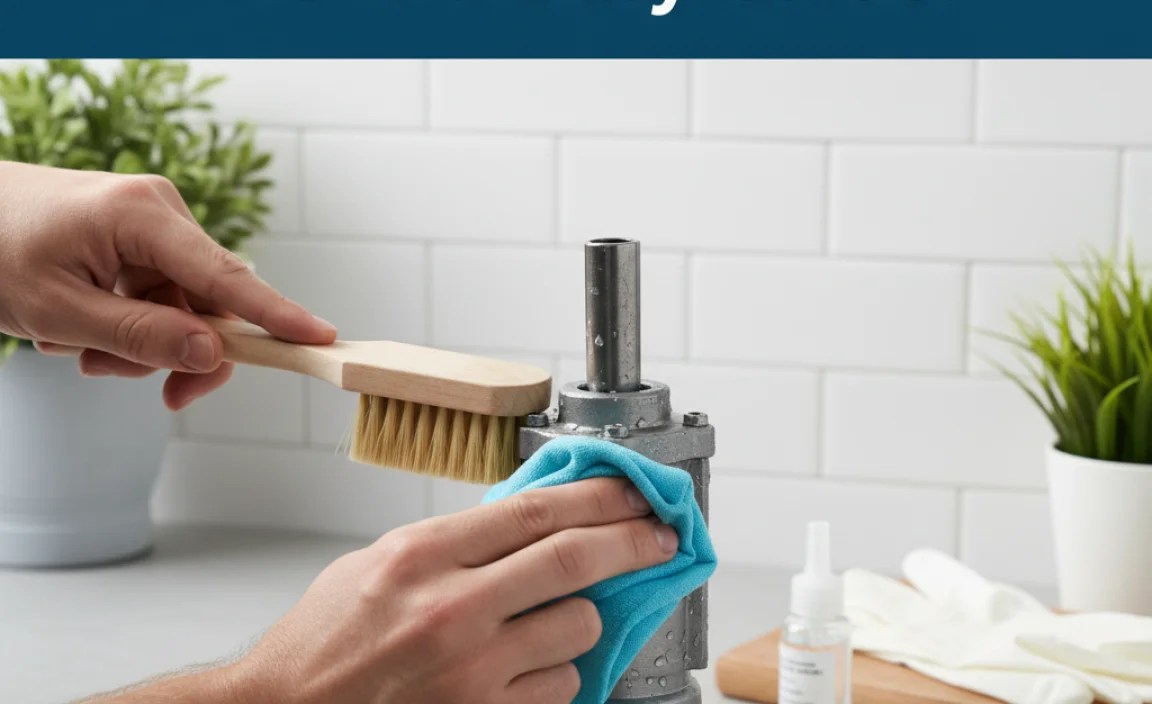
Step 2: Remove Visible Dirt and Debris
Use a brush and cloth to remove any visible dirt:
- Brush the Components: Use a small brush (like an old toothbrush) to scrub away dirt, grime, and sealant from all parts of the nozzle.
- Wipe Clean: Use a clean cloth or rag to wipe away the loosened dirt.
Step 3: Clear Any Blockages
Use a needle or pin to clear any obstructions:
- Identify Blockages: Look for any visible blockages in the nozzle openings.
- Gently Clear Obstructions: Use a needle or pin to carefully remove any debris blocking the airflow. Be gentle to avoid damaging the nozzle.
Step 4: Wash the Nozzle (Optional)
For a more thorough clean, wash the nozzle with warm, soapy water:
- Prepare Soapy Water: Mix a small amount of mild soap with warm water.
- Wash the Nozzle: Submerge the nozzle parts in the soapy water and scrub with a brush.
- Rinse Thoroughly: Rinse all parts with clean water to remove any soap residue.
- Dry Completely: Allow all parts to dry completely before reassembling.
Step 5: Reassemble the Nozzle
Put the nozzle back together carefully:
- Reassemble Parts: Reassemble the nozzle parts in the correct order, referring to any notes or photos you took during disassembly.
- Tighten Securely: Ensure all parts are securely tightened.
Step 6: Lubricate (Optional)
A small amount of lubricant can help maintain the seal:
- Apply Lubricant: Apply a small amount of silicone-based lubricant to the threads and seals of the nozzle.
- Wipe Excess: Wipe away any excess lubricant.
Step 7: Test the Nozzle
Test the nozzle to ensure it’s working correctly:
- Attach to Pump: Reattach the cleaned nozzle to your hand pump.
- Inflate Tire: Attach the pump to your bike tire valve and inflate the tire.
- Check for Leaks: Listen for any air leaks around the nozzle. If there are leaks, double-check the nozzle assembly and ensure it is properly tightened.
Troubleshooting Common Issues
Sometimes, cleaning isn’t enough. Here are some common issues and how to address them:
- Persistent Leaks: If the nozzle continues to leak after cleaning, the seals may be worn out. Consider replacing the nozzle or the entire pump.
- Nozzle Won’t Attach: Ensure the nozzle is compatible with your tire valve type (Presta or Schrader). Some nozzles are dual-headed or have adapters.
- Stiff Lever: If your nozzle has a lever that’s difficult to operate, apply a small amount of lubricant to the pivot points.
Maintaining Your Hand Pump for Longevity
Regular maintenance can extend the life of your hand pump. Here are some tips:
- Regular Cleaning: Clean the nozzle every few weeks, especially after riding in wet or dirty conditions.
- Store Properly: Store your pump in a clean, dry place to prevent dirt and moisture buildup.
- Check for Wear: Regularly inspect the pump hose, seals, and other parts for wear and tear. Replace worn parts as needed.
- Lubricate Moving Parts: Periodically lubricate the pump’s moving parts with a silicone-based lubricant.
Choosing the Right Cleaning Products
Selecting the right cleaning products can make a big difference. Here’s a comparison table:
| Cleaning Product | Pros | Cons | Best Use |
|---|---|---|---|
| Warm, Soapy Water | Gentle, readily available, effective for general cleaning | May not remove stubborn grime, requires thorough rinsing | Regular maintenance cleaning |
| Degreaser | Effective for removing grease and stubborn grime | Can be harsh on rubber and plastic parts, requires careful application and rinsing | Heavily soiled nozzles |
| Silicone-Based Lubricant | Protects rubber seals, prevents corrosion, improves pump action | Can attract dirt if overapplied | Maintaining nozzle seals and threads |
| Isopropyl Alcohol | Excellent for disinfecting, evaporates quickly | Can dry out rubber parts if used excessively | Disinfecting and cleaning internal components |
Understanding Presta vs. Schrader Valves
Different bikes use different valve types. Here’s a quick overview:
- Presta Valves: Narrower, with a small locking nut at the tip. Common on road bikes and high-performance bikes.
- Schrader Valves: Wider, like those on car tires. Common on mountain bikes, hybrid bikes, and older bikes.
Make sure your pump nozzle is compatible with your valve type. Many pumps have dual-headed nozzles or adapters for both types.
The Importance of Valve Caps
Valve caps protect your tire valves from dirt and damage. Make sure to use them:
- Keep Debris Out: Valve caps prevent dirt and debris from entering the valve, which can cause leaks.
- Prevent Damage: They protect the valve stem from being bent or damaged.
- Easy to Replace: Valve caps are inexpensive and easy to replace if lost or damaged.
Hand Pump vs. Floor Pump: Which is Right for You?
Choosing between a hand pump and a floor pump depends on your needs. Here’s a comparison:
| Type of Pump | Pros | Cons | Best Use |
|---|---|---|---|
| Hand Pump | Portable, lightweight, ideal for on-the-go inflation | Requires more effort, less efficient for high-pressure inflation | Emergency repairs, topping off tire pressure during rides |
| Floor Pump | More efficient, easier to inflate tires to high pressure, more stable | Less portable, not suitable for on-the-go use | Home use, setting precise tire pressure before rides |
Advanced Cleaning Techniques for Stubborn Grime
Sometimes, a simple cleaning isn’t enough. Here are some advanced techniques for stubborn grime:
- Ultrasonic Cleaning: An ultrasonic cleaner uses sound waves to dislodge dirt and grime. This is a highly effective method for cleaning small, intricate parts.
- Soaking in Vinegar: Soaking the nozzle in white vinegar can help dissolve mineral deposits and stubborn grime. Rinse thoroughly after soaking.
- Using Pipe Cleaners: Pipe cleaners can reach into small crevices and remove stubborn debris.
When to Replace Your Hand Pump Nozzle
Even with regular cleaning, your hand pump nozzle may eventually need to be replaced. Here are some signs it’s time for a new one:
- Cracked or Damaged Housing: If the nozzle housing is cracked or damaged, it may not be able to create a proper seal.
- Worn Seals: If the seals are worn or deteriorated, they may leak air even after cleaning.
- Corroded Parts: If the internal parts are corroded, they may not function properly.
- Difficulty Attaching: If the nozzle is difficult to attach to the valve, the threads may be damaged.
Replacing the nozzle is usually a simple and inexpensive repair. Check with the pump manufacturer or a local bike shop for replacement parts.
Hand Pump Maintenance Schedule
Here’s a recommended maintenance schedule to keep your hand pump in top condition:
| Frequency | Task | Description |
|---|---|---|
| After Each Ride | Wipe Down | Wipe down the pump with a clean cloth to remove dirt and moisture. |
| Monthly | Nozzle Cleaning | Clean the pump nozzle as described in this guide. |
| Quarterly | Lubrication | Lubricate the pump’s moving parts with a silicone-based lubricant. |
| Annually | Inspection | Inspect the pump for wear and tear, and replace any worn parts. |
FAQ: Cleaning Hand Pump Nozzles
Q1: How often should I clean my hand pump nozzle?
A: Clean your hand pump nozzle every few weeks, especially after riding in wet or dirty conditions. Regular cleaning prevents buildup and ensures a good seal.
Q2: What type of lubricant should I use on my hand pump nozzle?
A: Use a silicone-based lubricant. It’s safe for rubber and plastic parts and helps maintain a good seal without attracting too much dirt.
Q3: Can I use WD-40 to clean my hand pump nozzle?
A: It’s best to avoid WD-40, as it can damage rubber seals over time. Stick to silicone-based lubricants or warm, soapy water for cleaning.
Q4: What if I can’t disassemble my hand pump nozzle?
A: If you can’t disassemble the nozzle, try using a small brush and needle to clean it as thoroughly as possible. Rinse with water and allow it to dry completely.
Q5: How do I know if my hand pump nozzle needs to be replaced?
A: If your nozzle continues to leak air after cleaning, is cracked or damaged, or is difficult to attach to the valve, it may be time to replace it.
Q6: Can I use a floor pump nozzle on my hand pump?
A: No, floor pump nozzles are typically larger and not compatible with hand pumps. Use a nozzle designed specifically for your hand pump model.
Q7: What’s the difference between Presta and Schrader valves?
A: Presta valves are narrow with a locking nut, common on road bikes. Schrader valves are wider, like car tires, and found on mountain and hybrid bikes. Make sure your nozzle matches your valve type.
Conclusion
Keeping your hand pump nozzle clean is a simple but crucial part of bike maintenance. By following these steps, you can ensure efficient tire inflation, prevent damage to your tires, and extend the life of your pump. Regular cleaning and maintenance will keep you rolling smoothly on every ride. So grab your brush, needle, and cloth, and give your hand pump nozzle the attention it deserves. Happy riding!


