
How to Build Hand Pump for Science Project: Easy Guide
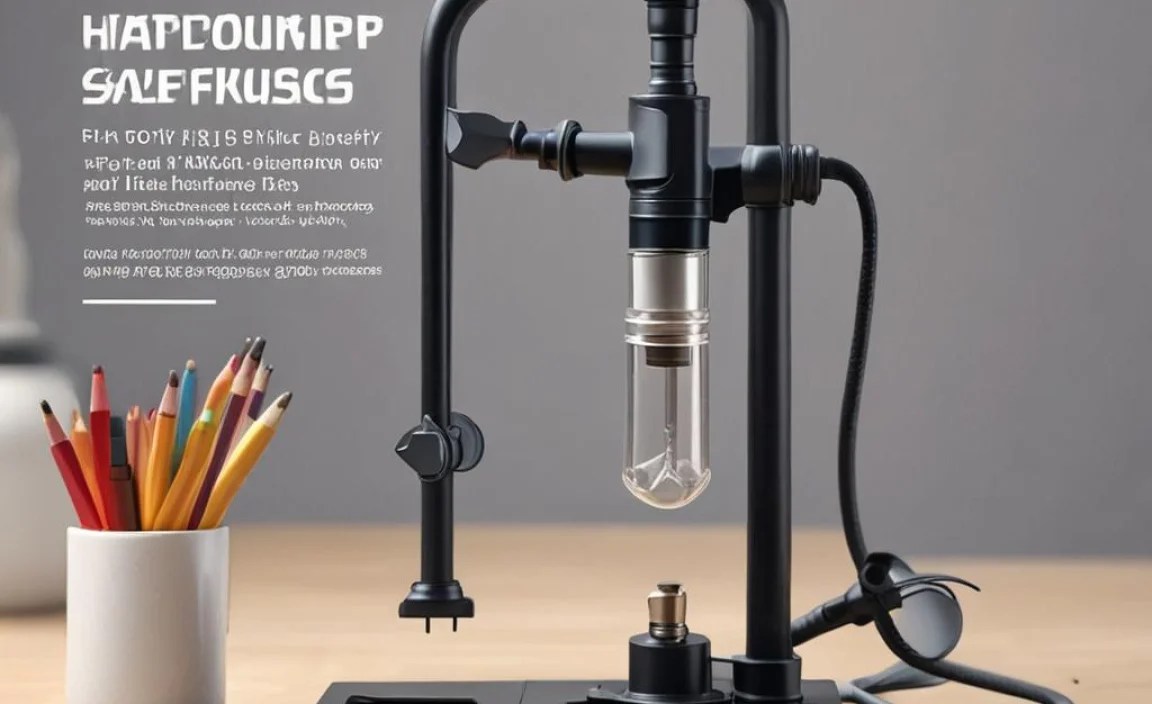
Building a hand pump for a science project? You got this! You’ll need some basic supplies like PVC pipes, valves, and a few simple tools. By following a few easy steps, you can create a working model to demonstrate how pumps move liquids or air. It’s a fun way to learn about pressure and volume!
Ever wondered how a simple hand pump works? It’s a great way to understand basic principles of physics. Maybe you’re looking for a cool science project that’s both educational and fun, or perhaps you just want to understand how these everyday devices function. Building your own hand pump is surprisingly easy.
Don’t worry if you’ve never done anything like this before. This guide will walk you through each step. We’ll cover everything from gathering materials to assembling the pump, so you can create a working model and impress your friends and teachers. Let’s get started!
Materials You’ll Need
Before you start building, gather all the necessary materials. This will make the process smoother and prevent any last-minute trips to the hardware store.
- PVC Pipe: Two different diameters (e.g., 1-inch and 1/2-inch)
- PVC End Caps: To fit the larger diameter pipe
- Check Valves: Two small check valves (also known as one-way valves)
- Rubber Stopper: To act as a piston
- Metal Rod or Dowel: For the pump handle
- Epoxy or PVC Cement: To glue the parts together
- Drill: With various drill bits
- Saw: To cut the PVC pipe
- Measuring Tape: For accurate measurements
- Sandpaper: To smooth rough edges
- Water or Air: For testing the pump
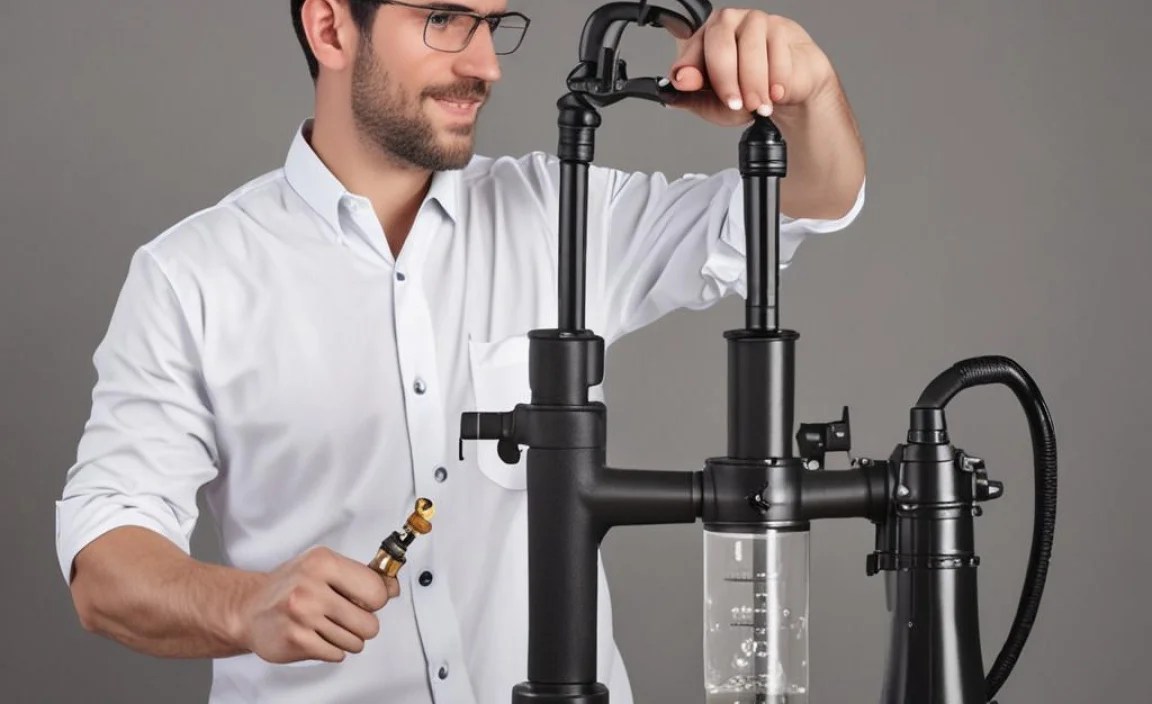
Step-by-Step Guide to Building Your Hand Pump

Follow these steps carefully to assemble your hand pump. Each step is designed to be simple and easy to understand.
Step 1: Cut the PVC Pipe
Use the saw to cut the PVC pipe into the required lengths. You’ll need:
- A longer piece of the larger diameter pipe (e.g., 12 inches) for the pump cylinder.
- A shorter piece of the smaller diameter pipe (e.g., 6 inches) for the piston rod.
Make sure the cuts are clean and straight. Use sandpaper to smooth any rough edges.
Step 2: Prepare the Pump Cylinder
Take the longer piece of larger diameter PVC pipe. This will be the main cylinder of your pump.
- Drill Holes: Drill two small holes near one end of the pipe. These holes will be for the water or air outlet.
- Attach Check Valve 1: Attach one of the check valves to the outlet holes. Make sure the valve is oriented so that fluid can only flow out of the cylinder. Use epoxy or PVC cement to secure it.
- Attach End Cap: Glue an end cap to the opposite end of the cylinder. This will seal off one end of the pump.
Step 3: Assemble the Piston
The piston is the part that moves inside the cylinder to create pressure.
- Prepare the Rubber Stopper: Drill a hole through the center of the rubber stopper. This hole should be just large enough to fit the smaller diameter PVC pipe (piston rod).
- Attach the Piston Rod: Insert the smaller diameter PVC pipe through the hole in the rubber stopper. Glue the stopper to the end of the pipe, ensuring a tight seal.
- Attach Check Valve 2: Attach the second check valve to the open end of the piston rod. Make sure the valve is oriented so that fluid can only flow into the piston. Use epoxy or PVC cement to secure it.
Step 4: Insert the Piston into the Cylinder
Carefully insert the piston assembly into the open end of the pump cylinder. The rubber stopper should fit snugly inside the cylinder, creating a seal.
Step 5: Create the Handle
Attach the metal rod or dowel to the end of the piston rod. This will serve as the handle for your pump.
- Drill a Hole: Drill a small hole through the end of the piston rod.
- Attach the Handle: Insert the metal rod or dowel through the hole and secure it with glue or a small bolt.
Step 6: Seal the Cylinder
Glue the remaining end cap to the open end of the cylinder, sealing the pump. Make sure the piston rod and handle can move freely.
Step 7: Test Your Pump
Now it’s time to test your hand pump.
- Submerge the Inlet: Place the end of the pump with the inlet check valve into a container of water.
- Operate the Handle: Move the handle up and down to create suction and pressure.
- Check the Outlet: Water should flow out of the outlet holes. If not, check the valves and seals for any leaks.
Troubleshooting Tips
Sometimes things don’t go as planned. Here are a few tips to help you troubleshoot common issues.
- Leaking Seals: If the pump is leaking, check all the connections and seals. Apply more epoxy or PVC cement to any leaky areas.
- Valve Problems: If the valves are not working correctly, make sure they are oriented properly and are not clogged.
- Piston Issues: If the piston is not moving smoothly, try lubricating it with a small amount of silicone grease.
Enhancements and Modifications

Once you’ve built a basic hand pump, you can add enhancements and modifications to improve its performance or demonstrate different principles.
- Pressure Gauge: Add a small pressure gauge to measure the output pressure of the pump.
- Transparent Cylinder: Use a clear PVC pipe for the cylinder to see the piston moving inside.
- Different Fluids: Experiment with pumping different types of fluids, such as oil or colored water.
The Science Behind the Hand Pump

Understanding the science behind the hand pump can make your science project even more impressive.
Pressure and Volume
The hand pump works by changing the volume inside the cylinder. When you pull the handle, you increase the volume, which decreases the pressure. This creates a suction that draws fluid into the cylinder through the inlet check valve.
Check Valves
Check valves are crucial for the operation of the pump. They allow fluid to flow in only one direction, ensuring that the fluid moves from the inlet to the outlet.
Applications of Hand Pumps
Hand pumps are used in many applications, from pumping water from wells to inflating tires. Understanding how they work can give you a greater appreciation for the simple machines that make our lives easier. You can find hand pumps used in:
- Water wells
- Bicycle tire inflation
- Manual fluid transfer
- Simple irrigation systems
Safety Tips
Safety should always be a priority when working on any project. Here are a few tips to keep you safe while building your hand pump.
- Wear Safety Glasses: Protect your eyes from flying debris when cutting or drilling.
- Use Gloves: Protect your hands from sharp edges and chemicals.
- Work in a Well-Ventilated Area: When using epoxy or PVC cement, work in a well-ventilated area to avoid inhaling harmful fumes.
- Supervision: If you are a student, make sure to have adult supervision.
Alternative Designs and Materials
While PVC is a common material for building hand pumps, you can also use other materials and designs.
Syringe Pump
A simple syringe pump can be made using a large syringe and some tubing. This design is great for small-scale experiments.
Wooden Pump
For a more advanced project, you can build a hand pump using wood. This requires more woodworking skills but can result in a more durable and aesthetically pleasing pump. For example, to build a wooden pump, one will need:
- Wood blocks (pine or cedar)
- Hand saw
- Chisel
- Drill
- Sandpaper
- Wood glue
- Check valves
Using Recycled Materials
Consider using recycled materials for your project. You can use plastic bottles, old pipes, and other discarded items to build a functional hand pump.
Hand Pump for Science Project: Data Collection and Analysis
Incorporating data collection and analysis into your science project can enhance its educational value and demonstrate a deeper understanding of the principles involved. Here’s how you can approach data collection and analysis for your hand pump project:
Measuring Output Volume
One of the key metrics to measure is the volume of fluid pumped per stroke. This can be done by collecting the output in a graduated cylinder or measuring cup. Repeat the measurement several times to ensure accuracy.
- Set Up: Place the outlet of the pump over a graduated cylinder.
- Pump: Perform 10 full strokes of the pump.
- Measure: Record the volume of fluid collected in the cylinder.
- Repeat: Repeat steps 2 and 3 at least three times.
- Calculate Average: Calculate the average volume per stroke by dividing the total volume by the number of strokes and the number of trials.
Measuring Pressure
Measuring the pressure generated by the pump can provide valuable insights into its performance. You’ll need a pressure gauge for this.
- Attach Gauge: Connect a pressure gauge to the outlet of the pump.
- Pump: Operate the pump and observe the pressure reading.
- Record: Record the maximum pressure achieved.
- Repeat: Repeat the measurement several times and calculate the average.
Calculating Efficiency
Pump efficiency is a measure of how effectively the pump converts mechanical energy into hydraulic energy. While a precise calculation requires more sophisticated equipment, you can estimate efficiency by comparing the theoretical output with the actual output.
Efficiency = (Actual Output / Theoretical Output) x 100%
Data Analysis
Once you’ve collected your data, analyze it to draw meaningful conclusions. Use tables and graphs to present your findings clearly.
| Trial | Volume per Stroke (mL) | Maximum Pressure (PSI) |
|---|---|---|
| 1 | X | Y |
| 2 | X | Y |
| 3 | X | Y |
| Average | X | Y |
Create graphs to visualize the relationship between different variables, such as the number of strokes and the output volume. This can help you identify trends and patterns in your data.
Interpreting Results
Discuss your findings in the context of the scientific principles involved. Explain how the data supports or contradicts your initial hypotheses. For example:
- Volume per Stroke: Analyze how the volume per stroke changes with different piston sizes or cylinder designs.
- Maximum Pressure: Discuss the factors that limit the maximum pressure achievable with your pump.
- Efficiency: Evaluate the efficiency of your pump and suggest ways to improve it.
Tips for Presentation
When presenting your science project, clarity and organization are key. Here are some tips to help you create a compelling presentation:
- Visual Aids: Use diagrams, photographs, and videos to illustrate your project.
- Clear Explanations: Explain the scientific principles involved in simple, easy-to-understand language.
- Data Presentation: Present your data in tables and graphs that are easy to read and interpret.
- Demonstration: Demonstrate your hand pump in action to show how it works.
FAQ
What is a check valve and why is it important?
A check valve is a one-way valve that allows fluid to flow in only one direction. It’s important in a hand pump because it ensures that the fluid moves from the inlet to the outlet without flowing back.
Can I use different materials other than PVC?
Yes, you can use other materials such as wood, metal, or even recycled materials. However, PVC is easy to work with and readily available, making it a popular choice for beginner projects.
How do I prevent leaks in my hand pump?
To prevent leaks, make sure all connections are tight and properly sealed. Use epoxy or PVC cement to glue the parts together, and check for any gaps or cracks. Applying silicone grease to the piston can also help create a better seal.
What is the ideal size for the PVC pipes?
A good starting point is to use a 1-inch diameter pipe for the cylinder and a 1/2-inch diameter pipe for the piston rod. Adjust the sizes as needed based on the materials you have available and the desired performance of the pump.
How can I make my hand pump more efficient?
To improve efficiency, minimize friction by lubricating the piston and ensuring a tight seal between the piston and the cylinder. Also, optimize the size and design of the valves to reduce flow resistance.
What are some real-world applications of hand pumps?
Hand pumps are used in many applications, including pumping water from wells, inflating tires, transferring fluids, and in simple irrigation systems.
Is it safe to pump any type of liquid with my homemade hand pump?
No, it’s not safe to pump all types of liquids. Avoid pumping corrosive or hazardous materials, as they can damage the pump and pose a safety risk. Stick to water or other non-toxic fluids for your science project.
Conclusion
Building a hand pump for a science project is a fun and educational way to learn about physics and engineering principles. By following these step-by-step instructions, you can create a working model that demonstrates the concepts of pressure, volume, and fluid dynamics. Remember to take your time, be careful, and have fun with the process. Good luck with your project!


