How to Check a Patched Inner Tube for Leaks: Easy!
Quick Summary: After patching an inner tube, you need to check for leaks to ensure your repair holds. Inflate the tube slightly, then submerge it in water, looking for bubbles. Alternatively, apply soapy water to the patch and look for bubbles forming. If no leaks are found, inflate the tube to its recommended pressure and check again before reinstalling it on your bike.
Patching an inner tube is a fantastic way to save money and reduce waste. But, a poorly sealed patch can leave you stranded with a flat tire. No fun, right? That’s why it’s super important to check your patched inner tube for leaks before you put it back in your tire. Think of it as a quality control check for your DIY repair job. This guide will walk you through simple steps to guarantee your patch is airtight, so you can ride with confidence. Ready to make sure your patch holds? Let’s get started!
What You’ll Need

Before we jump into the process, let’s gather the necessary tools. Don’t worry; you probably already have most of these items at home:
- A bucket or tub of water: Big enough to fully submerge the patched section of the inner tube.
- Bike pump: To inflate the inner tube. A hand pump or floor pump will work fine.
- Soapy water (optional): A mix of water and dish soap in a spray bottle.
- Rag or towel: To dry the inner tube after testing.
Step-by-Step Guide: Checking Your Patched Inner Tube

Follow these steps to ensure your patched inner tube is leak-free and ready for the road.
Step 1: Slightly Inflate the Inner Tube
Use your bike pump to add a small amount of air to the inner tube. You want it to have some shape, but not be fully inflated. This makes it easier to handle and spot leaks.
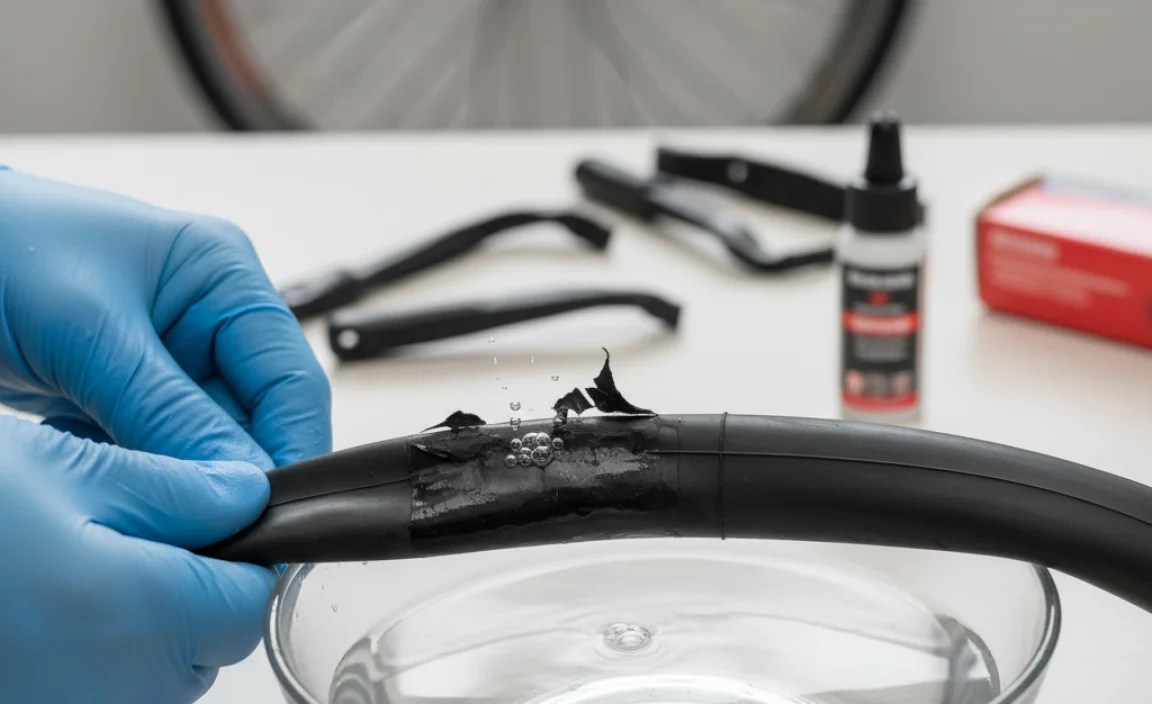
Step 2: Submerge the Patched Area in Water
Place the patched section of the inner tube into the bucket or tub of water. Make sure the entire patch and surrounding area are fully submerged.
Step 3: Look for Bubbles
Carefully observe the submerged area. Look for any bubbles coming from the patch or the area around it. Bubbles indicate air escaping, meaning your patch isn’t fully sealed.
Step 4: Rotate and Check the Entire Patch
Rotate the inner tube so you can inspect the entire circumference of the patch. Sometimes, leaks can be tiny and only appear from certain angles.
Step 5: Dry and Mark Leaks (If Any)
If you find any leaks, dry the area with a rag and mark the location of the leak with a pen or marker. This will help you when you need to re-patch the tube.
Step 6: Alternative Method: Soapy Water Test
If you don’t want to submerge the tube, you can use soapy water. Mix a small amount of dish soap with water in a spray bottle. Spray the soapy water onto the patch and surrounding area. Watch for bubbles forming, which indicate a leak.
Step 7: Inflate to Recommended Pressure and Recheck
If no leaks are apparent after the initial submersion or soapy water test, inflate the inner tube to its recommended pressure (printed on the sidewall of the tire). This will put more stress on the patch. Submerge the patched area again or apply soapy water to check for any leaks that might only appear under higher pressure. This is a crucial step to ensure the patch can handle the demands of riding.
What to Do If You Find a Leak

Discovering a leak after patching can be frustrating, but don’t worry! Here’s what you should do:
- Deflate the tube: Release all the air from the inner tube.
- Clean the area: Thoroughly clean the area around the old patch with sandpaper or a tire scuffer to remove any residue.
- Apply new glue: Apply a fresh layer of vulcanizing glue to both the inner tube and the patch. Let it dry until it’s tacky.
- Apply a new patch: Carefully apply a new patch, pressing firmly and evenly to ensure a good seal.
- Re-test: Repeat the leak-checking process to ensure the new patch is airtight.
Common Reasons for Patch Failure
Sometimes, patches fail despite your best efforts. Here are some common reasons why:
- Insufficient cleaning: If the area around the puncture isn’t properly cleaned, the glue won’t adhere well.
- Old glue: Vulcanizing glue has a shelf life. If it’s old or dried out, it won’t create a strong bond.
- Not enough pressure: Failing to apply enough pressure when applying the patch can result in a weak seal.
- Incorrect patch size: Using a patch that’s too small for the puncture can lead to leaks.
- Damaged tube: If the inner tube is damaged beyond repair (e.g., large cuts or multiple punctures close together), a patch might not hold.
Troubleshooting Tips
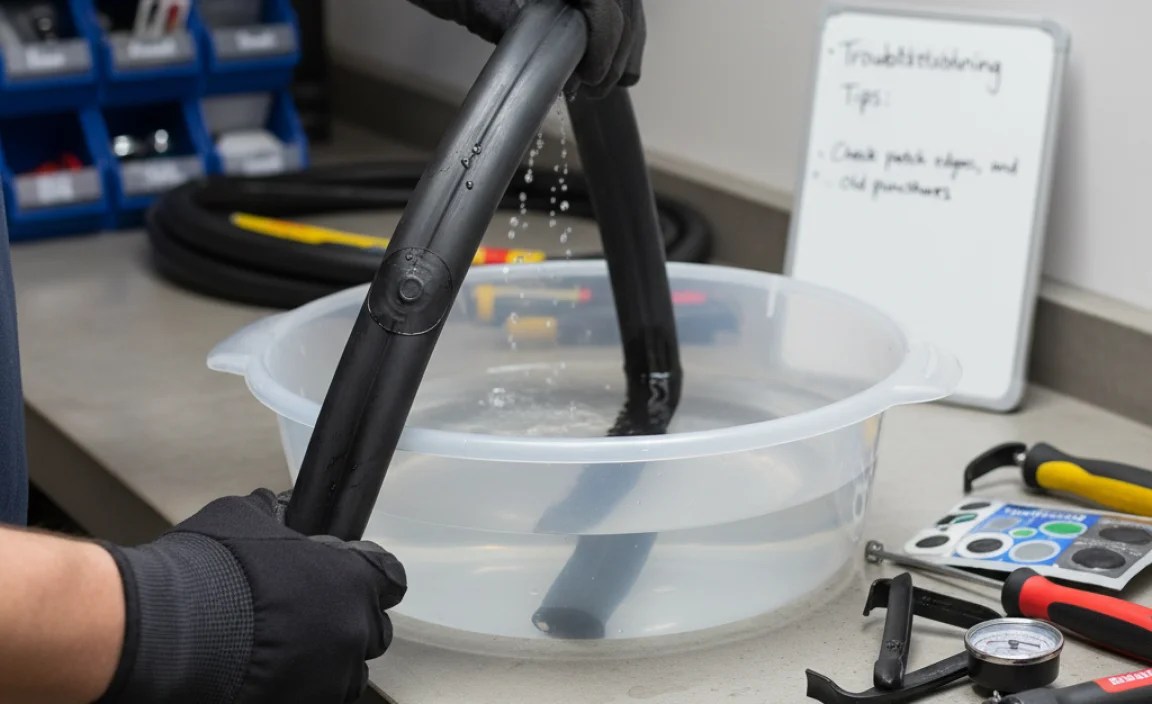
Here are some quick tips to help you troubleshoot common issues:
- Persistent leaks: If you’re having trouble getting a patch to hold, try using a larger patch or a different brand of patch kit.
- Slow leaks: Sometimes, leaks are so small that they’re hard to detect. Inflate the tube to a high pressure and listen carefully for a hissing sound.
- Patch lifting: If the edges of the patch are lifting, try applying a thin layer of super glue around the edges to seal them.
Choosing the Right Patch Kit
Not all patch kits are created equal. Here’s what to look for when choosing a patch kit:
- Vulcanizing patches: These patches use a chemical process to bond with the inner tube, creating a stronger and more permanent repair.
- Self-adhesive patches: These patches are convenient and easy to use, but they may not be as durable as vulcanizing patches.
- Patch size: Choose a patch kit that includes a variety of patch sizes to accommodate different puncture sizes.
- Glue quality: Make sure the kit includes high-quality vulcanizing glue that’s fresh and not dried out.
- Sandpaper or scuffer: A good patch kit will include sandpaper or a tire scuffer to prepare the inner tube surface.
Preventing Future Punctures
While patching inner tubes is a useful skill, preventing punctures in the first place is even better. Here are some tips:
- Maintain proper tire pressure: Underinflated tires are more prone to pinch flats. Check your tire pressure before each ride and inflate to the recommended pressure.
- Inspect your tires regularly: Look for cuts, embedded glass, or other debris that could cause a puncture.
- Use tire liners: Tire liners are strips of material that fit between the tire and the inner tube, providing an extra layer of protection against punctures.
- Consider tubeless tires: Tubeless tires use sealant to automatically seal small punctures, reducing the risk of flats.
- Ride defensively: Avoid riding through broken glass, potholes, and other road hazards.
Inner Tube Patch Kit Comparison
| Feature | Vulcanizing Patch Kit | Self-Adhesive Patch Kit |
|---|---|---|
| Durability | High (creates a chemical bond) | Moderate (relies on adhesive) |
| Ease of Use | Requires more steps and drying time | Very easy and quick to apply |
| Longevity | Long-lasting repair | May peel off over time, especially in wet conditions |
| Best For | Serious cyclists, long rides, and reliable repairs | Quick fixes, temporary solutions, and casual riders |
| Cost | Slightly more expensive | Generally less expensive |
Alternative Solutions to Patching
While patching is economical, other options exist:
- Replacing the Inner Tube: Simplest, but generates more waste.
- Tubeless Conversion: Eliminates inner tubes altogether.
- Tire Sealants: Inject sealant into the tube to automatically seal punctures.
Cost Analysis: Patching vs. Replacing
Let’s break down the cost savings of patching compared to replacing inner tubes.
| Item | Cost |
|---|---|
| Inner Tube (average) | $8 – $15 |
| Patch Kit (multiple patches) | $5 – $10 |
| Time to Patch | 15-30 minutes |
| Time to Replace | 5-10 minutes |
Over time, patching saves significant money, especially for frequent riders.
FAQ: Checking Patched Inner Tubes
What happens if I skip checking for leaks after patching?
You risk riding with a poorly sealed patch, which could lead to a flat tire while you’re out on a ride. It’s always best to double-check to avoid being stranded.
How long should I wait after patching before checking for leaks?
After applying the patch, wait at least 5-10 minutes for the glue to dry completely before inflating and checking for leaks.
Can I use any type of glue for patching an inner tube?
No, you should only use vulcanizing glue specifically designed for patching inner tubes. Other types of glue may not create a strong enough bond.
What if the patch seems to hold at first, but then starts leaking later?
This could be due to a small puncture that wasn’t initially detected, or a weak spot in the patch. Re-clean the area, apply a new patch, and re-test.
Is it possible to over-inflate an inner tube when checking for leaks?
Yes, over-inflating can cause the inner tube to burst, especially around a weakened patch. Always inflate to the recommended pressure printed on the tire sidewall.
Can I patch an inner tube multiple times?
Yes, but it’s generally recommended to replace the inner tube if it has too many patches close together. Too many patches can weaken the tube and increase the risk of failure.
Are tubeless tire repair kits similar to inner tube patch kits?
No, tubeless tire repair kits use different tools and materials, such as plugs and sealant, to repair punctures in tubeless tires. They don’t use patches in the same way as inner tubes.
Conclusion
Checking your patched inner tube for leaks is a simple but crucial step in bike maintenance. By following these steps, you can ensure your repairs are reliable and avoid the frustration of a flat tire on the road. Remember, a little extra care and attention can save you time, money, and a lot of hassle in the long run. So, grab your tools, get patching, and ride on with confidence!