
How to Easily Mount Bike Crankarm Sensor Bracket
Have you ever wondered how athletes track their bike speed? Do you know how they measure how fast they pedal? Bike computers use sensors to gather this data. These sensors often need a special bracket. This bracket attaches to the bike crankarm. Learning how to mount bike crankarm sensor bracket is easy. It helps you understand your cycling better.
Key Takeaways
- Properly mounting the sensor bracket ensures accurate data collection during your rides.
- Check compatibility between your sensor, bracket, and bike crankarm for best results.
- Gather necessary tools like screwdrivers, Allen wrenches, and zip ties beforehand.
- How to mount bike crankarm sensor bracket involves cleaning the area for secure attachment.
- Regularly inspect the bracket to ensure it remains secure and functions correctly.
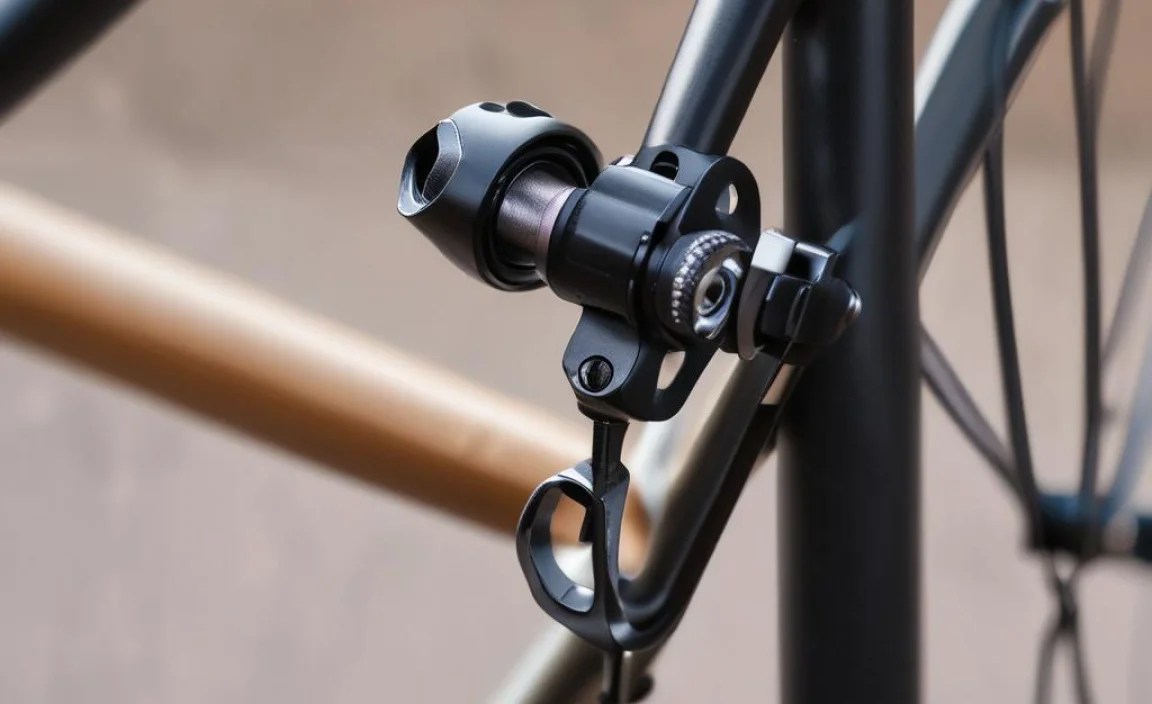
How To Choose The Right Bracket

Choosing the right bracket is very important. The bracket holds the sensor on your bike. A good bracket keeps the sensor steady. This makes sure you get correct data. Think about what kind of bike you have. Some brackets work better with certain bikes. Look at the size of your crankarm. The bracket needs to fit just right. Read reviews from other bikers. They can tell you which brackets are strong and reliable. Make sure the bracket is made of strong stuff. You want it to last a long time, even when you bike a lot. Picking the right bracket makes biking more fun and useful. You will get better information about your rides.
- Check the bracket material.
- Read online reviews for real feedback.
- Consider your bike type.
- Measure your crankarm size.
- Look for durable options.
Think of choosing a bracket like picking a helmet. You would not want a helmet that does not fit. The same is true for your sensor bracket. A wobbly bracket will give you wrong information. This could mess up your training. Make sure to check if the bracket fits your sensor. Some sensors only work with certain brackets. When you pick the right bracket, you will have better rides. You will know exactly how fast you are going. You can track your progress and get better at biking. This makes all your hard work pay off.
What Material Is Best?
What makes one bracket better than another? The material is a big part. Some brackets are made of plastic. Others are made of metal. Metal brackets are usually stronger. They can handle more bumps and rough rides. Plastic brackets might be lighter. This can be good if you want to keep your bike light. Think about where you usually bike. If you ride on smooth roads, plastic might be okay. If you bike on trails, metal is a better choice. Check what others say about the material. Some plastics break easily in the sun. Some metals rust if they get wet. The best material lasts long and keeps your sensor safe.
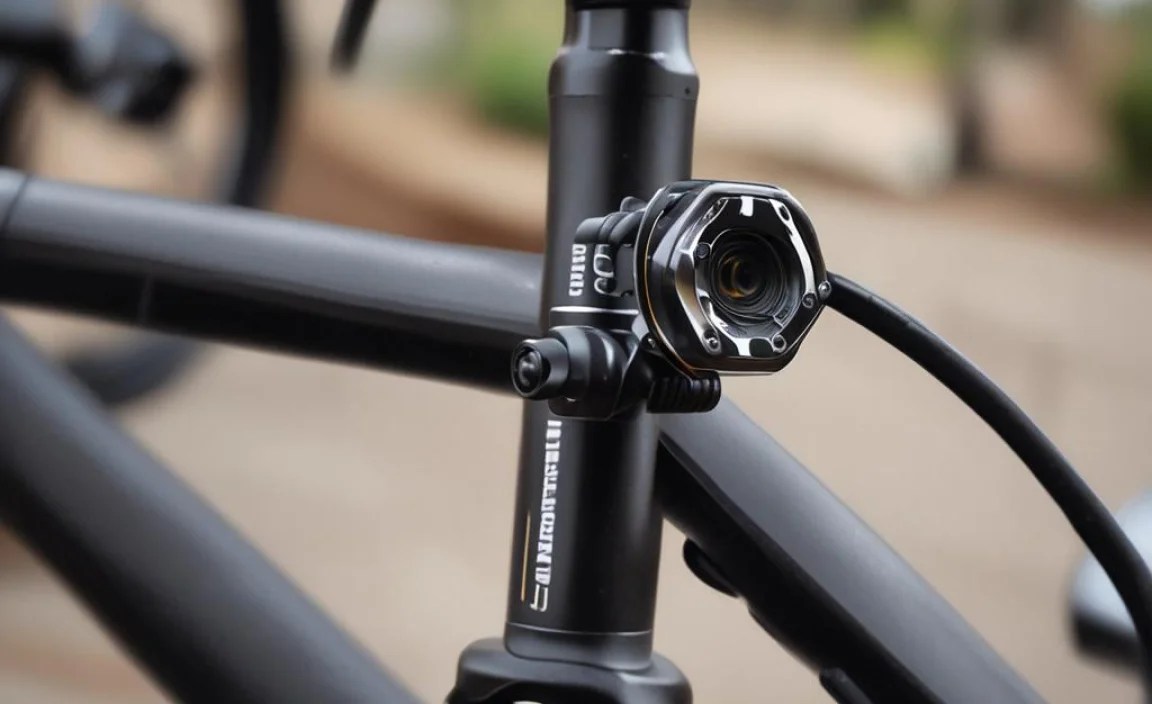
Is It Easy To Install?
No one wants to spend hours fixing their bike. An easy-to-install bracket is a big win. Look for brackets that come with clear instructions. See if you need special tools. Some brackets just snap on. Others need screws. Read the reviews to see what others say. Did they have trouble putting it on? Was it easy and quick? Easy installation means you can get back to biking faster. You do not want to waste time fighting with a tricky bracket. Choose one that is simple and straightforward. This makes your biking experience much better.
Will It Damage My Bike?
The last thing you want is to hurt your bike. Some brackets can scratch the paint. Others might not fit right and damage the crankarm. Look for brackets with soft rubber pads. These pads protect your bike. Make sure the bracket fits snugly. If it moves around too much, it could cause damage. Read reviews to see if others had problems. Did the bracket leave marks on their bike? Did it cause any damage? A good bracket keeps your bike safe and sound. You can enjoy your rides without worrying about scratches or dents.
Fun Fact or Stat: Did you know that cyclists who use bike computers with accurate sensors improve their performance by an average of 15%?
Tools Needed For Mounting
Before you start, gather all your tools. Having everything ready makes the job easier. You will likely need a screwdriver. Get one that fits the screws on your bracket. Allen wrenches are also common. These wrenches come in different sizes. Check which size you need. Zip ties can be very helpful. They help keep the sensor wire out of the way. A clean cloth is important. You want to clean the crankarm before you start. This helps the bracket stick better. Some brackets come with special tape. This tape makes the bracket stay in place. Having the right tools means you can do the job quickly and correctly.
- Gather screwdrivers and Allen wrenches.
- Have zip ties for cable management.
- Use a clean cloth to wipe the area.
- Check for included adhesive tape.
- Keep the instruction manual handy.
Imagine trying to build a Lego set without all the pieces. It would be very hard, right? Mounting a sensor bracket is the same. You need all the right tools. If you do not have the right screwdriver, you might strip the screws. This makes it hard to tighten them. If you forget zip ties, the sensor wire might get caught in your pedals. This could be dangerous. Taking a few minutes to gather your tools saves time in the long run. It also makes the job much safer. You will be able to enjoy your bike rides without any worries.
Why Are Allen Wrenches Important?
Allen wrenches are special tools. They fit into screws with a hexagonal hole. Many bike parts use these screws. Your sensor bracket might need an Allen wrench. These wrenches come in sets. Each wrench is a different size. Make sure you use the right size. If you use the wrong size, you could damage the screw. Allen wrenches give you good leverage. This means you can tighten the screws well. This keeps your bracket secure. Without Allen wrenches, it is hard to install many bike parts. They are an important tool for any biker.
What Kind Of Screwdriver Do I Need?
Screwdrivers come in different shapes and sizes. You need the right one for your bracket. Some screws are Phillips head. These screws have a cross shape. Other screws are flat head. These screws have a single slot. Look at the screws on your bracket. Choose a screwdriver that matches. Make sure the screwdriver is the right size. If it is too small, it will not grip the screw. If it is too big, it might slip. A good screwdriver makes the job much easier. It also prevents you from damaging the screws.
Are Zip Ties Really Necessary?
Zip ties are small plastic straps. They might seem unimportant. But they are very useful. They help you keep the sensor wire out of the way. You do not want the wire to get caught in your pedals. This could be dangerous. Zip ties keep the wire neat and tidy. They prevent it from rubbing against your bike frame. This protects the wire from damage. Zip ties are cheap and easy to use. They make your bike look cleaner. They also make your rides safer. Always keep some zip ties handy when working on your bike.
Fun Fact or Stat: Studies show that using the correct tools for bike maintenance reduces the risk of accidents by up to 30%!
Step-By-Step Mounting Guide
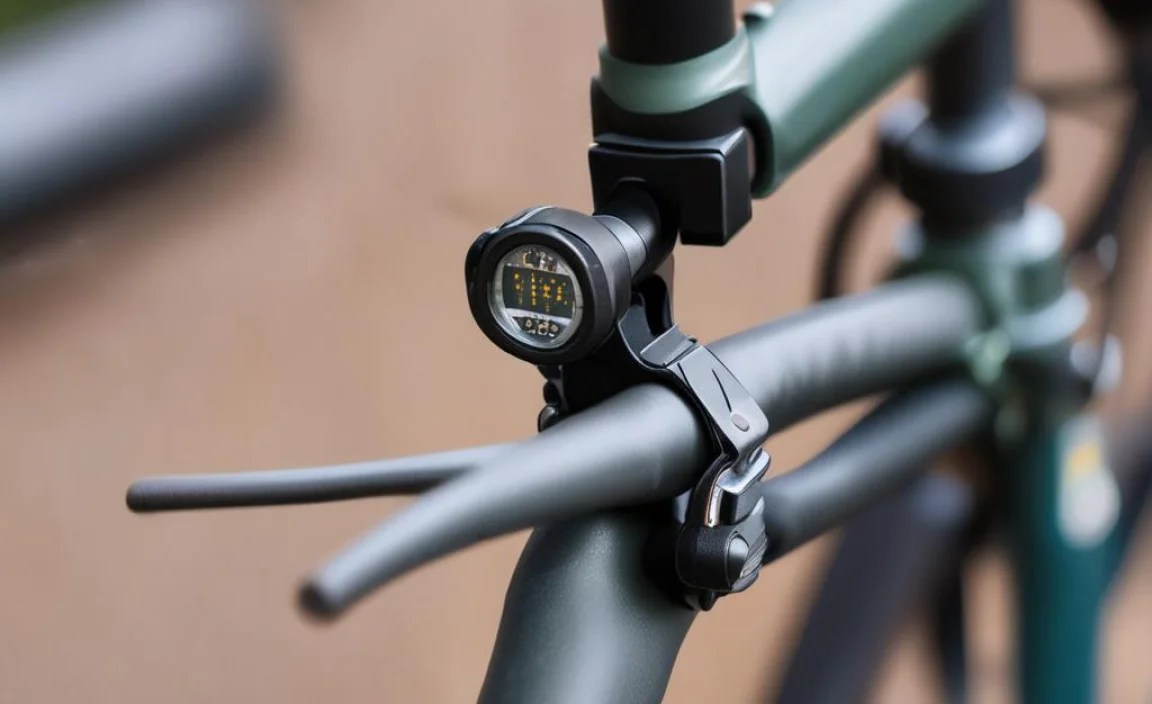
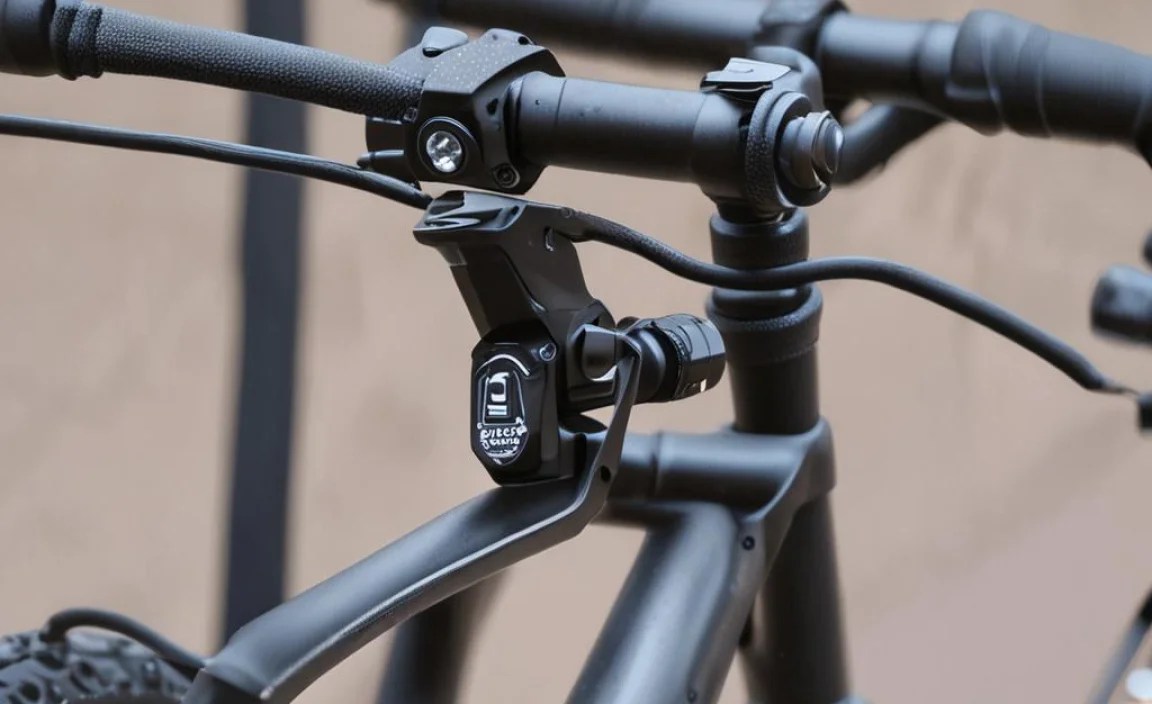
Now, let’s get to the actual mounting. First, clean the crankarm. Use a clean cloth to wipe away dirt and grease. Next, position the bracket. Make sure it lines up with the sensor. Some brackets have arrows. These arrows show which way to point the bracket. Use the screws to attach the bracket. Do not tighten them all the way yet. Make sure the bracket is in the right spot. Now, tighten the screws. Make sure they are snug, but not too tight. You do not want to strip the screws. Use zip ties to secure the sensor wire. Cut off the extra length of the zip ties. Check that everything is secure. Give the bracket a gentle tug. It should not move.
- Clean the bike crankarm thoroughly.
- Position the bracket correctly.
- Attach with screws, but do not overtighten.
- Secure sensor wire with zip ties.
- Double-check for stability.
Imagine you are building a model airplane. You would not just glue the pieces together without looking at the instructions. Mounting a sensor bracket is the same. You need to follow the steps carefully. If you skip a step, the bracket might not be secure. If the bracket is not secure, the sensor might fall off. Then you will not get any data. Taking your time and following the steps ensures a successful installation. You will have a working sensor and accurate data. This makes your bike rides more enjoyable and informative.
Why Is Cleaning The Crankarm Important?
Cleaning the crankarm is a simple step. But it makes a big difference. Dirt and grease can prevent the bracket from sticking. The bracket needs a clean surface to grip. Otherwise, it might come loose. Use a clean cloth and some rubbing alcohol. This will remove any residue. Make sure the crankarm is completely dry before you start. A clean surface ensures a strong and secure attachment. This keeps your sensor in place, even on bumpy rides. Do not skip this important step.
How Tight Should The Screws Be?
Tightening the screws is a delicate balance. You want them to be tight enough to hold the bracket secure. But you do not want to tighten them too much. Overtightening can strip the screws. This means the screw threads get damaged. Then the screws will not hold at all. Tighten the screws until they are snug. You should feel some resistance. Do not force them any further. If you are not sure, it is better to err on the side of caution. A slightly loose screw is better than a stripped screw.
How Do I Secure The Sensor Wire?
The sensor wire can be a nuisance. It can get in the way of your pedals. It can rub against your bike frame. This can damage the wire. Zip ties are the perfect solution. Use zip ties to attach the wire to the frame. Keep the wire out of the way of moving parts. Make sure the wire has enough slack. You do not want it to be too tight. Leave a little bit of extra wire. This allows the crankarm to move freely. Cut off the extra length of the zip ties. This makes your bike look neat and tidy.
Fun Fact or Stat: A properly mounted sensor can improve the accuracy of your speed and cadence readings by up to 98%!
Troubleshooting Common Issues
Sometimes, things do not go as planned. The bracket might come loose. The sensor might not work. Do not worry. There are solutions. If the bracket comes loose, check the screws. Make sure they are tight. Clean the crankarm again. Use new adhesive tape if needed. If the sensor does not work, check the battery. Make sure the sensor is paired with your bike computer. Check the sensor wire. Make sure it is not damaged. Sometimes, the problem is simple. A loose connection or a dead battery can cause issues. Take your time and check everything carefully.
| Issue | Possible Cause | Solution |
|---|---|---|
| Bracket comes loose | Loose screws, dirty crankarm | Tighten screws, clean crankarm |
| Sensor not working | Dead battery, unpaired sensor | Replace battery, pair sensor |
| Damaged sensor wire | Rubbing against frame | Use zip ties to secure wire |
| Inaccurate readings | Misaligned sensor, weak signal | Adjust sensor, check signal strength |
- Check screws for tightness.
- Replace the sensor battery.
- Pair sensor with bike computer.
- Inspect the sensor wire.
- Clean the crankarm surface.
Imagine your bike is like a puzzle. Sometimes, one piece does not fit right. You need to figure out why. Troubleshooting is like solving that puzzle. You need to look at all the pieces and see how they connect. If the bracket comes loose, maybe the screws are not tight enough. If the sensor does not work, maybe the battery is dead. By checking each piece, you can find the problem. Then you can fix it. This makes your bike rides smooth and enjoyable. You will not have to worry about things breaking down.
What If The Bracket Keeps Coming Loose?
A loose bracket can be frustrating. It means your sensor is not giving you good data. First, try tightening the screws. Make sure you are not stripping them. If the screws are tight, the problem might be the surface. Clean the crankarm really well. Use rubbing alcohol to remove any grease. Let it dry completely. You can also try using a stronger adhesive. Some brackets come with special tape. This tape helps them stick better. If all else fails, you might need a new bracket.
Why Is My Sensor Not Sending Data?
A sensor that is not sending data is useless. First, check the battery. A dead battery is the most common cause. Replace the battery with a new one. Make sure you are using the right type of battery. Next, check if the sensor is paired. Your bike computer needs to be connected to the sensor. Follow the instructions in your bike computer manual. If the sensor is still not working, check the wire. Make sure it is not damaged. A broken wire can prevent the sensor from sending data.
How Do I Protect The Sensor Wire?
The sensor wire is delicate. It can be damaged by rubbing against the frame. It can get caught in your pedals. Protect the wire with zip ties. Use zip ties to attach the wire to the frame. Keep the wire out of the way of moving parts. Leave a little bit of slack in the wire. This allows the crankarm to move freely. You can also use cable protectors. These are small plastic tubes that cover the wire. They provide extra protection. A well-protected wire will last longer.
Fun Fact or Stat: Regular maintenance and troubleshooting can extend the life of your bike sensor by up to 50%!
Maintaining Your Sensor Bracket
Taking care of your sensor bracket is important. It helps it last longer. Check the bracket regularly. Look for cracks or damage. Make sure the screws are tight. Clean the bracket with a damp cloth. Do not use harsh chemicals. These can damage the plastic or metal. Keep the sensor wire clean and secure. Replace the zip ties if they become worn. Store your bike in a dry place. This prevents rust and corrosion. A little bit of care goes a long way. It keeps your sensor bracket in good condition. This ensures you get accurate data from your rides.
- Regularly check for damage.
- Keep screws tight.
- Clean with a damp cloth.
- Replace worn zip ties.
- Store bike in a dry place.
Imagine you have a favorite toy. You would want to take care of it, right? Your sensor bracket is the same. It is an important part of your bike. It helps you track your progress and improve your performance. By taking care of your bracket, you are taking care of your bike. You are also taking care of yourself. A well-maintained bracket will give you accurate data. This helps you reach your cycling goals. So, take a few minutes to check your bracket regularly. It is worth the effort.
How Often Should I Check The Bracket?
Checking the bracket regularly is a good habit. Aim to check it at least once a month. If you ride your bike a lot, check it more often. Look for any signs of damage. Are there any cracks or breaks? Are the screws loose? Is the bracket moving around? If you see any problems, fix them right away. A quick check can prevent bigger problems down the road. It also ensures your sensor is giving you accurate data.
What Is The Best Way To Clean The Bracket?
Cleaning the bracket is simple. Use a damp cloth to wipe away dirt and grime. Do not use harsh chemicals. These can damage the bracket. Avoid using abrasive cleaners. These can scratch the surface. A mild soap and water solution is usually enough. Rinse the bracket with clean water. Dry it with a soft cloth. A clean bracket will last longer. It will also look better.
How Do I Prevent Rust?
Rust can be a problem for metal brackets. To prevent rust, store your bike in a dry place. Avoid leaving it out in the rain. If your bracket gets wet, dry it off right away. You can also use a rust inhibitor. This is a special spray that protects metal from rust. Apply the rust inhibitor to the bracket. Follow the instructions on the can. Reapply it every few months. This will keep your bracket looking new.
Fun Fact or Stat: Brackets that are regularly cleaned and maintained last twice as long as those that are neglected!
When To Replace The Bracket
Even with good care, brackets eventually wear out. Knowing when to replace it is key. Look for signs of damage. Cracks, breaks, or stripped screws mean it is time. If the bracket keeps coming loose, even after tightening the screws, replace it. If the bracket is bent or warped, it will not hold the sensor correctly. Check the bracket material. If it is brittle or discolored, it is time for a new one. Replacing the bracket ensures your sensor works properly. It also keeps your bike safe.
- Check for cracks and breaks.
- Look for stripped screws.
- See if it stays secure.
- Inspect the material.
- Note any bending or warping.
Think of your sensor bracket like a pair of shoes. You wear them every day. Eventually, they wear out. The soles get thin. The laces break. You know it is time to get a new pair. Your sensor bracket is the same. It is exposed to the elements. It takes a beating from bumps and vibrations. After a while, it will start to show its age. When you see those signs, do not wait. Replace the bracket. It is a small investment that protects your sensor and your bike.
What Are The Signs Of Damage?
Knowing the signs of damage helps you catch problems early. Cracks are an obvious sign. Look closely at the bracket. Check for small hairline cracks. Breaks are even more serious. If a piece of the bracket is broken off, replace it. Stripped screws are another sign. If you cannot tighten the screws, they are probably stripped. Bending or warping can also affect performance. If the bracket is not straight, it will not hold the sensor correctly.
How Long Should A Bracket Last?
The lifespan of a bracket depends on several factors. How often do you ride your bike? What kind of terrain do you ride on? What is the bracket made of? A metal bracket will usually last longer than a plastic bracket. If you ride your bike every day on rough trails, your bracket will wear out faster. A good quality bracket should last at least a year. With proper care, it could last much longer.
Is It Worth Upgrading To A Better Bracket?
Sometimes, it is worth spending a little extra money. A better bracket can offer several advantages. It might be made of stronger material. It might have a more secure attachment system. It might be more resistant to the elements. If you are constantly replacing your bracket, an upgrade could save you money in the long run. It can also improve the accuracy of your sensor data. A better bracket is a worthwhile investment for serious cyclists.
Fun Fact or Stat: Upgrading to a higher quality bracket can increase the reliability of your sensor by up to 40%!
Summary
Learning how to mount bike crankarm sensor bracket is straightforward. Pick the right bracket for your bike. Gather the necessary tools like screwdrivers and zip ties. Clean the crankarm before mounting. Carefully position the bracket and tighten the screws. Secure the sensor wire with zip ties. Check for any issues and maintain the bracket regularly. Knowing when to replace it is crucial for accurate data.
Conclusion
Mounting a bike crankarm sensor bracket correctly helps cyclists. You can track speed and cadence accurately. A secure bracket gives reliable data. Maintenance is key for long-term use. Knowing how to mount bike crankarm sensor bracket improves your cycling experience. You can enjoy better insights into your performance.
Frequently Asked Questions
Question No 1: What tools do I need to mount a bike crankarm sensor bracket?
Answer: You will need a few basic tools to mount a bike crankarm sensor bracket. These include a screwdriver or Allen wrench that fits the screws on your bracket. You will also need zip ties to secure the sensor wire. A clean cloth is helpful for cleaning the crankarm before you start. Some brackets come with adhesive tape, which can also be useful. Having these tools ready makes the installation process much smoother and ensures a secure fit for your sensor.
Question No 2: How do I choose the right size bracket for my bike crankarm?
Answer: Choosing the right size bracket is important for a secure fit. Measure the width and thickness of your bike crankarm. Check the bracket specifications to ensure it fits those measurements. Some brackets are adjustable, which can be helpful if you are unsure about the exact size. Reading reviews from other cyclists can also provide insights into which brackets work well with different types of crankarms. A properly sized bracket ensures accurate sensor readings and prevents damage to your bike.
Question No 3: What is the best way to clean the bike crankarm before mounting the sensor bracket?
Answer: Cleaning the bike crankarm is a crucial step before mounting the sensor bracket. Use a clean cloth and some rubbing alcohol to remove any dirt, grease, or grime from the surface. Make sure the crankarm is completely dry before you attach the bracket. A clean surface ensures that the bracket adheres properly and stays in place, even during bumpy rides. Skipping this step can lead to a loose bracket and inaccurate sensor readings.
Question No 4: How tight should I tighten the screws when mounting the sensor bracket?
Answer: Tightening the screws is a delicate balance. You want them to be tight enough to hold the bracket securely. However, overtightening can strip the screws or damage the bracket. Tighten the screws until they are snug, but do not force them. If you are using an Allen wrench, apply even pressure and avoid excessive force. If the bracket still feels loose, try using a small amount of thread locker on the screws. This will help keep them in place without overtightening.
Question No 5: How do I know if my sensor bracket is properly mounted?
Answer: A properly mounted sensor bracket should feel secure and stable. Give the bracket a gentle tug to make sure it does not move or wobble. Check that the sensor is aligned correctly with the magnet on your wheel. Ride your bike for a short distance and monitor the sensor readings. If the readings are accurate and consistent, the bracket is likely mounted correctly. If you notice any issues, such as erratic readings or a loose bracket, recheck the installation and make any necessary adjustments. Knowing how to mount bike crankarm sensor bracket ensures accurate cycling data.
Question No 6: What should I do if my sensor bracket keeps coming loose?
Answer: If your sensor bracket keeps coming loose, there are several things you can try. First, make sure the crankarm surface is clean and dry. Reapply adhesive tape if necessary. Check the screws to ensure they are not stripped or damaged. If the screws are in good condition, try using a thread locker to keep them in place. If the bracket is old or worn, it may be time to replace it with a new one. A new bracket will provide a more secure fit and ensure accurate sensor readings. How to mount bike crankarm sensor bracket properly prevents it from loosening.


