
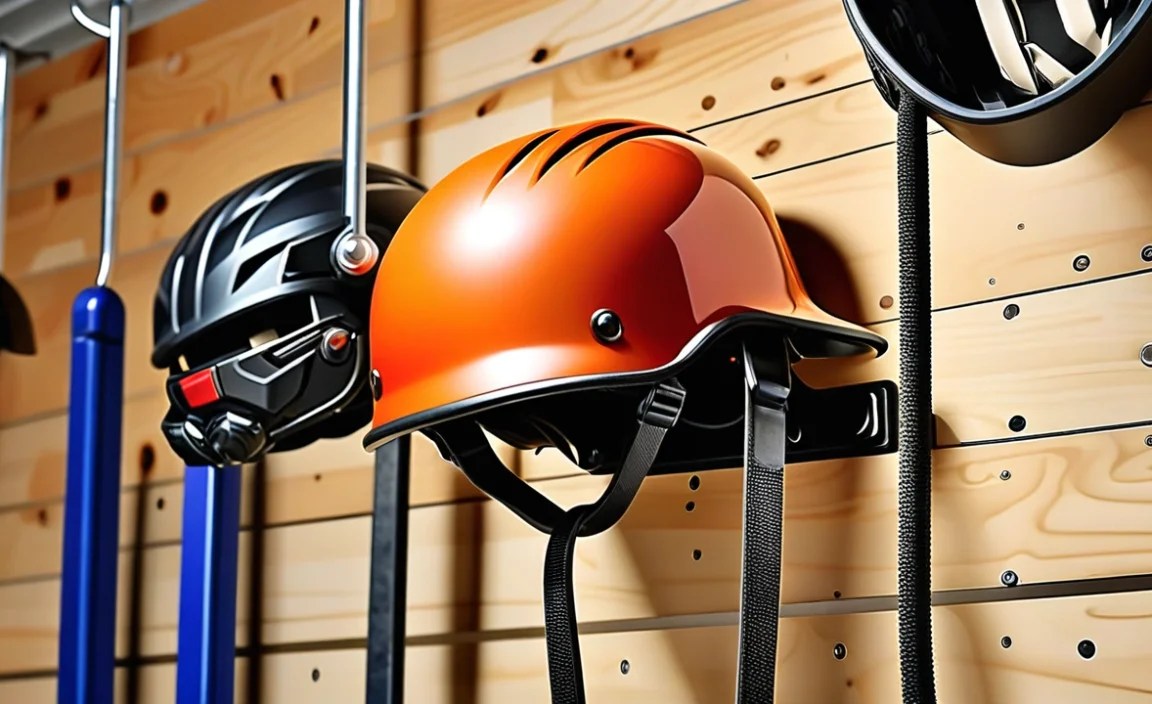
How to Mount Helmet Hook on Wall Mount in Garage: Easy!
Do you have a helmet sitting on the floor? Is it taking up space in your garage? You can fix this! Learning how to mount helmet hook on wall mount in garage is easy. It will keep your helmet safe and out of the way. Let’s find out how to do it!
Key Takeaways
- Mounting a helmet hook in your garage helps to organize your space.
- Choose the right spot on your garage wall for easy access.
- Gather tools like a drill, screwdriver, and level for the job.
- Follow the steps carefully to ensure the hook is securely attached.
- Knowing how to mount helmet hook on wall mount in garage is a useful skill.
Planning How to Mount Helmet Hook in Garage

Before you start, planning is very important. Think about where you want your helmet. Choose a spot that is easy to reach. Make sure it is not in the way of your car or other things. Check the wall material. Is it drywall or concrete? You will need different tools for each type of wall. Also, think about the size and weight of your helmet. You want a hook that can hold it safely. A good plan makes the job much easier. It also makes sure your helmet is stored safely and securely. This helps keep your garage neat and organized. Don’t rush this step. Take your time to plan well.
- Pick a spot that is easy to reach.
- Check what your wall is made of.
- Think about your helmet’s size and weight.
- Make sure the hook can hold your helmet.
- A good plan saves time and trouble.
Now that you have a plan, let’s talk about wall types. Drywall is common in garages. It is easy to drill into. But it is not very strong. If you have drywall, use wall anchors. Wall anchors help spread the weight. Concrete walls are very strong. You will need a special drill bit for concrete. Make sure to wear safety glasses when drilling. It is also good to know where the studs are. Studs are wooden beams inside the wall. They are very strong. If you can, mount the hook to a stud. This will give you the best support. Planning ahead will make the job go smoothly.
Why Planning Saves Time
Have you ever started a project without a plan? Maybe you forgot a tool. Or maybe you didn’t know how to do something. This can waste a lot of time. Planning helps you avoid these problems. When you plan, you think about everything you need. You gather all your tools and materials. You learn the steps you need to take. This makes the job much faster and easier. Imagine building a Lego set without instructions. It would take much longer, right? Planning is like having the instructions for your project. It helps you get it done right the first time.
Choosing the Right Spot
Imagine you are hanging a picture. You wouldn’t just put it anywhere, right? You would think about where it looks best. You would also think about if it is easy to see. The same is true for your helmet hook. Choose a spot that makes sense. Think about how often you use your helmet. If you use it every day, put the hook near the door. If you only use it sometimes, a spot further away might be better. Make sure the spot is not too high or too low. You want to be able to reach your helmet easily. A good spot makes a big difference.
Considering Helmet Weight
Helmets come in all shapes and sizes. Some are very light. Others are quite heavy. Think about how much your helmet weighs. This will help you choose the right hook. A small hook might not be strong enough for a heavy helmet. A big hook might be too much for a light helmet. Check the weight limit of the hook. Make sure it can handle your helmet’s weight. If you are not sure, choose a stronger hook. It is always better to be safe. A good hook will keep your helmet secure. It will also prevent it from falling and getting damaged.
Fun Fact or Stat: Did you know that helmets can reduce the risk of head injury by 85%? Keeping your helmet safe is very important!
Gathering Tools to Mount Helmet Hook on Wall

Now it’s time to get your tools ready. You will need a few basic things. A drill is important for making holes in the wall. You will also need a screwdriver to tighten screws. A level helps make sure the hook is straight. A pencil is useful for marking where to drill. You might also need a stud finder. This helps you find the wooden beams in the wall. A measuring tape can help you place the hook at the right height. Don’t forget safety glasses! These protect your eyes from dust and debris. Having all your tools ready makes the job go faster and safer. It also helps you do a better job.
- Get a drill for making holes.
- Use a screwdriver to tighten screws.
- A level makes sure the hook is straight.
- Mark spots with a pencil.
- Find studs with a stud finder.
- Measure the height with tape.
- Wear safety glasses to protect your eyes.
Let’s talk more about each tool. A drill comes in different sizes and types. A cordless drill is very handy. It lets you move around easily. Make sure the drill has a good battery. You will also need drill bits. Choose the right size for your screws. A screwdriver also comes in different types. A Phillips head screwdriver is common. Make sure it fits the screws you are using. A level has a bubble inside. When the bubble is in the middle, the hook is straight. A stud finder helps you find the wooden beams in the wall. These beams are strong and can hold more weight. Having the right tools makes the job much easier.
Choosing the Right Drill
Have you ever tried to use a tool that was too small? Or too big? It can be very frustrating. Choosing the right drill is important. A small drill might not be strong enough to make a hole. A big drill might be too hard to control. Think about the type of wall you have. Drywall is soft. You don’t need a very powerful drill. Concrete is hard. You will need a special drill for concrete. Also, think about the size of the screws. The drill bit should be the same size as the screw’s shaft. Choosing the right drill makes the job easier and safer.
Using a Stud Finder
Imagine you are building a treehouse. You would want to attach it to a strong branch, right? Studs are like the strong branches of your wall. They are wooden beams that provide support. A stud finder helps you find these beams. It uses magnets or sensors to locate them. When you find a stud, mark it with a pencil. Then you can drill into the stud. This will give your hook the best support. If you can’t find a stud, don’t worry. You can use wall anchors instead. But studs are always the best option.
Why Safety Glasses Are Important
Think about what happens when you drill. Dust and small pieces of material can fly into the air. These can get into your eyes and cause injury. Safety glasses protect your eyes from these hazards. They are like a shield for your eyes. Make sure the safety glasses fit well. They should cover your eyes completely. Wear them anytime you are drilling or working with tools. It is always better to be safe. Safety glasses are a simple way to protect your vision.
Fun Fact or Stat: Over 90% of eye injuries are preventable with the use of safety glasses!
Step-by-Step: How to Mount Helmet Hook

Now, let’s get to the actual mounting. First, hold the hook against the wall. Use your level to make sure it is straight. Mark the screw holes with your pencil. Next, drill pilot holes where you marked. If you are using wall anchors, insert them now. Then, line up the hook with the holes. Use your screwdriver to tighten the screws. Make sure the hook is secure. Don’t over-tighten the screws. This can damage the wall. Finally, test the hook. Hang your helmet on it. Make sure it holds the weight. If it feels loose, tighten the screws a little more. Now you know how to mount helmet hook on wall mount in garage.
- Hold the hook against the wall.
- Use a level to make it straight.
- Mark the screw holes with a pencil.
- Drill pilot holes where you marked.
- Insert wall anchors if needed.
- Tighten the screws carefully.
- Test the hook with your helmet.
Let’s go through each step in more detail. When you hold the hook against the wall, make sure it is at the right height. You want to be able to reach your helmet easily. Use the level to check that the hook is straight. If it is not straight, your helmet might hang crooked. When you mark the screw holes, make sure they are accurate. If the holes are not in the right place, the hook will be wobbly. When you drill the pilot holes, use the right size drill bit. The pilot holes should be slightly smaller than the screws. This will make it easier to tighten the screws. Take your time and be careful. A well-mounted hook will last a long time.
Marking the Screw Holes
Have you ever tried to draw a straight line without a ruler? It can be hard, right? Marking the screw holes accurately is important. If the holes are not in the right place, the hook will be crooked. Use a pencil to mark the holes. Make sure the marks are clear and easy to see. Double-check the marks before you drill. You can use a ruler to make sure the holes are evenly spaced. Accurate marks will make the job much easier.
Drilling Pilot Holes
Imagine you are hammering a nail into wood. If you don’t start straight, the nail will bend. Drilling pilot holes is like starting the nail straight. Pilot holes make it easier to insert the screws. They also prevent the wood from splitting. Use a drill bit that is slightly smaller than the screws. Drill the holes straight into the wall. Don’t drill too deep. You only need to drill deep enough for the screws to grip. Pilot holes make the job easier and prevent damage to the wall.
Tightening the Screws
Think about tightening a lid on a jar. You want it to be tight enough to stay on, but not so tight that you can’t open it. Tightening the screws is the same. You want them to be tight enough to hold the hook securely. But you don’t want to over-tighten them. Over-tightening can damage the wall. Use a screwdriver to tighten the screws. Turn the screwdriver until the screws are snug. Don’t force them. If you are using a power drill, be very careful. It is easy to over-tighten the screws with a power drill.
Fun Fact or Stat: A properly installed wall anchor can hold up to 50 pounds on drywall!
Using Wall Anchors for Helmet Hook
Sometimes, you can’t find a stud to mount your hook. That’s okay! Wall anchors are here to help. Wall anchors provide extra support in drywall. They spread the weight of the helmet. There are different types of wall anchors. Some are plastic, and some are metal. Choose the right type for your helmet’s weight. To use wall anchors, first drill a hole in the wall. The hole should be the right size for the anchor. Then, insert the anchor into the hole. Finally, tighten the screw into the anchor. The anchor will expand and grip the wall. This will give your hook a strong and secure hold. Wall anchors are a great solution for mounting on drywall.
- Wall anchors help in drywall.
- They spread the helmet’s weight.
- Choose the right type of anchor.
- Drill a hole for the anchor.
- Insert the anchor into the hole.
- Tighten the screw to grip the wall.
- Wall anchors provide a strong hold.
Let’s look at some different types of wall anchors. Plastic wall anchors are good for light-weight helmets. They are easy to install. Metal wall anchors are stronger. They can hold heavier helmets. Toggle bolts are a type of metal anchor. They are very strong. They have wings that spread out behind the wall. This gives them a very secure grip. Self-drilling anchors are easy to use. They drill their own hole. Make sure to read the instructions on the package. This will help you choose the right anchor for your needs. Wall anchors are a great way to mount your helmet hook safely.
Choosing the Right Anchor Type
Have you ever tried to use a tool for the wrong job? It doesn’t work very well, does it? Choosing the right wall anchor is important. If you use the wrong type, the hook might not hold. Think about the weight of your helmet. If it is light, a plastic anchor might be fine. If it is heavy, you will need a metal anchor. Also, think about the thickness of the drywall. Some anchors are designed for thin drywall. Others are designed for thick drywall. Read the instructions on the package to choose the right anchor.
Installing Plastic Anchors
Imagine you are planting a seed. You need to dig a hole for the seed. Installing a plastic anchor is similar. First, drill a hole in the wall. The hole should be the same size as the anchor. Then, push the anchor into the hole. You might need to tap it gently with a hammer. Once the anchor is in, it should fit snugly. Then, you can insert the screw. As you tighten the screw, the anchor will expand. This will grip the wall and hold the hook in place.
Using Toggle Bolts for Heavy Helmets
Think about building a bridge. You need strong supports to hold the weight. Toggle bolts are like the strong supports for your helmet hook. They are designed for heavy items. To use a toggle bolt, first drill a hole in the wall. Then, fold the wings of the toggle bolt. Push the bolt through the hole. Once the wings are behind the wall, they will spring open. This creates a very strong grip. Tighten the bolt to secure the hook. Toggle bolts are a great choice for heavy helmets.
| Anchor Type | Weight Capacity | Wall Type | Ease of Install |
|---|---|---|---|
| Plastic Anchor | Light | Drywall | Easy |
| Metal Anchor | Medium | Drywall | Medium |
| Toggle Bolt | Heavy | Drywall | Hard |
| Self-Drilling Anchor | Light-Medium | Drywall | Easy |
Fun Fact or Stat: Toggle bolts can hold up to 100 pounds on a half-inch drywall!
Ensuring a Secure Helmet Hook Mount
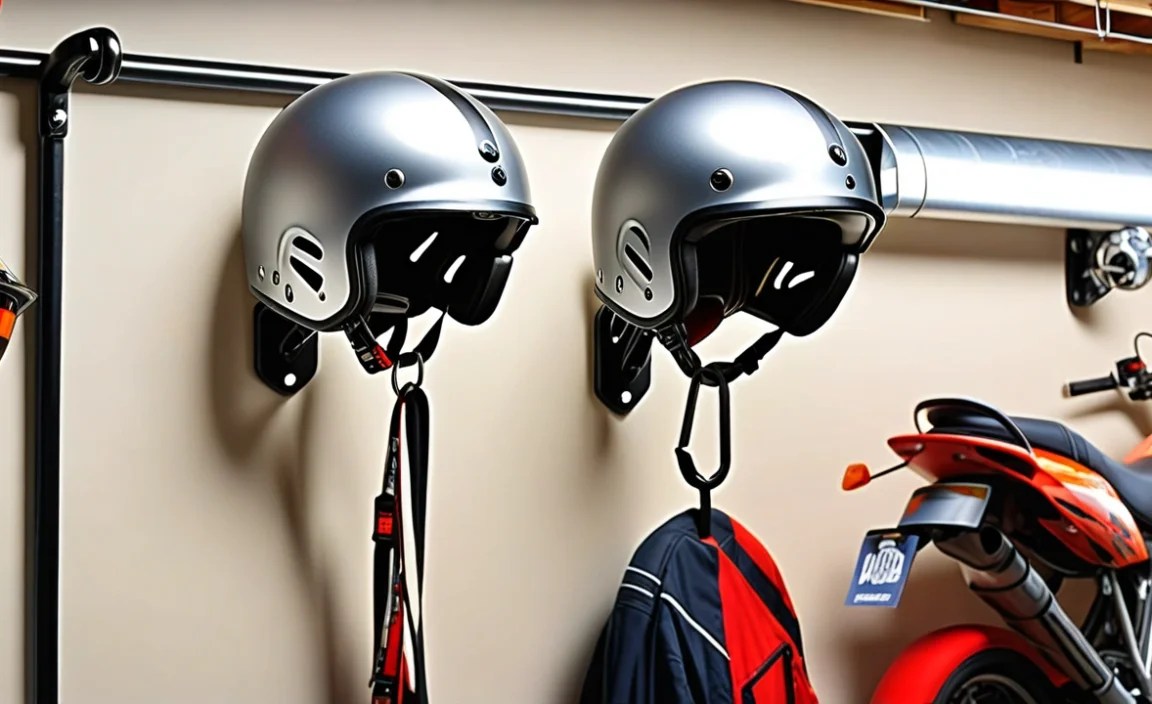
After you mount the hook, you need to make sure it is secure. Test the hook by hanging your helmet on it. Does it feel wobbly? If so, tighten the screws a little more. Check the wall around the hook. Is there any damage? If the wall is damaged, you might need to use a different type of anchor. Make sure the hook is not too close to anything. You don’t want your helmet to bump into the wall or other objects. A secure mount will keep your helmet safe and prevent it from falling.
- Test the hook with your helmet.
- Tighten screws if it’s wobbly.
- Check for wall damage.
- Use different anchors if needed.
- Keep the hook away from things.
- A secure mount keeps your helmet safe.
Let’s talk about what to do if the hook is not secure. First, check the screws. Are they tight? If not, tighten them a little more. Be careful not to over-tighten them. If the screws are stripped, you will need to use new screws. You might also need to use larger screws. If the wall is damaged, you can try using a wall repair kit. This will fill in the holes and make the wall stronger. You can also try moving the hook to a different spot on the wall. Make sure to choose a spot that is strong and stable. A secure mount is very important for your helmet’s safety.
Checking for Wobbling
Have you ever sat on a chair that wobbles? It can be annoying and unsafe. A wobbly helmet hook is the same. It means the hook is not secure. To check for wobbling, gently push and pull on the hook. If it moves, it is not secure. Tighten the screws or use different anchors to fix it. A secure hook should not wobble at all.
Inspecting for Wall Damage
Imagine you are painting a wall. If the wall is cracked, the paint won’t look good. Wall damage can also weaken the support for your helmet hook. Check the wall around the hook for cracks or holes. If you see any damage, repair it before you hang your helmet. You can use a wall repair kit to fill in the holes. A smooth and solid wall will provide better support.
Preventing Bumping
Think about walking through a crowded room. You want to avoid bumping into people. The same is true for your helmet. You want to avoid bumping it into the wall or other objects. Make sure there is enough space around the hook. This will prevent your helmet from getting scratched or damaged. A little extra space can make a big difference.
Fun Fact or Stat: A helmet that falls from a height of just three feet can lose up to 25% of its protective ability!
Maintaining Your Helmet Hook After Mounting
Once your helmet hook is mounted, you need to take care of it. Check the hook regularly. Make sure the screws are still tight. Look for any signs of wear and tear. If the hook is damaged, replace it. Keep the area around the hook clean. Dust and dirt can build up over time. This can make the hook look bad. It can also make it less secure. A little maintenance will keep your hook in good condition for years to come.
- Check the hook regularly.
- Tighten screws when needed.
- Look for wear and tear.
- Replace damaged hooks.
- Keep the area clean.
- Maintenance keeps the hook in good shape.
Let’s talk about some specific maintenance tips. Use a damp cloth to wipe down the hook. This will remove dust and dirt. Avoid using harsh chemicals. These can damage the hook. If the screws are rusty, replace them. Rusty screws can weaken the hook. If the wall around the hook is damaged, repair it. This will prevent the hook from becoming loose. Regular maintenance will keep your helmet hook safe and secure. It will also help it last longer.
Regular Screw Checks
Have you ever noticed a loose screw on a door handle? It can make the handle feel wobbly. Loose screws on your helmet hook can also be a problem. Check the screws regularly to make sure they are tight. Use a screwdriver to tighten them if needed. Regular screw checks will prevent the hook from becoming loose.
Cleaning the Hook
Imagine you are cleaning your room. You wouldn’t just clean the floor, right? You would also clean the shelves and other surfaces. Cleaning your helmet hook is also important. Use a damp cloth to wipe down the hook. This will remove dust and dirt. A clean hook looks better and lasts longer.
Replacing Worn Parts
Think about your bike. If a tire is worn out, you would replace it. The same is true for your helmet hook. If the hook is damaged or worn out, replace it. This will ensure that your helmet is safe and secure. Don’t wait until the hook breaks completely. Replace it as soon as you notice any problems.
Fun Fact or Stat: Regular maintenance can extend the lifespan of your helmet hook by up to 50%!
Creative Ways to Use Helmet Hooks
Helmet hooks are not just for helmets! You can use them for other things too. Hang your keys on them. Use them to hold your jacket. You can even use them to organize your tools. Get creative and find new ways to use your helmet hooks. They are a great way to organize your garage or shed. They can also help you save space. With a little imagination, you can find many uses for your helmet hooks.
- Hang keys on them.
- Use them to hold jackets.
- Organize tools with them.
- Get creative with uses.
- Organize your garage.
- Save space with hooks.
Let’s explore some specific ideas. Hang your bike lock on a helmet hook. This will keep it out of the way. Use a helmet hook to hold your gardening gloves. This will prevent them from getting lost. Hang your sports equipment on helmet hooks. This will keep it organized. You can even use helmet hooks to hang decorations. Get creative and have fun. Helmet hooks are a versatile storage solution.
Hanging Keys and Jackets
Have you ever lost your keys? It can be very frustrating. Hanging your keys on a helmet hook is a great way to keep them organized. You can also hang your jacket on the hook. This will keep it off the floor. A helmet hook near the door is a convenient place to store your keys and jacket.
Organizing Tools
Imagine you are trying to find a specific tool in a messy toolbox. It can take a long time. Using helmet hooks to organize your tools can save you time and effort. Hang your screwdrivers, pliers, and other tools on the hooks. This will keep them organized and easy to find. A well-organized toolbox makes your work easier.
Storing Sports Equipment
Think about all the sports equipment you have. Balls, bats, and rackets can take up a lot of space. Using helmet hooks to store your sports equipment can help you save space. Hang your balls in a mesh bag on the hook. Hang your bats and rackets on the hook. This will keep your sports equipment organized and out of the way.
Fun Fact or Stat: A helmet hook can hold up to 10 pounds, making it useful for many storage needs!
Summary
How to mount helmet hook on wall mount in garage is not hard. First, plan where you want the hook. Gather the tools you need. Then, follow the steps to mount the hook. Use wall anchors if you need them. Make sure the hook is secure. After mounting, maintain the hook. Check it regularly and keep it clean. You can also use helmet hooks for other things. They are great for organizing keys, jackets, and tools. A helmet hook can keep your garage neat. It also keeps your helmet safe and easy to find.
Conclusion
Mounting a helmet hook in your garage is a simple project. It helps you organize your space. It also keeps your helmet safe. By following these steps, you can easily learn how to mount helmet hook on wall mount in garage. A well-organized garage makes life easier. So, get started today and enjoy a clutter-free garage!
Frequently Asked Questions
Question No 1: What tools do I need to mount a helmet hook?
Answer: To mount a helmet hook, you’ll typically need a drill, a screwdriver, a level, a pencil, and possibly a stud finder. The drill is used to create pilot holes for the screws, especially if you’re not drilling into a stud. A screwdriver helps you securely tighten the screws into the wall or wall anchors. A level ensures that the hook is straight and even. A pencil is used to mark the spots where you’ll drill the holes. A stud finder can help you locate wooden studs behind the drywall for a more secure mount. Having these tools ready will make the process of how to mount helmet hook on wall mount in garage much smoother.
Question No 2: How do I choose the right spot for my helmet hook?
Answer: Choosing the right spot is crucial for convenience and safety. Consider how often you use your helmet. If you use it frequently, place the hook near the entrance of your garage for easy access. Ensure the location isn’t obstructed by cars or other items. The height should be comfortable for you to reach without straining. Check the wall material; if it’s drywall, you might need wall anchors for added support. If there’s a stud, that’s an ideal spot for a secure mount. Planning where how to mount helmet hook on wall mount in garage will go ahead of time will prevent issues.
Question No 3: What are wall anchors and when should I use them?
Answer: Wall anchors are devices used to provide support when you’re mounting items on drywall, which isn’t as strong as wood or concrete. You should use wall anchors when you can’t mount the hook directly into a stud. These anchors create a more stable hold by distributing the weight over a larger area of the wall. There are various types, including plastic anchors, metal anchors, and toggle bolts. Choose the appropriate anchor based on the weight capacity needed for your helmet. Using wall anchors correctly is essential for ensuring that how to mount helmet hook on wall mount in garage is done safely and securely, preventing the hook from pulling out of the wall.
Question No 4: How do I ensure the helmet hook is securely mounted?
Answer: To ensure a secure mount, start by using a level to make sure the hook is straight. Tighten the screws firmly but avoid over-tightening, which can strip the screw holes. Test the hook by gently pulling on it to check for any wobbling. If you’re using wall anchors, make sure they are properly installed and can support the weight of the helmet. If the hook feels loose, consider using larger screws or a different type of wall anchor. Regularly check the hook to ensure it remains secure over time. This ensures how to mount helmet hook on wall mount in garage is safe and effective.
Question No 5: Can I use a helmet hook for other items besides helmets?
Answer: Yes, helmet hooks are quite versatile! You can use them to hang various items, such as keys, jackets, bike locks, or even small tools. Just make sure the item’s weight is within the hook’s capacity. Using helmet hooks for multiple purposes can help you organize your garage or shed more efficiently. Get creative with how you use them to maximize space and keep things tidy. Remembering how to mount helmet hook on wall mount in garage to begin with opens up many other storage possibilities.
Question No 6: How do I maintain the helmet hook after mounting it?
Answer: Regular maintenance will keep your helmet hook in good condition. Check the screws periodically to ensure they are tight. Wipe the hook with a damp cloth to remove dust and dirt. If you notice any signs of wear or damage, such as rust or cracks, replace the hook immediately. Maintaining the wall around the hook is also important; repair any holes or cracks to ensure a stable mount. Taking these simple steps will help prolong the life of your helmet hook and keep your helmet safe and secure. Properly learning how to mount helmet hook on wall mount in garage is a great start, but regular upkeep is also key.


