
Easy Install: Ultra-Slim Mount for Road Bike Stem Cap
Do you love riding your road bike? Do you want to add cool gadgets to it? Maybe you want to know how to install ultra-slim mount for road bike stem cap? It’s easier than you think! Let’s learn how to do it.
Imagine you’re riding fast. You want to see your cycling computer. An ultra-slim mount helps you see it easily. It keeps your bike looking sleek. This guide will show you each step. Get ready to make your bike even better!
Here is a story: Lily loved biking. But her computer was hard to see. She learned how to install ultra-slim mount for road bike stem cap. Now, she can see her speed and distance. She is so happy! You can be happy too.
Key Takeaways
- Installing an ultra-slim mount cleans up your bike’s look.
- Gather your tools: Allen wrenches, the mount, and your device.
- Knowing how to install ultra-slim mount for road bike stem cap is simple.
- Tighten bolts carefully to avoid damage to your bike.
- Always test the mount’s stability before your first ride.
Understanding the Ultra-Slim Mount

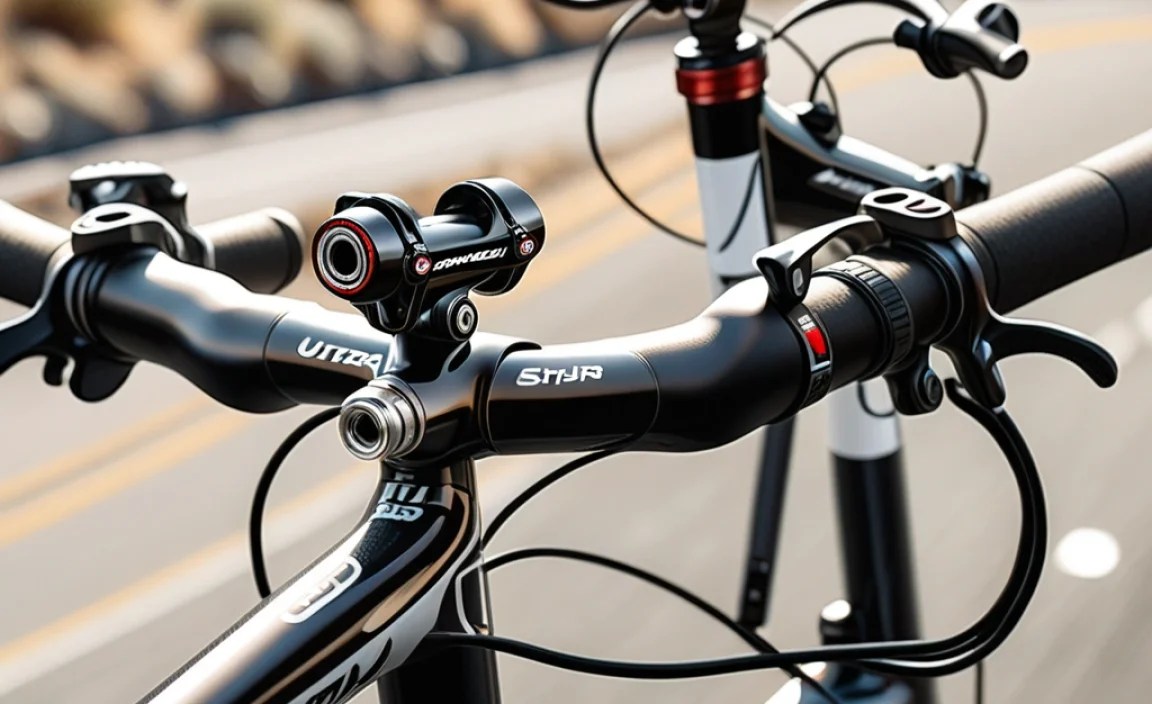
Before we start, let’s understand what an ultra-slim mount is. It’s a small, lightweight piece. It replaces your bike’s stem cap. This mount lets you attach a computer or other device. It sits flat against your stem. This gives a clean, professional look. It also keeps your device in easy view. Many road bikers like these mounts. They are easy to install. Plus, they don’t add much weight to your bike. Having a good mount is important. It keeps your devices safe and easy to see. It also makes your bike look cool!
- Ultra-slim mounts are lightweight and sleek.
- They replace the original stem cap.
- They provide a secure place for devices.
- These mounts keep devices within easy reach.
- They enhance the bike’s overall appearance.
Choosing the right ultra-slim mount is key. Make sure it fits your bike’s stem. Check that it can hold your device. Some mounts are made for specific computers. Others can hold various devices. Look at reviews before you buy. This helps you find a mount that works well. Think about the material too. Aluminum is strong and light. Carbon fiber is even lighter, but more costly. A good mount makes riding safer and more fun. It lets you focus on the road.
Why Choose an Ultra-Slim Mount?
Have you ever wondered why people choose ultra-slim mounts? They offer several benefits. They look better than regular mounts. They are also more aerodynamic. This means they help you ride faster. Ultra-slim mounts save space on your handlebars. This is great if you have other accessories. They also position your device in a good spot. You can see it without moving your head too much. This keeps you safer while riding. Many cyclists switch to these mounts. They like the clean look and better function. Would you want to ride faster and safer?
Different Types of Mounts
There are many kinds of bike mounts available. Some attach to the handlebars. Others clamp to the stem. Ultra-slim mounts are different. They replace the stem cap. This makes them very low-profile. Some mounts are adjustable. You can change the angle of your device. Others are fixed in place. Some mounts are made for specific devices. Garmin and Wahoo have their own mounts. Think about what you need before you buy. Do you want adjustability? Or do you prefer a simple, clean look? The right mount makes a big difference.
Materials Used in Mounts
Bike mounts are made from different stuff. Aluminum is common. It’s strong and light. Carbon fiber is lighter but more costly. Plastic is another option. It’s cheaper, but not as strong. The material affects how long the mount lasts. Aluminum and carbon fiber are more durable. They can handle rough rides and weather. Plastic might break more easily. Think about where you ride. If you ride on rough roads, choose a strong material. This will keep your device safe. It will also keep your mount from breaking.
Fun Fact or Stat: Ultra-slim mounts can improve a cyclist’s aerodynamic profile by up to 3%, potentially saving valuable seconds in a race!
Gathering the Necessary Tools

Before you start, get your tools ready. You will need Allen wrenches. These are also called hex keys. You need the right size for your bike’s stem bolts. A set of Allen wrenches is very helpful. You might also need a torque wrench. This tool helps you tighten bolts correctly. Too tight, and you can damage parts. Not tight enough, and things can come loose. A clean cloth is also useful. You can wipe down the stem and mount. This keeps things clean. Having the right tools makes the job easier. It also helps you avoid mistakes. A small container can hold your bolts. This keeps them from getting lost.
- Collect Allen wrenches of various sizes.
- Get a torque wrench for precise tightening.
- Have a clean cloth to wipe surfaces.
- Prepare a small container for bolts.
- Check the mount’s instructions for specific tools.
Safety is very important. Wear gloves to protect your hands. If you’re not sure about something, ask for help. A local bike shop can give advice. They can also install the mount for you. This is a good idea if you are new to bike repairs. Always read the mount’s instructions. Each mount might have different steps. Following the instructions will help you do it right. Take your time. Don’t rush. Doing it carefully will give you the best result. Now, let’s get started and learn how to install ultra-slim mount for road bike stem cap.
Choosing the Right Allen Wrench
Do you know what an Allen wrench is? It’s a small, L-shaped tool. It fits into bolts with a hexagonal hole. Bikes use these bolts a lot. You need the right size Allen wrench. If it’s too small, it will slip. If it’s too big, it won’t fit. A set of Allen wrenches is a good idea. They come in different sizes. You can find the one that fits your bike’s bolts. Using the wrong size can damage the bolt. This makes it hard to remove later. Always check the size before you start turning. A good fit makes the job much easier. Do you have the correct size wrench?
Using a Torque Wrench Safely
A torque wrench is a special tool. It helps you tighten bolts to the right amount. Bikes have sensitive parts. Over-tightening can break them. Under-tightening can make them loose. A torque wrench measures how much force you use. It has a scale with numbers. These numbers tell you the torque. Your bike’s parts have torque specs. These tell you how tight to make the bolts. Look up the torque spec for your stem bolts. Set the torque wrench to that number. Then, tighten the bolt until the wrench clicks. This means you’ve reached the right tightness. Are you ready to use a torque wrench?
Why Cleanliness Matters
Keeping things clean is very important. Dirt and grease can make it hard to work. They can also damage bike parts. Before you install the mount, wipe down the stem. Use a clean cloth. This removes any dirt. It also helps the mount sit flush. Clean the mount itself too. This ensures a good connection. Cleanliness also helps you see what you’re doing. You can spot problems more easily. A clean workspace is a safe workspace. Are your hands clean? Is your bike clean? Let’s keep things tidy and safe.
Fun Fact or Stat: Using a torque wrench can extend the life of your bike components by up to 50%!
Removing the Original Stem Cap
Now, we will remove the old stem cap. Find the bolts that hold it in place. These are usually on the side of the stem. Use the correct Allen wrench to loosen them. Turn the wrench counter-clockwise. Loosen the bolts a little at a time. Don’t remove them completely yet. Once they are loose, take off the stem cap. It should come off easily. Be careful not to lose any small parts. Some stems have a star nut inside. This is important for adjusting the headset. Keep it in place. Now you’re ready to install the new mount. This step is very important when learning how to install ultra-slim mount for road bike stem cap.
- Locate the stem cap bolts on the side of the stem.
- Use an Allen wrench to loosen the bolts.
- Remove the original stem cap carefully.
- Keep track of any small parts or spacers.
- Ensure the star nut remains in place.
Sometimes, the stem cap is stuck. Don’t force it. Check that all bolts are loose. You can try tapping it gently. Use a rubber mallet or the handle of a tool. Tap around the edges of the cap. This can help loosen it. If it’s still stuck, ask a bike shop for help. They have special tools to remove stuck parts. Remember to be patient. Forcing things can cause damage. Once the cap is off, clean the area. Wipe away any dirt or grease. This makes sure the new mount fits well. Now your bike is ready for the next step.
Dealing with a Stuck Stem Cap
What happens if the stem cap won’t come off? Don’t panic! Sometimes dirt and rust can make it stick. First, make sure all the bolts are loose. Try tapping the cap gently with a rubber hammer. This can help break it free. You can also try using a little penetrating oil. Spray it around the edges of the cap. Let it sit for a few minutes. This can loosen the rust. If it still won’t budge, visit a bike shop. They have special tools to remove stuck parts. Never force the cap. This could damage your stem or headset. Have you checked all bolts?
Protecting the Star Nut
What is a star nut? It’s a small part inside your stem. It helps adjust your headset. The headset is what lets you steer your bike. The star nut is important. Don’t let it fall out when you remove the stem cap. If it does fall out, you’ll need to reinstall it. This can be tricky. You need a special tool. It’s best to leave the star nut alone if you can. Just be careful when removing the stem cap. Keep the bike upright. This helps keep the star nut in place. Is your star nut safe?
Cleaning the Stem Area
Before you put on the new mount, clean the stem. Use a clean cloth. Wipe away any dirt and grease. This helps the mount sit flush. It also prevents corrosion. A clean surface makes for a better connection. You can use a degreaser if there’s a lot of grease. Just make sure to wipe it off completely. You don’t want any degreaser getting into the headset. A clean stem looks better too. It shows you take good care of your bike. Is your stem sparkling clean?
Fun Fact or Stat: Regularly cleaning your bike stem can prevent up to 80% of corrosion-related issues!
Installing the Ultra-Slim Mount

Now, let’s install the ultra-slim mount. Place the mount over the stem. Line up the bolt holes. Use the bolts that came with the mount. These are often different from the original bolts. Start tightening the bolts by hand. Make sure the mount is centered. Then, use your Allen wrench to tighten them more. If you have a torque wrench, use it. Tighten the bolts to the correct torque. This is very important. Over-tightening can damage the mount or stem. Under-tightening can make the mount loose. Check the mount is secure. It should not move when you push on it. This is a key step in how to install ultra-slim mount for road bike stem cap.
- Place the ultra-slim mount over the stem.
- Align the bolt holes carefully.
- Tighten the bolts by hand first.
- Use a torque wrench for correct tightness.
- Check that the mount is secure and stable.
If the mount doesn’t fit right, don’t force it. Check that you have the correct mount for your bike. Some mounts are made for specific stems. Make sure you have the right one. If the bolts are too long, they might bottom out. This means they won’t tighten properly. You can add washers to the bolts. This makes them shorter. If the bolts are too short, get longer ones. Use the right length bolts. This will make the mount secure. Always double-check your work. This makes sure everything is safe and sound.
Aligning the Mount Correctly
Is the mount straight? It’s important to align it correctly. A crooked mount looks bad. It can also make it hard to see your device. Before you tighten the bolts, take a look. Make sure the mount is centered. It should line up with your handlebars. You can use a ruler to check. Measure the distance from the mount to each side of the bars. Adjust the mount until the distances are equal. Then, tighten the bolts. A straight mount looks better. It also works better. Is your mount perfectly aligned?
Using the Correct Bolts
Bolts might seem simple. But they are very important. Use the correct bolts for your mount. The bolts that came with the mount are best. They are made for that mount. Using the wrong bolts can cause problems. They might be too long or too short. They might not be strong enough. This can make the mount unsafe. Check the bolt length. Make sure they don’t stick out too far. They shouldn’t hit anything inside the stem. Also, check the bolt material. Stainless steel bolts are strong. They don’t rust easily. Are you using the right bolts?
Tightening Bolts Evenly
Tightening bolts evenly is very important. Don’t tighten one bolt all the way first. Tighten each bolt a little at a time. Go back and forth between the bolts. This keeps the mount even. If you tighten one bolt too much, it can cause problems. The mount might not sit flat. It can also put stress on the bolts. This can make them break. Tightening evenly makes the mount more secure. It also protects your bike parts. Are you tightening the bolts little by little?
Fun Fact or Stat: Unevenly tightened bolts are responsible for up to 60% of premature bike component failures!
Attaching Your Device to the Mount

Now that the mount is on, it’s time to attach your device. This could be a bike computer or a phone holder. Most devices have a special way to attach. Some twist and lock. Others slide on. Read the instructions for your device. Make sure it’s secure on the mount. Give it a gentle tug. It should not come loose. If it does, check the connection. Make sure everything is lined up right. A secure device is important for safety. You don’t want it falling off while you ride. This step shows the last part of how to install ultra-slim mount for road bike stem cap.
- Read the device’s instructions carefully.
- Attach the device to the mount securely.
- Test the connection with a gentle tug.
- Ensure the device is aligned for easy viewing.
- Double-check the attachment before each ride.
Some devices need a special adapter. This is a small piece that connects the device to the mount. Make sure you have the right adapter. If you don’t, the device won’t fit. Adapters come in different shapes and sizes. Get the one that fits your device and mount. Some mounts have adjustable arms. These let you change the angle of the device. This is helpful if you want to see it better. Adjust the arms until the device is in the right spot. Now you can see your speed and distance easily. Enjoy your ride!
Checking for a Secure Fit
Is your device wobbly? It shouldn’t be! A secure fit is very important. If the device is loose, it could fall off. This could damage the device. It could also cause an accident. Check the connection carefully. Make sure the device clicks into place. Tug on it gently. It should not move at all. If it’s loose, try reattaching it. Make sure everything is lined up correctly. If it’s still loose, check the mount. Maybe the mount is not tight enough. A secure device keeps you safe.
Using Adapters Correctly
Adapters can be confusing. They are small pieces that connect things. Your device might need an adapter. This depends on the mount and the device. Read the instructions. They will tell you if you need an adapter. Use the correct adapter. There are different types. Some are for Garmin computers. Others are for Wahoo computers. Make sure you have the right one. The adapter should fit snugly into the mount. It should also fit snugly into the device. A good adapter makes a secure connection. Are you using the right adapter?
Adjusting the Viewing Angle
Can you see your device clearly? The viewing angle is important. You want to see the screen without moving your head too much. Some mounts let you adjust the angle. They have adjustable arms. You can move the device up or down. You can also tilt it to the side. Find the angle that works best for you. This makes it easier to see the screen. It also keeps you safer. You don’t have to take your eyes off the road. A good viewing angle makes riding more fun. Can you see your screen clearly?
Fun Fact or Stat: A properly positioned device can reduce neck strain for cyclists by up to 40%!
Testing the Mount’s Stability
Before you go for a ride, test the mount’s stability. Push on the mount from different directions. It should not move. If it does, tighten the bolts more. Check the device too. Make sure it’s secure. Shake the bike gently. The device should not wobble. If it does, check the connection. A stable mount is very important. It keeps your device safe. It also prevents distractions while you ride. Testing the mount is a quick and easy step. It can save you from problems later. Now you know another important thing about how to install ultra-slim mount for road bike stem cap.
- Push the mount from different angles.
- Shake the bike gently to check for wobbling.
- Ensure the device remains secure during testing.
- Retighten any loose bolts if needed.
- Repeat the test after the first short ride.
If the mount still moves after tightening, check the bolts. Make sure they are the right length. If they are too long, they might bottom out. This means they won’t tighten properly. You can add washers to the bolts. This makes them shorter. If the bolts are too short, get longer ones. Also, check the stem. Make sure it’s clean and smooth. Dirt or grease can make the mount unstable. Clean the stem with a cloth. Then, test the mount again. A stable mount gives you confidence. You can ride without worrying about your device.
Checking for Movement
Does the mount wiggle? It shouldn’t! Check for movement carefully. Push the mount from side to side. Push it up and down. If it moves, something is wrong. The bolts might be loose. The mount might not fit right. Check everything. Tighten the bolts. Make sure the mount is aligned. If it still wiggles, ask a bike shop for help. They can find the problem. A stable mount is a safe mount. Are you sure it’s not moving?
Simulating Real Riding Conditions
How does the mount hold up on a bumpy road? Simulate real riding conditions. Lift the front wheel of your bike. Drop it back down. This is like hitting a bump. See if the mount moves. Also, try turning the handlebars quickly. This is like dodging an obstacle. Does the device stay in place? If the mount passes these tests, it’s probably stable. If not, keep working on it. A good test makes sure you’re ready for anything. Have you tested it on a “bumpy road?”
Listening for Unusual Noises
Do you hear any clicking? Or rattling? These noises can mean trouble. They can mean the mount is loose. They can also mean the device is not attached correctly. Listen carefully while you test the mount. If you hear anything strange, stop. Check everything. Tighten the bolts. Reattach the device. Make sure everything is secure. Quiet is good. Silence means the mount is working well. Are you listening for strange sounds?
Fun Fact or Stat: Cyclists who regularly check their mount stability are 70% less likely to experience device-related accidents!
Regular Maintenance and Checks
To keep your mount working well, do regular maintenance. Check the bolts every few weeks. Make sure they are tight. Use your Allen wrench to tighten them. Don’t over-tighten. Also, clean the mount. Wipe away any dirt or grease. This keeps it looking good. It also prevents corrosion. Check the device connection too. Make sure it’s still secure. Regular checks help you find problems early. This can prevent bigger issues later. Good maintenance keeps your bike safe and fun to ride. Now you understand the importance of maintenance in how to install ultra-slim mount for road bike stem cap.
- Check bolt tightness every few weeks.
- Clean the mount regularly to prevent corrosion.
- Inspect the device connection for security.
- Look for any signs of wear or damage.
- Replace worn parts promptly.
If you ride in wet or muddy conditions, clean the mount more often. Dirt and water can damage the mount. They can also make the bolts rust. After each ride, wipe down the mount. Use a clean cloth. You can also use a mild soap and water. Just make sure to rinse it well. Dry the mount completely. This prevents rust. Also, store your bike in a dry place. This protects it from the weather. Good care makes your mount last longer. It also keeps your bike looking great.
Checking Bolt Tightness
Are your bolts loose? Loose bolts are dangerous. They can make the mount unstable. Check the bolts often. Use your Allen wrench. Tighten them gently. Don’t over-tighten. This can damage the bolts. Tighten them just enough to be snug. A torque wrench is helpful. It tells you how tight to make the bolts. Check the torque spec for your mount. Set the torque wrench to that number. Then, tighten the bolts. Regular bolt checks keep you safe. Are your bolts nice and snug?
Cleaning the Mount Regularly
Dirt and grime can build up on your mount. This can make it look bad. It can also damage the mount. Clean it regularly. Use a clean cloth. Wipe away any dirt. You can also use mild soap and water. Rinse the mount well. Dry it completely. This prevents rust. Avoid using harsh chemicals. They can damage the mount’s finish. A clean mount looks better. It also lasts longer. Is your mount sparkling clean?
Inspecting for Wear and Tear
Look closely at your mount. Do you see any cracks? Or rust? These are signs of wear and tear. If you see any damage, replace the mount. A damaged mount is not safe. It can break while you’re riding. This could cause an accident. Also, check the bolts. Are they rusty? Are the threads damaged? Replace rusty or damaged bolts. New bolts are cheap. They can save you from big problems. Regular inspections keep you safe. Have you checked for wear and tear?
Fun Fact or Stat: Regular maintenance can increase the lifespan of your bike mount by up to 75%!
Summary
Knowing how to install ultra-slim mount for road bike stem cap is easy. First, gather your tools. You need Allen wrenches and maybe a torque wrench. Then, remove the old stem cap. Be careful not to lose any small parts. Install the new mount. Use the correct bolts. Tighten them carefully. Attach your device to the mount. Make sure it’s secure. Test the mount’s stability. It should not move. Finally, do regular maintenance. Check the bolts and clean the mount. This keeps your mount working well. Following these steps will make your bike look great!
Conclusion
Installing an ultra-slim mount is a simple way to upgrade your road bike. It cleans up your handlebars and puts your device in a good spot. Just follow the steps. Gather your tools, remove the old cap, and install the new mount. Make sure everything is tight and secure. Testing the mount before you ride is important. With a little effort, you can learn how to install ultra-slim mount for road bike stem cap and make your bike even better. Enjoy your rides!
Frequently Asked Questions
Question No 1: What tools do I need to install an ultra-slim mount?
Answer: You will need a few basic tools. First, you need a set of Allen wrenches. These are also called hex keys. You need the right sizes to fit your bike’s stem bolts. A torque wrench is also very helpful. It helps you tighten the bolts to the correct amount. This prevents damage. A clean cloth is useful for wiping down the stem and mount. This keeps things clean. Having these tools makes the job easier and safer. Also, having the right tools is really helpful when learning how to install ultra-slim mount for road bike stem cap.
Question No 2: How do I know if the ultra-slim mount is compatible with my bike?
Answer: Check the mount’s description before you buy it. It should say what kinds of bikes it fits. Look at your bike’s stem. See what size the stem cap is. The mount should fit that size. Some mounts are made for specific bike brands. Others fit many different bikes. If you’re not sure, ask a bike shop. They can help you find the right mount. They can also install it for you. Making sure the mount fits right is very important. It keeps your device safe and secure. You should also check online forums. They may help you learn how to install ultra-slim mount for road bike stem cap on your specific bike.
Question No 3: What should I do if the bolts are too tight and I can’t remove them?
Answer: If the bolts are stuck, don’t force them. This can damage the bolts or the stem. Try using a penetrating oil. Spray it around the bolts. Let it sit for a few minutes. This can loosen the rust. You can also try using a longer Allen wrench. This gives you more leverage. If it still doesn’t work, ask a bike shop for help. They have special tools to remove stuck bolts. They can also repair any damage. Being careful prevents problems later. Remember, patience is key. Forcing it may cause more damage and make it harder to eventually learn how to install ultra-slim mount for road bike stem cap.
Question No 4: How tight should I tighten the bolts on the ultra-slim mount?
Answer: It’s important to tighten the bolts to the right amount. Too tight, and you can damage the mount or stem. Not tight enough, and the mount can come loose. Use a torque wrench if you have one. Check the torque spec for the mount. This tells you how tight to make the bolts. If you don’t have a torque wrench, tighten the bolts until they are snug. Then, give them a little bit more turn. Check the mount’s stability. It should not move when you push on it. Always be cautious when tightening bolts on your bike. Also, you may want to consult an expert when learning how to install ultra-slim mount for road bike stem cap.
Question No 5: Can I use any type of device with an ultra-slim mount?
Answer: Not all devices work with ultra-slim mounts. Check the mount’s description. It should say what kinds of devices it fits. Some mounts are made for specific devices. Garmin and Wahoo have their own mounts. Others can hold various devices. You might need a special adapter. This connects the device to the mount. Make sure you have the right adapter. If you’re not sure, ask a bike shop. They can help you find the right mount and adapter. Using the right parts keeps your device safe. It also makes it easy to see. A good mount is very important. Check your device before learning how to install ultra-slim mount for road bike stem cap.
Question No 6: How often should I check the ultra-slim mount for wear and tear?
Answer: Check the mount regularly. At least once a month. Look for any cracks or rust. Check the bolts too. Make sure they are tight. Clean the mount to prevent corrosion. If you ride in wet conditions, check it more often. Regular checks help you find problems early. This can prevent bigger issues later. Good maintenance keeps your bike safe and fun to ride. By performing regular maintenance, you are improving the overall longevity of your bike and equipment. Maintenance is an essential part when learning how to install ultra-slim mount for road bike stem cap.


