
How to Easily Install Modular Mounting Plate on Bicycle Frame
Have you ever wanted to add a cool accessory to your bike? Maybe a water bottle cage or a small bag? It can be tricky if your bike frame doesn’t have the right spots. That’s where modular mounting plates come in! Learning how to install modular mounting plate on bicycle frame can open up many possibilities.
Modular mounting plates are like little helpers. They let you attach things to your bike easily. They are super useful for all kinds of bikes. Want to know more about them? Let’s get started!
Key Takeaways
- Modular mounting plates let you add accessories to your bike frame easily.
- Installing these plates means you can customize your bike for any adventure.
- You can attach water bottles, bags, lights, and more with these plates.
- How to install modular mounting plate on bicycle frame is a simple process.
- Always make sure the mounting plates are secure for safe riding.
Understanding Modular Mounting Plates
Modular mounting plates are like LEGO bricks for your bike. They let you add things without needing special tools. These plates attach to your bike frame. Then, you can screw on accessories. This is great if your bike didn’t come with many mounting points. Or, maybe you want to add even more! These plates come in different shapes and sizes. Some are small and simple. Others are bigger and can hold more weight. Think of them as little platforms for your gear. They make your bike more useful and fun. They help you carry everything you need. You can bring water, snacks, or even a small tent on your bike!
- Modular mounting plates attach to bike frames.
- They allow you to add accessories easily.
- These plates come in various shapes and sizes.
- They help carry water bottles and bags.
- They make your bike more versatile.
Imagine you’re going on a long bike ride. You need water, snacks, and maybe a small repair kit. Without mounting plates, you’d have to carry everything in a backpack. That can be heavy and uncomfortable! But with modular mounting plates, you can attach bottle cages for your water. You can also add a small bag for your tools and snacks. This makes your ride much more enjoyable. You’ll be more comfortable and have everything you need within reach. Learning about mounting plates can really change how you use your bike. It can make your rides safer and more fun. They are a great addition for any cyclist!
Fun Fact or Stat: Did you know that the first bicycle was invented in the early 1800s and it didn’t have pedals?
Why Use Mounting Plates?
Have you ever wished you could carry more on your bike? Maybe you want to bring a water bottle. Or perhaps a small bag for your phone and keys. Mounting plates make this possible! They are like extra hands on your bike. They let you attach all sorts of things. Without them, you might have to carry everything in a backpack. This can make your back sweaty and sore. Mounting plates are a simple solution. They let you carry your gear easily and comfortably. They are also great for long bike rides. You can bring everything you need without feeling weighed down. They make biking more fun and practical.
Types of Mounting Plates
Did you know there are different kinds of mounting plates? Some are made of metal, like aluminum. Others are made of strong plastic. The metal ones are usually stronger and can carry more weight. The plastic ones are lighter. The type you choose depends on what you want to carry. If you’re carrying heavy water bottles, go for metal. If you just need to hold a small bag, plastic might be fine. Some plates also have different shapes. Some are flat, while others are curved. The shape helps them fit different parts of your bike frame. So, think about what you need before you pick a mounting plate.
Choosing the Right Plate
Choosing the right mounting plate can seem tricky. But it’s actually quite simple! First, think about what you want to attach to your bike. A water bottle? A small bag? A bike pump? The weight of the item matters. Heavier items need stronger plates. Next, look at your bike frame. Where do you want to attach the plate? Make sure the plate fits that spot. Some plates are made for round tubes. Others are for flat surfaces. Read the descriptions carefully before you buy. This will help you pick the perfect mounting plate for your needs. A little planning makes a big difference.
Tools You’ll Need
Before you start, you need to gather some tools. Don’t worry, you probably already have most of them! First, you’ll need a set of Allen wrenches. These are used to tighten the screws on the mounting plates. Make sure you have the right size. If the wrench is too small, it won’t work. If it’s too big, it might damage the screw. Next, you might need a screwdriver. Some mounting plates use screws instead of Allen bolts. Again, make sure you have the right size and type. A Phillips head screwdriver is common. You’ll also want a clean cloth. This is for wiping down your bike frame before you attach the plate. A clean surface helps the plate stick better. Finally, have a measuring tape handy. This helps you position the plate correctly.
- Allen wrenches are needed to tighten bolts.
- Screwdrivers are used for some mounting plates.
- A clean cloth helps prepare the bike frame.
- Measuring tape ensures correct placement.
- Having the right tools makes the job easier.
Imagine you’re trying to build a LEGO set without all the pieces. It would be frustrating, right? The same goes for installing mounting plates. Having the right tools makes the job much easier. If you try to use the wrong size Allen wrench, you might strip the screw. That means you won’t be able to tighten it properly. And if you don’t clean the bike frame first, the plate might not stick well. This could cause it to come loose while you’re riding. So, take a few minutes to gather your tools before you start. It will save you time and frustration in the long run. Plus, you’ll be sure that the mounting plate is installed correctly and safely.
Fun Fact or Stat: The first Allen wrench was patented in 1910 and was originally called a “safety screw.”
Allen Wrenches and Screwdrivers
Why are Allen wrenches and screwdrivers so important? Well, they are the keys to tightening the mounting plates. Allen wrenches fit into bolts with a hexagonal (six-sided) hole. Screwdrivers fit into screws with a slot or a cross. Using the right tool ensures you can tighten the plate securely. If you use the wrong tool, you might damage the bolt or screw. This can make it difficult to tighten or remove later. Always check the type of bolt or screw before you start. Using the correct tool will make the job much easier and safer.
Cleaning Supplies
Why do you need to clean your bike frame before installing a mounting plate? Because dirt and grime can prevent the plate from sticking properly! Think of it like trying to stick a sticker on a dirty window. It won’t stick very well, right? The same goes for mounting plates. A clean surface allows the adhesive to grip firmly. Use a clean cloth and some mild soap and water. Wipe the area where you’ll be attaching the plate. Make sure it’s completely dry before you proceed. This simple step can make a big difference in how well the plate stays in place.
Measuring Tools
Why is measuring tape useful when installing mounting plates? Because it helps you position the plate correctly! You want the plate to be straight and in the right spot. Measuring tape lets you make sure everything is aligned. This is especially important if you’re installing multiple plates. You want them to be evenly spaced. Take a few minutes to measure and mark the spot where you’ll attach the plate. This will ensure a professional-looking installation. It also helps prevent any problems later on.
Preparing Your Bike Frame

Before you start sticking anything to your bike, let’s get the frame ready. First, give the area a good wipe down. Use a clean cloth and some soapy water. Get rid of any dirt or grime. This helps the mounting plate stick better. Next, dry the area completely. Water can weaken the adhesive. Make sure it’s bone dry. Now, take a look at the frame. Are there any scratches or rough spots? If so, you might want to smooth them out. A little sandpaper can help. Be gentle! You don’t want to damage the paint. Finally, plan where you want to put the mounting plate. Use a measuring tape to make sure it’s in the right spot. A little prep work makes a big difference.
- Clean the bike frame with soapy water.
- Dry the area completely before attaching.
- Smooth out any rough spots with sandpaper.
- Plan the placement of the mounting plate.
- Measuring ensures correct positioning.
Imagine you’re putting a sticker on a piece of paper. If the paper is dirty and wrinkled, the sticker won’t stick very well. It might even fall off! The same is true for mounting plates. If your bike frame is dirty or rough, the plate won’t adhere properly. This could cause it to come loose while you’re riding. That’s why it’s so important to prepare the frame first. Cleaning and smoothing the surface ensures a strong and secure bond. This will keep your mounting plate in place, even on bumpy rides. So, take the time to prep your frame. It’s a small step that can make a big difference in the long run.
Fun Fact or Stat: The average bicycle frame is made of aluminum, steel, carbon fiber, or titanium.
Cleaning the Frame
Why is cleaning the bike frame so important? Think of it like this: would you want to put a bandage on a dirty wound? Probably not! The same principle applies here. Dirt and grime can prevent the mounting plate from sticking properly. Use a clean cloth, warm water, and a bit of mild soap. Gently scrub the area where you plan to attach the plate. Rinse with clean water and dry thoroughly. A clean surface ensures the best possible adhesion. This helps the mounting plate stay put, even on rough roads. So, don’t skip this step!
Drying the Frame
Why is it crucial to dry the bike frame completely after cleaning? Because water can interfere with the adhesive on the mounting plate! Imagine trying to glue two pieces of paper together when they’re wet. The glue won’t work very well, right? The same is true here. Water can weaken the bond between the mounting plate and the frame. Use a clean, dry cloth to wipe away any moisture. You can even use a hairdryer on a low setting to speed up the process. Just make sure the frame is completely dry before you move on to the next step.
Planning the Placement
Why should you plan the placement of your mounting plate before you attach it? Because you want it to be in the right spot! Think about what you’ll be attaching to the plate. A water bottle? A bag? Make sure the plate is positioned so that the accessory will be easily accessible. Use a measuring tape to ensure the plate is aligned correctly. You don’t want it to be crooked! Take your time and plan carefully. This will help you avoid any problems later on. A little forethought can save you a lot of hassle.
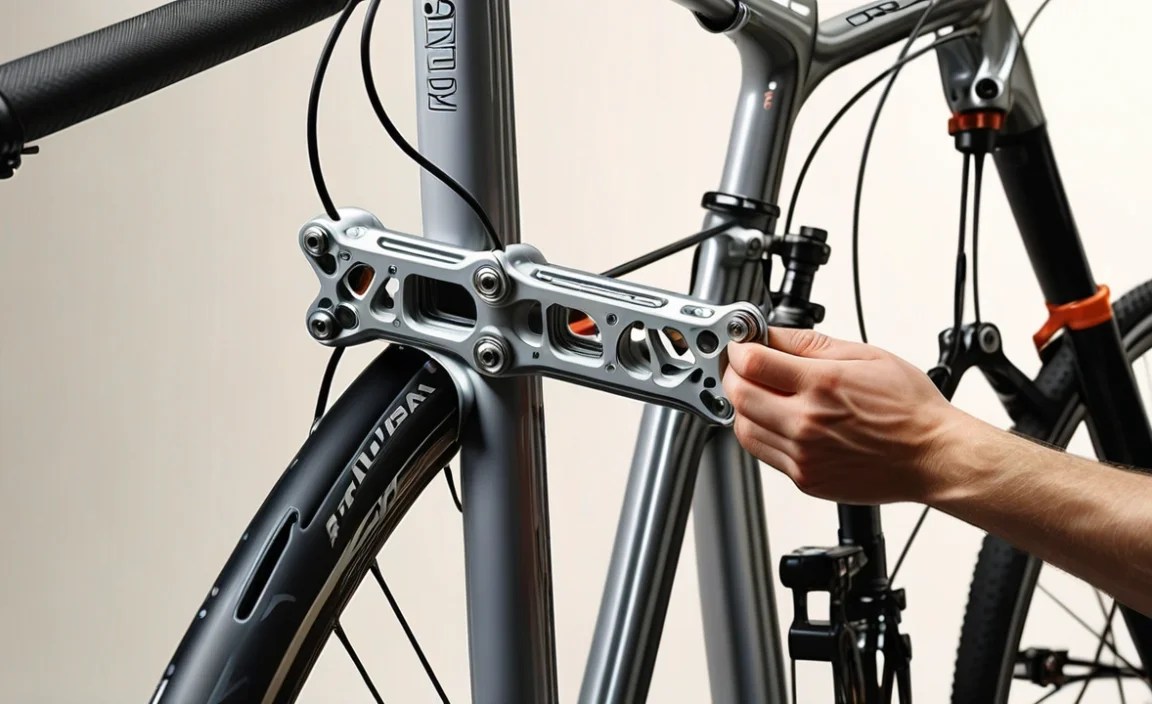
Attaching the Mounting Plate

Okay, now for the fun part! It’s time to attach the mounting plate to your bike frame. First, peel off the backing from the adhesive. Be careful not to touch the sticky part. You don’t want to get dirt or fingerprints on it. Next, line up the plate with the spot you marked earlier. Make sure it’s straight and in the right position. Now, press the plate firmly onto the frame. Hold it there for a few seconds. This helps the adhesive bond to the surface. If your plate has screws, tighten them with an Allen wrench. Don’t over-tighten! You don’t want to damage the frame. Just make sure they’re snug. Finally, double-check that the plate is secure. Give it a little wiggle. It shouldn’t move at all.
- Peel off the backing from the adhesive.
- Line up the plate with the marked spot.
- Press firmly to bond the adhesive.
- Tighten any screws with an Allen wrench.
- Double-check that the plate is secure.
Imagine you’re putting a puzzle together. You have to carefully line up the pieces before you can snap them into place. Attaching a mounting plate is similar. You need to line it up correctly with the spot you’ve prepared. If you don’t, it might not stick properly. Or, it might be crooked. Take your time and be precise. Once you’re happy with the position, press the plate firmly onto the frame. This helps the adhesive bond to the surface. If your plate has screws, make sure to tighten them properly. This will provide extra security. A well-attached mounting plate will stay in place, even on bumpy rides. So, take your time and do it right!
Fun Fact or Stat: Some adhesives can reach their maximum strength after 24-72 hours.
Peeling and Positioning
Why is it important to peel the backing carefully and position the plate accurately? Because the adhesive is what holds the plate in place! If you touch the adhesive with your fingers, you’ll transfer oils and dirt. This can weaken the bond. So, peel the backing slowly and carefully. Once the backing is off, line up the plate with the spot you’ve marked. Take your time and be precise. The better you position the plate, the stronger the bond will be. A little care at this stage can make a big difference in the long run.
Pressing Firmly
Why do you need to press the mounting plate firmly onto the frame? Because this helps the adhesive make a strong connection! Think of it like this: you’re trying to stick two pieces of paper together with glue. If you just lightly touch them together, they won’t stick very well. But if you press them together firmly, the glue will spread and create a strong bond. The same is true for mounting plates. Pressing firmly helps the adhesive grip the frame. This ensures a secure and long-lasting attachment.
Tightening Screws
Why are screws sometimes used in addition to adhesive? Because they provide extra security! Adhesive is good, but screws add an extra layer of protection. They help hold the mounting plate in place, even under stress. Use an Allen wrench to tighten the screws. Be careful not to over-tighten them! You don’t want to strip the threads or damage the frame. Just make sure they’re snug. The combination of adhesive and screws creates a super-strong bond. This will keep your mounting plate secure, no matter what.
Securing the Plate Further
Want to make sure that mounting plate stays put? There are a few extra steps you can take. First, use zip ties. These are like little plastic straps. Wrap them around the plate and the bike frame. Tighten them securely. This adds extra support. Next, consider using thread locker on the screws. This is a special liquid that prevents the screws from loosening. Just put a drop on the threads before you tighten them. Finally, give the adhesive time to cure. This means letting it dry completely. Check the instructions on the package for the recommended drying time. Usually, it’s about 24 hours. After that, your mounting plate will be super secure!
- Use zip ties for extra support.
- Apply thread locker to the screws.
- Allow the adhesive to cure completely.
- Check the plate regularly for looseness.
- Re-tighten screws if needed.
Imagine you’re building a tower out of blocks. You want to make sure it’s strong and stable. So, you add extra blocks to support the base. You also use glue to hold the blocks together. Securing a mounting plate is similar. You want to make sure it’s firmly attached to your bike frame. So, you use zip ties and thread locker for extra support. You also give the adhesive time to cure properly. These extra steps can make a big difference in the long run. They help prevent the mounting plate from coming loose, even on rough roads. A little extra effort can save you a lot of trouble later on.
| Securing Method | Pros | Cons | Best Use |
|---|---|---|---|
| Zip Ties | Easy to install, inexpensive | Not very strong, can break | Temporary support, light loads |
| Thread Locker | Prevents screws from loosening | Can be messy, requires time to cure | High-vibration environments |
| Adhesive Curing | Provides a strong bond | Requires time, affected by temperature | General purpose, smooth surfaces |
| Regular Checks | Ensures early detection of issues | Requires time and attention | All mounting plate installations |
Fun Fact or Stat: Zip ties were originally invented for use in the aviation industry.
Using Zip Ties
Why should you consider using zip ties to secure your mounting plate? Because they provide extra support and stability! Think of them as a backup plan. If the adhesive starts to weaken, the zip ties will help hold the plate in place. Wrap the zip ties tightly around the plate and the bike frame. Make sure they’re snug but not too tight. You don’t want to damage the frame. Zip ties are an inexpensive and easy way to add extra security. They can give you peace of mind, especially on long or bumpy rides.
Applying Thread Locker
Why is thread locker a good idea for screws on a mounting plate? Because it prevents them from loosening due to vibration! Imagine you’re riding your bike on a rough road. The vibrations can cause the screws to slowly unscrew themselves. Thread locker acts like a glue. It keeps the screws firmly in place. Just put a small drop on the threads before you tighten the screws. Make sure you use the right type of thread locker. Some are designed for permanent applications, while others are removable. Choose the one that’s best for your needs.
Allowing Adhesive to Cure
Why is it important to let the adhesive cure completely before using your bike? Because the adhesive needs time to reach its full strength! Think of it like baking a cake. You can’t take it out of the oven too soon, or it will be gooey and undercooked. The same is true for adhesive. It needs time to dry and harden. Check the instructions on the package for the recommended curing time. Usually, it’s about 24 hours. During this time, avoid putting any stress on the mounting plate. Let it sit undisturbed so the adhesive can bond properly.
Attaching Accessories
Now that your mounting plate is securely attached, it’s time to add some accessories! What do you want to carry on your bike? A water bottle? A small bag? A bike pump? Whatever it is, make sure it’s compatible with the mounting plate. Most accessories have screws or straps that attach to the plate. Line up the accessory with the mounting plate. Tighten the screws or straps securely. Don’t over-tighten! You don’t want to damage the accessory or the mounting plate. Double-check that everything is stable. Give it a little wiggle. It shouldn’t move around too much. Now you’re ready to ride!
- Choose accessories compatible with the plate.
- Line up the accessory with the plate.
- Tighten screws or straps securely.
- Don’t over-tighten to avoid damage.
- Double-check for stability before riding.
Imagine you’re decorating a Christmas tree. You carefully hang ornaments on the branches. You want to make sure they’re securely attached so they don’t fall off. Attaching accessories to a mounting plate is similar. You want to make sure they’re firmly attached so they don’t bounce around while you’re riding. Use the screws or straps that came with the accessory. Line them up with the holes or slots on the mounting plate. Tighten them securely, but not too tightly. You don’t want to strip the threads or break the straps. Double-check that everything is stable before you hit the road. A well-attached accessory will make your ride more enjoyable and convenient.
Fun Fact or Stat: The most common bicycle accessory is a water bottle cage.
Choosing the Right Accessory
Why is it important to choose the right accessory for your mounting plate? Because you want it to fit properly and function correctly! Think of it like wearing shoes that are too big or too small. They wouldn’t be very comfortable, right? The same is true for bike accessories. Make sure the accessory is compatible with the mounting plate. Check the size and weight limits. You don’t want to overload the plate. Choose accessories that are designed for bicycles. They’ll be more durable and reliable.
Tightening Screws and Straps
Why is it important to tighten screws and straps securely? Because you don’t want your accessories to fall off while you’re riding! Imagine you’re riding down a bumpy road and your water bottle suddenly pops off. That could be dangerous! Make sure the screws and straps are snug but not too tight. Over-tightening can damage the accessory or the mounting plate. Use the right tools for the job. An Allen wrench or a screwdriver will help you tighten the screws properly. Check the accessories regularly to make sure they’re still secure.
Checking for Stability
Why should you check for stability before you start riding? Because you want to make sure the accessories are securely attached! Give them a little wiggle. If they move around too much, tighten the screws or straps further. Make sure the accessories don’t interfere with your pedaling or steering. You want to be able to ride safely and comfortably. Take a few minutes to check everything before you hit the road. It could prevent a mishap later on.
Regular Maintenance
Once you’ve installed your mounting plate, don’t forget about it! It needs some love and care too. Check the plate regularly for any signs of looseness. Give it a little wiggle. If it moves, tighten the screws or zip ties. Also, check the adhesive. Make sure it’s still firmly attached to the frame. If it’s peeling, you might need to reapply it. Clean the plate regularly with a damp cloth. This will remove any dirt or grime. Finally, inspect the accessories. Make sure they’re still securely attached. Regular maintenance will keep your mounting plate in good condition for years to come.
- Check the plate for looseness regularly.
- Tighten screws or zip ties if needed.
- Inspect the adhesive for peeling.
- Clean the plate with a damp cloth.
- Inspect the accessories for security.
Imagine you have a pet. You need to feed it, groom it, and take it to the vet regularly. If you don’t, it might get sick or unhappy. A mounting plate is similar. It needs regular maintenance to stay in good condition. If you neglect it, it might come loose or get damaged. This could cause your accessories to fall off or even create a safety hazard. So, take a few minutes each month to check the mounting plate and its accessories. Tighten any loose screws, clean off any dirt, and inspect the adhesive. This simple routine will keep your mounting plate working properly for years to come. A little maintenance goes a long way.
Fun Fact or Stat: Regular bike maintenance can extend the lifespan of your bike by up to 50%.
Checking for Looseness
Why is it important to check for looseness regularly? Because a loose mounting plate can be dangerous! Imagine you’re riding down a hill and the plate suddenly comes off. Your accessories could fall into the road and cause an accident. Check the plate every time you ride your bike. Give it a little wiggle. If it moves, tighten the screws or zip ties immediately. Don’t wait until it’s too late. A quick check can prevent a serious problem.
Inspecting the Adhesive
Why should you inspect the adhesive on your mounting plate? Because the adhesive is what holds the plate to the frame! If the adhesive starts to peel or crack, the plate could come loose. Check the adhesive regularly for any signs of damage. If you see any problems, clean the area and reapply the adhesive. Use a high-quality adhesive that’s designed for outdoor use. This will ensure a strong and long-lasting bond.
Cleaning the Plate
Why should you clean your mounting plate regularly? Because dirt and grime can damage the adhesive and screws! Think of it like this: you wouldn’t want to leave your bike out in the rain without cleaning it, right? The same is true for mounting plates. Use a damp cloth to wipe off any dirt or grime. Avoid using harsh chemicals or abrasive cleaners. These can damage the plate and its components. A little cleaning can keep your mounting plate looking and working its best.
Summary
Modular mounting plates are a great way to add accessories to your bike frame. They let you carry water bottles, bags, lights, and more. How to install modular mounting plate on bicycle frame involves a few simple steps. First, gather your tools. You’ll need Allen wrenches, screwdrivers, and a clean cloth. Next, prepare your bike frame. Clean the area where you’ll be attaching the plate. Make sure it’s dry and smooth. Then, attach the mounting plate. Peel off the backing from the adhesive and press it firmly onto the frame. If your plate has screws, tighten them securely. Finally, secure the plate further with zip ties or thread locker. With a little effort, you can easily add modular mounting plates to your bike and customize it for any adventure.
Conclusion
Adding modular mounting plates to your bicycle frame is easier than you might think. With the right tools and a little patience, you can customize your bike to carry all sorts of accessories. This makes your rides more comfortable and convenient. You can bring water, snacks, tools, and more. Learning how to install modular mounting plate on bicycle frame opens up a world of possibilities for your cycling adventures. So, get out there and start customizing your ride!
Frequently Asked Questions
Question No 1: What is a modular mounting plate?
Answer: A modular mounting plate is like a small platform you attach to your bike frame. It lets you easily add accessories like water bottle cages, bags, or lights. Think of it as a customizable spot where you can attach different things to make your bike more useful. These plates come in various sizes and shapes. They often use screws or adhesive to stick to your bike frame. Learning how to install modular mounting plate on bicycle frame means you can personalize your bike for any adventure.
Question No 2: What tools do I need to install a modular mounting plate?
Answer: To install a modular mounting plate, you’ll need a few simple tools. These often include Allen wrenches, screwdrivers, and a clean cloth. Allen wrenches help tighten bolts, while screwdrivers work for screws. The clean cloth is for wiping down your bike frame before attaching the plate. This ensures a good stick. You might also want measuring tape to place the plate in the perfect spot. Having these tools ready will make the installation process smooth and easy.
Question No 3: How do I prepare my bike frame for a mounting plate?
Answer: Preparing your bike frame is super important for a secure fit. First, clean the area where you want to put the mounting plate. Use soapy water and a clean cloth to get rid of dirt. Then, dry the area well. Make sure there’s no water left. If there are any rough spots, you can smooth them out with sandpaper. Finally, plan exactly where you want to put the plate. This prep work helps the mounting plate stick better and last longer.
Question No 4: How do I attach the mounting plate to my bike frame?
Answer: Attaching the mounting plate is the key step. Start by peeling off the backing from the adhesive on the plate. Be careful not to touch the sticky part. Then, line up the plate with the spot you prepared on your bike frame. Press it firmly and hold for a few seconds. If the plate has screws, tighten them with an Allen wrench. Make sure everything is snug and secure. Doing this right makes sure the plate stays put.
Question No 5: How can I make sure the mounting plate is extra secure?
Answer: To make your mounting plate super secure, you can add a few extra steps. Use zip ties to wrap around the plate and your bike frame. Tighten them for extra support. You can also use thread locker on the screws to keep them from loosening. Give the adhesive enough time to dry completely. Usually, that’s about 24 hours. Checking and securing the plate well ensures it stays safe during your rides. Part of learning how to install modular mounting plate on bicycle frame is knowing the best way to make sure it’s secure.
Question No 6: How often should I check the mounting plate after installing it?
Answer: It’s a good idea to check your mounting plate regularly. After you install it, give it a check before each ride for the first week. Look for any signs of looseness or peeling. Then, check it about once a month to make sure everything is still secure. If you notice anything wrong, tighten the screws or reapply the adhesive. Regular checks help keep your accessories safe and your rides worry-free. This habit is important for anyone who wants to properly maintain and know how to install modular mounting plate on bicycle frame.


