
Easy How to Mount Bike Rack on Rear Axle Mount Points
Have you ever wanted to take your bike on a trip? It can be hard to fit a bike in a car. A bike rack can help you carry your bike. But how to mount bike rack on rear axle mount points? It might sound tricky, but it’s not! Let’s learn how to do it safely and easily.
Bike racks let you bring your bike anywhere. Imagine riding your bike in a new park. Or exploring a cool trail with your friends. Learning how to mount bike rack on rear axle mount points opens up many adventures. It helps you enjoy biking even more.
Bike racks come in different styles. Some attach to your car’s trunk. Others fit on the roof. Rear axle mount racks are strong and stable. They use special spots on your bike’s rear wheel area. This guide will show you exactly how to mount bike rack on rear axle mount points.
Key Takeaways
- Always check your bike rack after the first few miles of driving.
- Make sure the rack and bikes do not block your car’s lights.
- Read the bike rack’s instructions carefully before you start.
- Knowing how to mount bike rack on rear axle mount points is super useful.
- Using a rear axle mount bike rack keeps your car’s roof and trunk clear.
Understanding Rear Axle Mount Bike Racks

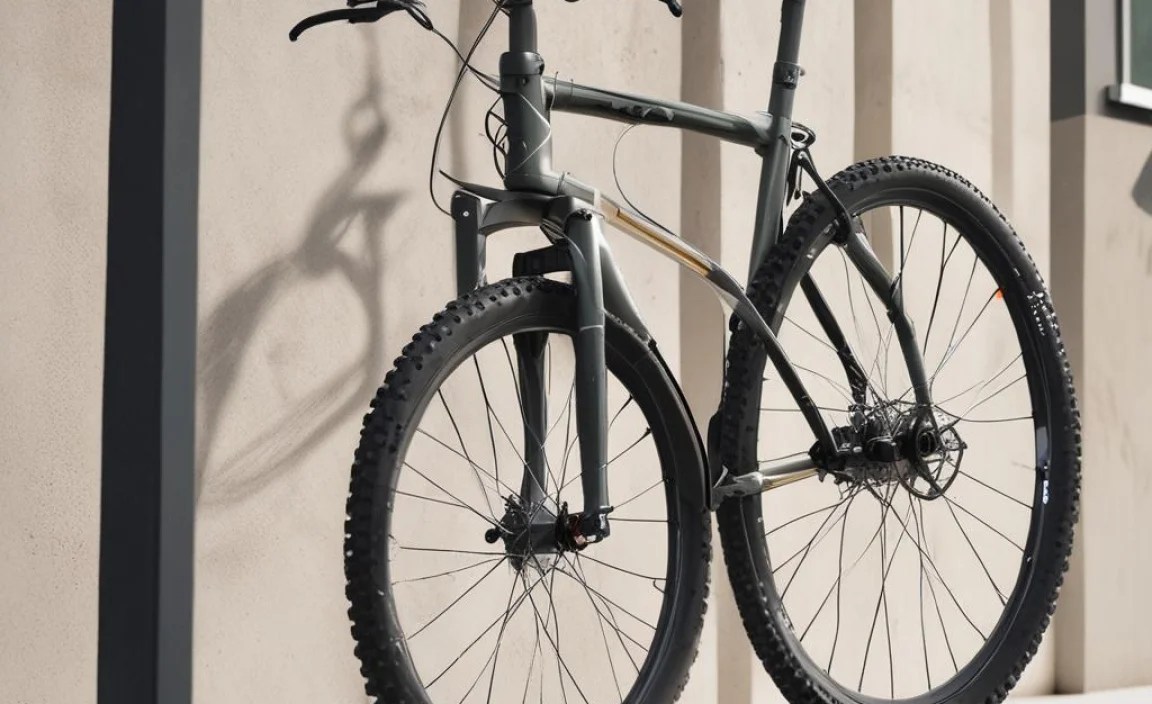
Rear axle mount bike racks are a cool way to carry bikes. They connect to the rear axle of your bike. This is the part that holds the back wheel on. These racks are strong. They keep your bike steady while you drive. They are also different from other types of racks. Some racks attach to the roof of your car. Others attach to the trunk. But rear axle mounts use the bike’s own structure. This makes them extra secure. They are great for long trips and bumpy roads. Knowing how to mount bike rack on rear axle mount points is important. It keeps you and your bike safe. Always follow the instructions that come with your rack. If you do, you will have no problems. You will be ready for fun bike rides!
- Rear axle racks attach to the bike’s rear axle.
- These racks are known for being very stable.
- They are good for long trips and rough roads.
- Always read the instructions carefully.
- Make sure the rack is properly secured.
Think about going on a family vacation. You want to bring your bikes. But your car is already full. A rear axle mount bike rack is perfect! It lets you carry your bikes without taking up space inside the car. Plus, it keeps your bikes safe. They won’t fall off or get damaged. Imagine the fun you will have exploring new places on your bikes. Learning how to mount bike rack on rear axle mount points can make your trips even better. It gives you the freedom to bike wherever you go. Just remember to check the rack often. Make sure it is still tight and secure. Then you can enjoy your ride without worry.
Fun Fact or Stat: Did you know that rear axle bike racks can carry up to three bikes at once, depending on the model?
Why Choose a Rear Axle Mount Rack?
Have you ever wondered why some people pick rear axle mount racks? Well, there are some great reasons. First, they are super stable. The way they attach to the bike’s axle makes them really strong. This means your bike won’t wobble around while you drive. Second, they are easy to load. You don’t have to lift your bike high up onto the roof. Just attach it to the rear axle mount. This is great for kids and anyone who can’t lift heavy things. Third, they don’t change your car’s height. Roof racks can make your car taller. This might make it hard to go under bridges or into garages. Rear axle mounts don’t have this problem. They keep your car the same size. So, if you want a safe, easy, and convenient way to carry your bike, a rear axle mount rack might be perfect for you.
The Benefits of Stability
Imagine you are driving down a bumpy road. You have your bike on a rack. Would you want the rack to be wobbly? Of course not! That’s why stability is so important. Rear axle mount racks are very stable. They hold your bike firmly in place. This means less shaking and bouncing. It also means less wear and tear on your bike. A stable rack protects your bike from damage. It also makes your driving experience better. You won’t have to worry about your bike falling off. You can just relax and enjoy the ride. A stable rack gives you peace of mind. So, when you are choosing a bike rack, think about stability. It’s one of the most important things to look for.
Are Rear Axle Mounts Right for You?
Are you trying to figure out if a rear axle mount rack is right for you? Think about what kind of biking you do. Do you go on long trips? Do you ride on rough roads? If so, a rear axle mount might be a good choice. They are strong and stable. They can handle tough conditions. Also, think about how easy they are to use. Do you want a rack that is easy to load and unload? Rear axle mounts are often easier than roof racks. You don’t have to lift your bike as high. But, rear axle mounts might not work for all bikes. Some bikes have different axle sizes. Make sure your bike is compatible with the rack. If you are not sure, ask a bike shop for help. They can tell you if a rear axle mount is right for your bike and your needs.
Tools and Materials Needed
Before you start, you need to gather some tools and materials. This will make the job easier. First, you will need the bike rack itself. Make sure it is the right size for your bike. Second, you might need some wrenches. These are used to tighten the bolts on the rack. The size of the wrenches will depend on the rack. Third, you might need a screwdriver. Some racks use screws instead of bolts. Fourth, you will need a measuring tape. This helps you make sure the rack is in the right spot. Fifth, you might want some rags. These can be used to clean the axle and the rack. Sixth, it is a good idea to have a friend help you. Two people can make the job easier and faster. Having the right tools and materials is important. It helps you how to mount bike rack on rear axle mount points safely and correctly. It also makes the process smoother and less frustrating.
- Bike rack (correct size for your bike)
- Wrenches (to tighten bolts)
- Screwdriver (if needed)
- Measuring tape (for placement)
- Rags (for cleaning)
- A friend (for help)
Imagine you are building a Lego set. You wouldn’t start without all the pieces, right? Mounting a bike rack is similar. You need to have all the right tools. This makes the job go smoothly. Without the right tools, you might get stuck. You might even damage your bike or the rack. So, take a few minutes to gather everything you need. Check the instructions that came with your rack. They will tell you exactly what tools you need. If you don’t have something, you can borrow it from a friend. Or you can buy it at a hardware store. Being prepared will make how to mount bike rack on rear axle mount points much easier. It will also make it safer. You will be able to enjoy your bike rides without worry.
Fun Fact or Stat: The average bike rack weighs between 15 and 30 pounds!
Choosing the Right Bike Rack
Choosing the right bike rack can feel tricky. There are so many options! But don’t worry, it’s not too hard. First, think about how many bikes you need to carry. Some racks hold one bike. Others hold two, three, or even more. Pick a rack that can hold all your bikes. Second, think about your car. Some racks work better on certain cars. Read the product details of the rack. It will tell you if it fits your car. Third, think about your budget. Bike racks can cost different amounts of money. Set a budget before you start shopping. This will help you narrow down your choices. Finally, read reviews. See what other people say about the rack. This can help you pick a good one. Choosing the right bike rack is important. It will make your bike trips easier and more fun.
Gathering Your Tools
Have you ever tried to fix something without the right tools? It can be super frustrating. That’s why gathering your tools is so important. Before you start mounting your bike rack, take a few minutes. Find all the tools you need. This might include wrenches, screwdrivers, and measuring tape. Check the instructions that came with your rack. They will tell you exactly what tools you need. If you don’t have something, ask a friend or family member. They might have it. You can also buy tools at a hardware store. Make sure you have the right size tools. A wrench that is too big or too small won’t work. Having the right tools will make the job much easier. It will also help you avoid mistakes. So, take the time to gather your tools before you start.
Ensuring Bike Compatibility
Imagine you buy a new pair of shoes. You are so excited to wear them. But then you realize they don’t fit! That would be a bummer, right? The same thing can happen with bike racks. You need to make sure your bike is compatible. This means the rack will work with your bike’s axle. Some bikes have different axle sizes. If the rack doesn’t fit, you won’t be able to use it. Before you buy a rack, check the product details. It will tell you what kind of bikes it works with. If you are not sure, ask a bike shop for help. They can tell you if the rack is compatible with your bike. They can also help you find a rack that will work. Ensuring bike compatibility is important. It will save you time and frustration. It will also make sure your bike is safe.
Preparing the Bike and Rack

Before you start attaching the rack, you need to prep your bike and the rack. This means getting them ready for the process. First, clean your bike’s rear axle. Use a rag to wipe off any dirt or grease. This will help the rack attach securely. Second, check the bike rack. Make sure all the parts are there. Read the instructions. Know how the rack is supposed to fit. Third, loosen any bolts or screws on the rack. This will make it easier to adjust. Fourth, practice attaching the rack to your bike. This will help you understand how it works. Fifth, have a friend help you hold the bike steady. Preparing the bike and rack is important. It makes how to mount bike rack on rear axle mount points easier and safer. It also helps you avoid mistakes.
- Clean the bike’s rear axle.
- Check the bike rack parts.
- Loosen bolts and screws.
- Practice attaching the rack.
- Get a friend to help.
Think about baking a cake. You wouldn’t just throw all the ingredients together, right? You would prepare each ingredient first. You would measure the flour, crack the eggs, and soften the butter. Preparing your bike and rack is like preparing your ingredients. It sets you up for success. It makes the whole process easier and smoother. If you skip this step, you might run into problems later. The rack might not fit properly. Or it might not be secure. So, take the time to prepare your bike and rack. It will be worth it in the end. You will be able to enjoy your bike rides without worrying about your bike falling off.
Fun Fact or Stat: Some bike racks have built-in locks to keep your bikes safe from theft!
Cleaning the Rear Axle
Have you ever tried to stick something to a dirty surface? It doesn’t work very well, does it? The same is true for bike racks. If your bike’s rear axle is dirty, the rack might not attach securely. That’s why cleaning the axle is so important. Use a clean rag to wipe off any dirt, grease, or grime. You might need to use a special cleaner if the axle is really dirty. Make sure the axle is completely dry before you attach the rack. A clean axle will help the rack grip better. It will also prevent rust and corrosion. Cleaning the axle is a small step, but it makes a big difference. It helps ensure that your bike rack is safe and secure.
Checking Rack Components
Imagine you are putting together a puzzle. You wouldn’t start without making sure you have all the pieces, right? The same is true for bike racks. Before you start mounting the rack, check all the components. Make sure you have all the bolts, screws, and straps. Read the instructions that came with the rack. They will show you a picture of all the parts. If something is missing, don’t try to use the rack. Contact the company that made the rack. They can send you a replacement part. Using a rack with missing parts is dangerous. It could cause your bike to fall off while you are driving. So, take the time to check the rack components. It’s a simple step that can prevent accidents.
Adjusting Rack Settings
Have you ever worn a hat that was too tight or too loose? It’s not very comfortable, is it? The same is true for bike racks. If the rack is not adjusted properly, it won’t fit your bike correctly. Before you attach the rack, take a few minutes to adjust the settings. This might include loosening bolts, moving straps, or changing the angle of the arms. Read the instructions that came with the rack. They will tell you how to adjust the settings. Make sure the rack is snug but not too tight. You don’t want to damage your bike. Adjusting the rack settings is important. It ensures that your bike is safe and secure. It also makes the rack easier to use.
Attaching the Bike Rack to the Axle Mounts

Now it’s time for the main event! Attaching the bike rack to the axle mounts. This is where you connect the rack to your bike. First, position the rack over the rear axle. Make sure it is centered. Second, line up the rack’s arms with the axle mounts on your bike. These are usually small holes or slots. Third, insert the rack’s bolts or screws into the axle mounts. Tighten them with a wrench or screwdriver. Fourth, make sure the rack is secure. It should not wobble or move. Fifth, double-check all the connections. Make sure everything is tight. Attaching the bike rack to the axle mounts can be tricky. But if you follow these steps, you will be fine. Remember, safety is important. Take your time and do it right. Knowing how to mount bike rack on rear axle mount points will help you enjoy your bike rides safely.
- Position the rack over the rear axle.
- Line up the rack’s arms.
- Insert bolts or screws.
- Tighten everything securely.
- Double-check all connections.
Imagine you are building a bridge. You wouldn’t just slap the pieces together, would you? You would carefully connect each piece. You would make sure everything is strong and stable. Attaching the bike rack is similar. You need to carefully connect the rack to your bike’s axle mounts. This is what keeps your bike safe while you drive. If you don’t attach the rack properly, your bike could fall off. That would be dangerous for you and other drivers. So, take your time and follow the instructions. Make sure everything is tight and secure. When you are finished, give the rack a good shake. If it doesn’t move, you know you did it right. You can relax and enjoy your bike ride.
Fun Fact or Stat: The first bike rack was invented in the 1920s!
Aligning the Rack Arms
Have you ever tried to put a puzzle piece in the wrong spot? It just doesn’t fit, does it? The same is true for bike rack arms. If you don’t align them properly, the rack won’t attach correctly. Before you tighten any bolts, take a moment to align the rack arms. Make sure they are lined up with the axle mounts on your bike. The arms should fit snugly into the mounts. If they don’t, loosen the bolts and try again. You might need to adjust the angle of the arms. Once the arms are aligned, you can tighten the bolts. But don’t overtighten them. You could damage the rack or your bike. Aligning the rack arms is important. It ensures that the rack is stable and secure.
Securing Bolts and Screws
Imagine you are building a treehouse. You wouldn’t just leave the boards loose, would you? You would secure them with nails or screws. The same is true for bike racks. You need to secure the bolts and screws. This keeps the rack from wobbling or falling off. Use a wrench or screwdriver to tighten the bolts and screws. But don’t overtighten them. You could strip the threads or damage the rack. Tighten them until they are snug. Then give them one more turn. Check the bolts and screws regularly. Make sure they haven’t loosened over time. Securing the bolts and screws is important. It keeps your bike safe while you drive.
Checking for Stability
Have you ever built a tower out of blocks? You wouldn’t just leave it standing without testing it, would you? You would give it a little shake to make sure it’s stable. The same is true for bike racks. Once you have attached the rack, check for stability. Grab the rack and give it a good shake. It should not wobble or move. If it does, tighten the bolts and screws. Check the alignment of the arms. Make sure everything is secure. You might also want to put your bike on the rack. Then shake the rack again. This will test the rack under load. Checking for stability is important. It ensures that your bike is safe while you drive. It gives you peace of mind.
Securing the Bikes to the Rack

Now that the rack is on, it’s time to secure your bikes. This is a very important step. You want to make sure your bikes are safe and won’t fall off. First, lift your bike onto the rack. Place the frame on the rack’s arms. Second, use the rack’s straps or clamps to secure the bike. These will hold the bike in place. Third, make sure the straps are tight. But don’t overtighten them. You could damage your bike. Fourth, check that the bike is stable. It should not wobble or move. Fifth, repeat these steps for each bike. Securing the bikes to the rack is crucial. It keeps your bikes safe and prevents accidents. Always double-check everything before you drive. Knowing how to mount bike rack on rear axle mount points and secure your bikes will make your trips safe and fun.
| Step | Action | Why? |
|---|---|---|
| 1 | Lift bike onto rack. | To position for securing. |
| 2 | Use straps or clamps. | To hold the bike in place. |
| 3 | Tighten straps. | To prevent wobbling. |
| 4 | Check bike stability. | To ensure safety. |
Imagine you are packing a suitcase. You wouldn’t just throw everything in, would you? You would carefully fold each item. You would make sure everything fits snugly. Securing your bikes to the rack is like packing a suitcase. You need to carefully secure each bike. This keeps them safe while you drive. If you don’t secure them properly, they could fall off. That would be dangerous for you and other drivers. So, take your time and follow the instructions. Make sure everything is tight and secure. When you are finished, give each bike a good shake. If they don’t move, you know you did it right. You can relax and enjoy your bike ride.
Fun Fact or Stat: Some bike racks can carry bikes of different sizes at the same time!
Using Straps and Clamps
Have you ever worn a belt that was too loose? Your pants would fall down, right? The same is true for bike rack straps and clamps. If they are not tight enough, your bike could fall off. Before you start driving, make sure the straps and clamps are secure. Wrap the straps around the bike frame. Fasten the clamps tightly. Check that the bike is not wobbling. If it is, tighten the straps and clamps. But don’t overtighten them. You could damage your bike. Using straps and clamps properly is important. It keeps your bike safe while you drive.
Distributing Weight Evenly
Imagine you are carrying a heavy bag. If all the weight is on one side, it would be hard to balance, right? The same is true for bike racks. If the weight is not distributed evenly, the rack could be unstable. Before you start driving, make sure the bikes are positioned evenly on the rack. If you are carrying two bikes, put one on each side. If you are carrying three bikes, put one in the middle. Check that the rack is not leaning to one side. If it is, adjust the position of the bikes. Distributing weight evenly is important. It keeps the rack stable and prevents accidents.
Protecting Your Bikes’ Frames
Have you ever scratched your favorite toy? It’s disappointing, right? The same is true for your bike’s frame. You want to protect it from scratches and dents. When you are securing your bikes to the rack, be careful not to damage the frames. Use padding or foam to protect the frames from rubbing against the rack. Don’t overtighten the straps or clamps. This could dent the frames. Check that the bikes are not rubbing against each other. If they are, adjust their position. Protecting your bikes’ frames is important. It keeps your bikes looking good and working properly.
Final Checks and Adjustments
You’re almost done! But before you hit the road, do some final checks. These checks make sure everything is safe and secure. First, double-check all the bolts and screws. Make sure they are tight. Second, check the straps and clamps. Make sure they are holding the bikes firmly. Third, check that the bikes are not wobbling. They should be stable. Fourth, check that the rack is not blocking your car’s lights or license plate. Fifth, take a short test drive. See how the rack and bikes feel. If anything seems loose or unstable, stop and fix it. These final checks are very important. They ensure your safety and the safety of others. Knowing how to mount bike rack on rear axle mount points includes these final steps. They help you enjoy your bike rides with peace of mind.
- Double-check bolts and screws.
- Check straps and clamps.
- Ensure bikes are stable.
- Check lights and license plate.
- Take a test drive.
Imagine you are a pilot getting ready for takeoff. You wouldn’t just start the engines and go, would you? You would go through a checklist. You would make sure everything is working properly. Doing final checks is like a pilot’s checklist. It helps you catch any problems before they become serious. It only takes a few minutes to do these checks. But it can save you a lot of trouble down the road. It can also prevent accidents. So, don’t skip this step. It’s an important part of how to mount bike rack on rear axle mount points and ensuring a safe trip.
Fun Fact or Stat: Bike racks can improve your car’s fuel efficiency by reducing wind resistance compared to carrying bikes inside!
Testing the Rack’s Stability
Have you ever built a sandcastle? You wouldn’t just leave it standing without testing it, would you? You would gently poke it to see if it’s strong. The same is true for your bike rack. Before you start driving, test the rack’s stability. Grab the rack and give it a good shake. It should not wobble or move. If it does, tighten the bolts and screws. Check the alignment of the arms. Make sure everything is secure. You might also want to put your bike on the rack. Then shake the rack again. This will test the rack under load. Testing the rack’s stability is important. It ensures that your bike is safe while you drive.
Adjusting Bike Positions
Imagine you are arranging flowers in a vase. You wouldn’t just stick them in randomly, would you? You would adjust their positions to make them look nice. The same is true for your bikes on the rack. You need to adjust their positions to make sure they are secure and don’t block your lights. Check that the bikes are not rubbing against each other. If they are, adjust their position. Make sure the bikes are not blocking your car’s taillights or license plate. If they are, move the bikes or adjust the rack. Adjusting bike positions is important. It keeps your bikes safe and ensures that you are following the law.
Checking Light Visibility
Have you ever tried to drive at night without headlights? It’s dangerous, right? The same is true for your car’s taillights. You need to make sure they are visible to other drivers. Before you start driving, check that your bike rack is not blocking your taillights. If it is, adjust the position of the rack or the bikes. You might need to use a different type of rack. You can also buy special lights that attach to the back of your bike rack. These lights will make sure you are visible to other drivers. Checking light visibility is important. It keeps you and other drivers safe.
Maintenance and Care Tips
Taking care of your bike rack will help it last longer. It will also keep your bikes safe. First, clean the rack regularly. Use soap and water to remove dirt and grime. Second, lubricate the moving parts. This will keep them working smoothly. Third, check the rack for rust or damage. Fix any problems right away. Fourth, store the rack in a dry place. This will prevent rust. Fifth, follow the manufacturer’s instructions. These instructions will tell you how to properly care for your rack. Good maintenance is important. It helps you get the most out of your bike rack. Knowing how to mount bike rack on rear axle mount points also means knowing how to care for it.
- Clean the rack regularly.
- Lubricate moving parts.
- Check for rust or damage.
- Store in a dry place.
- Follow instructions.
Imagine you have a pet. You wouldn’t just ignore it, would you? You would feed it, groom it, and take it to the vet. Taking care of your bike rack is like taking care of a pet. You need to give it regular attention. This will keep it healthy and happy. It will also prevent problems. A well-maintained bike rack is a safe bike rack. It will keep your bikes secure while you drive. It will also last longer. So, take the time to care for your bike rack. It’s worth the effort. You will be able to enjoy your bike rides for years to come.
Fun Fact or Stat: Regularly cleaning your bike rack can prevent rust and extend its lifespan by several years!
Cleaning the Rack Regularly
Have you ever washed your bike? It feels good to get rid of all the dirt and grime, right? The same is true for your bike rack. Cleaning it regularly will keep it looking good and working properly. Use soap and water to wash the rack. Pay attention to the moving parts. Remove any dirt or debris that could cause problems. Rinse the rack thoroughly and let it dry. You can also use a special cleaner designed for bike racks. Cleaning the rack regularly is important. It prevents rust and corrosion. It also makes the rack easier to use.
Lubricating Moving Parts
Imagine you have a door that squeaks every time you open it. It would be annoying, right? The same is true for your bike rack’s moving parts. If they are not lubricated, they could squeak or stick. Use a lubricant designed for bike racks to keep the moving parts working smoothly. Apply the lubricant to the hinges, bolts, and screws. Wipe off any excess lubricant. Lubricating the moving parts is important. It prevents wear and tear. It also makes the rack easier to use.
Storing the Rack Properly
Have you ever left your bike out in the rain? It can get rusty and damaged, right? The same is true for your bike rack. If you leave it out in the weather, it can get rusty and damaged. Store the rack in a dry place when you are not using it. This could be a garage, shed, or basement. Cover the rack with a tarp to protect it from dust and dirt. Storing the rack properly is important. It prevents rust and corrosion. It also extends the life of the rack.
Summary
Learning how to mount bike rack on rear axle mount points can be easy. You need the right tools and a bit of patience. First, gather your tools and prep your bike. Then, attach the rack to the axle mounts. Secure the bikes with straps. Finally, do some safety checks. Knowing how to do it right helps keep your bike safe. It also makes sure you don’t damage your car. Bike racks let you take your bike on adventures. They make it easy to explore new places. Always follow the instructions. If you do, you will have fun and stay safe.
Conclusion
How to mount bike rack on rear axle mount points doesn’t have to be hard. With a little practice, anyone can do it. Bike racks are a great way to carry your bikes. They let you explore new trails and parks. Make sure you follow all the steps. Check the rack often to make sure it’s secure. Enjoy your bike rides. Be safe and have fun!
Frequently Asked Questions
Question No 1: What tools do I need to mount a bike rack?
Answer: You will usually need some wrenches and possibly a screwdriver. The exact sizes depend on your bike rack. A measuring tape can help you position the rack correctly. Also, keep a rag handy to wipe down the rear axle. Check the instructions that came with your bike rack. They will tell you exactly what you need. Having the right tools makes the job much easier. It also helps you avoid mistakes. Knowing how to mount bike rack on rear axle mount points starts with being prepared.
Question No 2: How do I know if my bike is compatible with a rear axle mount bike rack?
Answer: Most bikes are compatible, but it’s good to check. Look at your bike’s rear axle. Does it have mounting points? These are small holes or slots where the rack attaches. If you see them, your bike is likely compatible. If you are not sure, ask a bike shop. They can help you figure it out. Some bikes have different axle sizes. The rack needs to fit snugly. Ensuring compatibility is important. It keeps your bike safe. It also helps you avoid buying the wrong rack. Understanding how to mount bike rack on rear axle mount points includes knowing what fits.
Question No 3: How do I keep my bikes from getting scratched on the rack?
Answer: Scratches are a common concern. Use foam padding or soft cloths. Wrap them around your bike’s frame where it touches the rack. This will protect the paint. Also, make sure the bikes aren’t rubbing against each other. Adjust their positions if needed. Tighten the straps carefully. Don’t overtighten them. This could damage the frame. Protecting your bikes is important. It keeps them looking good. It also helps them last longer. Consider this when learning how to mount bike rack on rear axle mount points.
Question No 4: What should I do if the bike rack blocks my car’s lights or license plate?
Answer: It’s important to keep your lights and license plate visible. If the rack blocks them, you need to fix it. Try adjusting the rack’s position. Move the bikes around. If that doesn’t work, you might need a different rack. Some racks are designed to avoid blocking lights. You can also buy extra lights. Attach them to the back of the rack. This will make sure you are visible to other drivers. Safety is key. Don’t drive with blocked lights. Understanding how to mount bike rack on rear axle mount points includes considering visibility.
Question No 5: How often should I check the bike rack after I install it?
Answer: Check the rack before every trip. Give it a good shake. Make sure the bolts and straps are tight. After the first few miles, stop and check again. Things can loosen up as you drive. Regular checks are important. They keep your bikes safe. They also prevent accidents. Make it a habit to check the rack often. This will give you peace of mind. Remember, safety first. This is important after you learn how to mount bike rack on rear axle mount points.
Question No 6: Can I use a rear axle mount bike rack on any car?
Answer: Rear axle mount racks work on many cars. But not all. Check your car’s manual. It will tell you if your car is compatible. Some cars have special bumpers or spoilers. These might get in the way. If you are not sure, ask a professional. A bike shop or car dealer can help you. They can tell you if a rear axle mount is right for your car. Choosing the right rack is important. It ensures a safe and secure fit. Consider your car before learning how to mount bike rack on rear axle mount points.


