
How to Install a Fan Cycling Switch on a Heat Pump: A Step-by-Step Guide
Quick Summary: Installing a fan cycling switch on your heat pump can boost its efficiency in cooler weather. This involves safely disconnecting power, locating the fan motor wires, wiring in the switch (usually in series with the fan motor), and testing the setup. Always prioritize safety and consult a professional if unsure.
Is your heat pump struggling to keep up when the temperature drops? One common culprit is a constantly running outdoor fan, even when it’s not needed. This overcooling can reduce efficiency and increase energy bills. The solution? Installing a fan cycling switch. It’s a straightforward upgrade that can significantly improve your heat pump’s performance. Don’t worry if you’re new to this – this guide will walk you through each step. By the end, you’ll know how to install a fan cycling switch safely and effectively, ensuring your heat pump runs optimally.
What is a Fan Cycling Switch and Why Do You Need One?

A fan cycling switch is a temperature-sensitive device designed to control the operation of the outdoor fan motor in a heat pump. During heating mode, especially in mild weather, the heat pump doesn’t always need the fan running continuously. The switch monitors the temperature of the refrigerant and cycles the fan on and off as needed, preventing overcooling of the refrigerant and improving heating efficiency.
Here’s why you might need one:
- Improved Efficiency: Prevents overcooling, leading to better heating performance.
- Reduced Energy Bills: By running the fan only when necessary, you consume less electricity.
- Enhanced Comfort: More consistent indoor temperatures.
- Extended Component Life: Reducing unnecessary fan operation can prolong the life of the fan motor and compressor.
Tools and Materials You’ll Need

Before you start, gather all the necessary tools and materials. This will make the installation process smoother and safer.
- Fan Cycling Switch: Choose a switch compatible with your heat pump model.
- Screwdrivers: Both Phillips head and flathead.
- Wire Strippers: For preparing the wires.
- Wire Connectors: To safely join wires.
- Electrical Tape: For insulation.
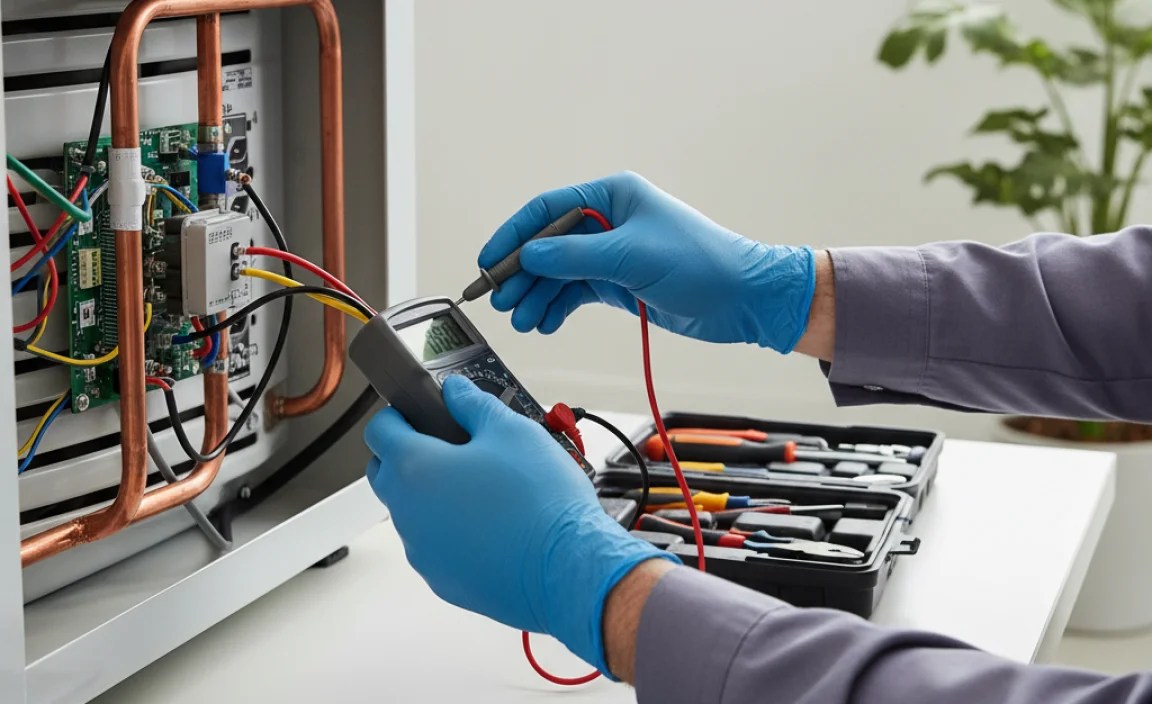
- Voltage Tester: To ensure the power is off.
- Pliers: For manipulating wires.
- Drill with appropriate bits: For mounting the switch.
- Safety Glasses: To protect your eyes.
- Gloves: To protect your hands.
- Multimeter (Optional): For testing continuity.
Step-by-Step Installation Guide
Follow these steps carefully to install your fan cycling switch correctly and safely.
Step 1: Safety First – Disconnect the Power
This is the most crucial step. Before you touch anything, turn off the power to the heat pump at the circuit breaker. Verify the power is off using a voltage tester on the heat pump’s electrical connections. Safety is paramount to avoid electrical shock.
- Locate the circuit breaker for your heat pump in your home’s electrical panel.
- Flip the breaker to the “off” position.
- Go to the outdoor unit and carefully use a voltage tester to confirm that no power is present at the unit’s main electrical disconnect. Test multiple points to be sure.
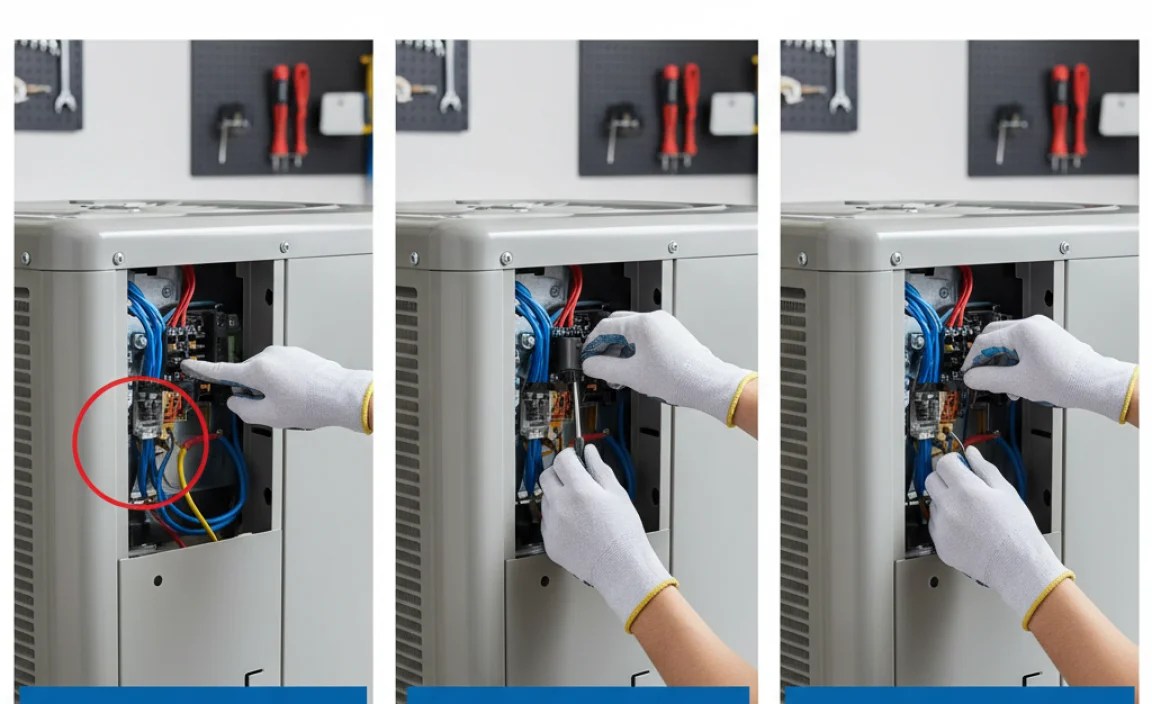
Step 2: Access the Heat Pump’s Control Panel
Locate the control panel on your heat pump unit. This is usually behind a removable access panel. Use a screwdriver to remove the screws securing the panel and carefully set the panel aside.
Step 3: Identify the Fan Motor Wires
Inside the control panel, you need to identify the wires that lead to the outdoor fan motor. Typically, there will be a wiring diagram on the inside of the access panel or somewhere inside the unit. Look for wires labeled “Fan,” “FAN,” or with a similar designation. The fan motor wires are usually connected with wire connectors. If you’re unsure, consult the wiring diagram or a professional.
Step 4: Mount the Fan Cycling Switch
Choose a suitable location to mount the fan cycling switch inside the control panel. Ensure it is in a place where it can accurately sense the temperature of the refrigerant lines or coils. Use the drill and appropriate bits to create mounting holes if necessary. Secure the switch using screws or other mounting hardware provided with the switch.
Step 5: Wire the Fan Cycling Switch
This step involves cutting one of the fan motor wires and connecting the two ends to the fan cycling switch. The switch will act as an intermediary, opening and closing the circuit to the fan motor based on temperature.
- Cut One Fan Motor Wire: Choose one of the fan motor wires you identified in Step 3. Use wire strippers to carefully cut the wire in a location that allows enough length to connect both ends to the fan cycling switch.
- Strip the Wire Ends: Use wire strippers to strip about 1/2 inch of insulation from the cut ends of the wire.
- Connect to the Switch: Connect each stripped wire end to the terminals on the fan cycling switch. The switch should have markings indicating which terminals are for the input and output. If not, refer to the switch’s documentation. Use wire connectors to make secure connections.
- Secure Connections: Ensure all wire connections are tight and secure. Loose connections can cause problems and potential hazards.
Step 6: Insulate the Connections
Wrap all wire connections with electrical tape to provide insulation and protect against shorts. This is a critical step for safety and reliability.
Step 7: Reassemble the Control Panel
Carefully reattach the control panel access panel using the screws you removed earlier. Make sure all wires are neatly tucked away and not pinched by the panel.
Step 8: Restore Power and Test
Go back to the circuit breaker and turn the power back on to the heat pump. Observe the heat pump’s operation. The fan should now cycle on and off based on the temperature. It might not start immediately; the system may need to run for a few minutes to reach the switch’s activation temperature.
Here’s what to look for during testing:
- Initial Startup: The fan might run continuously for a short period until the system stabilizes.
- Cycling: Observe the fan cycling on and off as the heat pump operates. The frequency of cycling will depend on the ambient temperature and the heat pump’s load.
- Abnormal Behavior: If the fan doesn’t turn on, runs constantly, or exhibits unusual behavior, immediately turn off the power and recheck your wiring.
Troubleshooting Common Issues
Even with careful installation, you might encounter some issues. Here are a few common problems and how to address them.
| Problem | Possible Cause | Solution |
|---|---|---|
| Fan not cycling | Incorrect wiring, faulty switch, incorrect temperature setting | Double-check wiring, test the switch with a multimeter, adjust the temperature setting on the switch |
| Fan runs constantly | Faulty switch, switch set to always on, incorrect wiring | Test the switch with a multimeter, check the switch settings, double-check wiring |
| Heat pump not heating | Incorrect wiring, switch interfering with system operation | Double-check wiring, bypass the switch to see if the heat pump functions normally |
Choosing the Right Fan Cycling Switch

Selecting the correct fan cycling switch is crucial for optimal performance. Consider these factors:
- Compatibility: Ensure the switch is compatible with your heat pump’s voltage and current requirements. Check the heat pump’s specifications and the switch’s ratings.
- Temperature Range: Choose a switch with a temperature range that suits your climate and heating needs. The switch should cycle the fan appropriately based on typical winter temperatures.
- Adjustability: Some switches offer adjustable temperature settings, allowing you to fine-tune the fan cycling behavior. This can be beneficial for optimizing performance in different conditions.
- Quality: Opt for a reputable brand known for producing reliable and durable switches. A higher-quality switch will likely provide better performance and last longer.
Benefits and Drawbacks of Using a Fan Cycling Switch
Like any modification, there are pros and cons to consider before installing a fan cycling switch.
Benefits
- Increased Energy Efficiency: Reduces energy consumption by preventing unnecessary fan operation.
- Lower Energy Bills: Saves money on heating costs.
- Improved Heating Performance: Maintains optimal refrigerant temperatures for better heating.
- Extended Component Life: Reduces wear and tear on the fan motor and compressor.
Drawbacks
- Initial Cost: The cost of the switch and installation (if you hire a professional).
- Potential for Malfunction: Like any mechanical device, the switch can fail.
- Complexity: Requires some electrical knowledge to install correctly.
FAQ About Fan Cycling Switches
Here are some frequently asked questions about fan cycling switches.
- Q: What is the ideal temperature setting for a fan cycling switch?
- A: The ideal setting depends on your climate, but typically, a setting between 30°F and 40°F is a good starting point. Adjust as needed based on performance.
- Q: Can I install a fan cycling switch myself if I have no electrical experience?
- A: If you have no electrical experience, it’s best to hire a qualified HVAC technician. Working with electricity can be dangerous.
- Q: Will a fan cycling switch void my heat pump’s warranty?
- A: Possibly. Check your warranty documentation or contact the manufacturer to confirm. Some modifications can void the warranty.
- Q: How do I know if my fan cycling switch is working correctly?
- A: Observe the fan operation during heating mode. The fan should cycle on and off as the heat pump operates. If it runs constantly or not at all, there may be an issue.
- Q: Where can I buy a fan cycling switch?
- A: You can purchase fan cycling switches at most HVAC supply stores or online retailers that sell HVAC components.
- Q: Are all fan cycling switches the same?
- A: No, they vary in voltage, current ratings, and temperature ranges. Choose one that is compatible with your heat pump and suitable for your climate.
- Q: What should I do if my heat pump stops working after installing a fan cycling switch?
- A: Immediately turn off the power and double-check your wiring. If you can’t identify the problem, contact a qualified HVAC technician.
When to Call a Professional
While this guide provides a detailed walkthrough, there are situations where it’s best to call a professional HVAC technician. If you’re not comfortable working with electricity, or if you encounter any complex issues during the installation process, don’t hesitate to seek expert help. Additionally, if your heat pump is still under warranty, professional installation may be required to maintain the warranty’s validity.
Here are some scenarios where professional assistance is recommended:
- You are uncomfortable working with electrical wiring.
- You are unsure about identifying the correct fan motor wires.
- You encounter unexpected issues during the installation process.
- Your heat pump is under warranty and requires professional installation.
Conclusion
Installing a fan cycling switch on your heat pump is a smart move for boosting efficiency and saving on energy costs. By following this step-by-step guide, you can confidently complete the installation process. Remember to prioritize safety by disconnecting the power before you begin and double-checking all your connections. If you ever feel unsure, don’t hesitate to call a professional. With a properly installed fan cycling switch, you’ll enjoy improved heating performance and lower energy bills, making your home more comfortable and efficient throughout the cooler months.
“`


