
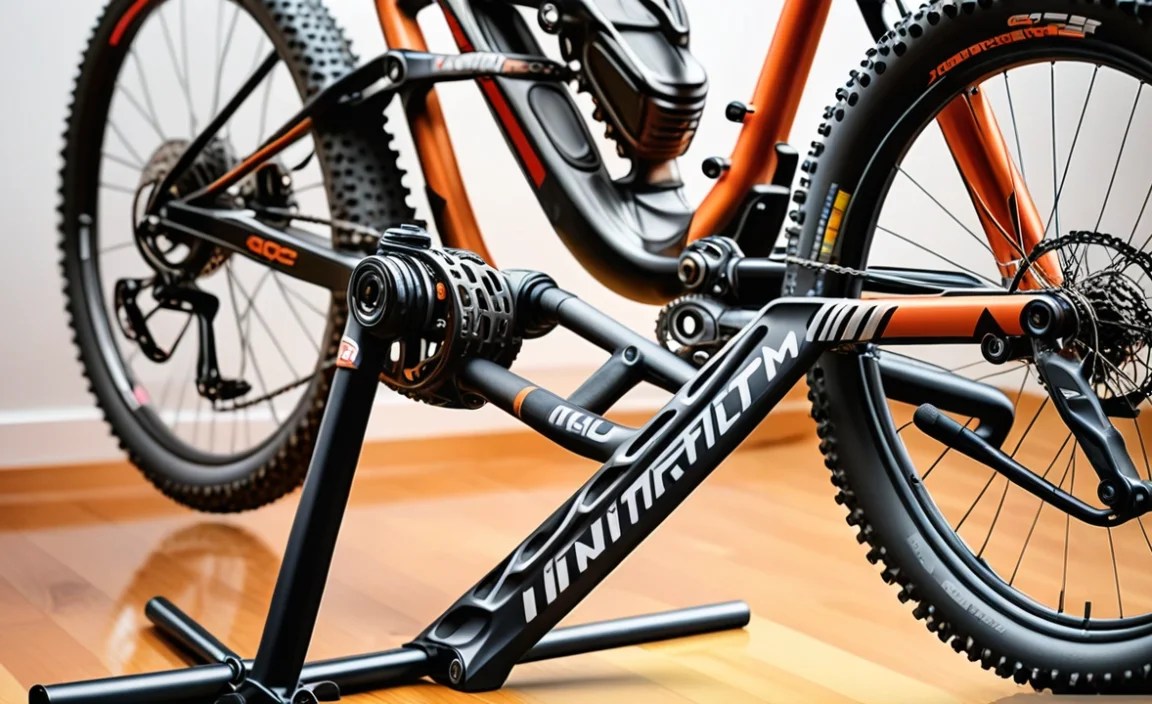
How to Install Indestructible Bike Mount for MTB: Easy!
Have you ever wished your bike accessories were super strong? Do you love mountain biking on rough trails? Then you know things can break easily. That’s why learning how to install indestructible bike mount for MTB is important. It keeps your stuff safe!
Imagine riding down a bumpy hill. Your water bottle flies off! Or your phone mount snaps. Not fun, right? An indestructible mount can stop this. Let’s find out how to get one on your bike.
Key Takeaways
- Knowing how to install indestructible bike mount for MTB ensures gear safety.
- Choosing the right materials like metal or strong plastic is important.
- Proper tools, such as wrenches and screwdrivers, are needed for secure installation.
- Following the manufacturer’s instructions prevents damage to your bike or mount.
- Regularly checking and tightening the mount ensures it stays strong and reliable.
How to Choose Indestructible MTB Mounts

Choosing the right mount is the first step. You want something tough! Look for mounts made from strong materials. Metal mounts are very durable. Some strong plastics are good too. Read reviews to see what other riders say. Think about what you need to mount. Is it a phone, water bottle, or light? Make sure the mount fits your bike’s handlebars or frame. A good mount will last a long time. It will survive those bumpy rides. Don’t just buy the cheapest one. Spend a little more for better quality. It’s worth it to keep your gear safe. A sturdy mount means less worry when you ride. You can focus on having fun!
- Check the material of the mount.
- Read online reviews from other riders.
- Think about what you need to attach.
- Make sure it fits your bike.
- Choose quality over price.
Think about your riding style. Do you ride hard trails often? Then you need a super tough mount. If you ride easy trails, a less expensive one might work. But it’s always better to be safe. Look for mounts that are easy to adjust. This helps you get the perfect angle for your phone or light. Some mounts have extra features. These can include shock absorption. This helps protect your devices from bumps. Choosing the right mount makes a big difference. It keeps your gear safe and makes your rides better.
What Materials Make a Mount Indestructible?
Ever wonder what makes something “indestructible?” It’s all about the materials! For bike mounts, strong materials are key. Metal is a great choice. Aluminum is light and strong. Steel is even stronger, but heavier. Some plastics are also really tough. Look for words like “high-impact” or “reinforced.” These plastics can handle lots of abuse. The way the mount is made matters too. A solid design helps it last longer. Are there any weak spots where it might break? Check where the mount attaches to your bike. Make sure those parts are strong. Good materials and design make a mount truly indestructible. They ensure it can handle any trail.
How Do Reviews Help Choose a Good Mount?
Reviews are like advice from other riders! They tell you what works and what doesn’t. When looking at reviews, pay attention to what people say about durability. Did the mount break easily? Did it hold up on rough trails? Also, look for comments about how easy it is to install. Is it confusing, or straightforward? Check if the mount fits different bikes. Some mounts only work on certain handlebars. Reviews can also tell you about customer service. Does the company help if there’s a problem? Reading lots of reviews gives you a good idea. It helps you choose a mount that’s right for you.
What Features Add to Mount Durability?
Some mounts have extra features that make them last longer. Shock absorption is a big one. This helps protect your devices from bumps and vibrations. Look for mounts with rubber or silicone padding. This reduces the impact on your phone or light. Another good feature is adjustability. Can you easily change the angle of the mount? This helps you get the perfect view. Also, check the locking mechanism. Does it hold your device securely? A good lock prevents your device from falling out. These extra features can make a big difference. They help your mount survive even the toughest rides.
Fun Fact or Stat: Did you know that a high-quality aluminum bike mount can withstand up to 50 lbs of force?
Tools You Need to Install MTB Mounts

Having the right tools makes installation much easier. You will need a few basic things. A set of wrenches is important. These help you tighten bolts securely. Get different sizes to fit different mounts. A screwdriver is also useful. Some mounts use screws instead of bolts. A rubber mallet can help gently tap things into place. Be careful not to hit too hard! A torque wrench is great for precise tightening. This prevents you from over-tightening and breaking things. Don’t forget safety glasses! These protect your eyes from flying debris. With the right tools, you can install your mount quickly and safely.
- A set of wrenches in different sizes.
- A screwdriver with different heads.
- A rubber mallet for gentle tapping.
- Safety glasses to protect your eyes.
- A torque wrench for precise tightening.
Before you start, read the instructions. The mount might need specific tools. Some mounts come with their own tools. Keep them handy! Organize your tools before you begin. This saves time and frustration. A clean workspace is also helpful. It prevents you from losing small parts. Take your time during installation. Don’t rush! Make sure everything is lined up correctly. Tighten bolts and screws gradually. Check everything again after you’re done. Using the right tools makes a big difference. It ensures your mount is installed safely and securely.
Why is a Torque Wrench Important?
A torque wrench is special. It measures how tight you are making a bolt. Over-tightening can break things. Under-tightening can make things loose. A torque wrench helps you get it just right. It prevents damage to your bike and mount. The instructions for your mount will tell you the right torque. Set the wrench to that number. Then tighten the bolt until the wrench clicks. That click means you’ve reached the right tightness. Using a torque wrench is important for safety. It ensures your mount is secure without being too tight. It’s a small tool that makes a big difference.
How Do Safety Glasses Protect You?
Safety glasses are simple but important. When you’re working with tools, things can fly around. Metal shavings, dust, or even small parts can hurt your eyes. Safety glasses create a barrier. They protect your eyes from these dangers. Wear them whenever you’re using tools. Even if you’re just tightening a bolt. It only takes a second for something to fly up. Safety glasses are cheap and easy to use. They can prevent serious eye injuries. Keep a pair in your toolbox. Make it a habit to wear them every time you work on your bike.
What if I Don’t Have All the Tools?
It’s okay if you don’t have every tool. You can still install your mount. Borrow tools from a friend or neighbor. Many bike shops will also rent tools. If you’re missing a torque wrench, be careful. Tighten bolts gradually. Check them often to make sure they’re not loose. If you’re not sure, ask for help. A bike shop can install the mount for you. They have all the right tools and experience. It’s better to be safe than sorry. Don’t risk damaging your bike or mount. Get the right tools or ask for help.
Fun Fact or Stat: Torque wrenches were invented in the early 20th century to prevent engine damage in cars!
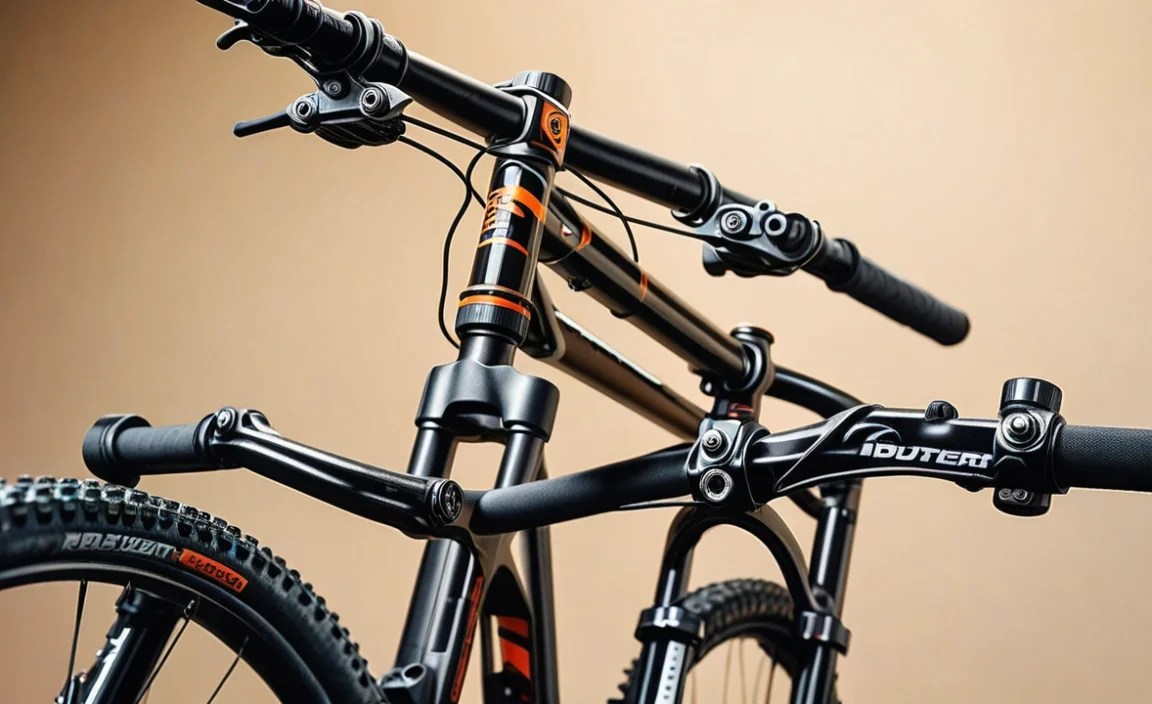
Step-by-Step Guide: Installing Your MTB Mount
Now it’s time to install your mount! First, read the instructions carefully. Every mount is a little different. Find the right spot on your handlebars or frame. Clean the area with a cloth. This helps the mount grip better. Attach the mount loosely at first. Don’t tighten anything yet. Make sure it’s in the right position. Adjust the angle to where you want it. Now, start tightening the bolts or screws. Use the right tools. If you have a torque wrench, use it. Tighten gradually, checking the position as you go. Once everything is tight, double-check. Make sure the mount is secure. Test it by gently pulling on it. If it moves, tighten it more.
- Read the instructions carefully first.
- Clean the area where you will attach it.
- Attach the mount loosely to start.
- Adjust the angle to your liking.
- Tighten bolts gradually and evenly.
Take your time with each step. Rushing can lead to mistakes. If you’re not sure about something, ask for help. A bike shop can give you advice. Or watch a video online. Many people have made videos showing how to install different mounts. After the installation, go for a short ride. See how the mount holds up. Check it again after the ride. Make sure nothing has come loose. If it has, tighten it again. Installing a mount is easy if you follow these steps. It keeps your gear safe on the trails.
How Do I Find the Best Spot for the Mount?
Finding the best spot is important. You want the mount to be easy to reach. But it shouldn’t get in your way. Think about what you’re mounting. A phone needs to be easy to see. A light needs to point in the right direction. Check your handlebars. Is there enough space? Some bikes have limited space. Try different positions before tightening anything. Hold the mount in place and imagine using it. Can you reach it easily? Does it block your view? Does it interfere with your hands? The best spot is one that’s comfortable and safe.
What if the Mount Doesn’t Fit Properly?
Sometimes a mount just doesn’t fit right. Maybe it’s too big or too small. Don’t force it! Forcing it can damage your bike. Check the instructions again. Make sure you’re using the right parts. Some mounts come with adapters. These help them fit different bikes. If it still doesn’t fit, contact the company. They might have a solution. Or you might need to return the mount. It’s better to get a mount that fits properly. A loose mount is dangerous. It can fall off during your ride.
How Tight Should I Tighten the Bolts?
Tightening the bolts just right is important. Too loose, and the mount will move. Too tight, and you could break something. A torque wrench helps you get it perfect. But if you don’t have one, be careful. Tighten the bolts gradually. Check the mount after each turn. Does it feel secure? Stop tightening when it feels snug. Don’t keep going until it’s super tight. Over-tightening can strip the threads. This makes the bolt useless. Check the bolts regularly. Especially after your first few rides.
Fun Fact or Stat: Bike manufacturers often use specific torque settings to ensure parts are secure without being damaged.
Maintaining Your Indestructible MTB Mount
Maintenance is key to keeping your mount strong. Regularly check the bolts and screws. Make sure they are tight. Use a wrench or screwdriver to tighten them. Clean the mount often. Dirt and grime can wear it down. Use a damp cloth and mild soap. Dry it thoroughly after cleaning. Check for any signs of damage. Cracks, bends, or rust can weaken the mount. If you see any damage, replace the mount. Don’t wait until it breaks completely. Lubricate moving parts. This keeps them working smoothly. Use a silicone-based lubricant. This helps prevent rust.
- Check bolts and screws regularly.
- Clean the mount often.
- Look for signs of damage.
- Lubricate moving parts to prevent rust.
- Replace damaged mounts immediately.
Store your bike properly. Keep it out of direct sunlight and rain. This helps prevent rust and fading. If you crash, inspect the mount carefully. Even if it looks okay, it might have hidden damage. Replace it if you’re not sure. Proper maintenance makes your mount last longer. It keeps your gear safe on every ride. Take a few minutes each month to check your mount. It’s worth it for peace of mind. A well-maintained mount is a safe mount.
How Often Should I Check the Mount?
Checking your mount regularly is a good habit. Aim to check it before every ride. This only takes a minute. Look for loose bolts or signs of damage. If you ride often, check it more frequently. Especially if you ride on rough trails. After a crash, always check the mount. Even if it seems fine, it could be damaged. Regular checks can prevent problems. They help you catch issues before they become serious. Make it part of your pre-ride routine. It’s a simple way to stay safe.
What Kind of Lubricant Should I Use?
Using the right lubricant is important. You don’t want to use something that will damage the mount. Avoid oil-based lubricants. These can attract dirt and grime. They can also damage plastic parts. Use a silicone-based lubricant instead. This type of lubricant is safe for most materials. It also repels water. This helps prevent rust. Apply the lubricant sparingly. A little goes a long way. Wipe off any excess lubricant. You don’t want it to drip onto your bike.
How Do I Know When to Replace the Mount?
Knowing when to replace your mount is important. If you see any cracks, replace it. Cracks can weaken the mount. If the mount is bent, replace it. Bends can change the angle of your device. If the bolts are stripped, replace the mount. Stripped bolts won’t hold tight. If the mount is rusty, replace it. Rust can weaken the metal. Don’t wait until the mount breaks completely. Replace it as soon as you see any signs of damage. It’s better to be safe than sorry.
Fun Fact or Stat: Regular bike maintenance can extend the life of your components by up to 50%!
Troubleshooting Common MTB Mount Issues
Sometimes things go wrong. Your mount might come loose. Or your device might wobble. Don’t panic! There are solutions. If the mount is loose, tighten the bolts. Make sure you’re using the right tools. If your device wobbles, check the mount’s grip. Is it holding your device securely? Adjust the mount to improve the grip. If the mount vibrates too much, try adding padding. Rubber or foam can absorb vibrations. If the mount breaks, replace it immediately. Don’t try to fix it with tape or glue. That’s not safe.
- Tighten loose bolts with the right tools.
- Adjust the mount for a better grip.
- Add padding to reduce vibrations.
- Replace broken mounts immediately.
- Seek professional help if needed.
Keep an eye on your mount during your rides. If you notice any problems, stop and fix them. Don’t ignore small issues. They can become bigger problems later. If you’re not sure how to fix something, ask for help. A bike shop can diagnose the problem. They can also recommend solutions. Troubleshooting is part of owning a bike. Don’t be afraid to get your hands dirty. With a little knowledge, you can fix most mount issues.
What if the Mount Keeps Coming Loose?
A mount that keeps coming loose is annoying. First, make sure you’re tightening the bolts enough. Use a torque wrench if you have one. If the bolts are still coming loose, try using threadlocker. This is a special glue that keeps bolts from vibrating loose. Apply a small amount to the threads of the bolt. Then tighten the bolt as usual. Let the threadlocker dry completely before riding. This should keep the bolts from coming loose. Check them regularly anyway.
How Do I Stop Vibrations?
Vibrations can make it hard to see your device. They can also damage it. Try adding padding between the mount and your device. Rubber or foam works well. You can also buy mounts with built-in vibration dampening. These mounts have special materials that absorb vibrations. Make sure your tires are properly inflated. Low tire pressure can increase vibrations. Check your suspension. Properly adjusted suspension can also reduce vibrations.
What if the Mount Breaks During a Ride?
A broken mount during a ride is a problem. Stop riding immediately. Don’t try to continue with a broken mount. This could damage your device. If you have a spare mount, install it. If not, carefully store your device. Put it in your backpack or pocket. Finish your ride slowly and carefully. Replace the broken mount as soon as possible. Don’t ride with a broken mount. It’s not safe.
Fun Fact or Stat: Over 70% of cycling accidents are due to equipment failure or lack of maintenance!
Choosing the Right Mount Type for Your Needs
There are many different types of bike mounts. Each one is designed for a specific purpose. Handlebar mounts are common. They attach to your handlebars. Stem mounts attach to your stem. Frame mounts attach to your frame. Fork mounts attach to your fork. Consider what you need to mount. A phone needs a secure mount. A light needs a mount that points forward. A water bottle needs a mount that’s easy to reach. Think about your riding style. Do you ride on rough trails? Then you need a tough mount. Do you ride on smooth roads? Then a lighter mount might work.
| Mount Type | Pros | Cons | Best For |
|---|---|---|---|
| Handlebar Mount | Easy to install, versatile | Can clutter handlebars | Phones, lights |
| Stem Mount | Sleek, aerodynamic | Limited space | GPS units, small devices |
| Frame Mount | Secure, out of the way | Can be hard to reach | Water bottles, pumps |
| Fork Mount | Good for accessories | Can affect handling | Fenders, lights |
| Saddle Rail Mount | Keeps things out of the way | Can be hard to see/reach | Tool bags, rear lights |
- Consider what you need to mount.
- Think about your riding style.
- Choose a mount that’s easy to reach.
- Make sure the mount is secure.
- Read reviews before buying.
Do some research before you buy a mount. Read reviews online. Ask other riders for recommendations. Visit a bike shop. They can help you choose the right mount. Don’t just buy the cheapest mount. Spend a little more for quality. A good mount will last longer. It will also keep your gear safe. Choose a mount that fits your bike. Some mounts only work on certain bikes. Make sure the mount is compatible with your bike. The right mount makes a big difference.
What Are the Benefits of a Handlebar Mount?
Handlebar mounts are very popular. They’re easy to install. They’re also very versatile. You can use them for many different things. Phones, lights, GPS units, and more. Handlebar mounts are easy to adjust. You can change the angle of your device. You can also move the mount to different positions. Handlebar mounts are usually affordable. There are many different options to choose from. They’re a great choice for most riders.
When Should I Choose a Stem Mount?
Stem mounts are sleek and aerodynamic. They attach to your stem. This keeps your handlebars clear. Stem mounts are good for small devices. GPS units, bike computers, and lights. They’re not ideal for phones. Phones can be hard to reach on a stem mount. Stem mounts are a good choice for racers. They reduce wind resistance. They’re also a good choice for riders who want a clean look.
Why Use a Frame Mount?
Frame mounts are secure. They attach directly to your frame. This keeps your gear out of the way. Frame mounts are good for water bottles. They’re also good for pumps and tool bags. They can be hard to reach while riding. Frame mounts are a good choice for long rides. They allow you to carry extra gear. They’re also a good choice for riders who want a minimalist look.
Fun Fact or Stat: The first bicycle was invented in the early 19th century and was called a “dandy horse.”
Summary
Learning how to install indestructible bike mount for MTB is super useful. It keeps your important stuff safe when you’re riding. Choosing a strong mount made of metal or tough plastic is key. You’ll also need the right tools, like wrenches and screwdrivers. Always follow the instructions that come with the mount. This helps avoid mistakes and keeps everything secure.
Don’t forget to check your mount often. Make sure the bolts are tight. Clean it regularly to keep it in good shape. If you see any damage, replace the mount right away. By following these simple steps, your mount will last a long time. You’ll have peace of mind knowing your gear is safe on every ride.
Conclusion
Installing an indestructible bike mount might seem tricky. But it’s really not that hard. With the right tools and a little patience, you can do it yourself. Remember to choose a mount made from strong materials. Follow the instructions carefully. Check the mount regularly to keep it secure. Now you know how to install indestructible bike mount for MTB! Go enjoy your rides with confidence.
Frequently Asked Questions
Question No 1: What makes a bike mount “indestructible?”
Answer: An “indestructible” bike mount is made from super strong stuff. Usually, this means metal like aluminum or steel. Sometimes, it’s a special kind of tough plastic. The design also matters. It needs to be built in a way that can handle lots of bumps and crashes without breaking. Think of it like a superhero’s suit for your bike gear. It needs to be able to take a beating and still protect what’s inside. Knowing how to install indestructible bike mount for MTB helps ensure it stays strong.
Question No 2: What tools do I really need for the installation?
Answer: You don’t need a whole toolbox! But a few key tools are important. Wrenches are used to tighten bolts. A screwdriver is used for screws. A torque wrench is super helpful. It helps you tighten bolts just right. Not too tight, not too loose. Safety glasses are also a must. They protect your eyes from flying bits. With these tools, you’ll be ready to install almost any bike mount. If you are unsure how to install indestructible bike mount for MTB, seek assistance from someone that is.
Question No 3: How often should I check my bike mount?
Answer: Checking your bike mount is like brushing your teeth. You should do it regularly! A good idea is to check it before every ride. This only takes a minute. Look for loose bolts or any signs of damage. If you ride on rough trails, check it even more often. After a crash, always check it. Even if it looks okay, it might have hidden damage. Regular checks keep you safe. It prevents your gear from falling off. Checking the mount is key to how to install indestructible bike mount for MTB safely.
Question No 4: What if my bike mount keeps coming loose?
Answer: A loose bike mount is no fun. It can be dangerous too! First, try tightening the bolts more. Make sure you’re using the right size wrench. If it still comes loose, try using threadlocker. This is a special glue that keeps bolts from vibrating loose. Put a tiny bit on the bolt threads. Then tighten it. Let it dry before you ride. If it still keeps coming loose, the mount might be bad. Get a new one. The steps for how to install indestructible bike mount for MTB will help.
Question No 5: Can I use any kind of lubricant on my bike mount?
Answer: Not all lubricants are created equal. Some can actually damage your bike mount. Avoid oil-based lubricants. They attract dirt. They can also hurt plastic parts. Instead, use a silicone-based lubricant. It’s safe for most materials. It also repels water. This helps prevent rust. Put a little bit on moving parts. This keeps them working smoothly. Wiping off any extra is part of how to install indestructible bike mount for MTB.
Question No 6: How do I know when it’s time to replace my bike mount?
Answer: Knowing when to replace your mount is important. If you see any cracks, replace it. If it’s bent, replace it. If the bolts are stripped, replace it. If it’s rusty, replace it. Don’t wait until it breaks completely! Replace it as soon as you see any of these problems. A broken mount can be dangerous. It can cause you to crash. It’s always better to be safe than sorry. Following the steps for how to install indestructible bike mount for MTB can help prevent damage.


