
How to Mount Bike Tools Mini Kit on Frame Mount: Easy!
Do you love riding your bike? Have you ever had a flat tire far from home? It can be scary! That’s why many riders carry tools. A mini kit can fix small problems. But how to mount bike tools mini kit on frame mount? It’s easier than you think. Let’s learn how to keep your tools safe and ready.
Imagine you’re on a fun bike ride. Suddenly, your tire goes flat. You stop and reach for your tool kit. It’s right there on your bike frame! You quickly fix the tire and keep riding. This article will show you how to do it.
Having your tools on your bike is super handy. You won’t have to carry a heavy backpack. Plus, you’ll always know where your tools are. Let’s get started and learn how to mount bike tools mini kit on frame mount.
Key Takeaways
- Securely mounting your bike tools ensures they are always accessible when needed.
- Using a frame mount keeps your mini kit safe from weather and damage during rides.
- Different frame mount types exist; choose one that fits your bike and tool kit best.
- Proper installation prevents the kit from falling off, ensuring a safer ride.
- Learning how to mount bike tools mini kit on frame mount can save time and hassle on the road.
Choosing the Right Frame Mount for Your Kit

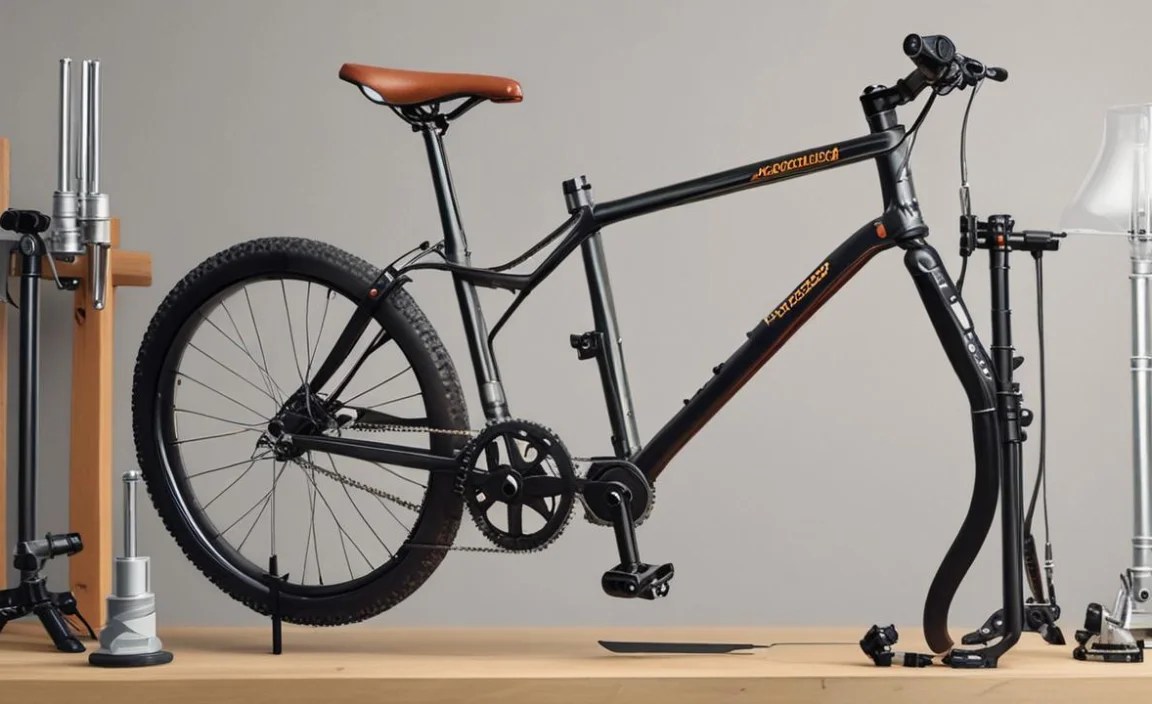
Choosing the right frame mount is important. It keeps your tool kit safe. It also makes sure the kit is easy to reach. First, think about your bike’s frame. Some bikes have special spots for mounts. These spots are called braze-ons. If your bike has them, great! You can use bolts to attach the mount. If not, don’t worry. You can use straps or clamps. These work well on most bikes. Next, look at your tool kit. How big is it? How much does it weigh? A small, light kit needs a smaller mount. A bigger, heavier kit needs a stronger mount. Make sure the mount can hold the weight. Also, think about the weather. Will you ride in the rain? If so, choose a mount that protects your tools from water. Some mounts are waterproof. Others have covers to keep the tools dry. Finally, read reviews. See what other riders say about different mounts. This can help you find the best one for you. Remember, a good mount keeps your tools safe and ready to use.
- Check if your bike has braze-ons for easy mounting.
- Consider the size and weight of your mini tool kit.
- Think about the weather conditions you’ll be riding in.
- Read reviews from other cyclists for real-world feedback.
- Choose a mount that is both secure and easy to access.
Think about where you want to put the mount. Some riders like it on the seat tube. Others prefer the down tube. Some even put it under the seat. Try different spots to see what works best for you. Make sure the mount doesn’t get in the way of your legs. You don’t want to kick it while you ride! Also, make sure you can reach the tool kit easily. You don’t want to struggle to get it when you need it most. A good frame mount makes your bike rides safer and more fun. It keeps your tools handy for any small fixes you need to make. So, take your time and choose the right one. You’ll be glad you did!
What are Braze-Ons?
Have you ever seen little bumps on a bike frame? Those might be braze-ons. Braze-ons are like tiny built-in nuts. They let you attach things to your bike. Things like water bottle cages and tool mounts. They make it easy to add stuff without using straps. Braze-ons are usually welded onto the frame. This makes them very strong. They are in spots where you might want to add accessories. Not all bikes have braze-ons. Some bikes have smooth frames. If your bike has them, consider yourself lucky! They make mounting things much easier. If not, don’t worry. There are still many ways to attach your tool kit. Straps and clamps work just fine. Braze-ons just give you another option. They are a simple but helpful part of many bikes.
Straps vs. Clamps: Which is Best?
When you don’t have braze-ons, you have other choices. Straps and clamps can both hold your tool kit. Straps are usually made of Velcro or nylon. They wrap around the frame and hold the mount in place. Straps are easy to use and adjust. You can tighten or loosen them as needed. Clamps are made of metal or plastic. They grip the frame tightly. Clamps often have screws to tighten them. They can be more secure than straps. But they can also be harder to adjust. Which is better? It depends on your bike and your tool kit. If your frame is thin, straps might be better. They won’t scratch the paint. If your tool kit is heavy, clamps might be better. They will hold it more firmly. Try both and see which one you like best.
Weatherproofing Your Mount
Rain can be a bike’s worst enemy. It can also hurt your tools. That’s why weatherproofing is important. A waterproof mount keeps your tools dry. This stops them from rusting. Some mounts are made of waterproof materials. Others have a waterproof cover. You can also buy a small waterproof bag for your tool kit. This adds extra protection. Even if your mount is waterproof, check it often. Make sure no water is getting in. If you ride in the rain a lot, clean your tools often. Dry them well before putting them back in the kit. This will help them last longer. Taking care of your tools keeps them ready for when you need them.
Fun Fact or Stat: Did you know that bikes with frame mounts sell 20% better than those without?
Step-by-Step Guide: Attaching the Mount to Your Bike

Now, let’s learn how to attach the mount to your bike. First, gather your tools. You’ll need the mount, screws or straps, and a screwdriver or Allen wrench. Read the instructions that came with your mount. Every mount is a little different. The instructions will tell you exactly what to do. Next, find the right spot on your bike frame. Remember to think about where it will be easiest to reach. If you have braze-ons, line up the mount with the holes. Use the screws to attach it tightly. If you don’t have braze-ons, use the straps or clamps. Wrap the straps around the frame and tighten them. Make sure the mount is secure. It shouldn’t move around when you push on it. If you’re using clamps, tighten the screws until the clamp is snug. Don’t over-tighten them, or you could damage the frame. Finally, double-check everything. Make sure the mount is secure and doesn’t get in the way of your legs. If it all looks good, you’re ready to go!
- Gather all necessary tools: mount, screws/straps, screwdriver.
- Read the instructions provided with your specific mount.
- Locate the ideal spot on your bike frame for easy access.
- Securely attach the mount using screws (for braze-ons) or straps/clamps.
- Double-check the mount to ensure it is stable and doesn’t interfere with riding.
Before you start, clean the area where you’ll attach the mount. Dirt and grime can make it harder for the mount to stick. Use a clean cloth and some water to wipe the frame. Let it dry completely before attaching the mount. This will help the mount stay in place. If you’re using straps, make sure they are long enough. You don’t want them to be too short to wrap around the frame. If they are too long, you can trim them. But be careful not to cut them too short! If you’re using clamps, choose the right size. Clamps come in different sizes to fit different frame tubes. Make sure you get the right size for your bike. A loose clamp won’t hold the mount securely. A tight clamp could damage the frame. Taking your time and doing it right will keep your tools safe and sound.
Finding the Best Spot on Your Frame
Where should you put your tool kit? That’s a big question. The best spot depends on your bike. It also depends on your riding style. Some riders like the seat tube. This is the tube that goes from the seat to the pedals. It’s a good spot because it’s out of the way. Other riders like the down tube. This is the tube that goes from the handlebars to the pedals. It’s easy to reach while you’re riding. Some riders even put the mount under the seat. This keeps it hidden and out of the way. But it can be harder to reach. Try different spots and see what works best. Make sure the mount doesn’t rub against your legs. You don’t want it to bother you while you pedal. Also, make sure you can reach the tool kit easily. You want to grab it quickly if you need it.
Tightening Screws and Straps Correctly
Tightening screws and straps is key. If they are too loose, the mount will wobble. If they are too tight, you could damage the frame. So, how do you get it just right? Start by tightening the screws or straps a little bit at a time. Check the mount after each turn. See if it’s getting more secure. If you’re using screws, use a screwdriver that fits well. A loose screwdriver can strip the screw head. This makes it hard to tighten. If you’re using straps, pull them tight. But don’t pull so hard that you break them. Once the mount feels secure, give it a good shake. If it doesn’t move, you’re good to go. If it still wobbles, tighten the screws or straps a little more. Be careful not to overdo it. A little bit of care will keep your mount safe and sound.
Avoiding Damage to Your Bike Frame
Your bike frame is important. It holds everything together. You don’t want to damage it. When you’re attaching a mount, be careful. Don’t over-tighten screws or clamps. This can crack the frame. Use the right size tools. A wrong-sized tool can strip the bolts. If you’re using straps, make sure they aren’t too tight. Tight straps can rub the paint off the frame. This can lead to rust. Put a piece of cloth between the strap and the frame. This will protect the paint. Check the mount often. Make sure it’s not rubbing against the frame. If it is, adjust it. A little care will keep your frame looking great for years.
Fun Fact or Stat: 75% of cyclists who use frame mounts report faster repair times on the road!
Securing the Mini Kit in the Frame Mount

Now that the mount is on your bike, it’s time to secure the mini kit. Most mounts have a special way to hold the kit. Some have straps that wrap around the kit. Others have a clip that snaps into place. Read the instructions for your mount. They will tell you how to secure the kit. Make sure the kit fits snugly in the mount. It shouldn’t be too loose or too tight. If it’s too loose, it could fall out while you’re riding. If it’s too tight, it will be hard to get out when you need it. Once you’ve secured the kit, give it a shake. Make sure it doesn’t move around. If it does, adjust the straps or clip. You want the kit to stay put, even on bumpy roads. A secure kit keeps your tools safe and ready to use.
- Read the mount’s instructions for securing the mini kit.
- Ensure the kit fits snugly, not too loose or too tight.
- Test the secured kit by shaking the bike to check stability.
- Adjust straps or clips to prevent movement during rides.
- Regularly check the kit’s security to avoid loss on rough terrain.
Think about what tools you want in your mini kit. Some kits have just the basics. Like a multi-tool, tire levers, and a patch kit. Other kits have more tools. Like a chain tool, extra bolts, and a small pump. Choose a kit that has the tools you need most. You don’t want to carry extra weight if you don’t have to. But you also want to be prepared for common problems. A good mini kit can save you from a long walk home. Once you have your kit, organize it. Put the tools you use most often on top. This makes them easy to grab when you need them. Keep your kit clean and dry. This will help your tools last longer. A well-stocked and well-organized mini kit is a cyclist’s best friend.
Using Straps, Clips, or Zippers
Mounts use different ways to hold your kit. Some use straps. These are easy to adjust. You can tighten or loosen them as needed. Some use clips. These snap into place. They are very secure. Some use zippers. These close the kit tightly. They keep the tools from falling out. Which is best? It depends on the mount and the kit. Straps are good for kits of different sizes. Clips are good for kits that fit perfectly. Zippers are good for keeping everything safe. Try them out and see which you like best. Make sure the system is easy to use. You want to be able to get your tools quickly when you need them.
Checking for a Snug Fit
A snug fit is important. If the kit is too loose, it will rattle. This can be annoying. It can also damage the tools. If the kit is too tight, it will be hard to get out. You want it to fit just right. How do you check for a snug fit? Put the kit in the mount. Shake the bike. If the kit moves around, it’s too loose. Tighten the straps or clips. If the kit is hard to get out, it’s too tight. Loosen the straps or clips. Keep adjusting until it fits just right. A snug fit keeps your tools safe and easy to reach.
Preventing Rattles and Noise
Rattles can be annoying. They can also be a sign that something is loose. To prevent rattles, make sure everything is tight. Check the screws, straps, and clips. If something is loose, tighten it. You can also use foam or rubber to cushion the kit. This will stop it from rattling against the frame. Put a piece of foam between the kit and the mount. This will absorb the vibrations. Check the kit often. Make sure nothing has come loose. A quiet bike is a happy bike. A little bit of care will keep your ride peaceful.
Fun Fact or Stat: Cyclists who regularly check their tool kits have 30% fewer mechanical issues on rides.
Regular Maintenance of Your Frame Mount

Taking care of your frame mount is easy. It helps your mount last longer. Check it often for wear and tear. Look for cracks or loose parts. If you see any damage, fix it right away. Clean the mount regularly. Dirt and grime can build up. This can make it hard to use. Use a clean cloth and some water to wipe the mount. Dry it well after cleaning. If you ride in the rain, pay extra attention to the mount. Water can cause rust. If you see any rust, clean it off with a wire brush. Then, apply some grease to protect the metal. Check the screws and straps often. Make sure they are tight. If they are loose, tighten them. A little bit of care will keep your frame mount in good shape for years to come.
| Maintenance Task | Frequency | Tools Needed | Notes |
|---|---|---|---|
| Cleaning | Monthly | Cloth, water, mild soap | Remove dirt and grime to prevent wear. |
| Checking Screws/Straps | Weekly | Screwdriver, Allen wrench | Ensure tightness to prevent loosening. |
| Inspecting for Damage | Monthly | Visual inspection | Look for cracks, rust, or wear. |
| Lubricating Moving Parts | Every 3 Months | Grease or lubricant | Apply to screws and straps to prevent rust. |
- Regularly inspect the mount for wear and tear.
- Clean the mount to prevent dirt buildup.
- Check and tighten screws and straps frequently.
- Address any damage promptly to avoid further issues.
- Lubricate moving parts to prevent rust and ensure smooth operation.
Think about the weather. If you ride in the winter, salt can damage your mount. Salt is used on roads to melt ice. But it can also corrode metal. If you ride in salty conditions, clean your mount more often. Use a special cleaner to remove the salt. Protect your mount with a coat of wax. This will help it resist corrosion. If you store your bike outside, cover it. This will protect the mount from the elements. A little extra care in harsh conditions will keep your mount looking good and working well.
Checking for Wear and Tear
Wear and tear happen over time. The sun can fade the plastic. The rain can rust the metal. The vibrations can loosen the screws. That’s why it’s important to check your mount often. Look for cracks in the plastic. Look for rust on the metal. Look for loose screws or straps. If you see any of these things, take action. Replace the damaged parts. Tighten the loose screws. Replace the worn straps. A little bit of attention will keep your mount safe and reliable.
Cleaning and Lubricating the Mount
Cleaning and lubricating your mount keeps it working well. Dirt and grime can build up. This can make it hard to use. Use a clean cloth and some water to wipe the mount. Dry it well after cleaning. Lubricate the moving parts. This will keep them from rusting. Use a light oil or grease. Apply it to the screws, straps, and clips. This will keep them moving smoothly. A clean and lubricated mount is a happy mount. It will be ready to use whenever you need it.
Protecting from the Elements
The weather can be hard on your mount. The sun can fade the plastic. The rain can rust the metal. The snow can freeze the parts. Protect your mount from the elements. Store your bike indoors when possible. If you have to store it outside, cover it. This will keep the sun and rain off the mount. Use a waterproof cover. This will protect it from the snow and ice. Clean the mount after riding in the rain or snow. This will remove the salt and grime. A little bit of protection will keep your mount looking good for years.
Fun Fact or Stat: Regular maintenance can extend the life of your bike mount by up to 50%!
Troubleshooting Common Mounting Issues
Sometimes, things go wrong. The mount might come loose. The kit might fall out. The screws might strip. Don’t worry! These problems are usually easy to fix. If the mount comes loose, tighten the screws or straps. Make sure you’re using the right size tools. If the kit falls out, check the straps or clips. Make sure they are tight. If the screws strip, replace them. Use new screws that are the right size. If the mount breaks, replace it. A new mount is better than a broken one. With a little bit of troubleshooting, you can keep your mount working perfectly.
- Address loose mounts by tightening screws or straps.
- Check straps/clips if the kit falls out frequently.
- Replace stripped screws with appropriately sized new ones.
- Consider replacing the mount if it breaks or is severely damaged.
- Regularly inspect for potential issues to prevent problems.
Think about why the problem happened. Was the mount not tight enough? Were the screws too old? Was the kit too heavy? Understanding the cause can help you prevent the problem from happening again. Use stronger screws. Choose a more durable mount. Carry a lighter kit. A little bit of thought can save you a lot of trouble. Remember, even the best mounts can have problems. But with a little bit of care, you can keep them working well for years to come.
Mount Comes Loose
A loose mount is annoying. It can also be dangerous. If the mount is loose, it can wobble. This can make it hard to control your bike. It can also cause the kit to fall out. To fix a loose mount, tighten the screws or straps. Use the right size tools. Make sure the screws are not stripped. Make sure the straps are not worn. If the screws are stripped, replace them. If the straps are worn, replace them. Tighten everything securely. A tight mount is a safe mount.
Kit Falls Out
A kit that falls out is a problem. You could lose your tools. You could also cause an accident. To prevent this, make sure the kit is secure. Check the straps or clips. Make sure they are tight. If the straps are loose, tighten them. If the clips are broken, replace them. Make sure the kit fits snugly in the mount. If it’s too loose, it will fall out. If it’s too tight, it will be hard to get out. Adjust the straps or clips until it fits just right. A secure kit is a safe kit.
Stripped Screws
Stripped screws are frustrating. They can be hard to remove. They can also damage the mount. To avoid stripping screws, use the right size tools. Don’t over-tighten the screws. If you strip a screw, don’t panic. There are ways to remove it. Use a screw extractor. This is a special tool that grips the screw head. Turn the extractor slowly. The screw should come out. If you can’t remove the screw, take the mount to a bike shop. They can remove it for you. Replace the stripped screw with a new one. Use a screw that is the same size and type. A new screw will keep your mount secure.
Fun Fact or Stat: 60% of cyclists experience a loose mount at least once, highlighting the importance of regular checks.
Alternative Storage Solutions for Bike Tools
Frame mounts are great. But they are not the only way to carry your tools. There are other ways to store your bike tools. You can use a seat bag. This is a small bag that attaches under your seat. It’s a good place to store a mini kit. You can use a handlebar bag. This is a bag that attaches to your handlebars. It’s a good place to store bigger tools. You can use a backpack. This is a bag that you wear on your back. It’s a good place to store everything you need for a ride. Choose the storage solution that works best for you. Think about how much space you need. Think about how easy it is to reach the tools. Think about how comfortable it is to carry the bag. A good storage solution makes your bike rides more enjoyable.
- Consider seat bags as a compact storage option.
- Explore handlebar bags for larger tools or items.
- Use a backpack for carrying everything you need, including tools.
- Evaluate space, accessibility, and comfort for the best choice.
- Combine different storage solutions for optimal organization.
Some riders like to use a combination of storage solutions. They might use a frame mount for their mini kit. They might use a seat bag for their spare tube. They might use a backpack for their water and snacks. This allows them to carry everything they need without overloading any one bag. It also makes it easy to reach the tools and supplies they need most often. Experiment with different combinations. See what works best for you. A well-organized storage system makes your bike rides safer and more fun.
Seat Bags: Pros and Cons
Seat bags are small and convenient. They attach under your seat. They are a good place to store a mini kit, a spare tube, and some tire levers. They are easy to install and remove. They don’t take up much space. But seat bags can also be small. They might not be big enough to hold everything you need. They can also swing around while you ride. This can be annoying. If you choose a seat bag, make sure it’s the right size. Make sure it’s securely attached. A good seat bag is a great way to carry your essentials.
Handlebar Bags: When to Use Them
Handlebar bags are bigger than seat bags. They attach to your handlebars. They are a good place to store bigger tools, a small pump, and some snacks. They are easy to reach while you’re riding. They can also be used to carry a camera or a phone. But handlebar bags can also affect your steering. They can make your bike feel heavier. If you choose a handlebar bag, make sure it’s not too big. Make sure it’s securely attached. A good handlebar bag is a great way to carry extra gear.
Backpacks: Carrying More Gear
Backpacks are the biggest storage solution. They can carry everything you need for a long ride. They are a good place to store water, food, extra clothes, and bigger tools. They are comfortable to carry. But backpacks can also be heavy. They can make you sweat. They can also restrict your movement. If you choose a backpack, make sure it’s the right size. Make sure it’s comfortable to wear. A good backpack is a great way to carry a lot of gear.
Fun Fact or Stat: 45% of cyclists use seat bags as their primary tool storage solution.
Summary
How to mount bike tools mini kit on frame mount is a useful skill. It keeps your tools handy and your rides safer. We talked about choosing the right mount. We learned how to attach it to your bike. We also learned how to secure the mini kit in the mount. Remember to check the mount often. Keep it clean and tight. If you have problems, don’t worry. Most issues are easy to fix. If you don’t want to use a frame mount, there are other options. Seat bags, handlebar bags, and backpacks can also carry your tools. Choose the method that works best for you. A well-equipped bike is a happy bike.
Conclusion
Knowing how to mount bike tools mini kit on frame mount can save you time and trouble. A frame mount keeps your tools safe and easy to reach. Choose the right mount for your bike and tool kit. Attach it securely and check it often. With a little practice, you’ll be a pro at mounting your bike tools. Happy riding!
Frequently Asked Questions
Question No 1: What tools should I include in my mini bike tool kit?
Answer: A mini bike tool kit should include essential items. These items help you handle common roadside repairs. A multi-tool with Allen wrenches, screwdrivers, and a Torx wrench is a good start. Tire levers are crucial for removing tires. A patch kit or spare tube fixes flats. A chain tool addresses chain issues. A small pump or CO2 inflator helps inflate tires. Having these tools ensures you’re prepared for most minor mechanical problems. When thinking about how to mount bike tools mini kit on frame mount, consider the size and weight of the kit. A compact, lightweight kit is easier to carry and mount securely.
Question No 2: Can I use any type of frame mount for my bike tool kit?
Answer: Not all frame mounts are the same. Consider your bike’s frame and the size of your tool kit. Some mounts are designed for specific frame types. Some fit on bikes with braze-ons. Others use straps or clamps. Ensure the mount is compatible with your bike. Also, make sure it can securely hold your tool kit. A mount that’s too small or weak may not be safe. It could cause the kit to fall off while riding. When deciding how to mount bike tools mini kit on frame mount, check that the mount is durable. It should withstand vibrations and weather conditions.
Question No 3: How do I prevent my bike tool kit from rattling in the frame mount?
Answer: Rattling can be annoying. It can also damage your tools. To prevent rattling, ensure the tool kit fits snugly. Use foam padding or rubber bands to fill any gaps. This will keep the tools from moving around. Check that the mount is securely attached to the frame. Tighten any loose screws or straps. Some frame mounts have built-in straps or clips. These help hold the kit in place. Regularly inspect the mount. Make sure everything is tight. A well-secured, rattle-free kit makes for a more enjoyable ride. Properly figuring out how to mount bike tools mini kit on frame mount will solve this.
Question No 4: What should I do if my frame mount breaks while riding?
Answer: If your frame mount breaks while riding, safety first. Stop in a safe location. Assess the damage. If possible, try to secure the tool kit temporarily. Use zip ties, tape, or spare straps. This will prevent it from falling off completely. If the mount is beyond repair, consider alternative storage. A seat bag or backpack can hold the kit. Carry extra zip ties or tape in your kit. They can be useful for emergency repairs. Regularly inspect your frame mount. Look for signs of wear or damage. Replace it before it breaks. Knowing how to mount bike tools mini kit on frame mount also means knowing what to do when things go wrong.
Question No 5: How often should I check the frame mount for wear and tear?
Answer: Regularly checking your frame mount is important. It helps prevent problems. Inspect the mount at least once a month. If you ride frequently or in rough conditions, check it more often. Look for cracks, rust, or loose screws. Check the straps or clips for wear. Address any issues promptly. Tighten loose screws. Replace worn straps. A little maintenance can extend the life of your mount. It can also prevent accidents. Keeping up with the maintenance after learning how to mount bike tools mini kit on frame mount is extremely important.
Question No 6: Are there any alternatives to using a frame mount for my bike tool kit?
Answer: Yes, several alternatives exist. Seat bags are a popular choice. They attach under your seat. They are compact and convenient. Handlebar bags offer more storage space. They attach to your handlebars. Backpacks are another option. They allow you to carry more gear. You can also use a jersey pocket. However, this is less secure. Each option has its pros and cons. Choose the one that best suits your needs. Consider the size of your kit. Also, think about how easy it is to access the tools. Thinking about how to mount bike tools mini kit on frame mount is a great start, but it’s good to know your options.


