
How to Fix Mount Bracket That Cracks Near Weld: Easy Fix!
Have you ever seen a metal bracket break? It’s like watching a superhero lose their powers. Mount brackets hold things together. They can crack near the weld. This is a problem! Do you know how to fix mount bracket that cracks near weld? It is important to learn how.
When a mount bracket cracks, things can fall apart. Imagine your TV falling off the wall. Or a shelf collapsing with all your toys. It’s scary! Fixing it quickly is super important. Let’s learn how to make things strong again.
Key Takeaways
- Knowing how to fix mount bracket that cracks near weld can save time and money.
- Welding is often the best way to repair a cracked mount bracket.
- Proper preparation and safety gear are essential for any welding job.
- Reinforcing the bracket can prevent future cracks near the weld.
- Consider replacing the bracket if the crack is too severe or the metal is weak.
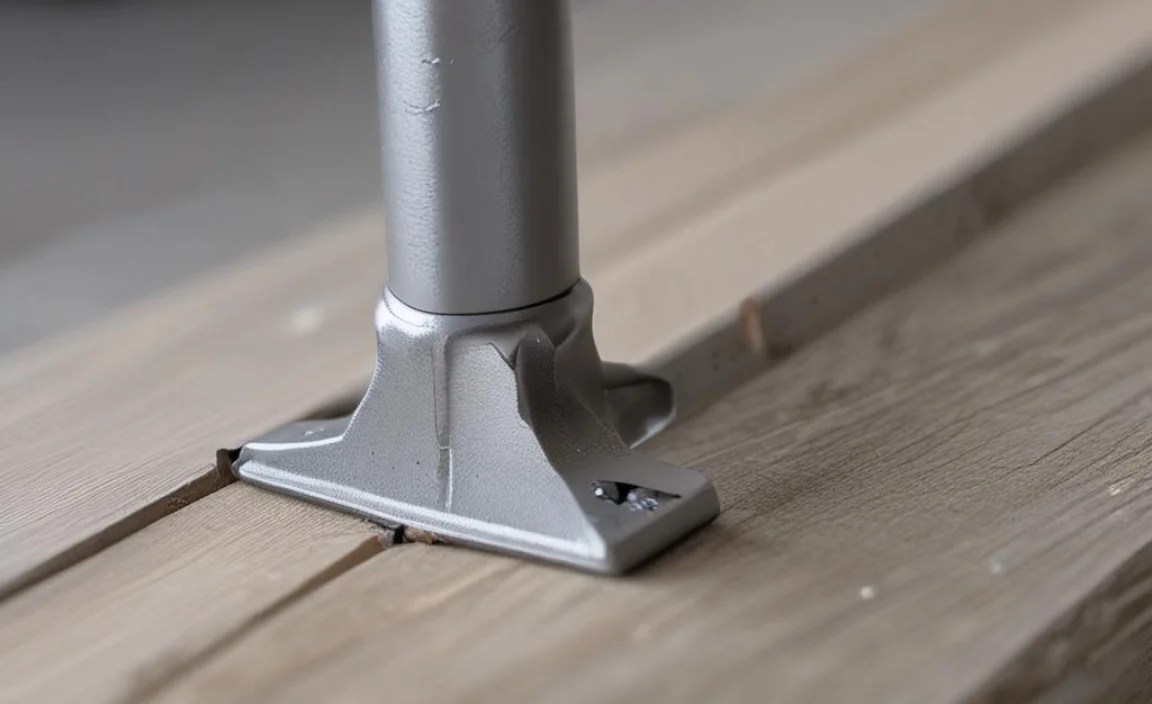
Why Mount Brackets Crack Near Welds?

Mount brackets crack for different reasons. Sometimes, it’s because of too much weight. Think of a shelf holding too many books. Other times, it’s from vibration. Like a washing machine shaking a lot. The area near the weld is often the weakest spot. Welding heats the metal. This can make it weaker if not done right. Also, poor quality metal can crack easily. Rust can weaken metal too. Knowing why cracks happen helps us fix them better.
- Too much weight can stress the bracket.
- Vibrations can cause metal fatigue over time.
- Welding can weaken the metal if not done properly.
- Poor quality metal is more prone to cracking.
- Rust can weaken the metal and lead to cracks.
Understanding the causes is important. It helps you choose the right fix. If the bracket is old and rusty, replace it. If it’s just a small crack, welding might work. Always think about the weight the bracket needs to hold. If it’s too much, get a stronger bracket. Remember to clean the area before you weld. This makes the weld stronger. Fixing a cracked mount bracket needs planning. It also needs the right tools and knowledge. Always be safe!
What is Metal Fatigue?
Metal fatigue is like bending a paperclip back and forth. Eventually, it breaks. Metal does the same thing. Small cracks form over time. These cracks get bigger with each vibration or weight change. Imagine a swing set that you use every day. The metal parts bend a little each time you swing. Over many years, these bends can cause cracks. That’s metal fatigue. It’s why things break even if they aren’t overloaded. Understanding metal fatigue helps us prevent breaks. We can check for small cracks early. We can also use stronger metal. Regular checks and good materials make things last longer.
How Does Rust Weaken Metal?
Rust is like a monster eating metal. It’s what happens when iron and oxygen mix with water. The rust takes away the strong parts of the metal. It turns the metal into a crumbly, orange mess. This makes the metal weaker. Think of an old bike left outside in the rain. The rust makes the bike frame weak. It might even break if you try to ride it. To stop rust, we can paint the metal. Paint keeps the water and air away. We can also use special sprays. These sprays protect the metal from rusting. Keeping metal dry and protected helps it stay strong.
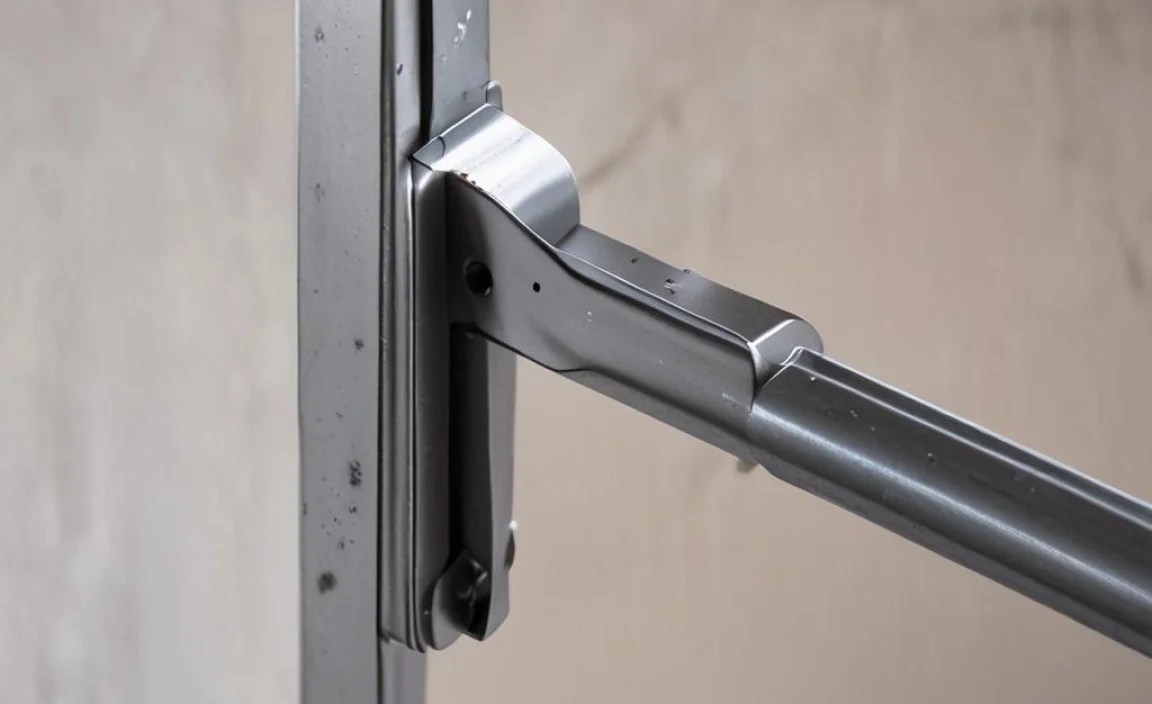
Why is the Weld Area Weak?
Welding is like gluing metal pieces together with heat. The heat melts the metal. When it cools, it forms a strong bond. But the area near the weld can get very hot. This heat changes the metal. It can make it weaker and more brittle. Imagine heating a piece of candy. If you heat it too much, it gets hard and breaks easily. The same thing can happen to metal during welding. That’s why welders need to be careful. They need to use the right amount of heat. They also need to cool the metal slowly. This helps keep the weld strong and prevents cracks.
Fun Fact or Stat: Did you know that some bridges use special types of steel that are designed to resist cracking near welds? This helps keep the bridges safe for many years.
Gathering Tools and Safety Gear

Before you start, get your tools ready. You’ll need a welder if you plan to weld. A grinder will help you clean the metal. You also need safety gear. Wear a welding helmet to protect your eyes. Gloves will protect your hands from burns. A welding jacket keeps sparks off your skin. A respirator helps you breathe clean air. Safety is the most important thing. Make sure you have everything you need. Don’t start until you’re ready. Working safely prevents accidents. It helps you do a good job.
- Welder for joining metal pieces.
- Grinder for cleaning and smoothing surfaces.
- Welding helmet to protect your eyes.
- Gloves to protect your hands from burns.
- Welding jacket to protect your skin.
- Respirator to breathe clean air.
Make sure your workspace is safe too. Clear away anything that can catch fire. Have a fire extinguisher nearby. Work in a well-ventilated area. Welding creates fumes that can be harmful. Open a window or use a fan. If you don’t have experience welding, ask someone who does. It’s better to learn from an expert. Welding can be dangerous if you don’t know what you’re doing. Remember, safety first! With the right tools and safety gear, you can fix the mount bracket safely and correctly.
Why is a Welding Helmet Important?
A welding helmet is like a superhero mask for your eyes. Welding creates very bright light. This light can hurt your eyes badly. It can even make you blind. A welding helmet has a special lens. This lens blocks the harmful light. It lets you see what you’re doing without hurting your eyes. Some helmets even have auto-darkening features. They get dark as soon as you start welding. This makes it easier to see clearly. Always wear a welding helmet when you weld. It’s the best way to protect your eyes.
What Kind of Gloves Should I Use?
Welding gloves are like oven mitts for metal work. They protect your hands from the heat and sparks. Welding gets very hot. Sparks can fly everywhere. Regular gloves will burn quickly. Welding gloves are made of thick leather. This leather can handle the heat. It also protects against sparks. Make sure the gloves fit well. You need to be able to move your hands easily. Choose gloves that are made for welding. They will keep your hands safe.
Why Do I Need a Respirator?
Welding creates fumes. These fumes are like tiny bits of metal and chemicals in the air. Breathing these fumes can make you sick. A respirator is like a filter for your nose and mouth. It cleans the air before you breathe it in. This keeps the harmful fumes out of your lungs. There are different kinds of respirators. Some are simple masks. Others are more powerful and cover your whole face. Choose a respirator that is made for welding fumes. It will help you breathe easier and stay healthy.
Fun Fact or Stat: A good welding helmet can darken in as little as 1/25,000 of a second to protect your eyes from the intense light of the welding arc!
Preparing the Bracket for Repair
Before you weld, clean the bracket. Use a wire brush to remove rust and dirt. A grinder can help smooth the edges. Make sure the area around the crack is clean. This helps the weld stick better. If there is paint, sand it off. Paint can cause problems with the weld. Check the bracket for other cracks. If there are more cracks, you might need a new bracket. A clean bracket makes for a strong weld. It also makes the job easier.
- Remove rust with a wire brush.
- Grind the edges smooth.
- Clean the area around the crack.
- Remove any paint.
- Check for other cracks.
If the bracket is bent, try to straighten it. A hammer and some blocks of wood can help. Be careful not to break it. Straightening the bracket makes the weld stronger. It also helps the bracket fit correctly. If the crack is very wide, you might need to fill it. Use a piece of metal to fill the gap. This will give the weld something to grab onto. Preparing the bracket takes time. But it’s worth it. A well-prepared bracket will result in a stronger, longer-lasting repair.
How Do I Remove Rust Effectively?
Rust is like a stubborn weed in your garden. It won’t go away easily. But there are ways to get rid of it. A wire brush is a good start. It scrubs away the loose rust. For tougher rust, use a grinder. A grinder is like a power washer for metal. It can quickly remove rust and smooth the surface. You can also use chemicals. Rust remover is like weed killer for rust. It dissolves the rust and makes it easy to wipe away. Always wear gloves and eye protection when using chemicals. Removing rust completely is important for a good repair.
Why is Smoothing Edges Important?
Imagine trying to glue two rough pieces of wood together. They won’t stick very well. The same thing happens with metal. Rough edges can weaken a weld. Smoothing the edges makes the metal fit together better. It gives the weld more surface to grab onto. A grinder is perfect for smoothing edges. It quickly removes bumps and rough spots. You can also use a file. A file is like a small hand-held grinder. It takes more time, but it gives you more control. Smooth edges make for a stronger, cleaner weld.
How Can I Straighten a Bent Bracket?
Bending metal back into shape can be tricky. You need to be careful not to break it. A hammer and blocks of wood are your friends here. Place the bracket on a block of wood. Use the hammer to gently tap the bent area. Don’t hit it too hard. You want to slowly bend it back into shape. Another block of wood can help protect the metal. It spreads out the force of the hammer. If the bend is severe, you might need a vise. A vise is like a strong clamp that holds the metal in place. Use the vise to slowly bend the bracket back into shape. Straightening a bent bracket takes patience. But it’s worth it for a good repair.
Fun Fact or Stat: Did you know that some rust converters can turn rust into a stable substance that prevents further corrosion?
Welding the Crack
Now it’s time to weld. Make sure you are wearing all your safety gear. Start by tack welding the crack. Tack welds are small welds that hold the pieces together. Then, weld the entire crack. Move the welder slowly and steadily. This will create a strong weld. Let the weld cool slowly. Don’t cool it with water. This can make the metal weak. After it cools, grind the weld smooth. This makes it look nice. It also removes any sharp edges. Welding takes practice. Don’t be afraid to try again if you make a mistake.
- Wear all your safety gear.
- Tack weld the crack first.
- Weld the entire crack slowly.
- Let the weld cool slowly.
- Grind the weld smooth.
If you are not comfortable welding, ask a professional. Welding can be dangerous if you don’t know what you’re doing. A professional welder can fix the bracket quickly and safely. They have the right tools and experience. If you do weld it yourself, practice on scrap metal first. This will help you get the hang of it. Remember to keep the welder clean. Clean the tip after each weld. This will help you make better welds. Welding is a skill that takes time to learn. But with practice, you can become a good welder.
What is Tack Welding?
Tack welding is like using small dots of glue before you use a lot of glue. It holds the pieces together while you work. Tack welds are small, quick welds. They don’t need to be very strong. Their job is just to keep the metal in place. Think of it like holding a puzzle together before you tape it. Tack welding makes it easier to weld the entire crack. It prevents the metal from moving or warping. Use tack welds every few inches along the crack. This will keep everything lined up perfectly.
How Do I Make a Strong Weld?
A strong weld is like a super glue bond between two pieces of metal. To make a strong weld, you need the right heat. Too little heat and the weld won’t stick. Too much heat and you’ll burn through the metal. Practice will help you find the right heat setting. You also need to move the welder at the right speed. Too fast and the weld will be weak. Too slow and you’ll create a big, ugly blob. A steady hand is important. Keep the welder moving smoothly along the crack. Clean metal is also key. Make sure the metal is free of rust, dirt, and paint. A strong weld will last for a long time.
Why Should I Let the Weld Cool Slowly?
Cooling metal too quickly is like shocking it. It can make it weak and brittle. When metal cools slowly, it stays strong. Think of it like baking a cake. If you take it out of the oven too soon, it will collapse. Let the weld cool on its own. Don’t pour water on it or blow on it. This will cool it down too fast. Slow cooling allows the metal to shrink evenly. This prevents cracks and stress. It also makes the weld stronger. Patience is important when welding. Let the weld cool slowly for the best results.
Fun Fact or Stat: Some welds are so strong that they are stronger than the original metal pieces they join together!
Reinforcing the Repaired Bracket
After welding, think about reinforcing the bracket. You can add a metal plate to the back. This will make it stronger. Weld the plate to the bracket. This will give the bracket extra support. You can also add gussets. Gussets are small pieces of metal that fit into corners. They spread the weight over a larger area. This prevents the bracket from cracking again. Reinforcing the bracket is like giving it a superhero upgrade. It makes it stronger and more durable.
- Add a metal plate to the back.
- Weld the plate to the bracket.
- Add gussets to the corners.
- Spread the weight over a larger area.
- Make the bracket stronger and more durable.
Think about how much weight the bracket needs to hold. If it’s a lot, you might need to add more reinforcement. Use thicker metal for the plate and gussets. Make sure the welds are strong and secure. If you’re not sure how much reinforcement you need, ask a professional. They can help you design a system that will work. Reinforcing the bracket is an important step. It will help prevent future cracks and keep your stuff safe.
What is a Gusset?
A gusset is like a triangle of strength. It fits into the corner of a bracket. Think of it like adding extra support to a shelf. Gussets spread the weight over a larger area. This prevents the bracket from bending or breaking. They are usually made of metal. You weld them to the bracket. Gussets come in different sizes and shapes. Choose the right size for your bracket. Gussets are a simple way to make a bracket much stronger.
How Thick Should the Reinforcement Plate Be?
The thickness of the reinforcement plate depends on the weight it needs to hold. If the bracket holds something light, a thin plate will work. If it holds something heavy, you need a thicker plate. A good rule of thumb is to use a plate that is at least as thick as the original bracket. You can also use a thicker plate for extra strength. Choose a plate that is made of the same material as the bracket. This will make the weld stronger. A thicker plate will provide more support and prevent future cracks.
Where Should I Place the Gussets?
Gussets should go in the corners of the bracket. These are the areas that are most likely to bend or break. Think of it like reinforcing the corners of a box. Place the gussets so that they spread the weight evenly. Weld them securely to the bracket. Use multiple welds to make them extra strong. Make sure the gussets don’t get in the way of anything. You don’t want them to block screws or other hardware. Properly placed gussets will make your bracket much stronger.
Fun Fact or Stat: Adding gussets to a bracket can increase its load-bearing capacity by as much as 50%!
Painting and Finishing the Bracket
After the repair, paint the bracket. This will protect it from rust. Use a metal primer first. Primer helps the paint stick better. Then, use a metal paint. Choose a color that matches the original bracket. Apply several thin coats of paint. Let each coat dry before applying the next. This will give you a smooth, even finish. Painting the bracket makes it look nice. It also protects it from the weather. A well-painted bracket will last longer.
- Use a metal primer first.
- Choose a metal paint.
- Apply several thin coats.
- Let each coat dry.
- Protect the bracket from rust.
If you want to make the bracket look even better, you can sand it. Use fine-grit sandpaper to smooth out any rough spots. Be careful not to sand off the paint. After sanding, wipe the bracket clean. Then, apply a clear coat. A clear coat will protect the paint. It will also give the bracket a glossy finish. Painting and finishing the bracket is the final step. It makes the repair look professional. It also helps the bracket last longer.
Why Use Metal Primer?
Metal primer is like a sticky base coat for paint. It helps the paint grab onto the metal. Think of it like putting glue on paper before you sprinkle glitter. The glue makes the glitter stick better. Metal primer does the same thing for paint. It prevents the paint from chipping or peeling. It also protects the metal from rust. Apply a thin, even coat of primer. Let it dry completely before painting. Primer is an important step for a long-lasting paint job.
How Do I Choose the Right Metal Paint?
Metal paint is like a suit of armor for your bracket. It protects it from rust and the weather. Choose a paint that is made for metal. It will stick better and last longer. There are different types of metal paint. Some are oil-based, and some are water-based. Oil-based paints are more durable. But they take longer to dry. Water-based paints are easier to clean up. Choose a paint that is the right color for your project. You can also choose a paint with a glossy or matte finish. The right metal paint will keep your bracket looking good for years.
Why Apply Thin Coats of Paint?
Thin coats of paint are like layers of protection. They dry faster and more evenly. Think of it like frosting a cake. If you put on too much frosting at once, it will be messy. If you put on thin layers, it will be smooth and perfect. Thin coats of paint prevent drips and runs. They also give you a more even color. Let each coat dry completely before applying the next. This will give you a professional-looking finish.
Fun Fact or Stat: Painting metal can extend its lifespan by up to 50% by preventing rust and corrosion!
When to Replace Instead of Repairing
Sometimes, repairing isn’t the best choice. If the bracket has many cracks, replace it. If the metal is very rusty, replace it. If the bracket is bent badly, replace it. A new bracket might be safer and stronger. It’s like getting a new tire for your bike. Sometimes, fixing the old one isn’t worth it. Think about how much weight the bracket needs to hold. If it’s a lot, a new bracket might be better. Replacing a bracket is easy. You can buy them at most hardware stores.
- Many cracks mean replace it.
- Very rusty metal means replace it.
- Badly bent bracket means replace it.
- New bracket might be safer.
- Consider the weight it needs to hold.
Before you replace the bracket, measure it. Make sure the new bracket is the same size. Also, check the mounting holes. They need to line up with the old ones. If you’re not sure what kind of bracket to get, ask a store employee. They can help you find the right one. Replacing a bracket is often the easiest solution. It gives you peace of mind knowing that it’s strong and safe.
How Do I Know if a Bracket is Too Rusty?
Rust is like a disease for metal. It eats away at the strong parts and makes them weak. If the rust is just on the surface, you can probably clean it off. But if the rust has eaten deep into the metal, it’s time to replace it. Poke the rusty areas with a screwdriver. If the metal crumbles easily, it’s too rusty. Think of it like a rotten apple. If the rot is just on the skin, you can cut it off. But if the whole apple is rotten, you need to throw it away. A bracket that is too rusty is not safe to use.
What if the Mounting Holes Don’t Line Up?
Mounting holes are like puzzle pieces. They need to fit together perfectly. If the mounting holes on the new bracket don’t line up with the old ones, you have a problem. You can try to drill new holes. But be careful not to weaken the bracket. Make sure the new holes are in the right place. You can also try using different screws. Sometimes, a slightly smaller or larger screw will work. If you can’t get the holes to line up, you might need to return the bracket and get a different one. Mounting holes that don’t line up can be a big headache.
Where Can I Buy Replacement Brackets?
Replacement brackets are like spare parts for your projects. You can find them at most hardware stores. Big box stores like Home Depot and Lowe’s also sell brackets. You can also buy them online. Amazon is a great place to find a wide variety of brackets. Before you buy, make sure you know what size and type of bracket you need. Take the old bracket with you to the store. This will help you find the right replacement. Buying a replacement bracket is easy and convenient.
| Problem | Solution | Severity |
|---|---|---|
| Small Crack | Weld and Reinforce | Low |
| Multiple Cracks | Replace Bracket | High |
| Surface Rust | Clean and Paint | Low |
| Deep Rust | Replace Bracket | High |
Fun Fact or Stat: Replacing a damaged bracket can prevent accidents and ensure the safety of your belongings, saving you potential costs and headaches in the long run!
Summary
Mount brackets can crack near the weld for many reasons. These reasons include too much weight, vibration, and rust. Knowing how to fix mount bracket that cracks near weld is useful. You can weld the crack if it is small. First, clean the bracket and use safety gear. Then, weld the crack slowly. After welding, reinforce the bracket. This prevents future cracks. You can add a metal plate or gussets. Finally, paint the bracket to protect it from rust. This makes it look nice too. If the bracket is too damaged, replace it with a new one.
Remember to measure the old bracket. Make sure the new one is the same size. Fixing a cracked mount bracket takes time and effort. But it’s worth it to keep things safe. Whether you weld, reinforce, or replace, always prioritize safety. A well-maintained bracket will keep your things secure for years to come.
Conclusion
Fixing a cracked mount bracket is important for safety. You can often repair a small crack with welding. Remember to clean the metal and wear safety gear. Reinforce the bracket after welding to make it stronger. If the bracket is too damaged, replace it. Knowing how to fix mount bracket that cracks near weld can save you money. It also keeps your things secure. Always prioritize safety and take your time.
Frequently Asked Questions
Question No 1: Why do mount brackets crack near the weld?
Answer: Mount brackets often crack near the weld because welding can weaken the metal. The heat from welding changes the metal’s structure. This makes it more brittle and prone to cracking. Also, the area around the weld can experience stress. This stress comes from the weight or vibrations. Poor welding techniques can also cause cracks. If the weld is not done properly, it will be weak. This weakness leads to cracking. Knowing how to fix mount bracket that cracks near weld starts with understanding why it happens.
Question No 2: What tools do I need to fix a cracked mount bracket?
Answer: To fix a cracked mount bracket, you will need several tools. A welder is essential for welding the crack. You’ll also need a grinder to clean the metal and smooth the weld. A wire brush will help remove rust and dirt. Safety gear is very important. You need a welding helmet to protect your eyes. Gloves and a welding jacket will protect your skin from burns. A respirator will help you breathe clean air. You might also need a hammer and blocks of wood to straighten the bracket. Having the right tools makes the job easier and safer. Remember, safety first!
Question No 3: How do I prepare the bracket before welding?
Answer: Preparing the bracket is very important. Start by cleaning the area around the crack. Use a wire brush to remove rust and dirt. A grinder can help smooth the edges. Remove any paint from the area. Paint can cause problems with the weld. If the bracket is bent, try to straighten it. Use a hammer and blocks of wood. Be careful not to break it. If the crack is very wide, you might need to fill it. Use a piece of metal to fill the gap. A clean and well-prepared bracket will result in a stronger weld. Knowing how to fix mount bracket that cracks near weld means preparing the metal properly.
Question No 4: Is it safe to weld a cracked mount bracket myself?
Answer: Welding can be dangerous if you don’t know what you’re doing. If you have experience welding, it is safe. But if you’re a beginner, ask a professional. Welding involves high heat and electricity. It can cause burns and eye damage. Always wear safety gear. This includes a welding helmet, gloves, and a jacket. Work in a well-ventilated area. Welding creates fumes that can be harmful. If you’re not comfortable welding, hire a professional. They can fix the bracket safely and quickly. Knowing how to fix mount bracket that cracks near weld is one thing, doing it safely is another.
Question No 5: How can I reinforce the bracket after welding?
Answer: Reinforcing the bracket is a great idea. It makes it stronger and prevents future cracks. You can add a metal plate to the back of the bracket. Weld the plate to the bracket for extra support. You can also add gussets to the corners. Gussets are small pieces of metal that fit into corners. They spread the weight over a larger area. Use thicker metal for the plate and gussets if needed. Make sure the welds are strong and secure. Reinforcing the bracket is like giving it a superhero upgrade. It makes it stronger and more durable. Think of it as the best way how to fix mount bracket that cracks near weld so it won’t crack again.
Question No 6: When should I replace the bracket instead of repairing it?
Answer: Sometimes, repairing isn’t the best option. If the bracket has many cracks, replace it. If the metal is very rusty, replace it. If the bracket is bent badly, replace it. A new bracket might be safer and stronger. Think about how much weight the bracket needs to hold. If it’s a lot, a new bracket might be better. Replacing a bracket is easy. You can buy them at most hardware stores. A new bracket gives you peace of mind. You know it’s strong and safe. This is sometimes the best way on how to fix mount bracket that cracks near weld.


