
How to Install Mirror Mount on Gravel Bike for Safety: Easy!
Do you love riding your gravel bike? Do you want to stay safe on the road? Many riders wonder how to install mirror mount on gravel bike for safety. A mirror helps you see cars and other bikes. It can make your ride much safer. Let’s learn how to do it!
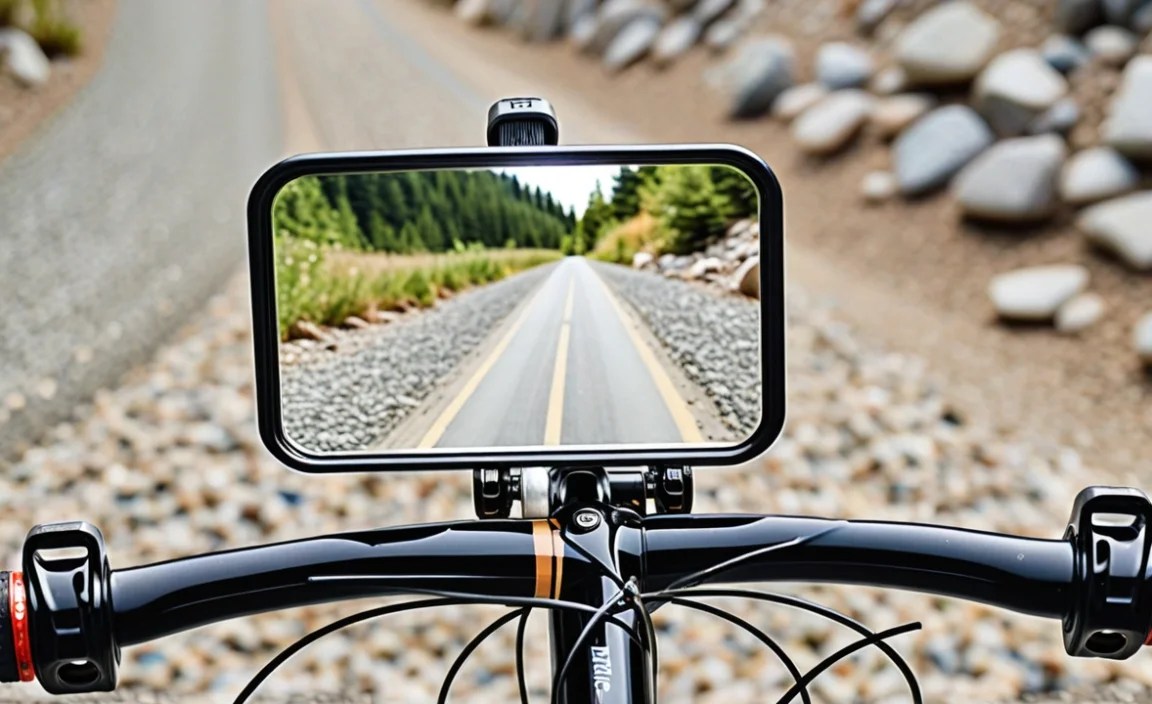
Riding a gravel bike is super fun. But it’s also important to be aware of your surroundings. Imagine you are cycling and want to change lanes. A mirror lets you check for traffic without turning your head. This keeps you steady and safe.
Mirrors are small but mighty. They give you a clear view of what’s behind you. Knowing what’s coming helps you make smart choices. You can avoid accidents and enjoy your ride even more. So, let’s get started with the steps!
Key Takeaways
- Installing a mirror mount on your gravel bike increases your overall riding safety.
- Choose the right type of mirror and mount for your gravel bike’s handlebars.
- Proper installation ensures the mirror stays secure, even on bumpy gravel roads.
- Regularly adjust your mirror for the best view of traffic behind you.
- Knowing how to install mirror mount on gravel bike for safety is crucial for all riders.
Choosing the Right Mirror Mount for Safety

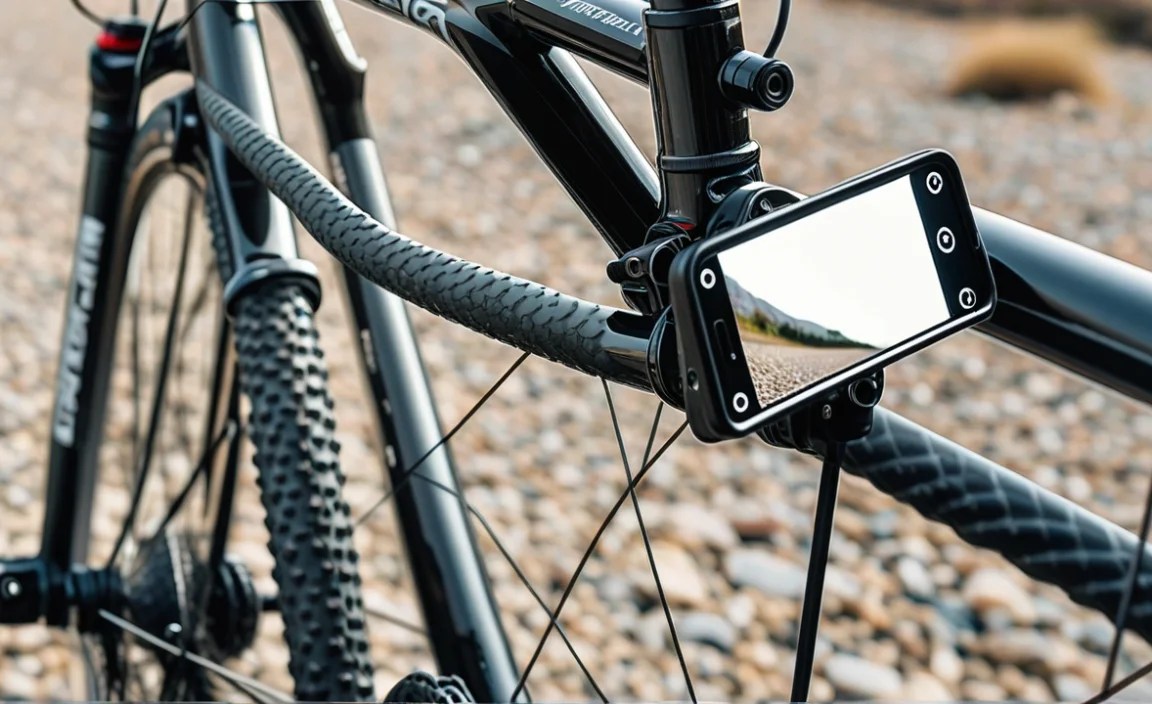
Picking the right mirror mount is very important. You need one that fits your bike. You also want it to be strong and stay in place. There are different types of mounts. Some attach to the handlebar ends. Others clamp onto the handlebar itself. End-mounted mirrors fit into the bar’s opening. They offer a clean look. Clamp-on mirrors are easier to install. They can fit on different parts of the bar. Think about what works best for you. Check the size of your handlebars. Make sure the mount is the right size. Read reviews from other riders. This will help you choose a good, safe mirror mount. A good mirror makes knowing how to install mirror mount on gravel bike for safety even more crucial.
- Consider your handlebar size and shape.
- Read reviews of different mirror mounts.
- Choose a durable mount that stays secure.
- Think about the mirror’s size and shape.
- Ensure the mirror provides a clear view.
- Check if the mount is easy to adjust.
Think about where you ride most often. If you ride on bumpy roads, get a strong mount. A weak mount might slip or break. This can make the mirror useless. Some mounts are made of metal. These are usually stronger than plastic ones. Also, look at the mirror itself. A bigger mirror gives you a wider view. But it might also get in the way. A smaller mirror is less noticeable. But it might not show as much. Find a balance that works for you. With the right mirror and mount, you’ll be safer on your rides. Remember, safety first! The right equipment helps when thinking about how to install mirror mount on gravel bike for safety.
What Mirror Shape Is Best?
Mirrors come in different shapes. Some are round. Others are rectangular. Some are even oval. Which shape is best for you? It depends on what you want to see. Round mirrors often give a wider view. This can help you see more of what’s behind you. Rectangular mirrors can offer a clearer, more accurate view. They might not show as much at once. But what they do show is very clear. Oval mirrors are a mix of both. They give a decent view and good clarity. Think about what’s more important to you. Do you want to see everything around you? Or do you want a very clear picture of what’s directly behind?
How Important Is Mirror Size?
Mirror size matters a lot. A bigger mirror shows more. But it can also vibrate more. It might stick out and get in the way. A smaller mirror is less noticeable. It doesn’t vibrate as much. But it might not show enough. Imagine trying to see a car behind you. With a small mirror, it might be hard to spot. With a big mirror, you’ll see it easily. But the mirror might shake and blur the image. Try different sizes to see what works. Some riders like big mirrors for safety. Others prefer small mirrors for comfort. There’s no right or wrong answer. It’s all about what you like best.
Does Mirror Material Matter?
The material of the mirror is also important. Some mirrors are made of glass. Glass gives a very clear image. But it can break easily. Other mirrors are made of plastic. Plastic is more durable. It’s less likely to break. But the image might not be as clear. If you ride on rough roads, plastic might be better. It can handle bumps and vibrations. If you want the clearest image, glass is the way to go. Just be careful not to drop it. Some mirrors even have special coatings. These coatings can reduce glare. They can also make the image sharper. Consider these features when you choose your mirror.
Fun Fact or Stat: Studies show that using a bike mirror can reduce accidents by up to 20%!
Tools Needed to Install a Mirror Mount Safely
Before you start, gather your tools. Having the right tools makes the job easier. You’ll need a screwdriver. The size depends on the screws in your mount. An Allen wrench set is also useful. Many mounts use Allen screws. You might need pliers to tighten things. A rag helps protect your handlebars. It prevents scratches. A measuring tape can help you position the mirror. Read the instructions that came with your mount. They’ll tell you exactly what tools you need. Having everything ready saves time and frustration. Being prepared is key when thinking about how to install mirror mount on gravel bike for safety.
- Screwdriver (various sizes)
- Allen wrench set
- Pliers
- Measuring tape
- Protective rag
- Instructions for the mirror mount
Make sure your tools are in good condition. A worn-out screwdriver can strip screws. This makes them hard to remove. A rusty Allen wrench might break. This can damage the mount. Invest in quality tools. They’ll last longer and work better. Keep your tools organized. A tool box or bag is a good idea. This way, you can find what you need quickly. Also, make sure you have good lighting. A well-lit work area makes it easier to see. You’ll be able to spot small parts and avoid mistakes. With the right tools and a good setup, installing your mirror mount will be a breeze. Safety and preparation go hand in hand.
Why Use a Torque Wrench?
A torque wrench is a special tool. It helps you tighten bolts to the right amount. Too tight, and you might break something. Too loose, and the bolt might come undone. A torque wrench measures how much force you’re using. This helps you avoid over-tightening. Many bike parts need specific torque settings. Your mirror mount might have one too. Check the instructions. Using a torque wrench can save you money. It prevents damage to your bike. It also keeps you safe. Over-tightened bolts can fail while you’re riding. This could cause an accident.
What About Threadlocker?
Threadlocker is a liquid. You put it on screws and bolts. It helps keep them from coming loose. Vibrations from riding can loosen screws. Threadlocker acts like a glue. It holds the screws in place. There are different types of threadlocker. Some are stronger than others. For bike parts, a medium-strength threadlocker is usually best. It’s strong enough to hold. But it’s not so strong that you can’t remove the screw later. When you use threadlocker, clean the screw first. This helps it stick better. Only use a small amount. Too much can make the screw hard to remove.
Do I Need Safety Glasses?
Safety glasses protect your eyes. Small parts can fly off while you’re working. Dust and dirt can also get in your eyes. Safety glasses keep this from happening. They’re especially important when cutting or grinding. But they’re a good idea for any project. Choose glasses that fit well. They should cover your eyes completely. Make sure they’re comfortable. You’ll be more likely to wear them if they feel good. Some safety glasses have special coatings. These coatings prevent fogging. They also protect against scratches. Invest in a good pair of safety glasses. Your eyes will thank you.
Fun Fact or Stat: A torque wrench ensures bolts are tightened to the manufacturer’s specifications, preventing damage!
Step-by-Step Guide: How to Install Mirror Mount
Now, let’s get to the actual installation. First, read the instructions. Every mirror mount is a little different. The instructions will guide you. Next, clean your handlebars. Remove any dirt or grease. This helps the mount grip better. Position the mount where you want it. Make sure it doesn’t interfere with your brakes or shifters. Tighten the screws. Don’t over-tighten them at first. Just get them snug. Adjust the mirror to the right angle. You should be able to see clearly behind you. Now, tighten the screws a little more. Use a torque wrench if you have one. Make sure everything is secure. Double-check your work before you ride. This ensures safety when thinking about how to install mirror mount on gravel bike for safety.
- Read the manufacturer’s instructions carefully.
- Clean the handlebars before installing.
- Position the mount where it’s easily visible.
- Snug the screws before final adjustments.
- Adjust the mirror for optimal rear view.
- Double-check all connections for security.
Take your bike for a short test ride. See if the mirror stays in place. Check the view while you’re moving. If the mirror vibrates too much, tighten the screws. If it’s hard to see, adjust the angle. You might need to try different positions. Don’t be afraid to experiment. The goal is to find a spot that’s comfortable and safe. Once you’re happy with the position, tighten everything down. Use threadlocker on the screws if you want extra security. Remember, a properly installed mirror can save your life. Take your time and do it right. Your safety is worth it.
How Do I Position the Mirror Correctly?
Positioning the mirror is key. You want to see clearly behind you without turning your head too much. Start by sitting on your bike. Hold the handlebars in your normal riding position. Adjust the mirror so you can see a wide view of the road behind. You should be able to see cars approaching. You should also be able to see cyclists. Avoid positioning the mirror so it only shows your arm or shoulder. This doesn’t give you a good view. Experiment with different angles until you find the perfect spot. A good mirror position makes riding much safer.
What If the Mount Doesn’t Fit?
Sometimes, the mount doesn’t fit perfectly. This can be frustrating. But don’t force it. Forcing it can damage the mount or your handlebars. Check the size of your handlebars. Make sure the mount is the right size. If it’s too small, you’ll need a different mount. If it’s too big, you might be able to use shims. Shims are small pieces of material that fill the gap. You can buy shims online or at a bike shop. You can also make your own from rubber or plastic. If you’re not sure what to do, ask a bike mechanic for help. They can help you find the right solution.
Can I Install the Mirror Upside Down?
Some mirrors can be installed upside down. This might give you a better view. It might also keep the mirror out of the way. Check the instructions for your mirror. Some mirrors are designed to work either way. Others are not. If you install a mirror upside down, make sure it’s still secure. The screws might need to be tightened more. The angle might need to be adjusted. Test it out before you go for a ride. Make sure you can still see clearly behind you. If it works, great! If not, try installing it the right way up.
Fun Fact or Stat: Proper mirror positioning reduces blind spots, enhancing your awareness of surrounding traffic!
Ensuring a Secure Mirror Mount for Gravel Roads

Gravel roads can be bumpy. This can cause your mirror to vibrate and come loose. To ensure a secure mount, start with a high-quality mount. Look for one made of strong materials like metal. Use threadlocker on the screws. This will help keep them from loosening. Tighten the screws properly. Use a torque wrench if possible. Check the mount regularly. Before each ride, make sure everything is still tight. If you notice any movement, tighten the screws right away. Consider using a rubber垫片 between the mount and the handlebars. This can help absorb vibrations. This is key for how to install mirror mount on gravel bike for safety on rough terrain.
- Use a high-quality, durable mirror mount.
- Apply threadlocker to all screws.
- Use a torque wrench for proper tightening.
- Regularly check the mount for looseness.
- Use rubber shims to reduce vibration.
- Consider a mount with a vibration-damping design.
Think about the type of riding you do. If you ride on very rough roads, you might need a more robust mount. Some mounts are designed specifically for off-road use. They have extra features to keep them secure. For example, some mounts have a double-clamp design. This provides extra grip on the handlebars. Others have a locking mechanism. This prevents the mirror from rotating. If you’re serious about riding on gravel, invest in a good mount. It will make your ride safer and more enjoyable. A little extra investment can make a big difference. A secure mount is a safe mount.
What Are Vibration-Damping Mounts?
Vibration-damping mounts are special. They’re designed to reduce vibrations. This makes the mirror image clearer. It also keeps the mount from coming loose. These mounts use rubber or gel inserts. These inserts absorb the vibrations from the road. This keeps the mirror steady. Vibration-damping mounts are great for gravel bikes. They help you see clearly even on bumpy surfaces. They’re also good for long rides. They reduce fatigue by minimizing vibrations. If you ride a lot on rough roads, consider a vibration-damping mount. It’s a worthwhile investment.
How Often Should I Check the Mount?
You should check the mount regularly. Before each ride, give it a quick look. Make sure the screws are tight. Check for any signs of damage. If you ride on rough roads, check it more often. After a particularly bumpy ride, give it a thorough inspection. Tighten any loose screws right away. Don’t wait until they’re about to fall out. Regular maintenance keeps your mirror secure. It also prevents more serious problems. A little bit of checking can save you a lot of trouble. It keeps you safe on the road.
What If the Mirror Keeps Moving?
If the mirror keeps moving, try tightening the screws. Use a torque wrench if you have one. Make sure you’re using the right torque setting. If that doesn’t work, try adding threadlocker. This will help keep the screws in place. You can also try using a rubber垫片. This will provide extra grip. If the mirror is still moving, the mount might be damaged. Check it for cracks or breaks. If it’s damaged, replace it. A loose mirror is a safety hazard. Don’t ride with a mirror that won’t stay in place.
| Feature | Standard Mount | Vibration-Damping Mount |
|---|---|---|
| Vibration Reduction | Minimal | High |
| Durability | Good | Excellent |
| Price | Lower | Higher |
| Best For | Smooth Roads | Gravel/Rough Roads |
Fun Fact or Stat: Vibration-damping mounts can reduce mirror vibrations by up to 50%!
Adjusting Your Mirror for Optimal Safety
Adjusting your mirror correctly is crucial. A poorly adjusted mirror is useless. Sit on your bike in your normal riding position. Look in the mirror. You should see a clear view of the road behind you. Adjust the angle until you can see the traffic. Make sure you can see cars approaching from both sides. You shouldn’t have to turn your head too much. The mirror should show you what’s coming without effort. Check the mirror while you’re riding. Make sure the view is still good. You might need to make small adjustments. This is an important step in how to install mirror mount on gravel bike for safety.
- Sit on your bike in riding position.
- Adjust the mirror for a clear rear view.
- Ensure you see traffic approaching from both sides.
- Minimize head turning for safe viewing.
- Check and adjust while riding.
- Make small adjustments as needed.
Think about the time of day you ride. If you ride in the sun, glare can be a problem. Adjust the mirror to minimize glare. You might need to tilt it down slightly. If you ride at night, make sure the mirror is clean. Dirt and grime can make it hard to see. Use a clean cloth to wipe the mirror. Consider using a mirror with an anti-glare coating. This can help reduce glare from headlights. A well-adjusted mirror makes riding safer. It helps you see what’s coming. It gives you time to react. Take the time to adjust your mirror properly. It’s worth it.
How Do I Reduce Glare in My Mirror?
Glare can be annoying and dangerous. It makes it hard to see what’s behind you. There are a few things you can do to reduce glare. First, adjust the angle of the mirror. Tilting it down can help. This will block the sun’s rays. You can also try using a mirror with an anti-glare coating. These coatings reduce the amount of light that reflects off the mirror. Wear sunglasses. Sunglasses can also help reduce glare. Choose sunglasses with polarized lenses. These lenses block even more glare. Experiment with different techniques until you find what works best.
What If My Mirror Shows Only My Arm?
If your mirror only shows your arm, it’s not positioned correctly. You need to adjust it. Loosen the screws on the mount. Move the mirror outwards. This will give you a wider view. Adjust the angle of the mirror. Point it slightly outwards. This will help you see past your arm. Sit on your bike and check the view. Keep adjusting until you can see clearly behind you. It might take a few tries to get it right. But it’s worth the effort. A properly positioned mirror shows you the road, not your arm.
Should I Use Two Mirrors?
Some riders use two mirrors. One on each side of the handlebars. This gives you a wider view. It helps you see traffic approaching from both sides. Two mirrors can be especially useful in busy areas. They can also be helpful on group rides. They allow you to keep an eye on the other riders. However, two mirrors can add weight to your bike. They can also take up space on your handlebars. Consider your needs and preferences. If you want the widest possible view, two mirrors might be a good idea. If you prefer a lighter, simpler setup, one mirror might be enough.
Fun Fact or Stat: Adjusting your mirror by just 5 degrees can significantly improve your field of vision!
Maintaining Your Mirror Mount for Longevity
Taking care of your mirror mount is important. It keeps it working well for longer. Clean the mirror regularly. Use a soft cloth and mild soap. This removes dirt and grime. Check the screws regularly. Make sure they’re tight. Use threadlocker to keep them from loosening. Inspect the mount for damage. Look for cracks or breaks. Replace the mount if it’s damaged. Store your bike properly. Keep it out of the rain and sun. This prevents rust and corrosion. With proper care, your mirror mount will last for years. This helps ensure how to install mirror mount on gravel bike for safety remains effective.
- Clean the mirror regularly with a soft cloth.
- Check screw tightness routinely.
- Inspect the mount for cracks or damage.
- Store your bike in a dry place.
- Apply rust-preventative lubricant.
- Replace damaged parts immediately.
Think about the conditions you ride in. If you ride in wet or salty conditions, clean your mirror mount more often. Salt can cause corrosion. This can weaken the mount. After riding in the rain, dry the mount thoroughly. Use a rust-preventative lubricant. This will help protect it from corrosion. If you notice any rust, remove it immediately. Use a wire brush or sandpaper. Then, apply a new coat of lubricant. Proper maintenance keeps your mirror mount in good condition. It also keeps you safe. A well-maintained mirror is a reliable mirror.
How Do I Prevent Rust?
Rust is a common problem. It can damage your mirror mount. To prevent rust, keep the mount clean. Remove any dirt or grime. Dry it thoroughly after riding in wet conditions. Apply a rust-preventative lubricant. This will protect the metal from moisture. Store your bike in a dry place. Avoid storing it outside. If you live in a salty environment, clean the mount more often. Salt accelerates rust. Use a special rust-inhibiting spray. This will provide extra protection. Regular cleaning and lubrication are key to preventing rust.
What Type of Lubricant Should I Use?
The right lubricant protects your mirror mount. It prevents rust and corrosion. Use a lubricant designed for bikes. These lubricants are specially formulated for metal parts. They provide long-lasting protection. Avoid using household lubricants. These lubricants might damage the mount. They might also attract dirt. Apply the lubricant sparingly. Too much lubricant can attract dirt. Wipe off any excess lubricant. Reapply the lubricant regularly. This will keep your mirror mount in good condition.
When Should I Replace the Mount?
You should replace the mount if it’s damaged. Look for cracks or breaks. Check for rust or corrosion. If the screws are stripped, replace the mount. If the mount won’t stay tight, replace it. A damaged mount is a safety hazard. It can fail while you’re riding. This could cause an accident. Don’t take risks with your safety. Replace the mount as soon as you notice a problem. It’s a small price to pay for peace of mind. A new mount will keep you safe on the road.
Fun Fact or Stat: Regular maintenance can extend the life of your mirror mount by up to 3 years!
Summary
Installing a mirror mount on your gravel bike improves safety. It helps you see traffic behind you. Choose the right mirror and mount. Use the right tools. Follow the instructions carefully. Position the mirror correctly. Ensure a secure mount, especially for gravel roads. Adjust the mirror for optimal viewing. Maintain the mount to prevent rust and damage. Knowing how to install mirror mount on gravel bike for safety ensures a safer, more enjoyable ride. Regular checks and adjustments are vital. A well-installed and maintained mirror is an investment in your safety.
Conclusion
Adding a mirror to your gravel bike is smart. It lets you see what’s behind you. This helps you stay safe on the road. Follow the steps in this article. Choose the right parts and tools. Take your time and do it right. Now you know how to install mirror mount on gravel bike for safety. Enjoy your safer, more confident rides!
Frequently Asked Questions
Question No 1: What type of mirror is best for a gravel bike?
Answer: The best type of mirror for a gravel bike is one that is durable and provides a clear view. Look for mirrors made of shatterproof materials like acrylic or strong plastic. Consider a mirror with a wide field of view to see more of what’s behind you. Vibration-dampening features are also helpful for gravel roads. They reduce shaking and improve visibility. Make sure it’s easy to adjust while riding. The most important thing is that it helps with how to install mirror mount on gravel bike for safety.
Question No 2: Can I install a mirror on any type of handlebar?
Answer: Most handlebars can accommodate a mirror, but you need to choose the right mount. Some mirrors attach to the end of the handlebar. Others clamp onto the side. Check the diameter of your handlebar. Make sure the mount fits properly. If you have drop handlebars, consider a mirror that attaches to the brake lever. This keeps it out of the way. Always read the product details. This will help you understand how to install mirror mount on gravel bike for safety with your specific bars.
Question No 3: How do I prevent my mirror from vibrating on rough roads?
Answer: Vibration can be a big problem on gravel roads. To prevent it, choose a mirror with a vibration-dampening mount. These mounts use rubber or gel to absorb shocks. Tighten the mount securely. Use threadlocker on the screws. This will keep them from loosening. You can also try adding a rubber垫片 between the mount and the handlebar. This will provide extra cushioning. Regularly check the tightness of the screws. Remember, a stable mirror is crucial when learning how to install mirror mount on gravel bike for safety.
Question No 4: What tools do I need to install a mirror mount?
Answer: The tools you need will depend on the type of mount you choose. However, most installations require a few basic tools. You’ll need a screwdriver or Allen wrench to tighten the screws. A torque wrench is helpful for ensuring proper tightness. Pliers can be useful for adjusting the mount. A rag will protect your handlebars from scratches. Always read the instructions. This will tell you exactly what tools you need. Having the right tools makes understanding how to install mirror mount on gravel bike for safety much easier.
Question No 5: How do I adjust the mirror for the best view?
Answer: Adjusting the mirror is important for safety. Sit on your bike in your normal riding position. Look in the mirror. You should see a clear view of the road behind you. Adjust the angle until you can see traffic approaching from both sides. Minimize the amount you need to turn your head. The mirror should show you what’s coming without effort. Test the view while riding. Make small adjustments as needed. This fine-tuning is vital for how to install mirror mount on gravel bike for safety effectively.
Question No 6: What should I do if my mirror mount keeps coming loose?
Answer: If your mirror mount keeps coming loose, there are a few things you can try. First, tighten the screws securely. Use a torque wrench to ensure proper tightness. Apply threadlocker to the screws. This will help keep them from loosening. Check the mount for damage. If it’s cracked or broken, replace it. You might also try using a different type of mount. Some mounts are more secure than others. Always prioritize safety. A secure mount is key to how to install mirror mount on gravel bike for safety and overall ride security.


