
How to Dry Hose After Cleaning? Easy Guide!
Quick Summary
Want to dry your garden hose quickly after cleaning? Simply drain as much water as possible, then stretch the hose out straight in a sunny spot or hang it up to air dry. Using compressed air or a leaf blower can speed up the process. Make sure it’s completely dry before storing to prevent mold and extend its life!
Keeping your garden hose clean is super important for watering your plants without spreading dirt or algae. But after you’ve scrubbed it down, how do you make sure it dries properly? A wet hose can quickly become a breeding ground for mold and mildew, which can clog it up and even shorten its lifespan. Don’t worry, drying your hose doesn’t have to be a chore!
In this guide, I’ll walk you through a few easy methods to get your hose dry quickly and efficiently. We’ll cover everything from simple air drying to using tools you might already have in your garage. By the end, you’ll know exactly how to keep your hose in tip-top shape, so it’s always ready when you need it. Let’s get started!
Why Drying Your Hose Matters

You might be wondering, “Is it really that important to dry my hose?” The answer is a resounding yes! Here’s why:
- Prevents Mold and Mildew: Damp environments are perfect for mold and mildew growth. These can cause unpleasant odors and even trigger allergies.
- Extends Hose Lifespan: Constant moisture can degrade the material of your hose, leading to cracks and leaks.
- Prevents Clogging: Algae and mineral deposits can build up inside a wet hose, causing blockages that reduce water flow.
- Maintains Water Quality: A clean, dry hose ensures that the water you use on your plants and garden is free from contaminants.
Essential Tools for Drying Your Hose

Before we dive into the drying methods, let’s gather a few tools that can make the process easier and more effective.
- Hose Hanger or Reel: Helps to keep the hose organized and allows for better airflow.
- Spray Nozzle with Shut-Off: Useful for quickly draining excess water.
- Clean Rags or Towels: For wiping down the exterior of the hose.
- Compressed Air or Leaf Blower (Optional): Speeds up the drying process by blowing out water.
- Garden Hose Drainer (Optional): A specialized tool designed to efficiently remove water from hoses.
Step-by-Step Methods to Dry Your Hose
Now, let’s explore the different ways you can dry your hose after cleaning. I’ll break down each method into simple, easy-to-follow steps.
Method 1: The Air Drying Method
Air drying is the simplest and most common method. It requires no special tools and is perfect for those who prefer a hands-off approach.
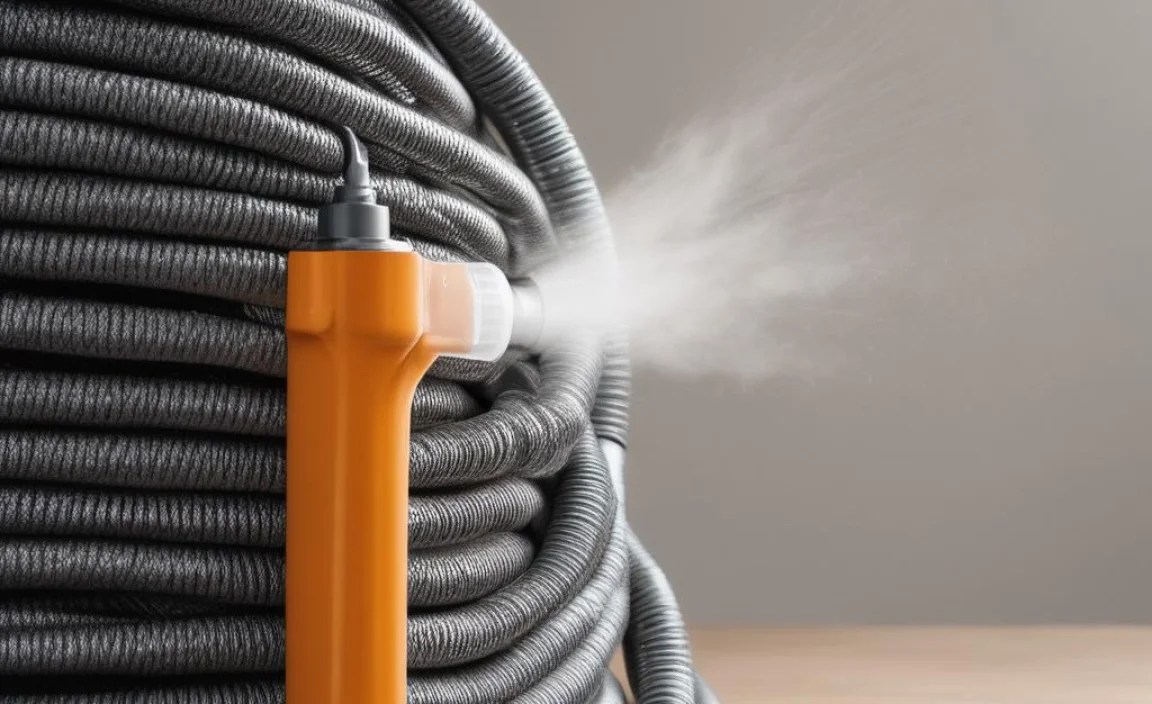
- Drain Excess Water: Start by attaching a spray nozzle to the end of your hose. Turn on the water and let it run through the hose to flush out any remaining dirt or debris. Then, turn off the water and use the nozzle to release any trapped water.
- Stretch Out the Hose: Find a clean, flat surface, preferably in a sunny spot. Stretch the hose out in a straight line to maximize exposure to air and sunlight. Avoid creating kinks or bends, as these can trap water.
- Elevate the Hose (Optional): If possible, elevate the hose slightly using bricks or wooden blocks. This allows air to circulate underneath, speeding up the drying process.
- Wait for It to Dry: Depending on the weather conditions, air drying can take anywhere from a few hours to a full day. Check the hose periodically to ensure it’s drying evenly.
- Wipe Down the Exterior: Once the inside of the hose is dry, use a clean rag or towel to wipe down the exterior. This removes any remaining dirt or water spots.
Method 2: The Hanging Method
Hanging your hose is another effective way to promote airflow and speed up drying. This method is particularly useful if you have limited ground space.
- Drain Excess Water: As with the air-drying method, start by draining as much water as possible using a spray nozzle.
- Hang the Hose: Use a hose hanger or reel to hang the hose vertically. Ensure that the hose is evenly distributed to prevent kinks or bends.
- Choose a Well-Ventilated Area: Hang the hose in a location with good airflow, such as a garage, shed, or covered patio. Avoid hanging it in direct sunlight for extended periods, as this can damage the hose material.
- Allow Time to Dry: Let the hose hang until it is completely dry, usually a few hours to a day.
- Inspect and Store: Before storing, inspect the hose for any signs of damage. Wipe down the exterior with a clean rag and store it in a cool, dry place.
Method 3: Using Compressed Air
For a quicker drying solution, you can use compressed air to force water out of the hose. This method is especially useful if you need to use your hose soon after cleaning.
- Prepare the Hose: Disconnect the hose from the water source and drain as much water as possible using a spray nozzle.
- Attach Air Compressor: Connect the nozzle of your air compressor to one end of the hose. Ensure that the connection is secure to prevent air leakage.
- Blow Air Through the Hose: Turn on the air compressor and gradually increase the air pressure. Blow air through the hose for several minutes, allowing the force of the air to push out any remaining water.
- Repeat as Needed: If necessary, repeat the process to ensure that all water is removed.
- Inspect and Store: Once the hose is dry, inspect it for any damage and store it properly.
Method 4: Using a Leaf Blower
If you don’t have an air compressor, a leaf blower can also be used to dry your hose. This method is similar to using compressed air but may require a bit more effort to create a secure seal.
- Drain Initial Water: Start by draining as much water as possible from the hose using a spray nozzle.
- Attach Leaf Blower: Attach the nozzle of your leaf blower to one end of the hose. You may need to use duct tape or a rubber adapter to create a secure seal.
- Blow Air Through the Hose: Turn on the leaf blower and blow air through the hose for several minutes. The force of the air will help to push out any remaining water.
- Adjust as Necessary: If the seal is not tight, adjust the duct tape or adapter to minimize air leakage.
- Final Inspection: Once the hose is dry, inspect it for any signs of wear and tear. Store it in a cool, dry place.
Method 5: Using a Garden Hose Drainer
A garden hose drainer is a specialized tool designed to quickly and efficiently remove water from hoses. It’s a great option if you frequently clean your hose and want a convenient solution.
- Connect the Drainer: Lay the hose flat on the ground. Attach the garden hose drainer to one end of the hose, following the manufacturer’s instructions.
- Roll Up the Hose: Begin rolling up the hose towards the drainer. As you roll, the drainer will force the water out of the hose.
- Complete the Roll: Continue rolling until you reach the end of the hose. By this point, most of the water should be removed.
- Final Check: Give the hose a quick check to ensure no water remains. If necessary, repeat the process.
- Store the Hose: Once you’re satisfied that the hose is dry, store it on a hose reel or in a storage container.
Comparing Drying Methods

To help you decide which drying method is best for you, here’s a comparison table:
| Method | Pros | Cons | Best For |
|---|---|---|---|
| Air Drying | Simple, no special tools needed, cost-effective | Slow, weather-dependent | Occasional cleaning, no time constraints |
| Hanging | Good airflow, saves ground space | Requires a hanger or reel, may take time | Limited ground space, regular cleaning |
| Compressed Air | Fast, effective | Requires an air compressor, may be noisy | Frequent cleaning, quick turnaround needed |
| Leaf Blower | Uses existing equipment, relatively fast | Requires a tight seal, may be less effective than compressed air | Those with a leaf blower, occasional quick drying |
| Garden Hose Drainer | Very efficient, easy to use | Requires purchasing a drainer, may not work on all hose types | Frequent hose cleaning, convenience |
Tips for Maintaining Your Hose
Drying your hose is just one part of keeping it in good condition. Here are some additional tips to extend the life of your hose:
- Store Properly: Always store your hose in a cool, dry place away from direct sunlight. Use a hose reel or hanger to prevent kinks and tangles.
- Avoid Extreme Temperatures: Don’t leave your hose exposed to freezing temperatures or extreme heat, as this can damage the material.
- Handle with Care: Avoid dragging the hose over rough surfaces or sharp objects, as this can cause abrasions and leaks.
- Inspect Regularly: Periodically inspect your hose for any signs of damage, such as cracks, leaks, or bulges. Repair or replace the hose as needed.
- Use a Hose Protector: Use a hose protector or guard to prevent damage near faucets and spigots.
- Winterize Your Hose: Before winter, disconnect your hose, drain it completely, and store it indoors to prevent freezing and cracking.
Troubleshooting Common Issues
Even with the best care, you might encounter some issues with your hose. Here are a few common problems and how to address them:
- Kinks and Tangling: Prevent kinks by using a hose reel or hanger. If kinks do occur, straighten them out as soon as possible to avoid permanent damage.
- Leaks: Repair small leaks with a hose repair kit. For larger leaks, you may need to replace the hose.
- Reduced Water Flow: Check for clogs or obstructions in the hose. Flush out any debris and ensure that the hose is not kinked or twisted.
- Mold and Mildew: Clean the hose regularly with a mixture of water and bleach to prevent mold and mildew growth. Ensure the hose is completely dry before storing.
FAQ: Drying Your Garden Hose
1. How long does it take for a garden hose to dry?
The drying time depends on the method and weather conditions. Air drying and hanging can take a few hours to a full day. Using compressed air or a leaf blower can dry the hose in minutes.
2. Can I use a dishwasher to clean my garden hose?
No, you should not use a dishwasher to clean your garden hose. The high temperatures and harsh detergents can damage the hose material.
3. Is it okay to leave my garden hose in the sun?
While some sunlight can help with drying, prolonged exposure to direct sunlight can degrade the hose material over time. It’s best to store your hose in a shaded area.
4. How often should I clean my garden hose?
You should clean your garden hose at least once a season, or more frequently if you notice signs of dirt, algae, or mold.
5. What’s the best way to store a garden hose in the winter?
Before winter, disconnect the hose, drain it completely, and store it indoors in a cool, dry place. This prevents freezing and cracking.
6. Can I use vinegar to clean my garden hose?
Yes, vinegar can be used to clean your garden hose. Mix equal parts water and vinegar, run the solution through the hose, and then rinse thoroughly with clean water.
7. What are the signs that my garden hose needs to be replaced?
Signs that your garden hose needs to be replaced include frequent leaks, cracks, bulges, reduced water flow, and a stiff or brittle texture.
Conclusion
Drying your garden hose after cleaning is a simple yet crucial step in maintaining its condition and prolonging its lifespan. Whether you choose the hands-off approach of air drying or opt for the speed of compressed air, the key is to ensure that all moisture is removed before storing. By following the methods and tips outlined in this guide, you can keep your hose in top shape, ready for all your gardening and watering needs. Remember, a little care goes a long way in preventing mold, clogs, and damage, ultimately saving you time and money in the long run. Happy gardening!


