
How to Attach Hose to Fork Valve: Easy Guide
Quick Summary:
Attaching a hose to a fork valve is straightforward. First, make sure you have the correct adapter for your valve type (Schrader or Presta). Thread the adapter onto the valve, then firmly press the pump hose onto the adapter. Lock the lever on the pump head to create an airtight seal, and you’re ready to inflate. Always double-check the connection to avoid air leaks.
Ever struggled with a bike pump that just won’t connect properly to your fork valve? It’s a common headache for cyclists of all levels. Whether you’re topping off your suspension before a ride or making adjustments on the trail, a secure connection is crucial. A loose or improperly attached hose can lead to wasted effort, inaccurate pressure readings, and even damage to your valve.
But don’t worry! This guide will walk you through the simple steps to attach your hose to a fork valve quickly and correctly. We’ll cover everything from identifying your valve type to choosing the right adapter and ensuring a leak-proof seal. Get ready to say goodbye to frustrating pump sessions and hello to perfectly dialed-in suspension!
Understanding Fork Valves
Before you start pumping, it’s important to understand the two main types of valves you’ll encounter on bike forks: Schrader and Presta. Knowing the difference is key to a secure and effective connection.
Schrader Valves
Schrader valves are the same type you find on car tires. They’re wider and sturdier than Presta valves, and they have a spring-loaded pin in the center. To inflate a Schrader valve, you simply press down on this pin. They are very common on mountain bike forks and older bikes.
- Pros: Durable, easy to use, common.
- Cons: Can be less precise for fine-tuning pressure, bulkier.
Presta Valves
Presta valves are narrower and longer than Schrader valves. They have a valve core that you need to unscrew before inflating. Presta valves are often found on higher-end bikes and road bikes because they can handle higher pressures. They are becoming more common on newer mountain bike forks as well.
- Pros: More precise pressure control, lighter, better for high-pressure inflation.
- Cons: More fragile, require unscrewing before inflation, can be confusing for beginners.
Identifying Your Valve Type
Take a close look at your fork valve. Is it wide and similar to a car tire valve? Then it’s a Schrader. Is it thin and does it have a small nut at the tip? That’s a Presta. Knowing this will help you choose the right adapter and pump head.
Tools and Equipment You’ll Need

Having the right tools makes the job much easier. Here’s what you’ll need to attach a hose to a fork valve:
- Bike Pump: A pump specifically designed for suspension forks is ideal. These pumps typically have a gauge for accurate pressure readings. A standard tire pump will not work.
- Valve Adapter (if needed): Some pumps have dual heads that work with both Schrader and Presta valves. If your pump head doesn’t match your valve type, you’ll need an adapter.
- Clean Rag: To wipe away any dirt or debris from the valve.
- Valve Core Tool (optional): Useful for tightening or replacing Presta valve cores.
Step-by-Step Guide: Attaching the Hose

Now, let’s get to the actual process. Follow these steps for a secure and leak-free connection.
Step 1: Prepare the Valve
Before you attach anything, make sure the valve is clean. Use a clean rag to wipe away any dirt or grime. For Presta valves, unscrew the valve core by turning the small nut at the tip counter-clockwise. Press the valve core briefly to release any remaining air.
Step 2: Choose the Correct Adapter (If Needed)
If your pump head doesn’t fit your valve type, you’ll need to use an adapter. Most adapters simply thread onto the valve. Make sure the adapter is securely tightened but not overtightened.
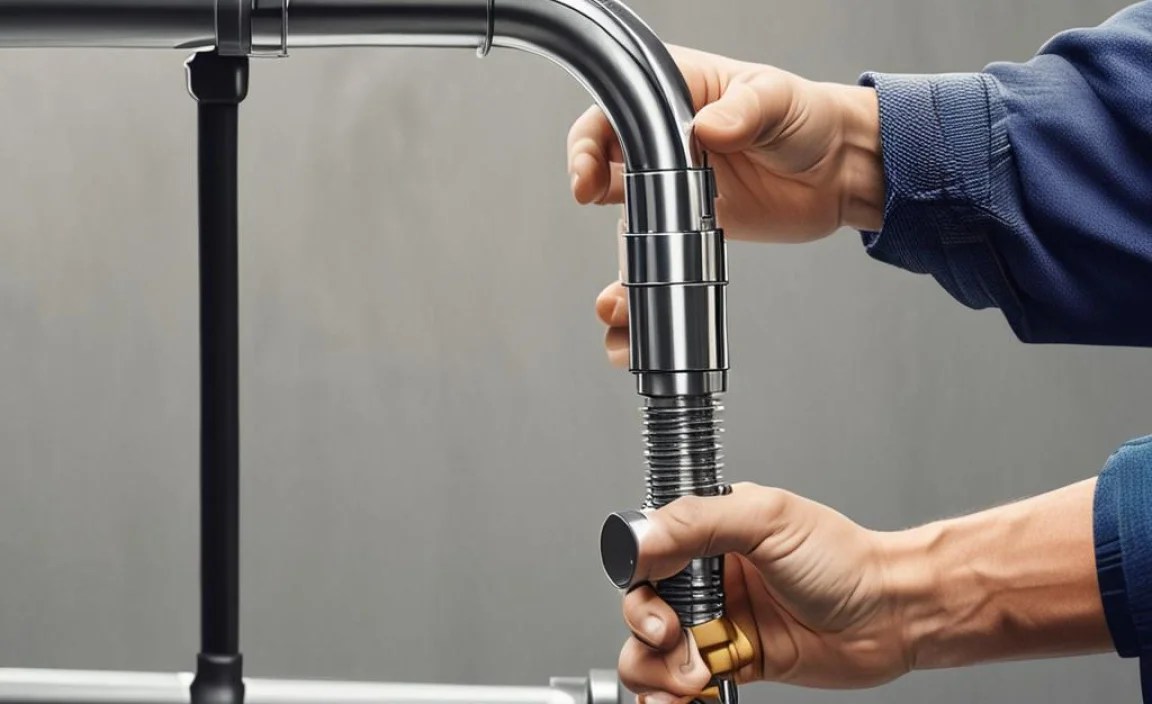
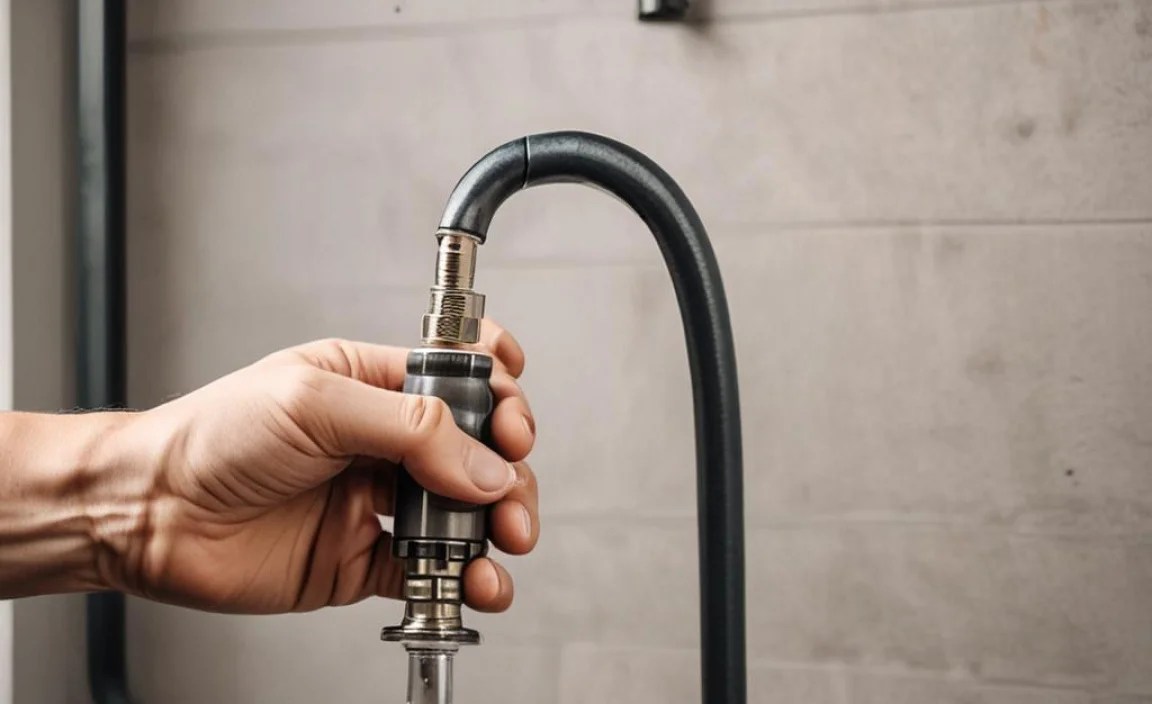
Step 3: Attach the Pump Hose
Now, carefully align the pump head with the valve (or adapter). Press the pump head firmly onto the valve, ensuring a snug fit. You should feel it click or snap into place. For pumps with a locking lever, make sure the lever is in the open position before attaching.
Step 4: Secure the Connection
Once the pump head is in place, engage the locking lever (if your pump has one). This lever clamps the pump head onto the valve, creating an airtight seal. Make sure the lever is fully engaged and feels secure. If you don’t have a locking lever, maintain firm pressure on the pump head to keep it in place.
Step 5: Check for Leaks
Before you start pumping, double-check for any air leaks. Listen closely for a hissing sound around the connection. If you hear a leak, readjust the pump head and locking lever until the seal is airtight.
Troubleshooting Common Issues
Even with careful preparation, you might encounter some problems. Here’s how to troubleshoot common issues:
Air Leaks
If you hear air leaking, try these solutions:
- Readjust the Pump Head: Make sure the pump head is fully seated on the valve.
- Check the Locking Lever: Ensure the locking lever is fully engaged and tight.
- Inspect the Valve: Look for any damage or debris on the valve.
- Replace the Adapter: If you’re using an adapter, it might be worn or damaged.
Pump Won’t Attach
If you can’t get the pump head to attach, consider these possibilities:
- Wrong Valve Type: Make sure you’re using the correct pump head or adapter for your valve type.
- Debris in the Valve: Clean the valve with a rag to remove any dirt or grime.
- Damaged Valve: The valve might be bent or damaged. Consider replacing it.
Inaccurate Pressure Readings
If your pump’s pressure readings seem off, check these factors:
- Gauge Calibration: Some pumps have adjustable gauges. Check the calibration instructions.
- Air Leaks: A leak can cause inaccurate readings. Fix any leaks before pumping.
- Pump Condition: An old or damaged pump might not provide accurate readings.
Tips for Maintaining Your Fork Valve and Pump

Regular maintenance can extend the life of your fork valve and pump. Here are some tips:
- Keep Valves Clean: Wipe valves regularly to prevent dirt buildup.
- Store Pump Properly: Store your pump in a clean, dry place.
- Inspect Hoses and Seals: Check for cracks or wear and replace as needed.
- Lubricate Moving Parts: Use a silicone-based lubricant on pump parts to keep them moving smoothly.
Choosing the Right Suspension Pump
Investing in a quality suspension pump can make a big difference in how easy and accurate it is to adjust your fork pressure. Look for these features:
- High-Resolution Gauge: A gauge that displays small pressure increments (e.g., 2 PSI) is crucial for fine-tuning suspension.
- Bleed Valve: A bleed valve allows you to release small amounts of air to achieve the exact desired pressure.
- Dual-Stage Pumping: Some pumps offer a dual-stage system for faster inflation at lower pressures and more precise inflation at higher pressures.
- Rotating Hose: A rotating hose makes it easier to access the valve at different angles.
Here’s a comparison table of some popular suspension pumps:
| Pump Model | Gauge Resolution | Bleed Valve | Dual-Stage | Rotating Hose |
|---|---|---|---|---|
| RockShox High Pressure Fork/Shock Pump | 2 PSI | Yes | No | Yes |
| Fox Racing Shox Digital Suspension Pump | 0.5 PSI | Yes | No | Yes |
| Topeak PocketShock DXG | 5 PSI | Yes | No | No |
Advanced Techniques for Fine-Tuning Suspension
Once you’re comfortable attaching the hose and inflating your fork, you can start experimenting with more advanced techniques to fine-tune your suspension. This includes:
- Using Volume Spacers: Volume spacers (also called tokens) change the progressiveness of your fork’s air spring. Adding more spacers makes the fork feel firmer at the end of its travel, preventing bottom-out.
- Adjusting Rebound Damping: Rebound damping controls how quickly the fork returns to its extended position after being compressed. Too little rebound can make the fork feel bouncy, while too much can make it feel harsh.
- Setting Sag: Sag is the amount the fork compresses under your weight when you’re sitting on the bike. Setting the correct sag is crucial for optimal suspension performance.
Safety Precautions
Working with pressurized systems requires caution. Keep these safety tips in mind:
- Wear Eye Protection: Wear safety glasses to protect your eyes from flying debris.
- Don’t Exceed Max Pressure: Never inflate your fork beyond the manufacturer’s recommended maximum pressure.
- Inspect Equipment Regularly: Check your pump and valve for damage before each use.
- Release Pressure Slowly: When deflating your fork, release the pressure slowly to avoid damaging the valve.
The Science Behind Suspension
Understanding the basics of suspension can help you make more informed adjustments. Here’s a quick overview:
- Air Spring: The air spring is what supports your weight and absorbs bumps. It’s essentially a sealed chamber of compressed air.
- Damping: Damping controls the speed at which the fork compresses and rebounds. It uses oil flowing through small orifices to create resistance.
- Progressiveness: Progressiveness refers to how the spring rate changes as the fork compresses. A more progressive fork becomes firmer as it moves through its travel.
Here’s a table summarizing the key suspension components and their functions:
| Component | Function |
|---|---|
| Air Spring | Supports weight and absorbs bumps |
| Damping | Controls compression and rebound speed |
| Volume Spacers | Adjust progressiveness of the air spring |
Frequently Asked Questions
What’s the difference between a shock pump and a regular tire pump?
Shock pumps are designed for the high pressures (100-300 PSI) used in suspension forks and shocks. They also have a much smaller volume per stroke, allowing for precise pressure adjustments. Tire pumps deliver a large volume of air at lower pressures (30-100 PSI) and are not suitable for suspension systems.
How often should I check my fork pressure?
It’s a good idea to check your fork pressure before each ride, especially if you’re riding frequently or aggressively. Small changes in pressure can significantly affect suspension performance.
Can I use a CO2 inflator to inflate my fork?
No, CO2 inflators are not suitable for inflating suspension forks. CO2 can damage the seals and internal components of the fork.
What does “sag” mean, and why is it important?
Sag is the amount the fork compresses under your weight when you’re sitting on the bike. Setting the correct sag ensures that the fork has enough travel available to absorb bumps effectively. It’s a crucial step in dialing in your suspension.
How do I know if I need to add volume spacers to my fork?
If you’re frequently bottoming out your fork, even with the correct air pressure, you may need to add volume spacers. Volume spacers make the fork more progressive, preventing bottom-out.
What if my pump gauge is broken?
A broken pump gauge will give you inaccurate pressure readings, which can lead to poor suspension performance. Replace the pump or gauge as soon as possible.
Can I use any type of lubricant on my fork valve?
No, only use silicone-based lubricants on your fork valve. Other types of lubricants can damage the seals and internal components.
Conclusion
Attaching a hose to a fork valve might seem simple, but mastering the technique ensures optimal suspension performance and a smoother ride. By understanding valve types, using the right tools, and following these step-by-step instructions, you can confidently adjust your fork pressure and fine-tune your suspension to match your riding style and terrain. Remember to regularly maintain your equipment and prioritize safety. With a little practice, you’ll be able to dial in your suspension like a pro and enjoy every ride to the fullest. Happy trails!


