
Easy How to Replace Zefal Floor Pump Hose
Replacing a worn or damaged hose on your Zefal floor pump is easy and can save you money. This guide walks you through each step, from removing the old hose to securely attaching the new one. You’ll need a few basic tools and about 15-20 minutes. A new hose will get your pump working like new!
Is your Zefal floor pump not inflating tires like it used to? A cracked or leaky hose is often the culprit. Don’t worry; replacing it is a simple fix that anyone can do. A new hose will restore your pump’s performance, saving you from buying a whole new pump.
This guide provides clear, step-by-step instructions to replace your Zefal floor pump hose quickly and easily. We’ll cover everything from gathering the right tools to ensuring a tight, leak-free connection. Get ready to breathe new life into your trusty Zefal pump!
Tools and Materials You’ll Need

Before you start, gather these tools and materials. Having everything ready will make the process smooth and efficient.
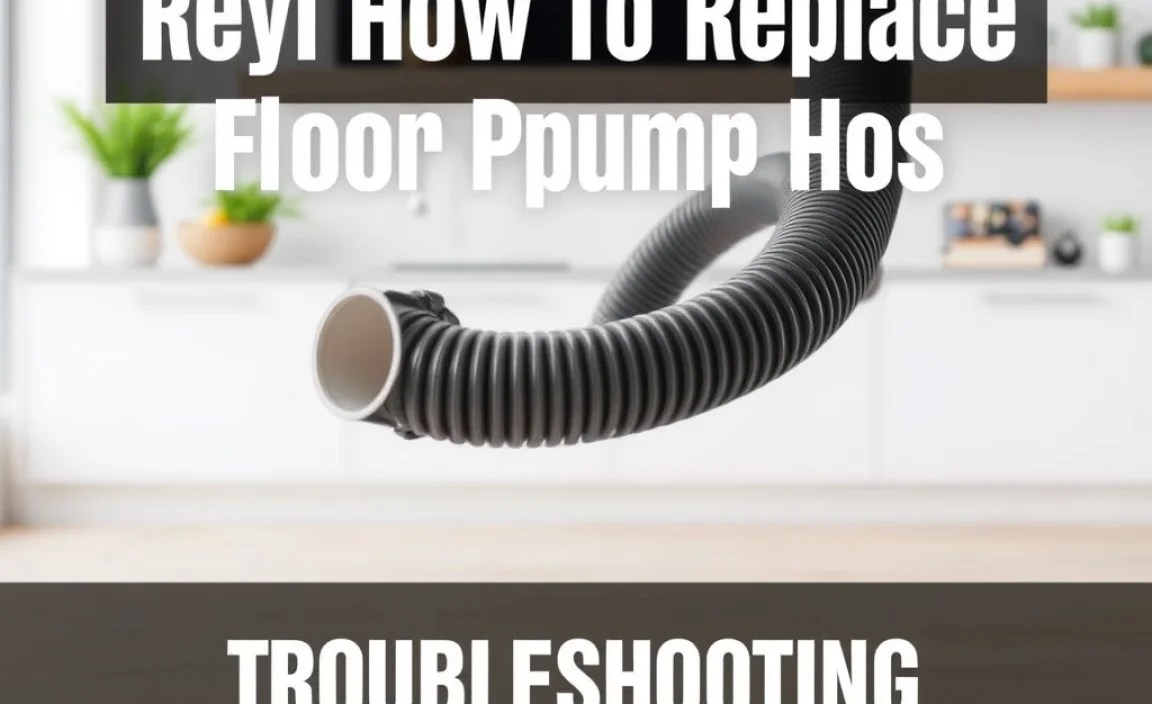
- New Zefal Floor Pump Hose: Make sure it’s compatible with your specific Zefal pump model.
- Screwdriver Set: Both Phillips head and flathead screwdrivers may be needed.
- Pliers: For gripping and loosening clamps.
- Hose Clamps: New clamps to secure the hose (often included with the new hose).
- Utility Knife or Scissors: To trim the hose if necessary.
- Warm Water and Soap: For cleaning the pump connections.
- Towel or Rag: To wipe up any spills and keep your workspace clean.
Step-by-Step Guide to Replacing Your Zefal Floor Pump Hose

Follow these steps to replace your Zefal floor pump hose. Take your time and double-check each connection to ensure a secure fit.
Step 1: Disconnect the Old Hose
First, you need to disconnect the old hose from the pump body and the pump head. This usually involves loosening clamps or unscrewing fittings.
- Locate the Hose Connections: Find where the hose connects to the pump body (usually near the base) and to the pump head (the part that attaches to the tire valve).
- Loosen the Clamps: Use a screwdriver or pliers to loosen the clamps securing the hose at both ends. Some models might use screw clamps, while others use pinch clamps.
- Remove the Hose: Gently pull the hose off the connections. If it’s stuck, try twisting it slightly while pulling. Be careful not to damage the pump body or head.
Step 2: Prepare the New Hose
Before installing the new hose, inspect it for any damage and prepare it for installation.
- Inspect the New Hose: Check the new hose for any cuts, kinks, or other damage. Make sure it’s the correct length and diameter for your pump.
- Trim if Necessary: If the new hose is too long, use a utility knife or scissors to trim it to the correct length. It’s better to cut it a bit longer than needed, as you can always trim more later.
- Clean the Connections: Use warm water and soap to clean the connection points on the pump body and pump head. This will help ensure a good seal.
Step 3: Attach the New Hose to the Pump Body
Now, attach one end of the new hose to the pump body. Make sure it’s securely fastened and properly aligned.
- Slide on the Clamp: Slide a new hose clamp onto the end of the hose that will connect to the pump body.
- Connect the Hose: Push the hose onto the connection point on the pump body. Make sure it’s fully seated.
- Secure the Clamp: Position the clamp over the connection and tighten it with a screwdriver or pliers. Make sure the clamp is snug but not so tight that it damages the hose.
Step 4: Attach the New Hose to the Pump Head
Next, attach the other end of the new hose to the pump head. This is similar to attaching it to the pump body.
- Slide on the Clamp: Slide a new hose clamp onto the end of the hose that will connect to the pump head.
- Connect the Hose: Push the hose onto the connection point on the pump head. Ensure it’s fully seated.
- Secure the Clamp: Position the clamp over the connection and tighten it with a screwdriver or pliers. Make sure the clamp is snug but not too tight.
Step 5: Test the Connection
After attaching both ends of the hose, test the connection to ensure there are no leaks.
- Inspect the Connections: Visually inspect both connections to make sure the hose is properly seated and the clamps are secure.
- Test the Pump: Attach the pump head to a tire valve and pump up the tire. Listen for any air leaks around the hose connections.
- Tighten if Necessary: If you hear or feel any air leaks, tighten the clamps slightly. Be careful not to overtighten them, as this could damage the hose.
Troubleshooting Common Issues
Sometimes, you might encounter issues while replacing the hose. Here are some common problems and how to solve them.
| Issue | Possible Cause | Solution |
|---|---|---|
| Air leaking from connections | Loose clamps, damaged hose, or dirty connections | Tighten clamps, replace hose if damaged, clean connections |
| Hose is difficult to attach | Incorrect hose size, stiff hose | Ensure correct hose size, warm the hose in warm water to make it more pliable |
| Clamps are too tight or too loose | Incorrect clamp size, overtightening or undertightening | Use correct clamp size, adjust tightness until snug but not damaging the hose |
| Pump is not building pressure | Hose not fully connected, damaged pump head | Ensure hose is fully seated and clamps are tight, inspect and replace pump head if necessary |
Tips for Maintaining Your Zefal Floor Pump

Regular maintenance can extend the life of your Zefal floor pump and keep it working efficiently. Here are some tips:
- Regularly Inspect the Hose: Check the hose for cracks, kinks, and wear. Replace it as soon as you notice any damage.
- Clean the Pump Head: Clean the pump head regularly to remove dirt and debris. This will help ensure a good seal with the tire valve.
- Lubricate Moving Parts: Occasionally lubricate the moving parts of the pump, such as the piston and seals, with a light oil or grease.
- Store the Pump Properly: Store the pump in a dry place away from direct sunlight. This will help prevent the hose and other parts from deteriorating.
Choosing the Right Replacement Hose
Selecting the correct replacement hose is crucial for ensuring proper pump function and longevity. Here’s what to consider:
- Compatibility: Ensure the hose is specifically designed for your Zefal floor pump model. Check the manufacturer’s specifications or consult your pump’s manual.
- Material: Look for hoses made from durable materials like reinforced rubber or high-quality polymers. These materials resist cracking, kinking, and wear.
- Length: Choose a hose length that matches the original hose. Too short, and it might be difficult to use; too long, and it can get in the way.
- Diameter: The hose diameter must match the connection points on your pump body and pump head. An incorrect diameter can lead to leaks or difficulty in installation.
- Flexibility: A flexible hose is easier to handle and less likely to kink. Test the hose’s flexibility before purchasing if possible.
- Reviews and Ratings: Check online reviews and ratings to see what other users say about the hose’s performance and durability.
Understanding Hose Clamps
Hose clamps are essential for creating a secure, leak-free connection between the hose and the pump body or pump head. Here’s what you need to know about different types of hose clamps and how to use them effectively:
Types of Hose Clamps
- Screw Clamps (Worm Gear Clamps): These are the most common type of hose clamp. They consist of a metal band with a screw that tightens or loosens the band. They provide a strong, adjustable grip.
- Pinch Clamps (O-Clips): These are single-use clamps that are crimped onto the hose with a special tool. They provide a very secure, tamper-proof connection.
- Spring Clamps: These clamps use spring tension to hold the hose in place. They are easy to install and remove but may not provide as strong a grip as screw clamps.
How to Choose the Right Hose Clamp
- Size: Select a clamp size that matches the outer diameter of the hose when it’s installed on the connection point. The clamp should fit snugly but not be overly tight.
- Material: Choose clamps made from corrosion-resistant materials like stainless steel, especially if you live in a humid or coastal area.
- Type: For most Zefal floor pump applications, screw clamps are the best choice due to their adjustability and ease of use.
Tips for Using Hose Clamps
- Positioning: Position the clamp so that it’s centered over the connection point. This ensures even pressure and a secure seal.
- Tightening: Tighten the clamp until it’s snug but not so tight that it damages the hose. Overtightening can cause the hose to crack or split.
- Inspection: Regularly inspect the clamps for signs of corrosion or damage. Replace them if necessary.
- Re-tightening: After the initial installation, re-tighten the clamps after a few days. This will compensate for any settling or stretching of the hose.
Alternatives to Replacing the Entire Hose
Before deciding to replace the entire hose, consider these alternatives, which might save you time and money:
- Hose Repair Kit: If the damage is localized, a hose repair kit might be sufficient. These kits typically include patches, adhesive, and clamps to repair small cracks or holes.
- Hose Splice: If the hose is cut or broken in the middle, you can use a hose splice to reconnect the two ends. This involves inserting a connector into both ends of the hose and securing it with clamps.
- Professional Repair: If you’re not comfortable doing the repair yourself, take the pump to a local bike shop. They can assess the damage and perform the necessary repairs.
However, keep in mind that these alternatives are typically only suitable for minor damage. If the hose is severely cracked, kinked, or worn, replacing it is the best option.
FAQ: Replacing Your Zefal Floor Pump Hose
Here are some frequently asked questions about replacing your Zefal floor pump hose.
- Q: How often should I replace my floor pump hose?
- A: You should replace your floor pump hose when you notice cracks, leaks, or reduced pumping efficiency. Regular inspection helps identify issues early.
- Q: Can I use any hose for my Zefal floor pump?
- A: No, it’s best to use a hose specifically designed for your Zefal pump model to ensure proper fit and performance. Universal hoses might not work correctly.
- Q: What tools do I need to replace the hose?
- A: You’ll typically need a screwdriver, pliers, a utility knife or scissors, and new hose clamps. Warm water and soap are also helpful for cleaning.
- Q: How do I know if my hose is leaking?
- A: You might hear a hissing sound, feel air escaping, or notice that your tire isn’t inflating properly. Inspect the hose for visible cracks or damage.
- Q: Can I repair a damaged hose instead of replacing it?
- A: For minor damage, you can use a hose repair kit. However, for significant cracks or wear, replacing the hose is the best solution.
- Q: Where can I buy a replacement hose for my Zefal pump?
- A: You can purchase replacement hoses from online retailers, local bike shops, or directly from the Zefal website.
- Q: How do I prevent my pump hose from getting damaged?
- A: Store your pump in a dry place, avoid kinking the hose, and regularly inspect it for wear. Proper storage and maintenance can extend its lifespan.
Conclusion
Replacing your Zefal floor pump hose is a straightforward task that can significantly improve your pump’s performance. By following these step-by-step instructions, you can easily replace the hose yourself, saving time and money. Regular maintenance and prompt replacement of damaged parts will keep your Zefal floor pump working efficiently for years to come. Now get back to pumping those tires and enjoying your ride!


