
Hose Keeps Detaching During Inflation? Easy Fix!
Quick Summary: Is your bike pump hose popping off when you’re trying to inflate your tires? Don’t worry, it’s a common problem! Usually, it’s because the chuck (the part that connects to your tire valve) isn’t fitting properly, is worn out, or the valve itself is damaged. Check your chuck for damage, make sure it’s compatible with your valve type (Presta or Schrader), and ensure a firm, straight connection. Sometimes, a new chuck or valve is all you need to get back to easy inflation.
Tire inflation should be a breeze, not a wrestling match! It’s super frustrating when your bike pump hose keeps popping off the valve, leaving you with deflated tires and a whole lot of wasted effort. You pump, it slips, you pump again…sound familiar? This annoying issue is usually down to a few simple things that are easy to check and fix.
In this guide, we’ll walk you through the most common reasons why your pump hose won’t stay put. We’ll cover everything from worn-out parts to incorrect connections, and give you step-by-step solutions to get your tires inflated quickly and easily. Get ready to say goodbye to frustrating pump sessions!
Understanding the Culprits: Why Your Pump Hose Detaches

Before we dive into fixes, let’s look at the usual suspects that cause your pump hose to detach during inflation. Knowing the cause helps you pinpoint the right solution.
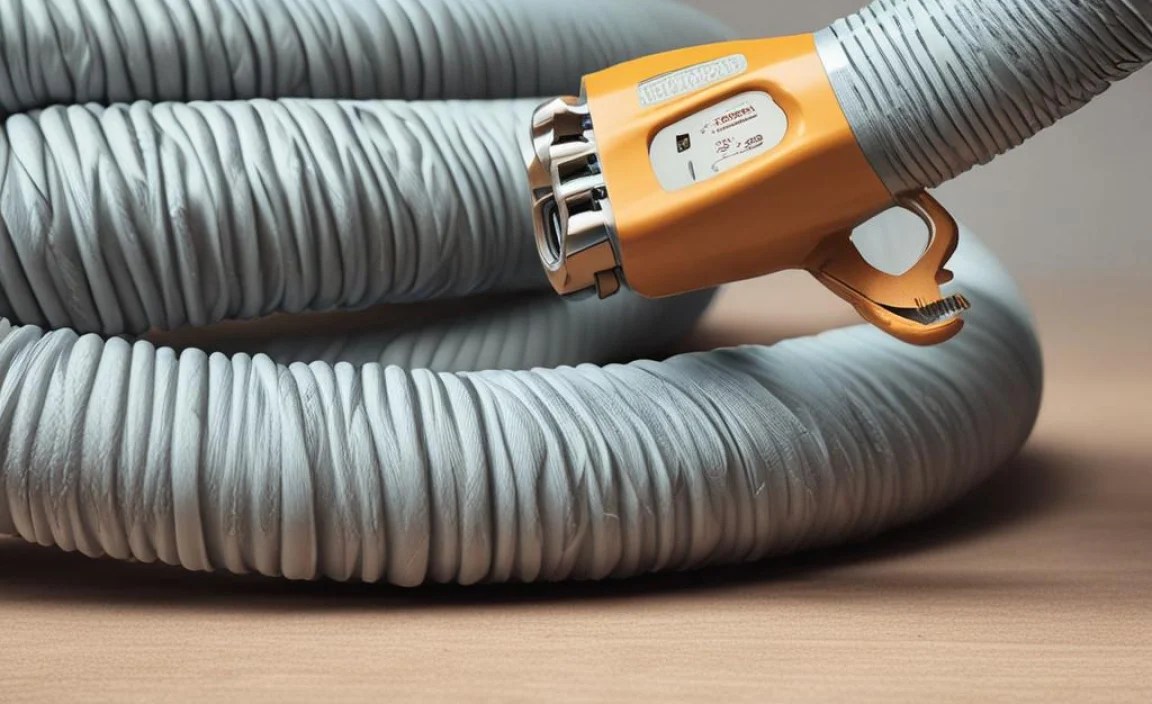
1. Worn-Out or Damaged Chuck
The chuck is the business end of your pump – it’s the part that grips onto the tire valve. Over time, the rubber or plastic parts inside the chuck can wear down, making it harder to get a tight seal.
- Rubber O-rings: These small rings create an airtight seal. If they’re cracked, dry, or missing, air will leak, and the chuck might pop off.
- Internal Clamps: Some chucks use internal clamps or levers to grip the valve. These can loosen or break, reducing their holding power.
- Cracks or Damage: A cracked or broken chuck won’t be able to maintain a secure connection.
2. Incorrect Valve Compatibility
Bikes typically use two types of valves: Presta and Schrader. Using the wrong chuck for the valve type will lead to a poor fit and detachment.
- Presta Valves: These are narrow valves with a small locking nut at the tip. They are commonly found on road bikes and high-performance bikes.
- Schrader Valves: These are wider valves, similar to those found on car tires. They are common on mountain bikes, hybrid bikes, and kids’ bikes.
Many pumps have a dual-head chuck that can be switched between Presta and Schrader valves. Make sure you’re using the correct setting!
3. Damaged or Dirty Valve
The tire valve itself can be the problem. A bent, corroded, or dirty valve can prevent the chuck from making a good connection.
- Bent Valve Stem: A bent valve stem can make it difficult for the chuck to align properly.
- Corrosion: Corrosion can build up on the valve, preventing a tight seal.
- Debris: Dirt and debris can clog the valve, interfering with the connection.
4. Improper Connection Technique
Sometimes, the issue isn’t the equipment but how you’re using it. A rushed or angled connection can lead to the chuck popping off.
- Angle of Attack: Make sure you’re pressing the chuck straight onto the valve, not at an angle.
- Insufficient Pressure: Apply firm, even pressure when attaching the chuck.
- Quick Release Levers: If your pump has a quick-release lever, make sure it’s fully engaged to lock the chuck in place.
5. High Tire Pressure
As you pump air into the tire, the pressure increases. If the connection isn’t secure enough, the increasing pressure can force the chuck off the valve. This is especially true for high-pressure road tires.
6. Faulty Pump Hose or Connection
Although less common, the pump hose itself or its connection to the pump body or chuck could be the issue.
- Hose Damage: Cracks or kinks in the hose can reduce pressure and affect the chuck’s performance.
- Loose Connection: If the hose isn’t securely attached to the pump or chuck, air can leak, and the chuck may detach.
Step-by-Step Solutions: Fixing a Detaching Pump Hose

Now that we’ve covered the potential causes, let’s get to the solutions. Follow these steps to diagnose and fix the problem.
Step 1: Inspect the Chuck
Start by carefully examining the chuck for any signs of wear or damage.
- Check the O-rings: Look for cracks, dryness, or missing O-rings. Replace them if necessary. You can usually find replacement O-rings at a local bike shop or online.
- Test the Clamps: If your chuck has internal clamps or a lever, make sure they’re working properly. They should grip the valve firmly.
- Look for Cracks: Inspect the chuck body for any cracks or breaks. If you find any, it’s time for a new chuck.
Step 2: Verify Valve Compatibility
Ensure that you’re using the correct chuck setting for your valve type. Most dual-head pumps have a switch or a way to reverse the internal parts for Presta or Schrader valves.
- Identify Your Valve Type: Determine whether you have Presta or Schrader valves.
- Adjust the Chuck: If you have a dual-head chuck, switch it to the correct setting for your valve type. Some chucks require you to remove and flip the internal rubber piece.
- Test the Fit: Try attaching the chuck to the valve. It should fit snugly and securely.
Step 3: Clean and Inspect the Valve
A dirty or damaged valve can prevent a good connection. Clean and inspect the valve carefully.
- Clean the Valve: Use a clean cloth to wipe away any dirt or debris from the valve stem. For stubborn dirt, you can use a mild soap and water solution.
- Inspect for Damage: Check the valve stem for bends, corrosion, or other damage. If the valve is bent or severely corroded, you may need to replace the inner tube or tire.
- Tighten the Valve Core (Presta): For Presta valves, make sure the valve core is tightened. You can use a valve core tool to tighten it gently.
Step 4: Perfect Your Connection Technique
Even with a good chuck and valve, a poor connection technique can cause problems. Follow these tips for a secure connection:
- Align the Chuck: Make sure the chuck is aligned straight with the valve stem. Avoid connecting at an angle.
- Apply Firm Pressure: Press the chuck firmly onto the valve, ensuring it’s fully seated.
- Engage the Lever (if applicable): If your pump has a quick-release lever, engage it fully to lock the chuck in place.
- Hold Steady: Keep the chuck steady while you’re pumping. Avoid wiggling or twisting it.
Step 5: Check Tire Pressure
Avoid over-inflating your tires, as this can put extra stress on the connection and cause the chuck to pop off. Check the recommended tire pressure on the tire sidewall and use a pump with a gauge to monitor the pressure.
Step 6: Inspect the Pump Hose and Connections
Check the pump hose for damage and ensure it’s securely connected to the pump body and chuck.
- Inspect the Hose: Look for cracks, kinks, or other damage to the hose. Replace the hose if necessary.
- Tighten Connections: Make sure the hose is securely attached to the pump body and chuck. Tighten any loose connections.
Step 7: Consider a New Chuck or Pump
If you’ve tried all of the above steps and your pump hose is still detaching, it may be time for a new chuck or pump. A high-quality chuck with a secure locking mechanism can make a big difference.
Troubleshooting Table: Quick Fixes for Common Issues
| Problem | Possible Cause | Solution |
|---|---|---|
| Chuck keeps popping off | Worn-out O-rings | Replace the O-rings |
| Chuck doesn’t fit the valve | Incorrect valve compatibility | Switch to the correct chuck setting (Presta or Schrader) |
| Valve is dirty or corroded | Dirty valve | Clean the valve with a cloth and mild soap |
| Chuck is hard to attach | Improper connection technique | Align the chuck straight, apply firm pressure, and engage the lever |
| Hose is cracked or damaged | Damaged hose | Replace the pump hose |
| Tire deflates slightly when removing chuck | Normal air loss | Quickly detach chuck after inflating |
| Pump is old and inefficient | Worn pump internals | Consider replacing the entire pump |
Essential Tools and Accessories

Having the right tools and accessories can make tire inflation much easier. Here are a few essentials:
- Bike Pump: A reliable floor pump with a gauge is a must-have for any cyclist. Look for one with a dual-head chuck and a sturdy base. A mini pump is also useful to carry with you on rides.
- Valve Core Tool: This small tool is used to tighten or remove valve cores, especially on Presta valves.
- Tire Pressure Gauge: A separate tire pressure gauge can provide more accurate readings than the gauge on your pump.
- Replacement O-rings: Keep a set of replacement O-rings on hand in case you need to replace them in your chuck.
- Patch Kit: While not directly related to inflation, a patch kit is essential for fixing punctures and keeping your tires inflated.
Choosing the Right Bike Pump

With so many bike pumps on the market, it can be tough to choose the right one. Here are a few factors to consider:
- Pump Type: Floor pumps are best for home use, while mini pumps are more portable for on-the-go inflation. CO2 inflators are another option for quick inflation on the road.
- Valve Compatibility: Make sure the pump is compatible with both Presta and Schrader valves.
- Gauge Accuracy: A pump with an accurate gauge will help you inflate your tires to the correct pressure.
- Build Quality: Look for a pump with a sturdy base, a durable hose, and a reliable chuck.
- Price: Bike pumps range in price from around $20 to over $100. Consider your budget and needs when choosing a pump.
Maintaining Your Bike Pump for Longevity
A little maintenance can go a long way in keeping your bike pump working smoothly. Here are a few tips:
- Clean the Chuck: Regularly clean the chuck with a clean cloth to remove dirt and debris.
- Lubricate the Piston: Apply a small amount of lubricant to the pump piston occasionally to keep it moving smoothly.
- Replace Worn Parts: Replace worn O-rings, hoses, or chucks as needed.
- Store Properly: Store your pump in a dry place to prevent corrosion and damage.
FAQ: Common Questions About Pump Hose Detachment
Q: Why does my pump hose keep popping off my Presta valve?
A: This often happens when the Presta valve core isn’t tightened enough, or the chuck’s rubber seal is worn out. Try tightening the valve core with a valve core tool and inspect the chuck for damage.
Q: How do I know if my pump chuck is compatible with my valve type?
A: Schrader valves are wider, like car tires, while Presta valves are narrow with a locking nut. Many pumps have dual-head chucks—make sure yours is set to the correct valve type.
Q: Can I fix a damaged pump hose?
A: It’s generally better to replace a damaged pump hose rather than trying to repair it. A damaged hose can leak air and affect the pump’s performance.
Q: What’s the best way to attach a pump chuck to a valve?
A: Align the chuck straight with the valve, press firmly, and engage any locking levers. Avoid angles to ensure a secure, airtight seal.
Q: How often should I replace the O-rings in my pump chuck?
A: Inspect your O-rings regularly. Replace them when you see cracks, dryness, or if they appear worn. This will maintain a good seal.
Q: Is it normal for some air to escape when I remove the pump chuck?
A: Yes, a small amount of air loss is normal. To minimize this, detach the chuck quickly and efficiently after inflating.
Q: Why does my pump feel harder to use than it used to?
A: This can be due to a dry or worn piston. Lubricating the piston can help. If the problem persists, internal parts may need replacement, or it might be time for a new pump.
External Resources for Further Learning
- Park Tool Repair Help: A comprehensive resource for bike repair information.
- Sheldon Brown’s Website: A wealth of information on all things cycling, including detailed explanations of valve types and inflation techniques.
- Bicycle Tutor: Offers videos and tutorials on various bike maintenance topics.
Conclusion
A detaching pump hose can turn a simple task into a frustrating ordeal, but with a little troubleshooting and maintenance, you can easily solve the problem. By inspecting your chuck, ensuring valve compatibility, perfecting your connection technique, and maintaining your pump, you’ll be back to inflating your tires with ease. Remember, a well-maintained bike pump is a cyclist’s best friend, ensuring smooth and enjoyable rides every time. So, keep your pump in top shape, and happy cycling!


