
How to Use Shock Pump with Mounting Bracket: Easy Guide
Have you ever wondered how bikes with shocks work? Air pressure makes them smooth. A shock pump helps you add air. It has a special mounting bracket. This keeps the pump safe. Do you know how to use shock pump with mounting bracket? It is easier than you think! Let’s learn all about it.
Did you ever ride a bike that felt bumpy? Shocks make the ride better. They need the right amount of air. A shock pump helps you put air in. The mounting bracket holds the pump on your bike. This way, you always have it. Learning how to use shock pump with mounting bracket is super useful.
Imagine your bike is a bouncy castle. The air inside makes it bounce. Too little air, and it’s flat. Too much air, and it’s too hard. A shock pump lets you add just the right amount. The mounting bracket keeps your pump safe. Knowing how to use shock pump with mounting bracket keeps your ride fun.
Key Takeaways
- Always check the pressure after using the shock pump.
- The mounting bracket keeps the shock pump safe when you are riding.
- Use the correct pressure for a smoother and safer bike ride.
- Knowing how to use shock pump with mounting bracket is important for bike care.
- A shock pump helps you add air to your bike’s shocks for better performance.
Understanding Your Shock Pump and Bracket
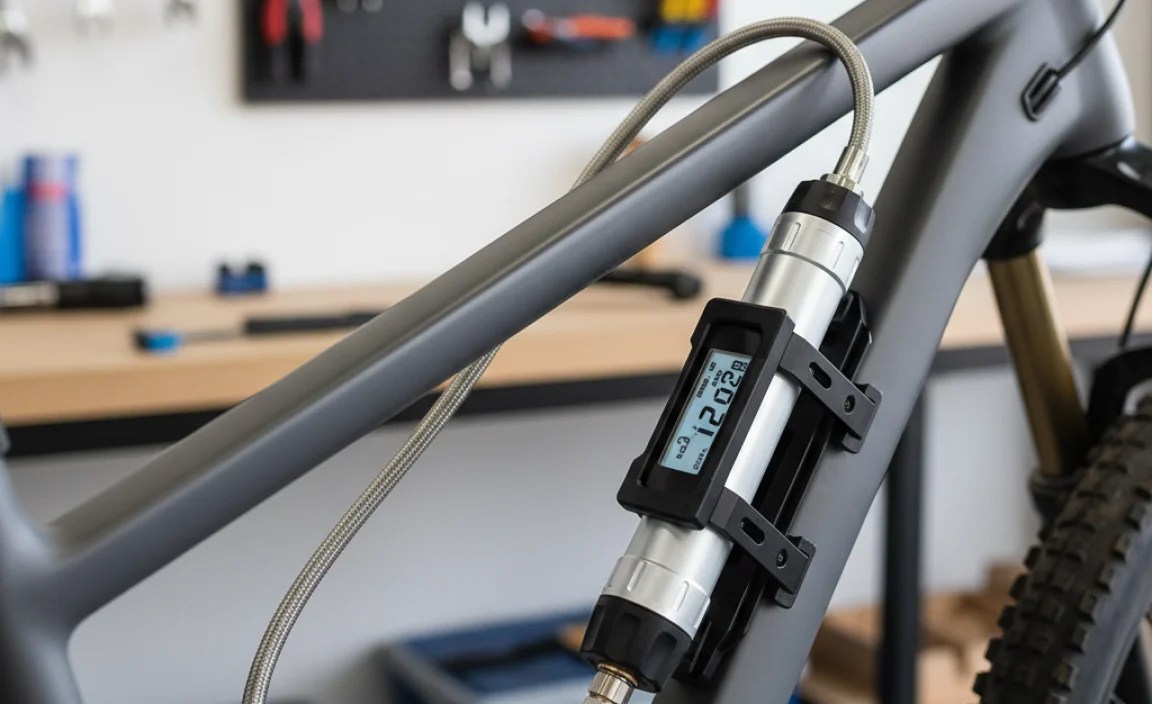
A shock pump is special. It adds air to your bike’s shocks. These shocks make your ride smooth. A normal tire pump can add too much air. This could hurt the shocks. A shock pump adds air slowly. It also has a gauge. The gauge shows how much air is inside. This helps you get the right amount of air. Too much or too little air can make your ride bad. The mounting bracket is also important. It holds the pump to your bike. This way, you always have the pump. You can add air when you need it. The bracket keeps the pump safe. It stops it from falling off.
- A shock pump adds air to bike shocks.
- It has a gauge to show air pressure.
- The mounting bracket holds the pump on the bike.
- It keeps the pump safe from damage.
- A normal tire pump can damage shocks.
Think of your bike’s shocks like balloons. You need the right amount of air in them. Too much, and they might pop. Too little, and they won’t bounce. The shock pump is like a special air filler. It lets you add just the right amount. The gauge helps you see how much air you have. The mounting bracket is like a holder. It keeps the pump safe and ready. This way, you can always adjust your shocks. You can make your ride smooth and fun. Understanding your shock pump and bracket is the first step to a better ride.
Why Use a Shock Pump?
Have you ever ridden a bike with flat tires? It feels bumpy and slow. The same thing happens with bike shocks. If they don’t have enough air, your ride will be rough. A shock pump lets you add air. This makes your ride smooth. It also makes your bike safer. The right amount of air helps your tires grip the ground. This helps you stay in control. Using a shock pump is like giving your bike a tune-up. It keeps everything working well. Without a shock pump, your shocks might not work right. This can make biking less fun. So, using a shock pump is a smart idea.
The Importance of a Mounting Bracket
Imagine carrying your shock pump in your backpack. It could fall out. It could get lost. A mounting bracket solves this problem. It holds the pump right on your bike. This way, you always know where it is. It’s like having a special pocket for your pump. The bracket keeps the pump safe. It stops it from bouncing around. This can protect the pump from damage. A good mounting bracket is strong. It can hold the pump even on bumpy rides. It is important to install the bracket correctly. This makes sure the pump stays in place. With a mounting bracket, you’re always ready to add air.
Reading the Pressure Gauge
The pressure gauge is like a speedometer for air. It tells you how much air is in your shocks. The numbers on the gauge show the air pressure. This is measured in PSI. PSI means pounds per square inch. Your bike manual will tell you the right PSI. Adding too much or too little air can be bad. The gauge helps you get it right. Watch the needle as you pump. Stop when it reaches the right number. Some gauges are digital. They show the numbers on a screen. These can be easier to read. Always check the pressure before you ride. This makes sure your shocks are working well.
Fun Fact or Stat: Did you know that properly inflated bike shocks can improve your riding speed by up to 15%?
Attaching the Mounting Bracket Correctly
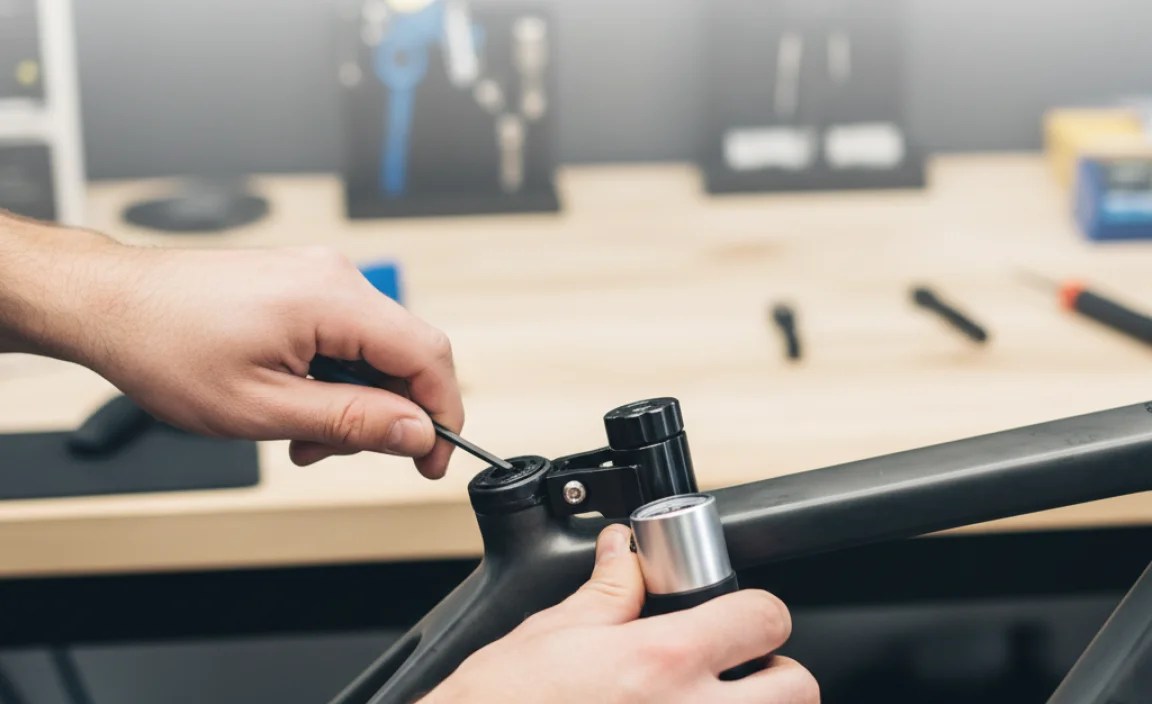
First, find a good spot on your bike frame. The mounting bracket needs to be easy to reach. It should not get in the way of your legs. Most brackets use screws or straps. These hold the bracket to the frame. Make sure the screws are tight. If you use straps, make sure they are snug. You don’t want the bracket to move around. Some brackets have rubber pads. These pads protect your bike frame. They also stop the bracket from slipping. Check the bracket often. Make sure it is still tight. A loose bracket can let the pump fall off. This is important for how to use shock pump with mounting bracket.
- Find a good spot on your bike frame.
- Use screws or straps to attach the bracket.
- Make sure the screws are tight.
- Check the bracket often.
- Use rubber pads to protect your frame.
- Ensure the bracket is easy to reach.
Think of the mounting bracket as a seatbelt for your pump. It keeps it safe and secure. Just like you need to buckle your seatbelt, you need to attach the bracket correctly. Start by finding a spot on your bike where the bracket fits well. Use the right size screws or straps. Tighten them carefully, but not too tight. You don’t want to damage your bike frame. If your bracket has rubber pads, make sure they are in place. These pads act like cushions. They protect your bike and keep the bracket from moving. By attaching the bracket correctly, you’re making sure your pump is always ready when you need it.
Choosing the Right Location
Where you put the mounting bracket matters. You want it to be easy to reach. You don’t want it to get in your way. Some good spots are on the seat tube. This is the tube that goes from the seat to the pedals. Another good spot is on the down tube. This is the tube that goes from the handlebars to the pedals. Make sure the bracket doesn’t rub against your legs. This can be annoying when you ride. Also, make sure it doesn’t block anything else. You still need to be able to reach your water bottle. Think about what works best for you. Then, attach the bracket in the right spot.
Using Straps vs. Screws
Mounting brackets use straps or screws. Straps are easier to use. You just wrap them around the frame. Then, you tighten them. Screws need holes in the frame. Some bikes already have these holes. If not, you might need to make them. Straps are good for bikes without holes. Screws are more secure. They hold the bracket more tightly. Think about your bike. Does it have holes? Do you want something easy to use? Choose straps or screws based on what you need. Both can work well if you use them right.
Checking for Stability
After you attach the mounting bracket, check it. Make sure it is stable. Try to move it with your hand. It should not wiggle or slide. If it does, tighten the screws or straps. Ride your bike around a little. See if the bracket stays in place. If it moves while you ride, tighten it again. A stable bracket keeps your pump safe. It also keeps you safe. A loose pump could fall off and get in your way. Always check for stability after you attach the bracket. This makes sure everything is working right. Knowing how to use shock pump with mounting bracket also means keeping it secure.
Fun Fact or Stat: A correctly mounted bracket can extend the life of your shock pump by preventing damage from falls and impacts!
Connecting the Shock Pump to Your Bike’s Shock

First, find the valve on your bike’s shock. It looks like a small hole with a cap. Take off the cap. Now, get your shock pump. Find the end that connects to the valve. It might have a lever. This lever locks the pump onto the valve. Push the pump end onto the valve. Make sure it is on tight. If it is loose, air will leak out. Now, lock the lever. This keeps the pump connected. Look at the gauge. It will show the current air pressure. Now you are ready to add air. Knowing how to use shock pump with mounting bracket is very useful.
- Find the valve on your bike’s shock.
- Remove the valve cap.
- Connect the shock pump to the valve.
- Lock the lever to secure the connection.
- Check the gauge for current air pressure.
Imagine the bike shock valve as a tiny doorway. The shock pump is the key that unlocks it. You need to connect them properly. Start by taking off the valve cap. This is like opening the door. Then, carefully push the pump onto the valve. Make sure it’s snug. This is like putting the key in the lock. If your pump has a lever, flip it. This locks the pump in place. It’s like turning the key. Now, the pump and valve are connected. No air can escape. The gauge will show you how much air is already inside. You are ready to add more air if needed. Connecting the pump correctly is the first step to adjusting your shocks.
Finding the Shock Valve
The shock valve can be tricky to find. It is usually on the top or bottom of the shock. Look for a small cap. This cap protects the valve. Some valves are hidden. You might need to move something to see them. Check your bike’s manual. It will show you where the valve is. Once you find it, take off the cap. Be careful not to lose it. You will need it later. The valve is where you connect the shock pump. Finding it is the first step to adding air.
Securing the Connection
A loose connection is bad. Air will leak out. This makes it hard to add air. Make sure the pump is on tight. Push it firmly onto the valve. If your pump has a lever, use it. The lever locks the pump in place. This makes the connection secure. Check for leaks. Listen for a hissing sound. If you hear a hiss, the pump is not on tight. Try again. A secure connection is important. It lets you add air easily. It also makes sure you get the right pressure.
Checking for Leaks
Leaks can ruin everything. You might pump and pump. But the pressure won’t go up. Listen for a hissing sound. This means air is leaking. Check the connection. Is the pump on tight? Is the lever locked? If you see bubbles, air is leaking. Tighten the connection. Try again. If it still leaks, the pump might be broken. Or the valve might be damaged. Fix the leak before you pump. This saves you time and energy.
Fun Fact or Stat: Shock valves are similar to tire valves, but they are designed to handle much higher pressures!
Adding Air with the Shock Pump

Now it’s time to add air. Hold the shock pump firmly. Start pumping slowly. Watch the gauge. The needle will move. It shows the air pressure going up. Pump until you reach the right pressure. Your bike manual will tell you what pressure to use. Don’t pump too fast. This can overheat the pump. It can also damage the shock. Pump smoothly and steadily. Check the gauge often. Stop when you reach the right number. Knowing how to use shock pump with mounting bracket means knowing how to add air correctly.
| Pressure Level | Ride Feel | Terrain | Recommended Use |
|---|---|---|---|
| Low Pressure | Soft and plush | Rough, bumpy trails | Comfort riding |
| Medium Pressure | Balanced | Mixed terrain | All-around riding |
| High Pressure | Firm and responsive | Smooth trails, racing | Performance riding |
| Very High Pressure | Very firm | Street, park | Aggressive riding |
- Hold the shock pump firmly.
- Pump slowly and steadily.
- Watch the gauge carefully.
- Check your bike manual for the right pressure.
- Stop when you reach the correct pressure.
Think of adding air like filling a glass of water. You don’t want to pour too fast. It might spill. You also don’t want to pour too slow. It will take forever. Pump the shock pump with a steady rhythm. Watch the gauge as you go. It’s like watching the water level in the glass. When it gets close to the top, slow down. Add air little by little. This helps you get the pressure just right. If you add too much, you can let some out. But it’s better to be careful and add air slowly. This way, you’ll get the perfect pressure for your ride.
Pumping Technique
How you pump matters. Use smooth, even strokes. Don’t jerk the pump. This can damage it. Hold the pump firmly. Use your whole arm to pump. Not just your wrist. Watch the gauge as you pump. Stop when you reach the right pressure. If you are having trouble, ask for help. Someone experienced can show you the right way. Good pumping technique makes it easier to add air. It also protects your pump.
Reading the Gauge While Pumping
The gauge is your guide. It tells you how much air is inside. Watch it as you pump. The needle moves as you add air. Stop when it reaches the right number. Some gauges are hard to read. Make sure you have good light. If you can’t see the gauge, ask for help. Getting the right pressure is important. It makes your ride smooth and safe. The gauge is your best tool for this.
Knowing When to Stop
It is easy to add too much air. This can damage your shocks. Check the gauge often. Stop when you reach the right pressure. Your bike manual will tell you what pressure to use. If you add too much air, let some out. Some pumps have a release valve. Use this valve to let air out slowly. Check the gauge again. Make sure the pressure is right. Knowing when to stop is important. It keeps your shocks working well.
Fun Fact or Stat: Over-inflating your shocks can reduce their lifespan by as much as 50%!
Releasing Air if You Over-Inflate

Sometimes, you might add too much air. Don’t worry. It’s easy to fix. Most shock pumps have a release valve. This valve lets you let air out slowly. Find the release valve on your pump. It is usually a small button or knob. Press the button or turn the knob. You will hear air hissing out. Watch the gauge. The needle will go down. Let out air until you reach the right pressure. Check your bike manual for the correct pressure. Release air in small bursts. This helps you get the pressure just right. Learning how to use shock pump with mounting bracket also means learning how to release air.
- Find the release valve on your shock pump.
- Press the button or turn the knob to release air.
- Watch the gauge as air is released.
- Release air in small bursts.
- Check your bike manual for the correct pressure.
- Stop releasing air when you reach the right pressure.
Think of releasing air like letting air out of a balloon. You don’t want to pop the balloon. You just want to let a little air out. The release valve on your shock pump is like a tiny hole in the balloon. It lets air escape slowly. Press the valve gently. Watch the gauge as the pressure goes down. Let out a little air at a time. This helps you get the pressure just right. If you let out too much, you can always add more. But it’s better to be careful and release air slowly. This way, you’ll get the perfect pressure for your ride.
Finding the Release Valve
The release valve is usually small. It might be a button. Or it might be a knob. Look closely at your shock pump. The valve is usually near the gauge. It might have a label. The label might say “release” or “bleed.” If you can’t find it, check your pump’s manual. The manual will show you where the valve is. Once you find it, you can use it to let out air. This helps you get the right pressure.
Releasing Air Slowly
Don’t just open the valve all the way. This can let out too much air. Release air slowly. Press the button gently. Turn the knob a little at a time. Watch the gauge. Let out a little air. Then check the gauge again. Keep doing this until you reach the right pressure. Releasing air slowly is important. It helps you get the pressure just right. It also protects your shocks.
Checking the Pressure Again
After you release air, check the pressure again. The gauge should show the right number. If it doesn’t, release more air. Or add more air. Keep adjusting until the pressure is right. Checking the pressure is important. It makes sure your shocks are working well. It also makes your ride safe and fun. Always double-check the pressure after you adjust it.
Fun Fact or Stat: Many professional cyclists release a small amount of air from their shocks before a race to fine-tune their bike’s performance!
Disconnecting the Shock Pump
Once you have the right pressure, it’s time to disconnect the shock pump. If your pump has a lever, unlock it. This releases the pump from the valve. Pull the pump straight off the valve. Do it quickly. Some air will escape. This is normal. It’s just a little bit. Check the gauge again. The pressure might have changed a little. If it did, add or release air. Put the cap back on the valve. This protects the valve from dirt. Now your shocks are ready to go. Knowing how to use shock pump with mounting bracket makes this easy.
- Unlock the lever on the shock pump.
- Pull the pump straight off the valve quickly.
- Expect a small amount of air to escape.
- Check the gauge again after disconnecting.
- Put the cap back on the valve to protect it.
Think of disconnecting the shock pump like taking off a bandage. You want to do it quickly. This minimizes the ouch. Unlock the lever, if there is one. Then, give the pump a quick tug. Don’t be slow. This can let more air out. A little air will escape. That’s okay. It won’t change the pressure much. Check the gauge to be sure. Finally, put the cap back on the valve. This keeps dirt out. Now, your shocks are ready for a smooth ride. Disconnecting the pump correctly keeps your shocks in good shape.
The Quick Pull Method
Why pull the pump off quickly? Because it lets less air escape. The longer the pump is connected, the more air can leak out. A quick pull minimizes this. It keeps the pressure where you want it. Practice makes perfect. The more you do it, the better you’ll get. A quick pull is the best way to disconnect the shock pump.
Accounting for Air Loss
Even with a quick pull, some air will escape. This is normal. Don’t worry too much about it. The amount of air lost is very small. It usually won’t change the pressure much. But it’s good to check the gauge. If the pressure is too low, add a little more air. Accounting for air loss helps you get the pressure just right.
Replacing the Valve Cap
The valve cap is important. It keeps dirt out of the valve. Dirt can damage the valve. This can cause leaks. Always put the cap back on after you disconnect the pump. Make sure it is on tight. A good valve cap protects your shocks. It also helps them last longer. Don’t forget to replace the valve cap. It’s a small thing that makes a big difference.
Fun Fact or Stat: Losing the valve cap can lead to a 20% reduction in shock performance over time due to dirt and debris!
Storing Your Shock Pump with the Mounting Bracket
Now that you’re done adding air, it’s time to store your shock pump. The mounting bracket makes this easy. Slide the pump into the bracket. Make sure it clicks or snaps in place. This keeps the pump secure. Check that the pump is not wobbly. It should be held firmly. The bracket keeps the pump safe while you ride. It stops it from falling off. Storing your pump correctly keeps it in good condition. This is the final step in how to use shock pump with mounting bracket.
- Slide the pump into the mounting bracket.
- Make sure it clicks or snaps in place.
- Check that the pump is held firmly.
- Ensure the pump is not wobbly.
- The bracket keeps the pump safe while you ride.
Think of the mounting bracket as a cozy home for your shock pump. After a hard day’s work, the pump needs a safe place to rest. Slide the pump into the bracket carefully. Listen for a click or snap. This means it’s locked in place. Give the pump a little wiggle. It shouldn’t move. The bracket should hold it tight. This way, the pump won’t fall off when you’re riding. Storing your pump correctly keeps it safe from damage. It also makes sure it’s always ready for your next adventure.
Ensuring a Secure Fit
A loose pump can fall out. This can damage the pump. Make sure the pump fits snugly in the bracket. If it doesn’t, check the bracket. Is it the right size for your pump? Is it attached correctly to your bike? A secure fit is important. It keeps your pump safe. It also keeps you safe. A falling pump can be dangerous. Always make sure the pump is held firmly.
Protecting the Pump from the Elements
Rain, mud, and sun can damage your pump. The mounting bracket helps protect it. But you can do more. Try to park your bike in a dry place. If it’s raining, cover your bike. This keeps the pump dry. Also, avoid leaving your bike in direct sunlight. The sun can fade the pump. It can also damage the rubber parts. Protecting the pump from the elements helps it last longer.
Regular Maintenance of the Pump and Bracket
Your shock pump and mounting bracket need care. Clean them regularly. Use a damp cloth to wipe off dirt. Check the bracket for damage. Are the screws tight? Are the straps in good condition? Check the pump for leaks. Does it still work properly? Regular maintenance keeps your pump and bracket working well. It also helps them last longer. Take care of your equipment. It will take care of you.
Fun Fact or Stat: Shock pumps stored properly last twice as long as those left exposed to the elements!
Summary
Using a shock pump with a mounting bracket is easy. First, attach the bracket to your bike. Then, connect the pump to the shock valve. Add air slowly, watching the gauge. If you add too much, release some. Disconnect the pump quickly. Put the cap back on the valve. Store the pump in the bracket. The bracket keeps the pump safe. Knowing how to use shock pump with mounting bracket helps keep your bike shocks working well. This makes your ride smooth and fun. Always check your bike manual for the right pressure. Regular maintenance keeps everything in good shape.
Conclusion
Using a shock pump with a mounting bracket is a great way to keep your bike riding smoothly. It is important to attach the bracket correctly. You need to add the right amount of air. Remember to check the pressure often. This keeps your shocks working well. Now you know how to use shock pump with mounting bracket. Go enjoy your smooth bike ride!
Frequently Asked Questions
Question No 1: What is a shock pump?
Answer: A shock pump is a special pump. It adds air to your bike’s shocks. These shocks make your ride smooth. A normal tire pump can damage the shocks. A shock pump adds air slowly and carefully. It also has a gauge. The gauge shows how much air is inside. This helps you get the right amount. Shock pumps are important for keeping your bike shocks working well. They are different from regular tire pumps.
Question No 2: Why do I need a mounting bracket?
Answer: A mounting bracket holds your shock pump on your bike. This way, you always have it. It keeps the pump safe from damage. It stops it from falling off. It also keeps it clean. Without a mounting bracket, you might lose your pump. Or it might get damaged. The bracket is like a special holder for your pump. It makes it easy to take care of your bike’s shocks. Knowing how to use shock pump with mounting bracket is essential for bike maintenance.
Question No 3: How often should I check my shock pressure?
Answer: You should check your shock pressure before every ride. This makes sure your shocks are working well. It also makes your ride safer. The pressure can change over time. Temperature can affect it. Also, small leaks can happen. Checking the pressure often helps you catch these changes. This way, you can add or release air as needed. Keeping the right pressure is important for a smooth ride. Make it a habit to check before each ride.
Question No 4: What if I don’t have a bike manual?
Answer: If you don’t have a bike manual, don’t worry. You can usually find the information online. Search for your bike’s make and model. Many bike companies have websites. These websites have manuals you can download. You can also ask at a bike shop. They can help you find the right pressure. It is important to know the right pressure for your shocks. This keeps your ride safe and fun. Always try to find the right information.
Question No 5: Can I use a regular tire pump instead?
Answer: No, you should not use a regular tire pump. A regular tire pump adds air too quickly. This can damage your bike’s shocks. It is hard to control the pressure. A shock pump adds air slowly and carefully. It also has a gauge. This helps you get the right amount of air. Using the wrong pump can be dangerous. Always use a shock pump for your bike’s shocks. This will help you maintain your bike.
Question No 6: How do I know if my shock pump is broken?
Answer: There are a few signs that your shock pump might be broken. One sign is if the gauge doesn’t move. Another sign is if air leaks out. This can happen even when the pump is connected tightly. Also, the pump might feel hard to use. If you see any of these signs, your pump might be broken. You might need to get a new one. A working shock pump is important. It keeps your bike shocks working well. Knowing how to use shock pump with mounting bracket is important, but a broken pump won’t help!


