
How to Read the Gauge on a Shock Pump: Easy Guide
Do you love riding your bike? Do you want it to feel smooth? A shock pump can help. But how do you read the gauge on a shock pump? It might seem tricky. Don’t worry! This guide will show you how.
Imagine your bike bouncing all over the place. Not fun, right? A shock pump lets you add air. The gauge tells you how much air is inside. Let’s learn how to read it. Then, you can make your ride super comfy!
Key Takeaways
- Learning how to read the gauge on a shock pump helps you adjust your bike’s suspension.
- Always check the recommended air pressure for your bike’s shocks or forks.
- Make small adjustments to the air pressure for optimal riding performance.
- The gauge shows the pressure in PSI (pounds per square inch) or BAR.
- Bleed valves allow you to release small amounts of air for fine-tuning.
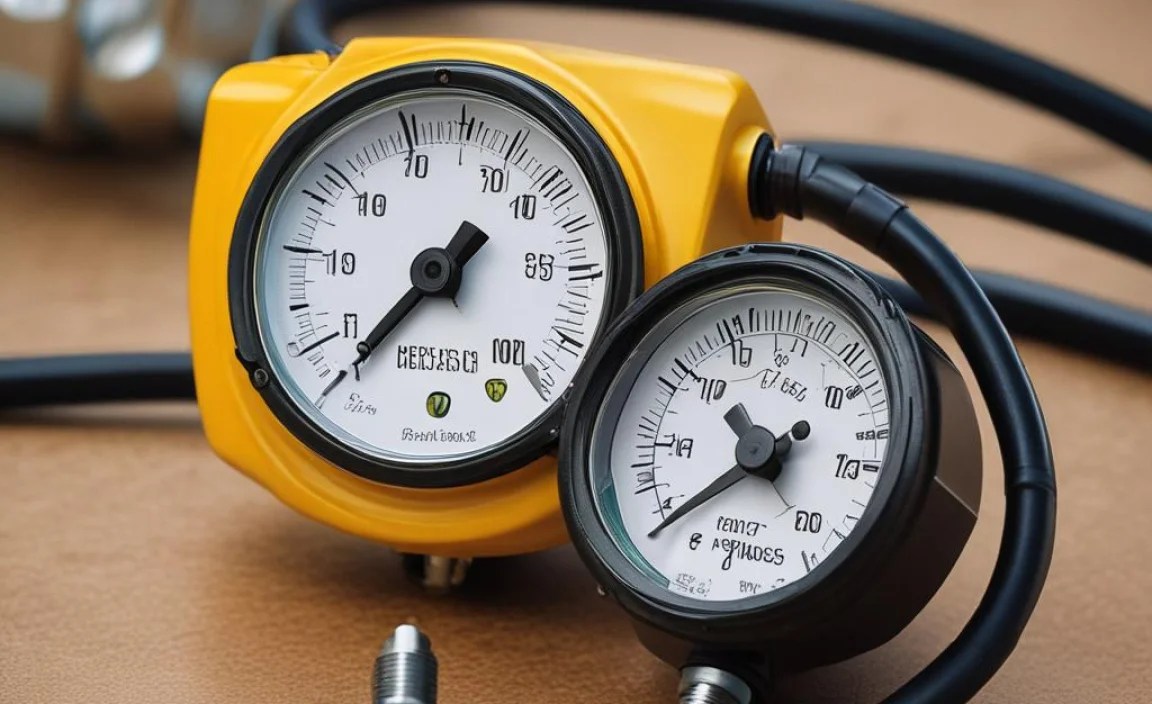
Understanding Your Shock Pump Gauge

A shock pump helps you put air in your bike’s shocks. The gauge is like a speedometer for air. It tells you how much air is inside. Most gauges show pressure in PSI. PSI means “pounds per square inch.” Some gauges also show BAR. BAR is another way to measure air pressure. Knowing how to read the gauge on a shock pump is key. It helps you get the right amount of air. Too much air makes the ride stiff. Too little air makes it bumpy. Look closely at the numbers on the gauge. Find the little needle that moves. That needle points to the air pressure. Make sure you read the right scale (PSI or BAR). Some pumps have digital gauges that show a number, making it easier to read.
- The gauge shows air pressure.
- PSI and BAR are common units.
- A needle points to the pressure.
- Digital gauges show numbers.
- Knowing the units is very important.
Think of your bike’s shocks like tiny balloons. You need the right amount of air in them. The gauge on the shock pump is your guide. It helps you fill the “balloons” just right. If you put too much air, they might pop! If you don’t put enough, they won’t bounce well. So, pay close attention to the gauge. Check your bike’s manual. It will tell you the right PSI for your weight. This is a good starting point. Then, you can adjust it to make your ride perfect. Understanding the gauge is like learning a secret code. Once you know it, you can make your bike ride like a dream!
Why is the Gauge Important?
Have you ever ridden a bike with flat tires? It’s not fun! Your shocks need the right air pressure too. The gauge on your shock pump tells you if the pressure is right. It helps you avoid a bumpy ride. Without a gauge, you’re just guessing. Guessing can damage your shocks. It can also make your bike hard to control. Always check the gauge before you ride. Make sure the pressure is in the right range. This will keep you safe and comfortable. Think of the gauge as your bike’s health meter. It tells you if everything is okay. A little attention to the gauge goes a long way.
What Happens if You Ignore It?
Imagine overfilling a balloon. It pops, right? The same thing can happen to your bike’s shocks. Too much air pressure can damage them. It can even make them break. On the other hand, too little air is also bad. It makes the shocks bottom out. Bottoming out is when they hit the end of their travel. This feels like a hard jolt. It can also damage the shocks. Ignoring the gauge is like ignoring your body’s warning signs. You might be okay for a while, but eventually, something will go wrong. So, pay attention to the gauge. It’s there to help you.
Digital vs. Analog Gauges
Shock pumps come with two main types of gauges. There are digital gauges and analog gauges. Digital gauges show the pressure as a number. They are usually very easy to read. Analog gauges have a needle that points to the pressure. Some people find them a little harder to read. But both types of gauges do the same job. They tell you how much air is in your shocks. Digital gauges often have extra features. They might remember the last pressure. They might also have a backlight for easy reading in the dark. Analog gauges are usually cheaper. Choose the type of gauge that you like best. The most important thing is to use it correctly.
Fun Fact or Stat: Shock pump gauges are often accurate to within +/- 3 PSI, providing reliable pressure readings for optimal suspension performance.
Finding the Right Pressure
Now that you know how to read the gauge on a shock pump, let’s talk about pressure. What’s the right amount of air for your bike? It depends on a few things. Your weight is important. The type of bike you have matters too. Mountain bikes usually need more air than road bikes. Look in your bike’s manual. It should have a chart. The chart will show you the recommended pressure. Find your weight on the chart. Then, find the recommended PSI. This is a good starting point. You might need to adjust it a little. After a few rides, you’ll find the perfect pressure for you. Remember to always start with the recommended pressure and adjust from there. Don’t just guess, or you could damage your shocks or have a bad ride.
- Check your bike’s manual.
- Find the recommended PSI.
- Consider your weight.
- Adjust for your riding style.
- Start with the recommended pressure.
- Always check before each ride.
Think of finding the right pressure like finding the perfect shoe size. Too big, and your foot slips around. Too small, and your toes are cramped. The right pressure makes your bike feel just right. It’s not too bouncy, and it’s not too stiff. You can find the perfect balance. Start with the recommended pressure. Then, go for a ride. If it feels too bouncy, add a little air. If it feels too stiff, let a little air out. Keep making small adjustments until it feels perfect. It might take a few tries, but it’s worth it. Once you find the right pressure, write it down. That way, you’ll always know where to start.
Weight and Pressure: The Connection
Imagine a tiny person sitting on a big bike. The shocks would barely move. Now imagine a big person sitting on the same bike. The shocks would sink down a lot. That’s why weight matters. Heavier riders need more air pressure. Lighter riders need less air pressure. The chart in your bike’s manual takes this into account. It gives you a starting point based on your weight. Remember, this is just a starting point. You might need to adjust it based on your riding style. But your weight is always the first thing to consider.
Bike Type Matters Too
A mountain bike is different from a road bike. Mountain bikes have bigger shocks. They need more air pressure to handle bumps. Road bikes have smaller shocks or no shocks at all. They don’t need as much air pressure. Some road bikes have suspension forks. These forks need a little air pressure. Check your bike’s manual to see what’s recommended. The type of bike you have makes a big difference. Don’t use mountain bike pressures on a road bike. It won’t feel right, and it could be dangerous.
Adjusting for Riding Style
Do you like to jump and do tricks? Or do you prefer smooth, easy rides? Your riding style affects the pressure you need. If you’re doing jumps, you need more air pressure. This will keep the shocks from bottoming out. If you’re doing easy rides, you can use less air pressure. This will make the ride more comfortable. Experiment with different pressures. See what feels best for you. Just remember to make small adjustments. Don’t change the pressure too much at once. It’s all about finding the sweet spot for your riding style.
Fun Fact or Stat: Professional mountain bikers often adjust their shock pressure by as little as 1-2 PSI to optimize performance for specific courses.
Using the Bleed Valve
The bleed valve is a small button or screw on your shock pump. It lets you release a tiny bit of air. This is useful for fine-tuning the pressure. Sometimes, you might add too much air. The bleed valve lets you take some out. Press the bleed valve gently. A little air will escape. Check the gauge to see how much the pressure dropped. Be careful not to press it too hard. You don’t want to release too much air at once. The bleed valve is your friend. It helps you get the pressure just right. It’s like having a tiny eraser for your air pressure. It’s an important part of learning how to read the gauge on a shock pump.
- The bleed valve releases air.
- Use it for fine-tuning.
- Press it gently.
- Check the gauge after each press.
- Don’t release too much air.
Imagine you’re adding sugar to your cereal. You accidentally pour in too much. Now it’s too sweet! The bleed valve is like taking a tiny pinch of sugar out. It lets you correct small mistakes. It’s much easier than starting over. The bleed valve is especially useful for digital gauges. Digital gauges can be very precise. But they can also be hard to adjust perfectly. The bleed valve lets you get the pressure exactly where you want it. It’s a small tool, but it makes a big difference. Practice using the bleed valve. You’ll become a master of fine-tuning your bike’s suspension.
Why is Fine-Tuning Important?
Have you ever worn shoes that were a little too tight? They’re uncomfortable, right? The same is true for your bike’s suspension. If the pressure is a little off, it won’t feel right. Fine-tuning lets you get it perfect. It makes your ride more comfortable and efficient. It also helps you control your bike better. A well-tuned suspension absorbs bumps smoothly. It keeps your tires on the ground. This gives you more grip and control. Fine-tuning is like getting a custom fit for your bike.
How to Use the Bleed Valve
First, find the bleed valve on your shock pump. It’s usually a small button or screw. Then, attach the pump to your bike’s shock. Check the gauge to see the current pressure. If it’s too high, gently press the bleed valve. Watch the gauge as you press it. Release the valve when the pressure is correct. It might take a few tries to get it right. Don’t be afraid to experiment. The more you practice, the better you’ll get. Remember to check the pressure often. Small changes can make a big difference.
Common Mistakes to Avoid
One common mistake is pressing the bleed valve too hard. This releases too much air. Another mistake is not checking the gauge after each press. You need to know how much the pressure changed. Some people also forget to detach the pump before riding. This can damage the pump or the shock. Always double-check everything before you go. A little attention to detail can prevent problems. Using the bleed valve is easy, but it’s important to do it right.
Fun Fact or Stat: The bleed valve allows for adjustments as small as 1-2 PSI, enabling riders to dial in their suspension with precision.
Safety Tips for Using a Shock Pump
Using a shock pump is generally safe. But there are a few things to keep in mind. Always wear safety glasses. Air can sometimes escape quickly. You don’t want it to get in your eyes. Make sure the pump is securely attached. A loose pump can damage the valve. Never exceed the maximum pressure. The maximum pressure is written on the shock. Overfilling can cause the shock to explode. Keep the pump clean. Dirt can damage the seals. Follow these safety tips. You’ll be able to use your shock pump safely and effectively. Remember, safety always comes first. Knowing how to read the gauge on a shock pump is important, but being safe is even more important.
- Wear safety glasses.
- Securely attach the pump.
- Don’t exceed maximum pressure.
- Keep the pump clean.
- Follow instructions carefully.
- Check for leaks.
Think of using a shock pump like cooking with a stove. You need to be careful. You don’t want to burn yourself or start a fire. The same is true for a shock pump. You don’t want to damage your shocks or hurt yourself. Always read the instructions before you start. Make sure you understand how the pump works. If you’re not sure about something, ask an adult. It’s better to be safe than sorry. A little caution can prevent accidents. Using a shock pump is a great way to improve your bike’s performance. Just remember to do it safely.
Wearing Safety Glasses
Why wear safety glasses? Because air can be dangerous! When you detach the pump, a little air escapes. This air can carry dirt and debris. If it gets in your eyes, it can hurt. Safety glasses protect your eyes from this. They also protect your eyes from flying debris. Always wear them when using a shock pump. It’s a simple way to stay safe. Think of safety glasses as your eye shields. They protect you from unexpected dangers. Don’t skip this important step.
Checking for Leaks
Before you start pumping, check for leaks. Make sure the pump is securely attached. Listen for hissing sounds. Hissing means air is escaping. If you hear hissing, tighten the connection. If the leak continues, try a different pump. Leaks can prevent you from getting the right pressure. They can also damage the pump. A little leak can turn into a big problem. So, always check for leaks before you start. It’s a quick and easy way to avoid trouble.
Maximum Pressure Limits
Every shock has a maximum pressure limit. This is the highest amount of air you can put in. Exceeding this limit can damage the shock. It can even cause it to explode. The maximum pressure is usually written on the shock. It’s important to pay attention to this number. Never exceed it. It’s like a speed limit for your shock. Staying within the limit keeps you safe. It also protects your equipment. Always check the maximum pressure before you start pumping.
Fun Fact or Stat: Exceeding the maximum pressure on a shock can lead to seal failure or even catastrophic damage to the suspension component.
Troubleshooting Common Issues
Sometimes, things don’t go as planned. You might have trouble with your shock pump. The gauge might not be working. The pump might not be attaching properly. Or you might not be able to get the right pressure. Don’t worry! These problems are common. There are usually easy solutions. First, check the pump’s instructions. Make sure you’re using it correctly. Check the valve on your bike’s shock. Make sure it’s clean and free of dirt. If you’re still having trouble, ask an adult for help. They might have some experience with shock pumps. With a little troubleshooting, you can get your bike riding smoothly again. Understanding how to read the gauge on a shock pump won’t help if the pump isn’t working.
- Check the pump instructions.
- Clean the valve.
- Ask for help.
- Check the pump’s seals.
- Make sure the gauge is working.
Imagine your shock pump is like a toy that’s not working right. The batteries might be dead. Or a piece might be stuck. You need to figure out what’s wrong. Start by checking the simple things. Is the pump turned on? Is the valve clean? If those things are okay, then you might need help from an adult. They can help you find the problem and fix it. Troubleshooting is like being a detective. You’re trying to solve a mystery. With a little patience, you can usually find the answer. And once you fix the problem, your bike will be riding like new again!
Gauge Not Working
If the gauge isn’t working, the first thing to check is the battery. Some digital gauges need batteries. If the battery is dead, the gauge won’t work. Replace the battery and try again. If it’s an analog gauge, make sure the needle is moving freely. Sometimes, the needle can get stuck. Gently tap the gauge to see if it moves. If the gauge still doesn’t work, you might need a new pump. A broken gauge is useless. You won’t be able to get the right pressure.
Pump Not Attaching
Sometimes, the pump won’t attach properly to the valve. This can be frustrating. Make sure you’re using the right adapter. Some pumps come with different adapters. Choose the one that fits your valve. Also, make sure the valve is clean. Dirt can prevent the pump from attaching. Clean the valve with a soft cloth. If the pump still won’t attach, the valve might be damaged. You might need to replace the valve. Ask an adult for help with this.
Pressure Won’t Increase
If you’re pumping but the pressure isn’t increasing, there might be a leak. Check the connection between the pump and the valve. Make sure it’s tight. Listen for hissing sounds. Hissing means air is escaping. If you find a leak, tighten the connection. If the pressure still won’t increase, the pump might be broken. The seals inside the pump might be worn out. You might need a new pump. It’s important to have a working pump to get the right pressure.
Fun Fact or Stat: A common issue is a leaking pump seal, which can prevent the user from reaching the desired pressure in the shock.
Comparing Shock Pumps
There are many different shock pumps on the market. Some are cheap, and some are expensive. Some have digital gauges, and some have analog gauges. How do you choose the right one? Consider your needs. If you’re just starting out, a basic pump is fine. If you’re a serious rider, you might want a more advanced pump. Look for a pump with a good gauge. The gauge should be easy to read. It should also be accurate. Read reviews online. See what other people say about the different pumps. Choose a pump that fits your budget and your needs. Understanding how to read the gauge on a shock pump is easier with a good pump.
| Feature | Basic Pump | Advanced Pump |
|---|---|---|
| Gauge Type | Analog | Digital |
| Accuracy | +/- 5 PSI | +/- 1 PSI |
| Bleed Valve | Basic | Precise |
| Price | Cheap | Expensive |
| Durability | Lower | Higher |
- Consider your needs.
- Read reviews.
- Check the gauge.
- Think about your budget.
- Look for durability.
Imagine you’re buying a new video game. There are lots of different games to choose from. Some are simple, and some are complex. Some are cheap, and some are expensive. You need to find the right game for you. The same is true for shock pumps. Think about what you need the pump for. Are you just going to use it occasionally? Or are you going to use it every day? Do you need a super accurate gauge? Or is a basic gauge good enough? Consider your budget. How much money are you willing to spend? Once you’ve answered these questions, you can start shopping. Read reviews online. See what other people say about the different pumps. Choose the pump that’s right for you.
Price vs. Quality
Cheap pumps are tempting. But they might not last long. They might also not be very accurate. Expensive pumps are more durable. They also have better gauges. But you don’t always need the most expensive pump. A mid-range pump can be a good choice. It gives you good quality without breaking the bank. Think about how often you’ll use the pump. If you’re using it a lot, it’s worth investing in a good one. If you’re only using it occasionally, a cheaper pump might be fine.
Digital vs. Analog: Which Is Better?
Digital gauges are easy to read. They show the pressure as a number. They’re also usually very accurate. But they need batteries. Analog gauges have a needle. Some people find them harder to read. But they don’t need batteries. Which type is better? It depends on your preference. If you want easy reading and high accuracy, choose a digital gauge. If you want a simple, reliable gauge, choose an analog gauge. Both types of gauges can work well.
Features to Look For
Some pumps have extra features. They might have a rotating hose. This makes it easier to attach the pump. They might have a pressure release button. This lets you fine-tune the pressure. They might have a built-in storage compartment. This lets you store the pump easily. Think about which features are important to you. Choose a pump that has the features you need. Extra features can make the pump easier to use. But they also add to the cost.
Fun Fact or Stat: High-end shock pumps often feature a “no-loss” chuck design, which prevents air from escaping when disconnecting the pump from the shock.
Summary
Learning how to read the gauge on a shock pump is important for bike maintenance. The gauge shows the air pressure in your bike’s shocks. It helps you adjust the pressure for a smooth ride. Too much air makes the ride stiff. Too little air makes it bumpy. Check your bike’s manual for the recommended pressure. Use the bleed valve to fine-tune the pressure. Be careful not to overfill the shocks. Always wear safety glasses when using a shock pump. With a little practice, you’ll be able to keep your bike riding perfectly.
Remember to check the gauge regularly. Small adjustments can make a big difference. A well-tuned suspension improves your bike’s performance. It also makes your ride more comfortable. So, take the time to learn how to read the gauge on a shock pump. It’s an investment in your riding experience.
Conclusion
Using a shock pump might seem hard at first. But it’s actually quite easy. Just remember the steps. Check the recommended pressure. Attach the pump securely. Read the gauge carefully. Use the bleed valve to fine-tune. With a little practice, you’ll become a pro. Knowing how to read the gauge on a shock pump will help you keep your bike in top shape. So, grab your pump and get started!
Frequently Asked Questions
Question No 1: What does PSI mean on a shock pump gauge?
Answer: PSI stands for “pounds per square inch.” It’s a way to measure air pressure. The gauge on your shock pump shows the pressure in PSI. This tells you how much air is in your bike’s shocks. The higher the PSI, the more air is in the shocks. Knowing what PSI means helps you understand how to read the gauge on a shock pump. It’s like knowing what “mph” means on a car’s speedometer. It helps you control your bike’s performance.
Question No 2: How do I know the correct PSI for my bike’s shocks?
Answer: The best place to find the correct PSI is in your bike’s manual. The manual will have a chart. The chart shows the recommended pressure based on your weight. Find your weight on the chart. Then, find the corresponding PSI. This is a good starting point. You might need to adjust it a little. But the manual is the best place to start. If you don’t have the manual, you can usually find it online. Search for your bike’s make and model. You should be able to find a digital copy of the manual. This will help you learn how to read the gauge on a shock pump with the correct values.
Question No 3: What is a bleed valve and how do I use it?
Answer: A bleed valve is a small button or screw on your shock pump. It lets you release a tiny bit of air. This is useful for fine-tuning the pressure. If you add too much air, the bleed valve lets you take some out. To use the bleed valve, gently press it. A little air will escape. Check the gauge to see how much the pressure dropped. Be careful not to press it too hard. You don’t want to release too much air at once. The bleed valve helps you get the pressure just right. It’s an important part of learning how to read the gauge on a shock pump accurately.
Question No 4: What happens if I put too much air in my shocks?
Answer: Putting too much air in your shocks can be dangerous. It can damage the shocks. It can even cause them to explode. The maximum pressure is written on the shock. Never exceed this limit. Too much air makes the ride stiff and uncomfortable. It can also make the bike hard to control. If you accidentally put too much air in, use the bleed valve to release some. Always check the gauge to make sure the pressure is correct. Knowing how to read the gauge on a shock pump is crucial to prevent over inflation.
Question No 5: How often should I check the pressure in my shocks?
Answer: You should check the pressure in your shocks before every ride. Air can leak out over time. The pressure can also change with the temperature. Checking before each ride ensures the pressure is correct. This will keep you safe and comfortable. It will also help your bike perform its best. It only takes a few seconds to check the pressure. It’s a simple way to maintain your bike. Make it a habit to check before every ride. This habit contributes to better understanding of how to read the gauge on a shock pump and adjusting accordingly.
Question No 6: Can I use a regular tire pump for my bike’s shocks?
Answer: No, you should not use a regular tire pump for your bike’s shocks. Regular tire pumps deliver a lot of air quickly. This can easily overfill the shocks. Shock pumps deliver a small amount of air slowly. This gives you more control. They also have a gauge that shows the pressure. A regular tire pump does not have a gauge. Using a regular tire pump can damage the shocks. It can also be dangerous. Always use a shock pump for your bike’s shocks. This will give you the best results and keep you safe. Using the correct tools is important when learning how to read the gauge on a shock pump and making adjustments.


