
How to Attach a Shock Pump to a Rear Shock: Easy Guide
Have you ever bounced too hard on your bike? Do you know what a rear shock does? It makes your ride smooth. You might need to add air to it sometimes. This is where a shock pump comes in handy. Let’s learn how to attach a shock pump to a rear shock. It’s easier than you think!
Key Takeaways
- Knowing how to attach a shock pump to a rear shock is key for bike maintenance.
- Always check your bike’s manual for the right air pressure.
- Be gentle when you screw and unscrew the pump.
- Use a shock pump, not a tire pump, for accurate pressure.
- Regularly check your rear shock to keep your ride smooth.
Understanding Rear Shocks and Pumps

A rear shock is like a spring for your bike. It helps soak up bumps. This makes riding much more fun. Without it, every bump would hurt! Rear shocks use air or oil inside. Over time, the air can leak out. That’s why you need a shock pump. A shock pump is special. It lets you add small amounts of air. It also has a gauge. The gauge shows how much air is inside. Using a regular tire pump can damage your rear shock. It can add too much air too fast. You need to know how to attach a shock pump to a rear shock the right way. This keeps your bike working well. Always use the correct pump for the job. This will protect your bike’s suspension. It also keeps you safe while riding. Make sure to check the pressure regularly.
- A rear shock makes your ride smoother.
- Air can leak out of the rear shock.
- A shock pump adds air slowly.
- A gauge shows the air pressure.
- Never use a tire pump on a rear shock.
Think of your bike’s rear shock like a balloon. If the balloon has too little air, it’s floppy. If it has too much air, it might pop! A shock pump helps you find the perfect amount of air. It’s like giving your bike a little boost. Learning how to attach a shock pump to a rear shock will save you money. You won’t have to go to a bike shop every time. Plus, you’ll know your bike is always ready to ride. Always double-check the air pressure after you pump. This makes sure you have the right amount. Keeping your rear shock properly inflated is important for safety. It also helps your bike perform its best. Check it before every ride to be sure.
Why Rear Shocks Need Air
Have you ever jumped on a trampoline? A rear shock works a bit like that. It absorbs the impact when you hit a bump. Inside the shock, air acts like a spring. This spring cushions your ride. Over time, this air can escape. This means the shock won’t work as well. It might feel like you’re hitting every bump harder. Adding air with a shock pump fixes this. It refills the “spring” inside. This brings your suspension back to life. That’s why knowing how to attach a shock pump to a rear shock is so important. It keeps your ride comfortable and safe. It also helps your bike last longer. Regularly checking the air pressure is a good habit.
The Importance of a Good Seal
Imagine trying to blow up a balloon with a hole in it. It’s hard, right? The same thing happens with a rear shock. If the pump doesn’t seal well, air will leak out. This makes it hard to get the right pressure. A good seal is very important. Make sure the pump is screwed on tight. Listen for any hissing sounds. That means air is escaping. Some pumps have special seals. These seals help prevent leaks. Learning how to attach a shock pump to a rear shock properly includes making sure it seals. A good seal means accurate pressure readings. It also means less work for you. Always double-check the connection before pumping.
Checking for Leaks
Leaks are the enemy of a good suspension. They can slowly drain the air from your rear shock. This makes your ride bumpy and uncomfortable. After pumping, check for leaks. Listen for hissing sounds around the valve. You can also use soapy water. Brush it around the valve. If you see bubbles, there’s a leak. Sometimes, the valve core is loose. You can tighten it with a special tool. Other times, the valve might be damaged. You may need to replace it. Knowing how to attach a shock pump to a rear shock also means knowing how to spot and fix leaks. This keeps your suspension working perfectly. It also saves you money in the long run.
Fun Fact or Stat: Did you know that a rear shock can lose up to 5 PSI (pounds per square inch) of air pressure per month? That’s why regular checks are so important!
Gathering Your Tools and Information

Before you start, you need a few things. First, grab your shock pump. Make sure it’s the right type. Regular tire pumps won’t work. Next, find your bike’s manual. It tells you the right air pressure for your weight. This is very important. Too much or too little air can be bad. You might also want a rag. This helps clean the valve. A clean valve makes a better seal. Knowing how to attach a shock pump to a rear shock starts with having the right tools. A clean work area also helps. This prevents dirt from getting into the shock. Take your time and be careful. This will keep your bike in good shape. Always double-check the pressure before riding.
- Get your shock pump ready.
- Find your bike’s manual.
- Use a rag to clean the valve.
- Make sure your work area is clean.
- Take your time and be careful.
Imagine you’re baking a cake. You wouldn’t start without the recipe, right? The same goes for your rear shock. Your bike’s manual is like the recipe. It tells you exactly how much air to add. Don’t guess! Guessing can damage your shock. It can also make your ride unsafe. Learning how to attach a shock pump to a rear shock includes reading the manual. It’s the most important step. The manual also tells you what type of pump to use. Some shocks need special adapters. Make sure you have the right ones. This will make the job much easier. Always follow the instructions carefully.
Finding the Right Air Pressure
Finding the right air pressure is like finding the perfect pair of shoes. Too tight, and they hurt. Too loose, and you might trip. The same goes for your rear shock. Too much air, and it will be stiff. Too little, and it will bottom out. Your bike’s manual has a chart. This chart tells you the right pressure for your weight. Start with that number. You can always add or remove a little air. Finding the perfect pressure might take some testing. But it’s worth it. Knowing how to attach a shock pump to a rear shock is only half the battle. Knowing how much air to add is just as important. This keeps your ride smooth and comfortable.
Understanding PSI and Bar
PSI and Bar are ways to measure air pressure. PSI stands for pounds per square inch. Bar is another unit of measurement. Your shock pump gauge will show one or both of these. Don’t get confused! Just look at the numbers. Your bike’s manual will tell you the pressure in PSI or Bar. Match the number on the gauge to the number in the manual. It’s like reading a speedometer in a car. You need to know what the numbers mean. Learning how to attach a shock pump to a rear shock includes understanding these measurements. This ensures you add the right amount of air. Always double-check the units before pumping.
Different Types of Shock Pumps
Not all shock pumps are the same. Some are small and portable. Others are bigger and have more features. Some have a digital gauge. This makes it easier to read the pressure. Others have a bleed valve. This lets you release small amounts of air. Choose a pump that works for you. A good pump will last for years. It’s worth spending a little more for quality. Knowing how to attach a shock pump to a rear shock is easier with the right tools. The pump is the most important tool. Make sure it’s reliable and accurate. Always store your pump in a safe place.
Fun Fact or Stat: The average shock pump can reach pressures of up to 300 PSI. That’s a lot of air!
Attaching the Shock Pump Correctly
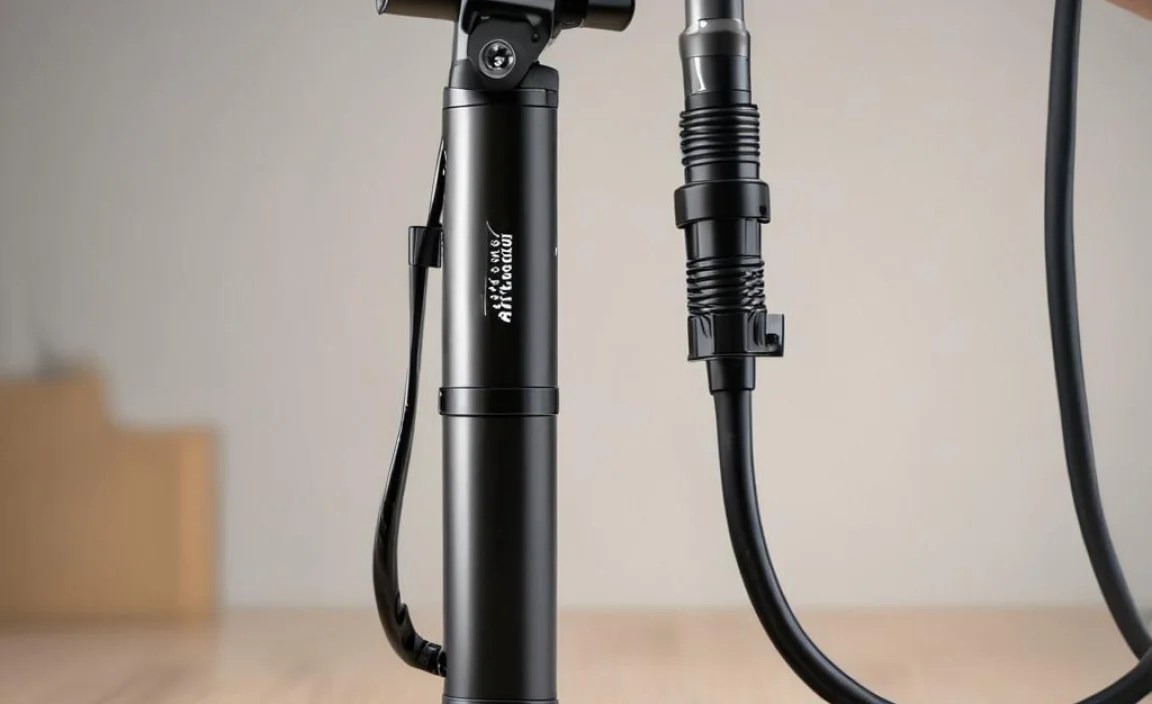
Now it’s time to attach the shock pump to the rear shock. First, find the valve on your shock. It looks like a tire valve. Remove the valve cap. This protects the valve from dirt. Next, screw the pump onto the valve. Be gentle. Don’t cross-thread it. Make sure it’s on tight. You should not hear any hissing. If you do, it’s not on tight enough. Now you’re ready to pump. Knowing how to attach a shock pump to a rear shock is easy. Just take your time. Be careful not to damage the valve. A damaged valve will leak air. Always double-check the connection before pumping. This prevents air loss and ensures accurate readings.
- Find the valve on the rear shock.
- Remove the valve cap.
- Screw the pump onto the valve gently.
- Make sure it’s on tight.
- Listen for hissing sounds.
Imagine you’re putting a puzzle together. You wouldn’t force the pieces, right? The same goes for attaching the shock pump. Don’t force it! If it’s not screwing on easily, stop. Check to see if the threads are lined up. Forcing it can damage the valve. This can cause leaks. Learning how to attach a shock pump to a rear shock includes being gentle. It’s better to take your time and do it right. A damaged valve is expensive to fix. Always double-check the connection before pumping. This prevents damage and ensures a good seal. This will also make pumping easier.
Finding the Valve Location
The valve on your rear shock might be hidden. Look closely! It’s usually on the top or bottom of the shock. It might be covered by a rubber cap. The cap protects it from dirt and water. Some bikes have a tricky valve location. You might need to use a mirror to see it. Once you find it, remove the cap. Be careful not to lose it. You’ll need it later. Knowing how to attach a shock pump to a rear shock starts with finding the valve. It’s like finding the start of a treasure hunt. Once you find it, the rest is easy. Always clean the valve before attaching the pump.
Ensuring a Secure Connection
A secure connection is key to getting an accurate pressure reading. If the pump is loose, air will leak out. This will give you a false reading. It will also make it harder to pump. Make sure the pump is screwed on tight. But don’t over-tighten it! That can damage the valve. Wiggle the pump gently. If it moves, it’s not on tight enough. Listen for hissing sounds. That means air is escaping. Knowing how to attach a shock pump to a rear shock includes making a secure connection. This ensures accurate readings and efficient pumping. Always double-check the connection before pumping.
Avoiding Cross-Threading
Cross-threading is when you screw something on crooked. This can damage the threads on the valve and the pump. It’s like trying to put a lid on a jar the wrong way. The lid won’t fit, and you might damage the jar. To avoid cross-threading, line up the threads carefully. Turn the pump slowly. If it feels rough or tight, stop. Back it off and try again. Don’t force it! Knowing how to attach a shock pump to a rear shock includes avoiding cross-threading. This protects your valve and your pump. Always take your time and be gentle.
Fun Fact or Stat: Cross-threading can reduce the lifespan of your valve by up to 50%! Be careful!
Pumping the Shock to the Correct Pressure

Now comes the fun part: pumping! Look at the gauge on the pump. It shows the air pressure. Pump slowly and steadily. Watch the gauge as you pump. Stop when you reach the right pressure. It’s better to add a little too much air. You can always let some out. But it’s harder to add air if you don’t have enough. Knowing how to attach a shock pump to a rear shock is only the first step. Pumping to the right pressure is just as important. Always double-check the pressure after pumping. This ensures you have the correct amount. This will keep your ride smooth and safe.
| Weight (lbs) | Recommended Pressure (PSI) |
|---|---|
| 100-120 | 80-100 |
| 120-140 | 100-120 |
| 140-160 | 120-140 |
| 160-180 | 140-160 |
- Pump slowly and steadily.
- Watch the gauge as you pump.
- Stop when you reach the right pressure.
- Add a little too much air if needed.
- Double-check the pressure after pumping.
Imagine you’re filling a glass of water. You wouldn’t fill it too fast, right? You might spill it. The same goes for your rear shock. Pump slowly and steadily. This gives you more control. It also prevents you from over-pumping. Learning how to attach a shock pump to a rear shock includes pumping at the right speed. It’s like finding the perfect rhythm. This makes the job easier and more accurate. Always keep an eye on the gauge. This ensures you don’t over-pump or under-pump. This will keep your suspension working perfectly.
Reading the Pressure Gauge
The pressure gauge is your best friend. It tells you how much air is in your rear shock. Look at the numbers carefully. Some gauges are hard to read. Make sure you have good light. Some pumps have a digital gauge. This makes it easier to read the pressure. Pay attention to the units. Is it PSI or Bar? Match the units to your bike’s manual. Knowing how to attach a shock pump to a rear shock includes reading the gauge. This ensures you add the right amount of air. Always double-check the reading before and after pumping.
The Importance of Slow, Steady Pumping
Pumping too fast can heat up the air inside the shock. This can give you a false reading. The pressure will seem higher than it really is. When the air cools down, the pressure will drop. That’s why it’s important to pump slowly and steadily. This gives the air time to cool down. It also gives you more control. Knowing how to attach a shock pump to a rear shock includes pumping at the right speed. It’s like cooking on low heat. It takes longer, but it’s worth it. Always be patient when pumping your rear shock.
Reaching the Target Pressure
Reaching the target pressure might take some time. Don’t get discouraged! Just keep pumping slowly and steadily. Check the gauge often. If you go over the target pressure, don’t worry. Most pumps have a bleed valve. This lets you release small amounts of air. Use the bleed valve to fine-tune the pressure. Get it exactly where you want it. Knowing how to attach a shock pump to a rear shock includes fine-tuning the pressure. This ensures your suspension is working perfectly. Always double-check the pressure after fine-tuning.
Fun Fact or Stat: Pumping a rear shock can burn about 5-10 calories per minute. It’s a mini workout!
Detaching the Shock Pump Without Losing Air

This is the trickiest part. You don’t want to lose air when you detach the pump. Some air will escape, but you can minimize it. First, unscrew the pump quickly. Then, quickly replace the valve cap. The faster you are, the less air you’ll lose. Some pumps have a special valve. This valve helps prevent air loss. Knowing how to attach a shock pump to a rear shock also means knowing how to detach it properly. Practice makes perfect. The more you do it, the better you’ll get. Always double-check the pressure after detaching the pump. This ensures you haven’t lost too much air.
- Unscrew the pump quickly.
- Replace the valve cap quickly.
- Minimize the amount of time the valve is open.
- Use a pump with a special valve.
- Practice detaching the pump quickly.
Imagine you’re pulling off a Band-Aid. You wouldn’t do it slowly, right? You’d rip it off quickly. The same goes for detaching the shock pump. The faster you are, the less air you’ll lose. Learning how to attach a shock pump to a rear shock includes mastering the detachment. It’s like learning a magic trick. The secret is speed. Always have the valve cap ready. This will save you time. This will also prevent dirt from getting into the valve. Always double-check the pressure after detaching the pump.
The “Hiss” is Normal
Don’t panic when you hear a hiss. A little hiss is normal. It’s just the air escaping from the pump hose. The air inside the rear shock is still there. A good pump will minimize the hiss. But you’ll always hear it a little bit. The hiss doesn’t mean you’ve done anything wrong. It’s just part of the process. Knowing how to attach a shock pump to a rear shock includes understanding the hiss. It’s like understanding the rumble of a car engine. It’s normal and expected.
Using Pumps with No-Loss Valves
Some shock pumps have a special valve. This valve is called a “no-loss” valve. It’s designed to prevent air loss when you detach the pump. These pumps are more expensive. But they’re worth it if you’re worried about losing air. The no-loss valve seals the rear shock before you detach the pump. This keeps the air inside. Knowing how to attach a shock pump to a rear shock is easier with a no-loss valve. It takes the guesswork out of the process. Always read the instructions for your pump carefully.
Checking the Pressure After Detachment
Always check the pressure after detaching the pump. This is the most important step. It ensures you haven’t lost too much air. If you’ve lost a lot of air, repeat the process. Re-attach the shock pump to the rear shock. Add more air. Detach the pump again. Check the pressure again. Keep doing this until you get the right pressure. Knowing how to attach a shock pump to a rear shock includes checking the pressure. It’s like checking the temperature of food. It ensures it’s cooked properly.
Fun Fact or Stat: A quick detachment can save you up to 2 PSI of air pressure compared to a slow one!
Maintaining Your Rear Shock and Pump
Your rear shock and pump need love too. Keep them clean. Wipe them down with a rag after each use. Store them in a safe place. This prevents damage. Check the pump hose for cracks. Replace it if needed. Check the valve core on the shock. Tighten it if it’s loose. Knowing how to attach a shock pump to a rear shock also means knowing how to maintain them. This keeps them working properly. This also extends their lifespan. Always take care of your equipment.
- Keep your rear shock and pump clean.
- Store them in a safe place.
- Check the pump hose for cracks.
- Tighten the valve core on the shock.
- Replace parts as needed.
Imagine you’re taking care of a pet. You wouldn’t ignore it, right? You’d feed it and groom it. The same goes for your rear shock and pump. They need regular care. Learning how to attach a shock pump to a rear shock includes maintaining them. It’s like keeping your bike chain oiled. It makes everything run smoother. Always clean your equipment after each ride. This prevents dirt from building up. This will keep them working perfectly.
Cleaning the Shock and Pump
Dirt and grime can damage your rear shock and pump. Clean them regularly. Use a damp rag to wipe them down. Don’t use soap or harsh chemicals. These can damage the seals. Pay special attention to the valve. Clean it with a small brush. This removes dirt that can cause leaks. Knowing how to attach a shock pump to a rear shock includes keeping them clean. It’s like brushing your teeth. It prevents problems before they start. Always clean your equipment after each ride.
Checking for Leaks and Damage
Regularly check your rear shock and pump for leaks and damage. Look for cracks in the hose. Listen for hissing sounds. Check the valve core for looseness. If you find any problems, fix them right away. Don’t wait until they get worse. Small problems can become big problems. Knowing how to attach a shock pump to a rear shock includes spotting problems early. It’s like checking your car’s oil. It prevents major breakdowns. Always inspect your equipment before each ride.
Storing Your Equipment Properly
Store your rear shock and pump in a safe place. Keep them out of direct sunlight. Avoid extreme temperatures. Don’t leave them in a damp area. This can cause rust. A good storage place is a cool, dry closet. You can also store them in a toolbox. This protects them from damage. Knowing how to attach a shock pump to a rear shock includes storing them properly. It’s like storing food in the refrigerator. It keeps them fresh and usable. Always protect your equipment from the elements.
Fun Fact or Stat: Properly maintained rear shocks can last up to 5 years or more!
Summary
Learning how to attach a shock pump to a rear shock is important for keeping your bike in top shape. A rear shock helps your bike ride smoothly. It absorbs bumps and keeps you comfortable. Over time, the air inside the shock can leak out. This is why you need a shock pump. A shock pump lets you add air back into the shock. It has a gauge that shows the air pressure. To attach the shock pump to the rear shock, you need to find the valve, screw on the pump, and pump to the right pressure. Always check your bike’s manual for the correct pressure. Don’t forget to detach the pump carefully to avoid losing air. With practice, you’ll become a pro at maintaining your bike’s suspension.
Conclusion
You now know how to attach a shock pump to a rear shock. Remember to be gentle and take your time. Always check your bike’s manual for the right air pressure. Regular maintenance will keep your bike riding smoothly for years to come. Knowing how to properly inflate your rear shock is a valuable skill. So go ahead and give it a try. Your bike will thank you for it. Happy riding!
Frequently Asked Questions
Question No 1: What is a rear shock and why does it need air?
Answer: A rear shock is like a spring on your bike. It soaks up bumps and makes your ride smoother. Inside the shock, air acts like a cushion. Over time, this air can leak out. When this happens, the shock doesn’t work as well. Adding air with a shock pump refills the cushion. This brings your suspension back to life. That’s why it is so important to ensure you know how to attach a shock pump to a rear shock in order to keep your bike in tip-top condition for every ride, as well as keep you safe.
Question No 2: Can I use a regular tire pump to inflate my rear shock?
Answer: No, you should never use a regular tire pump on your rear shock. Tire pumps push a lot of air very quickly. This can easily over-inflate the shock and damage it. Shock pumps are special. They add small amounts of air slowly. They also have a gauge that shows the pressure. Using the wrong pump can be dangerous. It can also damage your bike. It’s always best to use the right tool for the job. This is an important part of knowing how to attach a shock pump to a rear shock.
Question No 3: How often should I check the air pressure in my rear shock?
Answer: You should check the air pressure in your rear shock regularly. A good rule is to check it before every ride. This ensures that the shock is working properly. It also helps you catch any leaks early. If you ride often, check it at least once a week. If you don’t ride often, check it before each ride. Knowing how to attach a shock pump to a rear shock and checking the pressure regularly is important for safety. A properly inflated shock makes for a safer and more comfortable ride.
Question No 4: What do I do if I over-inflate my rear shock?
Answer: If you over-inflate your rear shock, don’t panic. Most shock pumps have a bleed valve. This valve lets you release small amounts of air. Use the bleed valve to slowly release air until you reach the right pressure. Check the gauge often to make sure you don’t release too much air. If your pump doesn’t have a bleed valve, you can carefully unscrew the pump slightly to release air. But be very careful! Knowing how to attach a shock pump to a rear shock also means knowing how to fix mistakes. Always double-check the pressure after releasing air.
Question No 5: Why does some air escape when I detach the shock pump?
Answer: It’s normal for some air to escape when you detach the shock pump. This is because the valve on the shock needs to close. When you detach the pump, some air from the hose escapes. This is usually a small amount. Some pumps have a “no-loss” valve. This valve helps prevent air loss. To minimize air loss, detach the pump quickly. Then, quickly replace the valve cap. Understanding how to attach a shock pump to a rear shock includes knowing about this air loss. Don’t worry if you hear a little hiss.
Question No 6: How do I know what the correct air pressure is for my rear shock?
Answer: The best way to find the correct air pressure is to check your bike’s manual. The manual will have a chart that tells you the right pressure for your weight. Start with that number. You can always add or remove a little air to fine-tune the pressure. If you don’t have the manual, you can usually find it online. Search for your bike’s make and model. Knowing how to attach a shock pump to a rear shock is important. But knowing the right pressure is even more important. This ensures your suspension is working perfectly for your weight and riding style.


