
How to Pump to Correct PSI with Mini Pump: Easy Guide
Quick Summary: Pumping your tires to the correct PSI with a mini pump can be tricky, but it’s totally doable! First, find the recommended PSI range on your tire’s sidewall. Attach the pump head securely to the valve. Then, pump steadily, using your body weight for leverage. Check the pressure frequently using the pump’s gauge (if it has one) or a separate pressure gauge. It might take some effort, but precise inflation ensures a safer, smoother ride!
Getting your bike tires to the right pressure is super important for a comfy and safe ride. Mini pumps are great because they’re small and easy to carry. But, let’s be real, using them can sometimes feel like a workout! It can be frustrating when you’re on the road or trail, trying to get your tires just right. But don’t worry, with a few simple tricks, you can master the mini pump and get your tires inflated to the perfect PSI every time.
This guide will walk you through each step, from understanding PSI to pumping like a pro. We’ll cover everything from reading your tire’s sidewall to using your body weight to your advantage. Plus, we’ll answer some common questions about mini pumps and tire pressure. Let’s get started!
Understanding PSI and Your Tires

PSI stands for “pounds per square inch.” It’s how we measure the air pressure inside your tires. Knowing the right PSI for your tires is key for a good ride.
Why is Correct PSI Important?
- Safety: Underinflated tires can lead to pinch flats (when the tube gets squeezed between the tire and the rim) and make your bike harder to control. Overinflated tires can burst or provide a harsh ride.
- Performance: The right PSI optimizes rolling resistance. This means you’ll ride faster and use less energy.
- Comfort: Correct tire pressure absorbs bumps and vibrations, making your ride smoother and more enjoyable.
Finding the Recommended PSI
The recommended PSI range is printed on the sidewall of your tire. It usually looks something like “50-80 PSI” or “3.5-5.5 BAR.”
Important notes:
- The listed range is a guideline.
- Your ideal PSI depends on your weight, riding style, and the terrain.
- Wider tires generally need lower pressure, while narrower tires need higher pressure.
Factors Affecting Your Ideal PSI
- Rider Weight: Heavier riders need higher PSI to prevent pinch flats. Lighter riders can use lower PSI for a more comfortable ride.
- Terrain: Smooth pavement? Higher PSI. Rough gravel or trails? Lower PSI for better grip and comfort.
- Tire Width: Wider tires have more volume, so they need less pressure. Narrower tires need more pressure to maintain their shape and prevent pinch flats.
- Weather Conditions: In wet conditions, slightly lower PSI can improve grip.
Choosing the Right Mini Pump
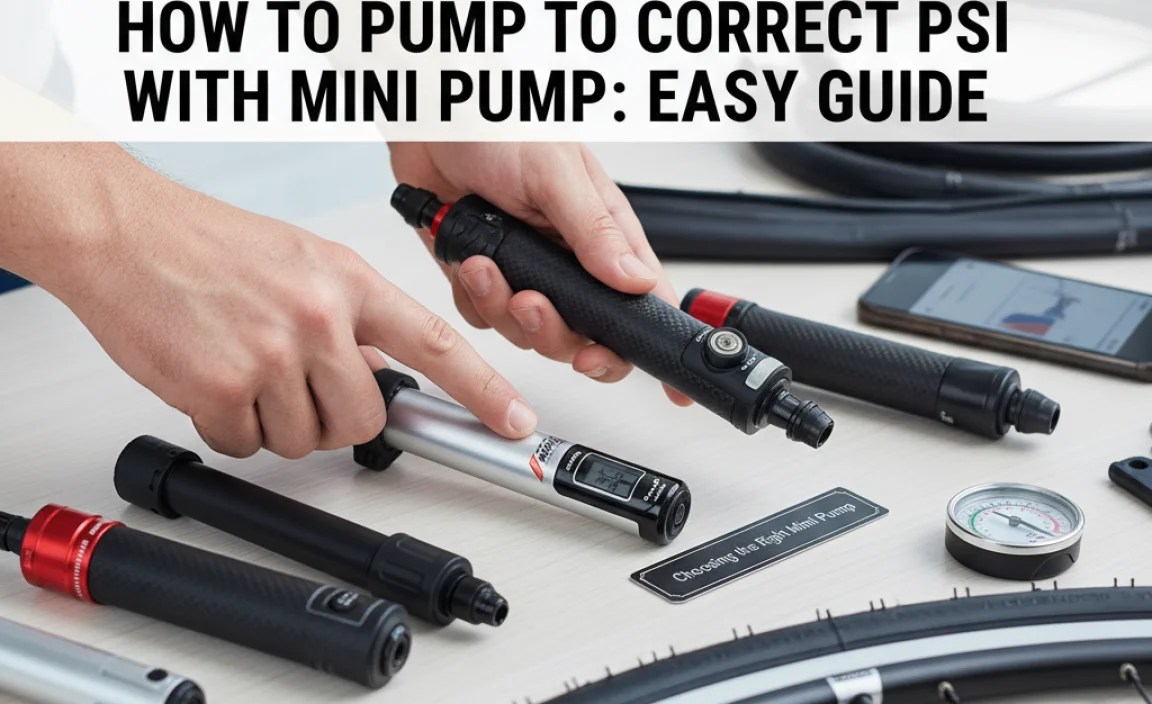
Not all mini pumps are created equal. Here’s what to look for:
Types of Mini Pumps
- Hand Pumps: These are the most common type. They’re lightweight and portable, but require more effort to use.
- Frame-Mounted Pumps: These attach directly to your bike frame, so you always have them with you.
- CO2 Inflators: These use CO2 cartridges to quickly inflate your tires. They’re fast and easy, but you need to carry extra cartridges.
- Hybrid Pumps: These combine features of hand pumps and CO2 inflators, offering both options.
Key Features to Consider
- Pressure Gauge: A built-in gauge lets you see how much pressure you’re adding. This is super helpful for getting the PSI just right. Some pumps have digital gauges for even greater accuracy.
- Valve Compatibility: Make sure the pump works with your bike’s valve type (Presta or Schrader). Some pumps have a switch or adapter to work with both.
- Pumping Efficiency: Look for a pump that delivers a decent amount of air per stroke. This will save you time and effort.
- Size and Weight: Consider how small and light the pump is, especially if you’re carrying it in a jersey pocket or backpack.
- Durability: A well-built pump will last longer and withstand more use. Look for pumps made from high-quality materials like aluminum.
Recommended Mini Pumps
Here are a few popular and reliable mini pumps:
| Pump Model | Type | Features | Pros | Cons |
|---|---|---|---|---|
| Lezyne Micro Floor Drive HP | Hand Pump | Foot peg, gauge, hose | Easy to use, efficient | Slightly larger |
| Topeak Road Morph G | Hand Pump | Foot peg, gauge, hose | Stable, accurate inflation | Can be bulky |
| Crankbrothers Sterling S | Hand Pump | Compact, Presta/Schrader | Lightweight, versatile | Less efficient at high PSI |
| Genuine Innovations Ultraflate CO2 Inflator | CO2 Inflator | Fast inflation, compact | Very quick | Requires cartridges |
Step-by-Step Guide: Pumping Your Tires

Okay, let’s get to the actual pumping! Here’s a detailed guide to inflating your tires to the correct PSI using a mini pump.
Tools You’ll Need
- Mini pump
- Tire pressure gauge (if your pump doesn’t have one)
- A clean cloth (optional, for wiping down the valve)
Step 1: Prepare Your Bike and Pump
- Find a Safe Location: Park your bike on a stable, flat surface away from traffic.
- Inspect Your Tires: Check for any cuts, embedded glass, or other damage. Address any issues before inflating.
- Prepare the Pump: Extend the pump hose (if it has one) and make sure the pump head is compatible with your valve type (Presta or Schrader).
Step 2: Access the Valve
- Remove the Valve Cap: Unscrew the small cap on the valve and set it aside in a safe place.
- Presta Valve (Skinny Valve): Unscrew the small nut at the top of the valve to open it. Gently press the valve stem to release a tiny bit of air and ensure it’s not stuck.
- Schrader Valve (Car Valve): No need to do anything special. It’s ready to go.
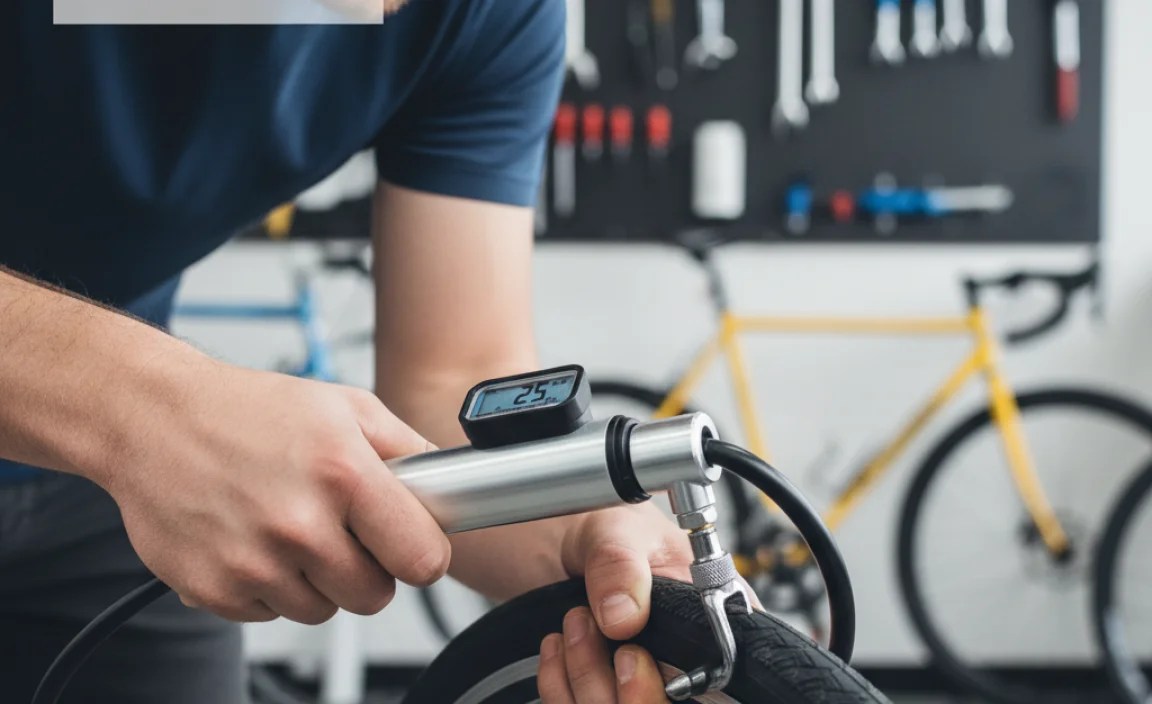
Step 3: Attach the Pump Head
- Position the Pump Head: Place the pump head straight onto the valve.
- Secure the Connection: For Presta valves, make sure the pump head is fully seated and the locking lever (if there is one) is engaged. For Schrader valves, press the pump head firmly onto the valve until it’s snug.
- Check for Leaks: Listen for any hissing sounds. If you hear air leaking, reposition the pump head and try again. A secure connection is crucial for efficient pumping.
Step 4: Start Pumping
- Grip the Pump: Hold the pump firmly with both hands. Place one hand on the pump body and the other on the handle.
- Use Your Body Weight: Instead of just using your arms, use your body weight to push down on the pump handle. This will make pumping easier and more efficient.
- Pump Steadily: Maintain a smooth, consistent pumping motion. Avoid jerky or rushed movements.
Step 5: Check the Pressure
- Use the Built-In Gauge: If your pump has a gauge, monitor the pressure as you pump.
- Use a Separate Gauge: If your pump doesn’t have a gauge, stop pumping periodically and use a separate tire pressure gauge to check the PSI.
- Squeeze Test (Rough Estimate): As a last resort, you can squeeze the tire to get a rough idea of the pressure. The tire should feel firm but still have some give.
Step 6: Reach the Correct PSI
- Continue Pumping: Keep pumping until you reach the desired PSI. Remember to stay within the recommended range printed on your tire.
- Small Adjustments: It’s better to slightly underinflate than overinflate. You can always add more air, but it’s harder to remove it with a mini pump.
Step 7: Detach the Pump Head
- Disengage the Locking Lever (if applicable): If your pump has a locking lever, disengage it before removing the pump head.
- Remove the Pump Head: Pull the pump head straight off the valve. Be careful not to bend the valve stem.
Step 8: Secure the Valve
- Presta Valve: Screw the small nut at the top of the valve back down until it’s snug.
- Replace the Valve Cap: Screw the valve cap back on to protect the valve from dirt and debris.
Step 9: Double-Check and Ride!
- Inspect the Tire: Give the tire one last look to make sure everything is in order.
- Bounce Test: Bounce the bike a few times to feel the tire pressure. It should feel firm and responsive.
- Enjoy Your Ride: You’re now ready to hit the road or trail with properly inflated tires!
Troubleshooting Common Issues
Even with the best technique, you might run into some problems. Here’s how to handle them:
Problem: Air Leaking When Pumping
- Cause: Poor seal between the pump head and the valve.
- Solution:
- Reposition the pump head and make sure it’s fully seated.
- Check the pump head for wear or damage.
- Try a different pump head if possible.
Problem: Difficulty Pumping
- Cause: Insufficient leverage or a pump with low pumping efficiency.
- Solution:
- Use your body weight to push down on the pump handle.
- Make sure the pump is properly lubricated.
- Consider upgrading to a more efficient pump.
Problem: Can’t Reach Desired PSI
- Cause: Mini pumps have limited volume.
- Solution:
- Pump slowly and steadily.
- Take breaks to avoid overheating the pump.
- Accept that you might not be able to reach the maximum PSI listed on the tire with a mini pump. Get as close as you can.
Problem: Bent or Broken Valve
- Cause: Excessive force when attaching or detaching the pump head.
- Solution:
- Be gentle when handling the valve.
- Use a pump with a flexible hose to reduce stress on the valve.
- If the valve is bent, try to straighten it carefully. If it’s broken, you’ll need to replace the tube.
Tips for Easier Pumping
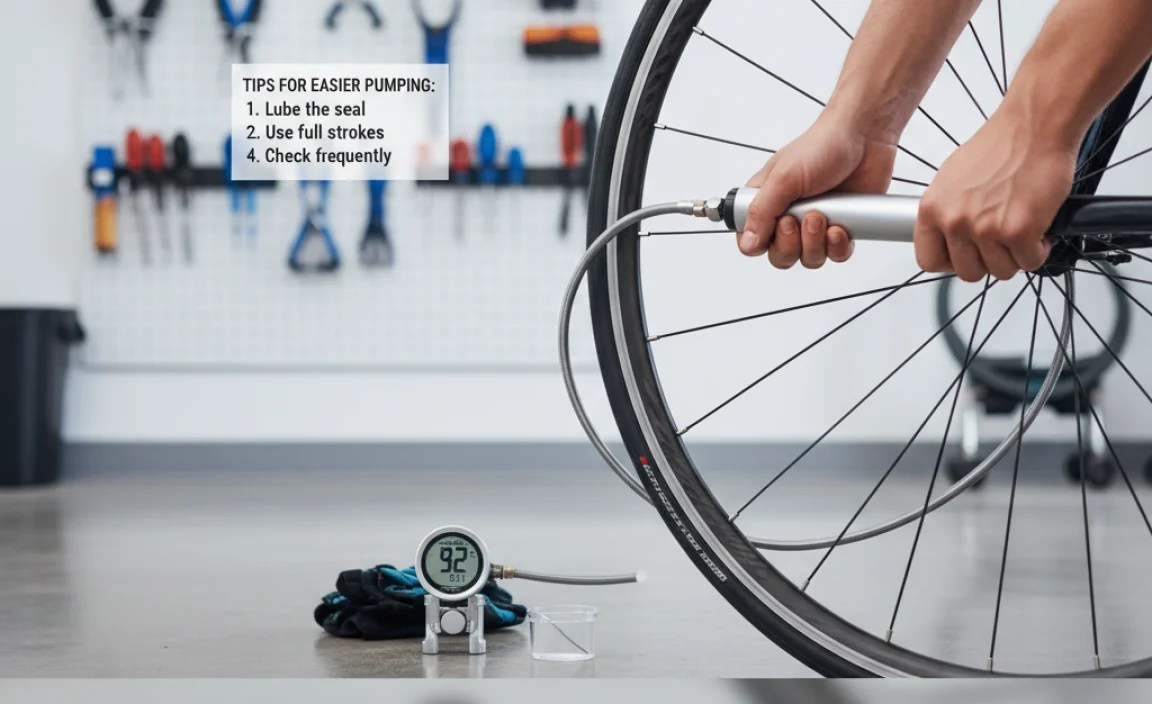
Here are some extra tips to make pumping with a mini pump less of a hassle:
- Use a Foot Peg: Some mini pumps have a fold-out foot peg that you can stand on for extra stability.
- Take Breaks: Pumping can be tiring, especially at higher pressures. Take short breaks to avoid getting exhausted.
- Lubricate the Pump: A little bit of lubricant on the pump piston can make pumping smoother and easier.
- Practice Makes Perfect: The more you use your mini pump, the better you’ll get at it. Practice at home before you need to use it on the road.
- Consider a Floor Pump at Home: While mini pumps are great for emergencies, a floor pump is much easier to use for regular inflation.
Mini Pump vs. Floor Pump: Which is Right for You?
Let’s compare mini pumps and floor pumps to help you decide which one is best for your needs.
| Feature | Mini Pump | Floor Pump |
|---|---|---|
| Portability | Excellent | Poor |
| Ease of Use | Difficult | Easy |
| Pumping Efficiency | Low | High |
| Pressure Accuracy | Variable (depends on gauge) | High |
| Best For | Emergency repairs on the road | Home use, precise inflation |
Mini pumps are essential for carrying with you on rides for emergency repairs. They are compact and lightweight, but require more effort to use and may not provide the most accurate pressure readings.
Floor pumps are ideal for home use. They offer greater stability, efficiency, and accuracy, making it easier to inflate your tires to the precise PSI you need.
FAQ About Mini Pumps and Tire Pressure
Here are some frequently asked questions about using mini pumps and maintaining proper tire pressure:
1. What’s the difference between Presta and Schrader valves?
Presta valves are narrow and have a small nut at the top that you need to unscrew to inflate. Schrader valves are wider and look like the valves on car tires. Most road bikes use Presta valves, while mountain bikes and hybrid bikes often use Schrader valves.
2. How do I know if my mini pump is compatible with my valve type?
Most mini pumps are designed to work with both Presta and Schrader valves. Some have a switch or adapter that you need to adjust, while others automatically adjust to the valve type. Check the pump’s instructions to be sure.
3. Can I use a mini pump to inflate tubeless tires?
Yes, you can use a mini pump to inflate tubeless tires, but it might be challenging. Tubeless tires often require a large volume of air to seat the bead properly. A floor pump or a special tubeless inflator is usually more effective.
4. How often should I check my tire pressure?
Ideally, you should check your tire pressure before every ride. Tires lose pressure over time, so regular checks will ensure you’re always riding with the correct PSI.
5. What happens if I overinflate my tires?
Overinflating your tires can lead to a harsh ride and increase the risk of a burst tire. It’s best to stay within the recommended PSI range printed on your tire’s sidewall.
6. Can temperature affect tire pressure?
Yes, temperature can affect tire pressure. As the temperature increases, the air pressure in your tires will also increase. Conversely, as the temperature decreases, the air pressure will decrease. It’s a good idea to check your tire pressure more frequently during periods of significant temperature changes. The ideal gas law explains this relationship: PV = nRT, where P is pressure, V is volume, n is the amount of substance, R is the ideal gas constant, and T is temperature.
7. How accurate are the gauges on mini pumps?
The accuracy of gauges on mini pumps can vary. Some high-end mini pumps have very accurate gauges, while others may be less precise. If you want to ensure accurate pressure readings, it’s best to use a separate, high-quality tire pressure gauge.
Conclusion
Pumping your tires to the correct PSI with a mini pump might seem like a chore, but it’s a skill that every cyclist should master. By understanding PSI, choosing the right pump, and following the steps outlined in this guide, you can keep your tires properly inflated and enjoy a safer, more comfortable ride. Remember to practice, be patient, and don’t be afraid to experiment to find the perfect tire pressure for your riding style and conditions.
So, the next time you’re out on the road or trail and your tires need a little boost, you’ll be ready to confidently whip out your mini pump and get back to enjoying your ride. Happy cycling!


