
Parts of a Bicycle Pump: Easy Guide for Beginners
Quick Summary:
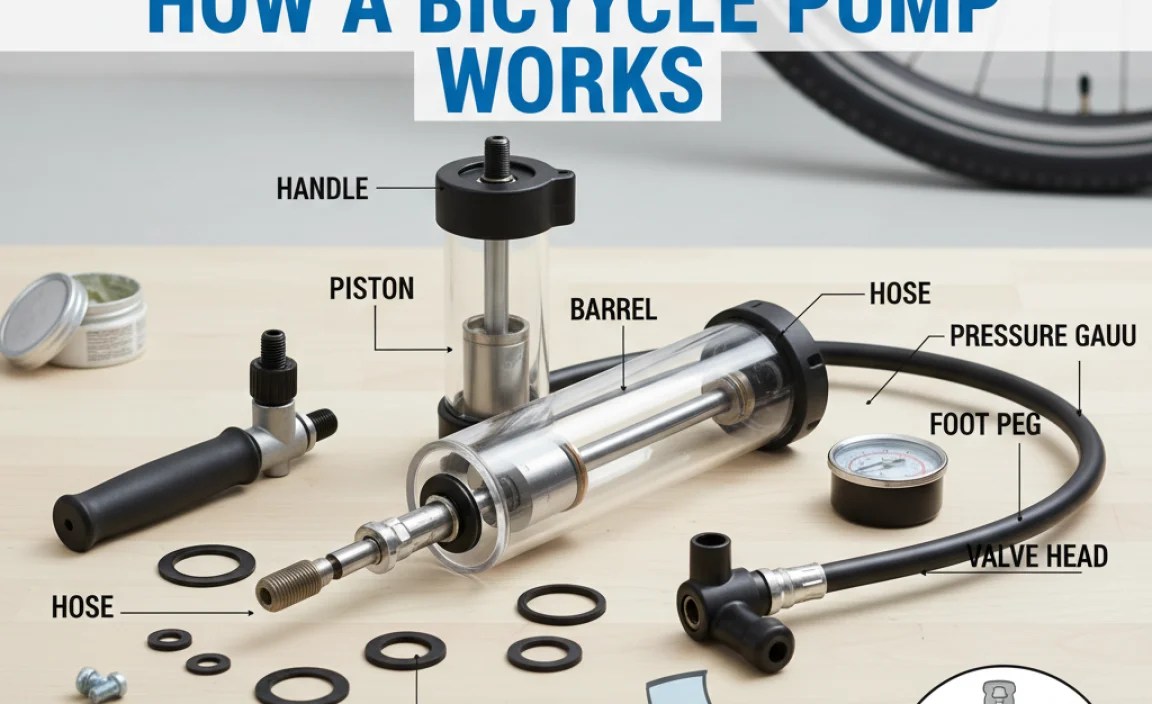
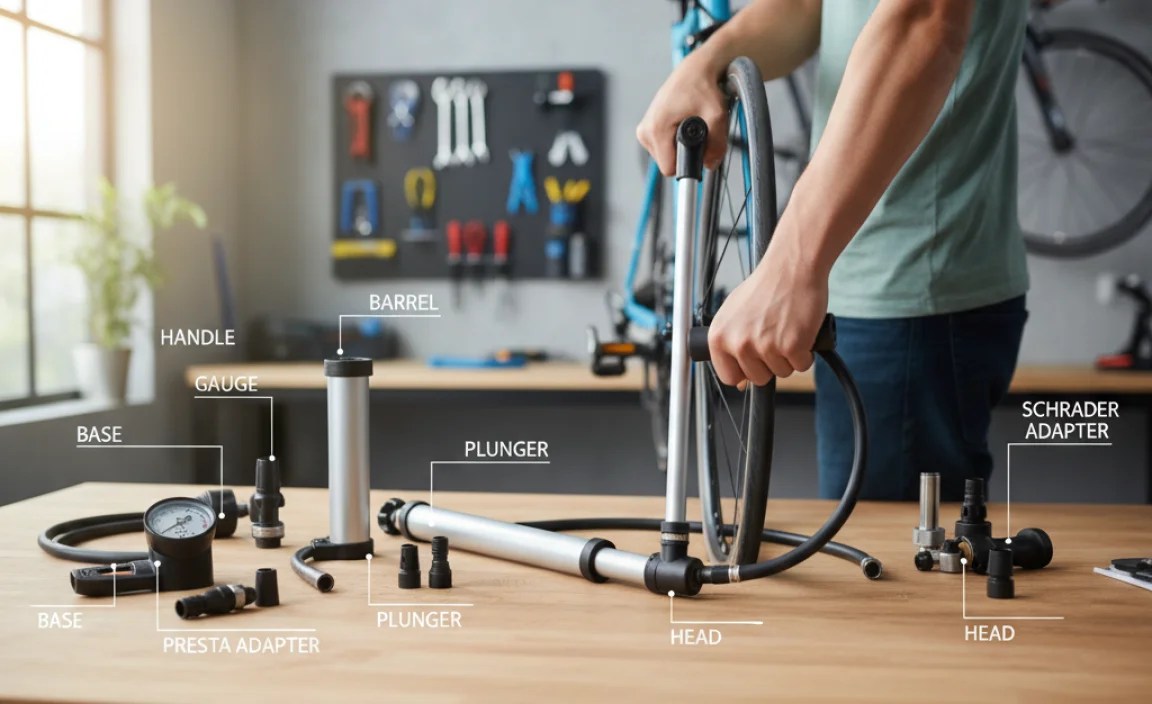
A bicycle pump has several key parts that work together to inflate your tires. These include the handle, barrel, piston, hose, valve connector (like Schrader or Presta), base, and pressure gauge. Understanding these components helps you maintain your pump and keep your tires properly inflated for a smooth ride.
Ever struggled with a bike pump that just won’t do its job? You’re not alone! Many cyclists find bike pumps confusing, especially when things go wrong. Knowing the different parts of your bicycle pump is essential for easy maintenance and efficient inflation. This guide breaks down each component, so you’ll know exactly what’s what.
We’ll cover everything from the handle to the valve connector, explaining how each part contributes to getting air into your tires. Ready to become a bike pump pro? Let’s dive in!
Understanding the Parts of a Bicycle Pump

A bicycle pump is a simple machine, but each part plays a vital role. Let’s explore each component in detail.
1. Handle
The handle is what you grip and push or pull to operate the pump. It’s usually made of plastic, wood, or metal, often with a rubber or foam grip for comfort.
- Function: Allows you to apply force to the piston, creating air pressure.
- Materials: Plastic, wood, metal with rubber or foam grip.
- Maintenance: Check for cracks or looseness. Replace if damaged.
2. Barrel
The barrel is the main body of the pump, a cylinder inside which the piston moves. It’s usually made of steel or aluminum.
- Function: Houses the piston and holds the air before it’s pushed into the tire.
- Materials: Steel or aluminum.
- Maintenance: Ensure it’s clean and free from dents or damage.
3. Piston
The piston is a component that moves up and down inside the barrel to compress air. It includes a seal (often a rubber O-ring) to prevent air leakage.
- Function: Compresses air inside the barrel.
- Materials: Plastic or metal with a rubber or synthetic seal.
- Maintenance: Regularly check and replace the O-ring if worn or damaged.
4. Hose
The hose connects the pump to the tire valve. It’s usually made of flexible rubber or plastic.
- Function: Transfers air from the pump to the tire valve.
- Materials: Rubber or plastic.
- Maintenance: Inspect for cracks or leaks. Replace if necessary.
5. Valve Connector
The valve connector attaches to the tire valve (either Schrader or Presta). Some pumps have dual-head connectors to fit both types.
- Function: Creates a secure connection to the tire valve.
- Types: Schrader, Presta, or dual-head.
- Maintenance: Ensure it’s clean and fits snugly on the valve. Replace if damaged.
6. Base
The base provides stability for the pump, especially for floor pumps. It’s usually made of steel or plastic.
- Function: Provides a stable platform for pumping.
- Materials: Steel or plastic.
- Maintenance: Check for stability and ensure it’s securely attached to the barrel.
7. Pressure Gauge
The pressure gauge indicates the air pressure in the tire, usually measured in PSI (pounds per square inch) or BAR. Some pumps have digital gauges for more precise readings.
- Function: Displays the tire pressure.
- Types: Analog or digital.
- Accuracy: Check and calibrate if possible.
8. Check Valve
The check valve is a one-way valve that allows air to flow into the tire but prevents it from flowing back into the pump.
- Function: Prevents backflow of air.
- Location: Usually located near the base of the barrel or in the valve connector.
- Maintenance: Ensure it’s clean and functioning correctly. Replace if faulty.
Types of Bicycle Pumps

There are several types of bicycle pumps, each designed for specific uses. Here’s a quick overview:
1. Floor Pumps
Floor pumps are designed for home use and offer high volume and pressure. They’re easy to use and have a stable base.
- Pros: High volume, stable, easy to use.
- Cons: Not portable.
- Best For: Home use, inflating tires quickly.
2. Hand Pumps
Hand pumps are portable and designed for on-the-go inflation. They’re smaller and lighter than floor pumps but require more effort.
- Pros: Portable, lightweight.
- Cons: Requires more effort, lower volume.
- Best For: Emergency repairs on the road.
3. CO2 Inflators
CO2 inflators use compressed carbon dioxide cartridges to quickly inflate tires. They’re very fast but require purchasing cartridges.
- Pros: Very fast inflation.
- Cons: Requires cartridges, can be wasteful.
- Best For: Racing, quick repairs.
4. Mini Pumps
Mini pumps are compact versions of hand pumps, designed for maximum portability. They often attach to the bike frame.
- Pros: Extremely portable, lightweight.
- Cons: Requires significant effort, low volume.
- Best For: Carrying on rides for emergencies.
How a Bicycle Pump Works
Understanding how a bicycle pump works can help you troubleshoot issues and maintain it properly.
The Pumping Action
When you pull up on the handle, the piston moves up inside the barrel, creating a vacuum. This vacuum sucks air into the barrel through an intake valve. When you push down on the handle, the piston compresses the air. This compressed air forces the check valve open, allowing air to flow into the tire. The check valve prevents the air from flowing back into the pump when you release the handle.
Valve Types: Schrader vs. Presta
Bicycle tires use two main types of valves: Schrader and Presta. Understanding the difference is crucial for using your pump correctly.
Schrader Valves
Schrader valves are the same type used on car tires. They’re wider and more robust, with a spring-loaded pin in the center.
- Commonly Found On: Mountain bikes, hybrid bikes, and some road bikes.
- Pros: Durable, easy to inflate.
- Cons: Less precise pressure control.
Presta Valves
Presta valves are narrower and have a valve core that you must unscrew to inflate. They’re common on high-performance road bikes.
- Commonly Found On: Road bikes, high-performance bikes.
- Pros: Allows for higher pressure, more precise control.
- Cons: More fragile, requires unscrewing before inflation.
Many modern pumps come with dual-head connectors that can accommodate both valve types. Ensure you use the correct side of the connector for your valve.
Step-by-Step Guide: Using a Bicycle Pump
Here’s how to use a bicycle pump effectively:
Step 1: Prepare the Valve
For Presta valves, unscrew the valve core by turning the small nut counterclockwise. Gently press the valve core to release any remaining air.
Step 2: Attach the Pump Head
Place the correct side of the pump head (Schrader or Presta) onto the valve. Ensure it’s firmly seated to create a good seal.
Step 3: Lock the Pump Head (If Applicable)
Many pumps have a lever that locks the pump head onto the valve. Engage the lever to secure the connection.
Step 4: Inflate the Tire
Hold the pump handle firmly and begin pumping. Use smooth, consistent strokes. Watch the pressure gauge to monitor the tire pressure.
Step 5: Reach the Desired Pressure
Inflate the tire to the recommended pressure, which is usually printed on the sidewall of the tire. Avoid over-inflating, as this can cause a blowout.
Step 6: Remove the Pump Head
Disengage the locking lever (if applicable) and carefully remove the pump head from the valve. For Presta valves, screw the valve core back in.
Step 7: Check the Tire
Squeeze the tire to ensure it feels firm but not overly hard. Check the pressure with a separate gauge if you’re unsure.
Troubleshooting Common Pump Problems
Even with a good pump, you might encounter some common issues. Here’s how to troubleshoot them:
1. Pump Won’t Inflate
Possible Causes:
- Incorrect valve connector setting.
- Leaky hose or valve connector.
- Damaged piston O-ring.
Solutions:
- Ensure the valve connector is set correctly for your valve type.
- Check the hose and connector for leaks. Replace if necessary.
- Inspect and replace the piston O-ring.
2. Air Leaking from Valve Connector
Possible Causes:
- Loose connection.
- Damaged valve core.
- Worn-out pump head seal.
Solutions:
- Ensure the pump head is securely attached.
- Tighten or replace the valve core.
- Replace the pump head seal.
3. Pressure Gauge Inaccurate
Possible Causes:
- Faulty gauge.
- Loose connection.
Solutions:
- Compare the reading with a separate gauge. Replace if necessary.
- Check and tighten the gauge connection.
4. Hard to Pump
Possible Causes:
- Dry piston.
- Clogged valve.
Solutions:
- Lubricate the piston with a silicone-based lubricant.
- Clean the valve connector and valve core.
Maintaining Your Bicycle Pump
Regular maintenance will keep your bicycle pump in good working condition and extend its lifespan.
1. Clean the Pump
Wipe down the pump with a clean cloth to remove dirt and grime. Pay special attention to the valve connector and hose.
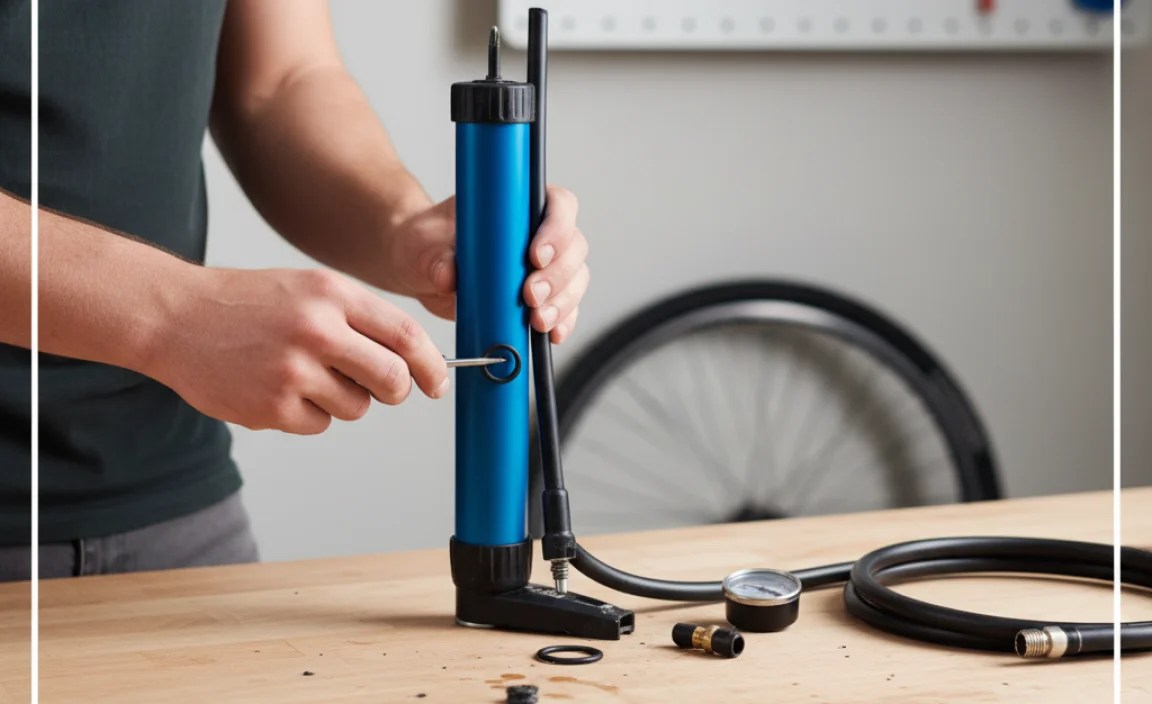
2. Lubricate the Piston
Apply a few drops of silicone-based lubricant to the piston regularly. This will keep it moving smoothly and prevent wear.
3. Check the O-Rings
Inspect the O-rings on the piston and valve connector for wear or damage. Replace them as needed.
4. Inspect the Hose
Check the hose for cracks or leaks. Replace it if you find any damage.
5. Store Properly
Store your pump in a dry place away from direct sunlight. This will prevent the rubber and plastic parts from deteriorating.
Essential Tools for Bike Pump Maintenance
Having the right tools on hand makes pump maintenance easier.
- O-Ring Replacement Kit: Contains various sizes of O-rings for the piston and valve connector.
- Silicone Lubricant: Keeps the piston moving smoothly.
- Valve Core Tool: For removing and tightening Presta and Schrader valve cores.
- Wrench Set: For tightening or replacing pump parts.
Recommended Bicycle Pumps
Here are a few recommended bicycle pumps for different needs:
| Pump Type | Model | Features | Price Range |
|---|---|---|---|
| Floor Pump | Topeak JoeBlow Sport III | Durable, accurate gauge, dual head | $40-$60 |
| Hand Pump | Lezyne Road Drive | Compact, high pressure, lightweight | $40-$50 |
| CO2 Inflator | Genuine Innovations Second Wind | Fast inflation, compact | $20-$30 |
| Mini Pump | Crankbrothers Sterling S | Ultra-compact, versatile | $30-$40 |
These pumps offer a good balance of performance, durability, and value. Consider your specific needs and budget when choosing a pump.
Advanced Tips for Bike Pump Users
Here are some advanced tips to help you get the most out of your bicycle pump:
- Use a Floor Pump with a Gauge: A floor pump with an accurate gauge is essential for precise inflation, especially for road bikes.
- Carry a Mini Pump or CO2 Inflator: Always carry a mini pump or CO2 inflator on your rides for emergency repairs.
- Check Tire Pressure Regularly: Check your tire pressure before each ride to ensure optimal performance and safety.
- Inflate to the Correct Pressure: Refer to the tire sidewall for the recommended pressure range. Adjust the pressure based on your weight and riding conditions.
- Consider Tubeless Setups: If you’re using tubeless tires, invest in a pump designed for tubeless inflation. These pumps deliver a high volume of air quickly to seat the tire beads. Learn more about tubeless tire setups.
FAQ: Parts of a Bicycle Pump
1. What is the difference between a Schrader and Presta valve?
Schrader valves are wider, like those on car tires, while Presta valves are narrower and have a lock nut that needs to be unscrewed before inflation.
2. How often should I lubricate my bike pump?
Lubricate your bike pump every few months, or whenever you notice it becoming harder to pump. Use a silicone-based lubricant.
3. What does PSI mean on a bike pump gauge?
PSI stands for pounds per square inch, a unit of pressure. The gauge shows how much air pressure is in your tire.
4. Can I use a car tire pump on my bicycle?
Yes, if your bike has Schrader valves. However, car pumps can sometimes over-inflate bicycle tires quickly, so be cautious.
5. How do I know if my bike pump is broken?
If the pump isn’t inflating the tire, air is leaking, or the gauge isn’t working, it may be broken. Check each part for damage.
6. What is a dual-head pump?
A dual-head pump has two different openings to fit both Schrader and Presta valves, making it versatile for different bikes.
7. Where can I find replacement parts for my bike pump?
You can find replacement parts at most bike shops or online retailers that sell cycling equipment. Websites like Amazon or specialized cycling stores often carry pump parts.
Conclusion
Understanding the parts of a bicycle pump and how they work together empowers you to maintain your equipment and keep your tires properly inflated. By knowing the function of each component, from the handle to the valve connector, you can troubleshoot common issues and ensure your pump is always ready for action. Regular maintenance, such as cleaning and lubricating the piston, will extend the life of your pump and make your rides smoother and safer.
Whether you’re a casual rider or a seasoned cyclist, taking the time to learn about your bike pump is an investment in your cycling experience. So, next time you reach for your pump, you’ll know exactly what’s going on inside, and you’ll be well-equipped to keep your tires at the perfect pressure for every adventure. Happy riding!


