
Bicycle Pump Repair Parts: Find Yours Fast!
Quick Summary:
Bicycle pumps often fail due to worn-out parts like seals, hoses, or valves. Repairing them is easy and affordable. You’ll typically need replacement O-rings, hose fittings, or valve cores. Identify the faulty part, find a compatible replacement, and follow our step-by-step guide to get your pump working like new!
Is your trusty bike pump not so trusty anymore? Does it struggle to inflate your tires, or has it given up entirely? Don’t toss it out just yet! Many pump problems come from a few common parts that wear out over time. The good news is that these parts are often easy and inexpensive to replace.
In this guide, we’ll walk you through identifying the most common culprits behind pump failures and show you how to replace them. We’ll cover everything from simple O-rings to more complex valve assemblies. Let’s get your pump back in action and your tires properly inflated!
Common Bicycle Pump Problems and Their Solutions
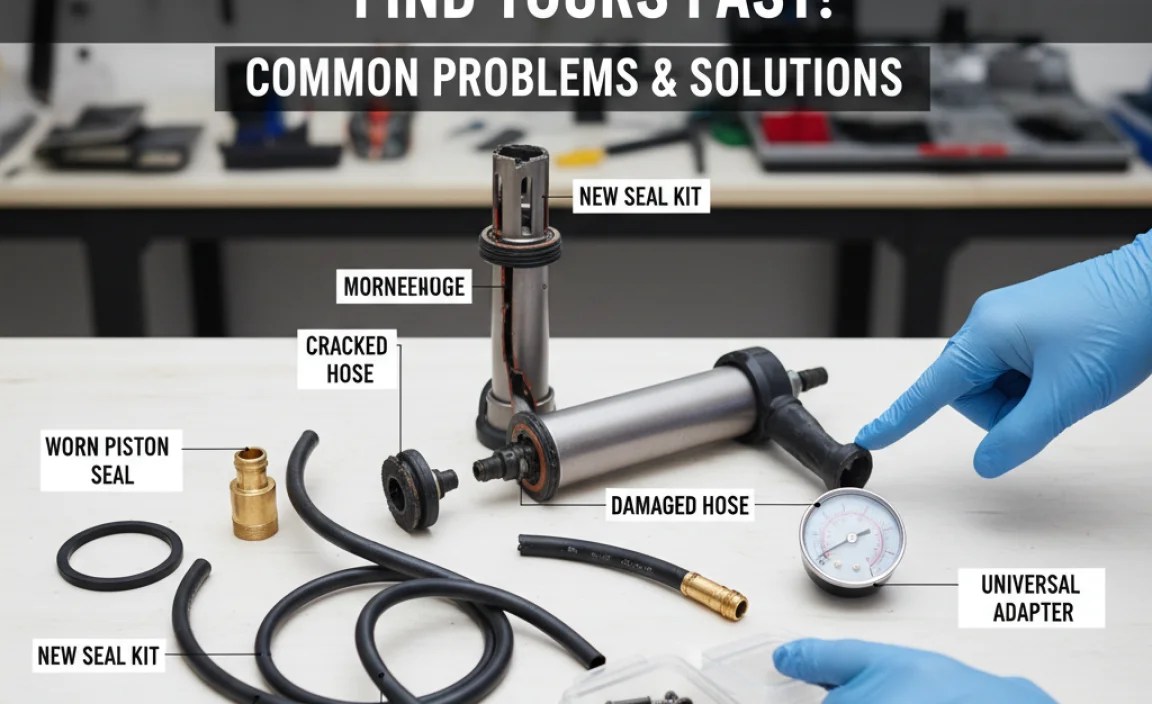
Before you can fix your bike pump, you need to figure out what’s wrong. Here’s a breakdown of common issues and the parts you’ll likely need to address them:
- Loss of Pressure: This often points to worn-out O-rings or seals in the pump’s piston or valve assembly.
- Leaky Hose: Cracks or punctures in the hose can cause air to escape. Check the hose and fittings for damage.
- Valve Problems: If the pump head doesn’t connect securely to the valve, or if air leaks from the valve during inflation, the valve core or pump head may be the issue.
- Sticking Piston: A sticky or difficult-to-move piston can be caused by dried-out grease or a damaged piston seal.
Essential Bicycle Pump Repair Parts

Here’s a rundown of the most common replacement parts you might need:
- O-Rings: These small rubber rings create airtight seals in various parts of the pump.
- Hose: Replace a damaged or cracked hose to prevent air leaks.
- Valve Cores: These are the inner parts of your tire valves (Presta or Schrader).
- Pump Head: The part that attaches to the tire valve. Some allow switching between Presta and Schrader.
- Piston Seal: This seal sits on the piston and ensures air is pushed efficiently into the tire.
- Check Valve: This valve prevents air from flowing back into the pump from the tire.
- Grease: Special grease designed for bicycle parts helps the pump function smoothly.
Tools You’ll Need for Bicycle Pump Repair

Having the right tools makes the job much easier. Here’s what you’ll likely need:
- Screwdrivers: Both Phillips head and flathead screwdrivers of various sizes.
- Pliers: For gripping and removing small parts.
- Allen Wrenches (Hex Keys): For loosening or tightening bolts.
- Valve Core Tool: Specifically designed for removing and installing valve cores.
- Grease: Bicycle-specific grease to lubricate moving parts.
- Rag or Paper Towels: For cleaning parts.
- Work Gloves: Protect your hands from grease and dirt.
Step-by-Step Guide to Replacing Common Bicycle Pump Parts

Now, let’s get into the nitty-gritty of repairing your pump. These steps cover the most common repairs.
Replacing O-Rings
Worn-out O-rings are a frequent cause of pressure loss. Here’s how to replace them:
- Disassemble the Pump: Carefully take apart the pump, noting the location of each part. Take pictures as you disassemble; this will help with reassembly.
- Locate the O-Rings: They are usually found on the piston and in the valve assembly.
- Remove the Old O-Rings: Use a small pick or screwdriver to gently pry them off. Be careful not to scratch the surrounding parts.
- Clean the Area: Wipe the area where the O-rings sit with a clean rag to remove any dirt or debris.
- Install the New O-Rings: Lightly grease the new O-rings with bicycle-specific grease and carefully place them in their grooves.
- Reassemble the Pump: Put the pump back together in the reverse order of disassembly.
Replacing a Damaged Hose
A cracked or leaky hose will prevent your pump from building pressure.
- Remove the Old Hose: Use pliers or a wrench to loosen the fittings that connect the hose to the pump and the pump head.
- Install the New Hose: Attach the new hose to the pump and pump head, tightening the fittings securely. Make sure the hose is properly seated in the fittings.
- Test for Leaks: Inflate a tire and check for any air leaks around the hose connections.
Replacing a Valve Core
If your tire valve is leaking, replacing the valve core is a simple fix.
- Remove the Old Valve Core: Use a valve core tool to unscrew and remove the old valve core from the valve stem.
- Install the New Valve Core: Screw the new valve core into the valve stem using the valve core tool. Tighten it snugly, but don’t overtighten.
- Test for Leaks: Inflate the tire and check for any air leaks around the valve stem.
Replacing the Pump Head
- Remove the Old Pump Head: Depending on the model, the pump head may be screwed on or attached with a clamp. Loosen the clamp or unscrew the head.
- Install the New Pump Head: Attach the new pump head, ensuring it’s securely fastened.
- Test the Connection: Try inflating a tire to ensure a secure, leak-free connection.
Lubricating the Piston
A sticky piston can make pumping difficult. Lubrication often solves the problem.
- Disassemble the Pump: Take the pump apart to access the piston.
- Clean the Piston and Cylinder: Wipe away any old grease or dirt from the piston and the inside of the pump cylinder.
- Apply New Grease: Apply a thin layer of bicycle-specific grease to the piston seal and the inside of the cylinder.
- Reassemble the Pump: Put the pump back together.
- Test the Action: The piston should now move smoothly.
Troubleshooting Tips
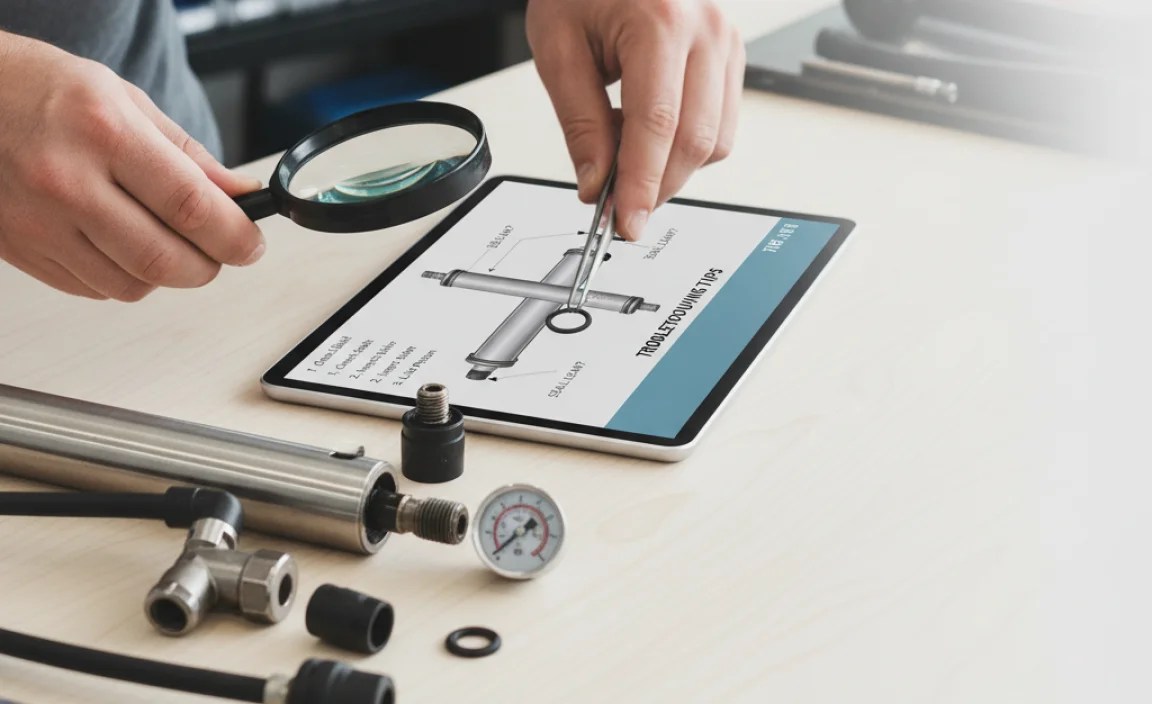
- Still Losing Pressure? Double-check all connections and O-rings. Sometimes a tiny piece of dirt can cause a leak.
- Pump Head Not Connecting Properly? Make sure the pump head is compatible with your valve type (Presta or Schrader). Some pump heads are adjustable.
- Piston Still Sticking? You may need to replace the piston seal if cleaning and greasing don’t solve the issue.
Choosing the Right Replacement Parts
Getting the right replacement parts is crucial for a successful repair. Here’s what to consider:
- Pump Model: Identify the make and model of your pump. Many manufacturers offer specific replacement parts for their pumps.
- O-Ring Size: If you’re replacing O-rings, measure the old ones carefully or consult the pump’s manual for the correct size.
- Valve Compatibility: Ensure the valve core or pump head is compatible with your tire valves (Presta or Schrader).
- Material Quality: Opt for high-quality replacement parts made from durable materials. This will ensure a longer-lasting repair.
Where to Buy Bicycle Pump Repair Parts
You can find bicycle pump repair parts at:
- Local Bike Shops: Often the best place to get advice and find specific parts.
- Online Retailers: Sites like Amazon, eBay, and specialty cycling stores offer a wide selection of parts.
- Pump Manufacturers’ Websites: Some manufacturers sell replacement parts directly on their websites.
Preventative Maintenance for Your Bicycle Pump
Taking good care of your pump can prevent many problems. Here are some tips:
- Regular Cleaning: Wipe down your pump regularly to remove dirt and grime.
- Lubrication: Periodically lubricate the piston and other moving parts with bicycle-specific grease.
- Proper Storage: Store your pump in a dry place to prevent rust and corrosion.
- Avoid Over-Pumping: Don’t exceed the pump’s maximum pressure rating.
Bicycle Pump Repair Parts: A Comprehensive Table
| Part | Common Issues | Solutions | Estimated Cost |
|---|---|---|---|
| O-Rings | Cracked, worn, or dried out, leading to air leaks. | Replace with correctly sized O-rings, lubricate with grease. | $5 – $10 (for a set) |
| Hose | Cracks, punctures, or loose connections. | Replace the entire hose assembly or tighten connections. | $10 – $25 |
| Valve Core | Leaking air, damaged threads. | Replace with a new valve core using a valve core tool. | $3 – $7 (for a pair) |
| Pump Head | Doesn’t seal properly, damaged connector. | Replace the entire pump head. Some are rebuildable. | $15 – $40 |
| Piston Seal | Worn out, causing loss of pressure. | Replace the piston seal, lubricate the cylinder. | $8 – $15 |
| Check Valve | Fails to prevent backflow of air. | Replace the check valve assembly. | $5 – $12 |
Presta vs. Schrader Valves: Understanding the Difference
It’s crucial to know which type of valve your bike uses, as the pump head and valve cores are not interchangeable.
- Presta Valves: These are narrower, with a small nut at the tip that needs to be unscrewed before inflation. They are commonly found on road bikes and high-performance bicycles.
- Schrader Valves: These are wider and similar to car tire valves. They have a spring-loaded pin in the center. They are often used on mountain bikes, hybrid bikes, and kids’ bikes.
Many pumps come with dual-head designs or adapters to accommodate both valve types.
Advanced Repairs: When to Seek Professional Help
While many pump repairs are straightforward, some issues may require professional attention:
- Complex Internal Damage: If the pump has significant internal damage, such as a broken cylinder or a severely damaged piston assembly.
- Specialized Tools Required: Some pumps require specialized tools for disassembly and repair.
- Lack of Experience: If you’re not comfortable working on mechanical devices, it’s best to take the pump to a bike shop.
FAQ: Bicycle Pump Repair
Here are some frequently asked questions about bicycle pump repair:
What causes a bicycle pump to stop working?
A pump usually stops working due to worn-out O-rings, a damaged hose, a faulty valve core, or a sticky piston.
How do I know what size O-ring to buy for my pump?
Check your pump’s manual or measure the old O-ring. Many bike shops can also help you identify the correct size.
Can I use regular grease on my bicycle pump?
No, use bicycle-specific grease. It’s designed to be safe for rubber and plastic parts.
How often should I lubricate my bicycle pump?
Lubricate your pump every few months, or whenever you notice the piston becoming sticky.
What is a valve core tool?
A valve core tool is a small tool used to remove and install valve cores in Presta and Schrader valves. They’re inexpensive and widely available.
Is it worth repairing a bicycle pump?
Yes, repairing a bicycle pump is usually more cost-effective than buying a new one, especially for high-quality pumps.
Can I convert my pump from Schrader to Presta or vice versa?
Some pump heads are convertible, while others require a complete pump head replacement. Check your pump’s specifications.
Conclusion
Repairing your bicycle pump is a simple and rewarding way to save money and keep your bike in top condition. By identifying the problem, gathering the right tools and parts, and following our step-by-step guide, you can get your pump working like new. Regular maintenance and preventative care will extend the life of your pump and ensure it’s always ready when you need it. So, don’t give up on that old pump – with a little TLC, it can be a reliable companion for many rides to come. Now, get out there and enjoy the ride with properly inflated tires!


