
Easy Install: Action Camera Mount on Drop Bar Ends
Do you love riding your bike? Do you want to record your cool tricks? You can! An action camera can capture all the fun. But how do you put it on your bike? Let’s learn how to install action camera mount on drop bar ends. It’s easier than you think!
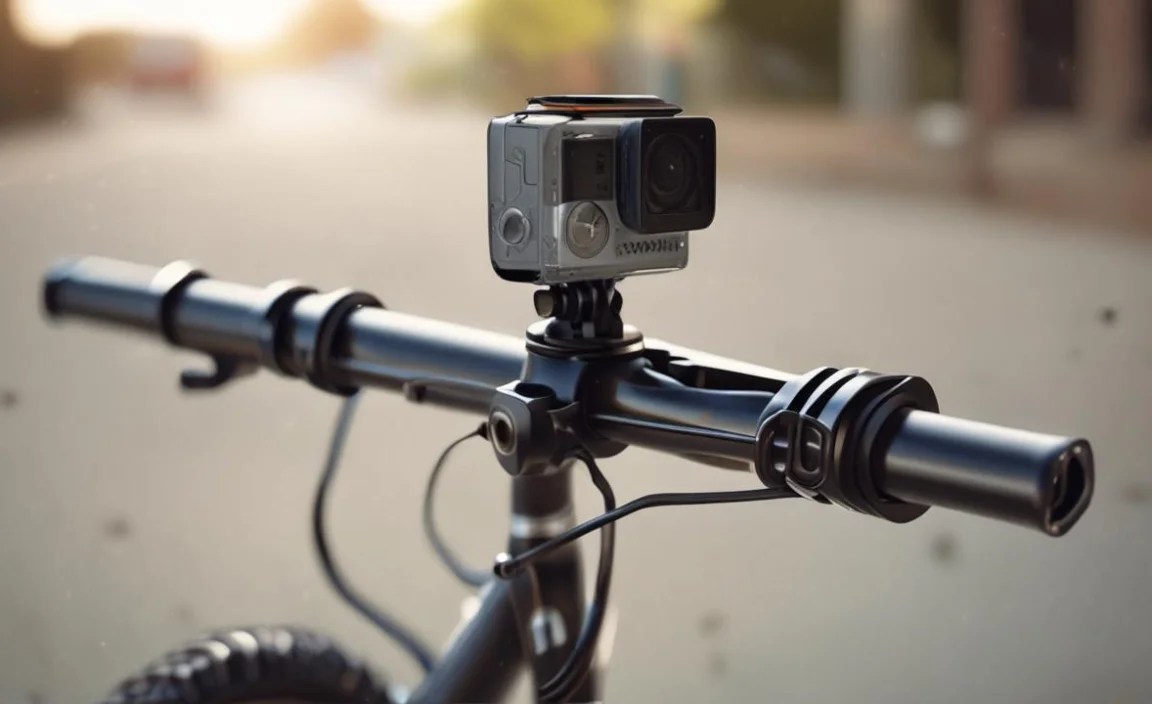
Have you ever seen a cyclist with a camera? They often use drop bar ends. These are the curved parts of the handlebars. Mounting a camera here gives a great view. It shows where you are going. Plus, it looks super cool. Let’s find out how to do it safely and easily.
Putting a camera on your bike is a great way to share your adventures. You can show your friends your favorite trails. You can even make videos for the internet. So, let’s get started and learn how to install action camera mount on drop bar ends.
Key Takeaways
- Installing an action camera mount on your drop bar ends is easier than it seems.
- Make sure the mount is super secure to prevent your camera from falling off.
- Choose a mount that fits your specific action camera and drop bar size.
- Proper installation ensures you capture stable and awesome footage while riding.
- Knowing how to install action camera mount on drop bar ends can improve your videos.
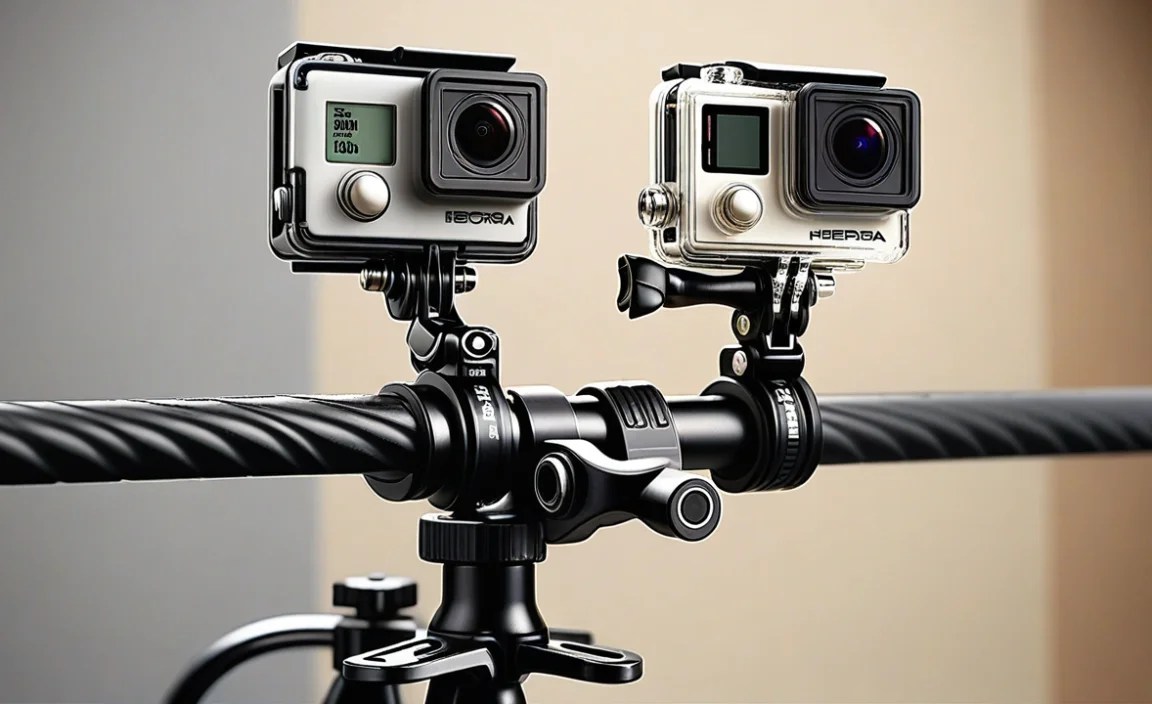
Choosing the Right Mount for Drop Bars
Picking the right mount is very important. The mount needs to fit your bike. It also needs to hold your camera safely. There are many different mounts. Some mounts are made for specific cameras. Other mounts can fit many cameras. Look for mounts that say they work with drop bars. Drop bars are the curved handlebars on some bikes. A good mount will be strong. It will keep your camera steady. This helps you get clear videos. Think about how you will use your camera. Do you want to take it on and off easily? Some mounts have quick-release features. This makes it simple to remove your camera. Read reviews to see what other riders like. This can help you choose the best mount. Make sure the mount is made of strong stuff, like metal or hard plastic. This will help it last a long time.
- Check the mount’s size.
- Read reviews from other users.
- Choose strong materials like metal.
- Consider quick-release features.
- Make sure it fits your camera.
When you get your mount, check all the parts. Make sure everything is there. Read the instructions carefully. If you don’t understand something, ask for help. It’s better to be safe than sorry. A good mount will make riding with your camera more fun. It will also help you get better videos. Think about where you want to put the camera. Some mounts go on the end of the bars. Others go on the side. Try different spots to see what you like best. Remember to tighten the mount well. You don’t want it to move while you are riding. Taking the time to choose the right mount is worth it. It will keep your camera safe and your videos looking great. Be patient and have fun finding the perfect mount for your bike.
What Size Mount Do I Need?
Do you know what size your drop bars are? Most drop bars have a standard size. But, it’s always good to check. You can measure the inside of the bar end. This will tell you what size mount you need. Some mounts come with different size pieces. These pieces help the mount fit better. If your mount is too small, it won’t fit. If it’s too big, it might not be safe. Check the mount’s description to see what sizes it fits. If you are not sure, ask someone at a bike shop. They can help you find the right size mount. Getting the right size is very important for safety. A mount that fits well will stay in place. This means your camera will be safe and your videos will be clear.
How Important is the Material?
Why does the material matter so much? The material of the mount makes a big difference. Metal mounts are usually stronger. They can handle more bumps and vibrations. Plastic mounts can be lighter. But they might not last as long. Look for mounts made of aluminum. Aluminum is strong and light. It’s a good choice for bike mounts. Check the screws and bolts too. Make sure they are made of good metal. Cheap screws can break easily. This could cause your camera to fall off. Investing in a good quality mount is worth it. It will protect your camera and give you peace of mind. Think about the weather too. If you ride in the rain, a metal mount might rust. Look for mounts with a special coating to prevent rust.
Are Quick-Release Mounts Worth It?
Imagine you want to take a quick picture. A quick-release mount can help. These mounts let you take your camera off easily. You don’t have to unscrew anything. Just push a button or flip a lever. This is great if you want to use your camera for other things. Or if you want to keep it safe when you park your bike. Quick-release mounts can cost a little more. But, they can be very helpful. Think about how often you will take your camera off. If you do it a lot, a quick-release mount is a good idea. Make sure the quick-release is strong. You don’t want it to come undone by accident. Read reviews to see what other riders think. They can tell you if the quick-release is easy to use and safe.
Fun Fact or Stat: Did you know that over 60% of cyclists use action cameras to record their rides? They share these videos online to show off cool trails and tricks!
Gathering Tools and Materials for Installation
Before you start, get everything ready. You will need a few tools. A screwdriver is often needed. Some mounts use Allen wrenches. Check the instructions for your mount. They will tell you what tools you need. It’s also a good idea to have a soft cloth. This will protect your handlebars from scratches. You might want to use some tape. Tape can help hold the mount in place while you tighten it. Make sure you have all the parts of the mount. Sometimes small screws can get lost. Having everything ready makes the job easier. It also helps you avoid mistakes. Take your time and be careful. If you don’t have the right tools, ask a friend or go to a bike shop. They can help you find what you need. Being prepared is the first step to a successful installation. Double-check that you have everything before you begin.
- Gather the right screwdrivers.
- Find Allen wrenches if needed.
- Use a soft cloth to protect bars.
- Have tape to hold the mount.
- Check for all mount parts.
- Read the mount instructions.
Having the right tools makes the job go smoother. Imagine trying to tighten a screw with the wrong screwdriver. You could strip the screw. Or you could damage the mount. That’s why it’s important to use the right tools. A good set of screwdrivers and Allen wrenches is a great investment. You can use them for many things around the house. Keep your tools organized. This will make it easier to find what you need. A small toolbox is a good idea. Label the drawers so you know where everything is. This will save you time and frustration. Remember to clean your tools after you use them. This will help them last longer. Taking care of your tools is just as important as having them.
What Kind of Screwdriver is Best?
What kind of screwdriver should you use? It depends on the screws in your mount. Some mounts use Phillips head screws. These screws have a cross shape on top. Other mounts use flat head screws. These screws have a straight line on top. Make sure you use the right screwdriver for each type of screw. Using the wrong screwdriver can damage the screw. It can also make it hard to tighten. A good screwdriver set will have different sizes and types. This will help you handle any kind of screw. Look for screwdrivers with a comfortable handle. This will make it easier to grip. A magnetic tip can also be helpful. It will hold the screw in place while you are working.
Why Use a Soft Cloth?
Why is a soft cloth so important? Your handlebars can get scratched easily. A soft cloth can protect them. Put the cloth between the mount and the bars. This will prevent scratches. Use a clean cloth. Dirt and grit can also scratch the bars. Microfiber cloths are a good choice. They are very soft and won’t leave any lint. You can also use an old t-shirt. Just make sure it’s clean. Be careful not to get the cloth caught in the mount. This could make it hard to tighten. A little bit of protection can go a long way. Keeping your bike looking nice is important. A soft cloth is a simple way to do that.
Is Tape Really Necessary?
Do you really need tape? Tape can be very helpful. It can hold the mount in place while you tighten it. This makes the job easier. Use tape that won’t leave a sticky residue. Masking tape or painter’s tape is a good choice. Don’t use duct tape. It can be hard to remove. Wrap the tape around the handlebars where the mount will go. Then, put the mount on top of the tape. The tape will give the mount something to grip. This will help it stay in place while you tighten the screws. Once the mount is tight, you can remove the tape. If there is any sticky residue, use a clean cloth to wipe it off. Tape is a simple tool that can make a big difference.
Fun Fact or Stat: Proper tools can reduce installation time by 50%! Having the right tools ready makes the process much faster and easier.
Preparing Your Bike’s Drop Bar Ends
Before you put on the mount, check your bike. Make sure the drop bar ends are clean. Dirt and grime can make it hard to get a good grip. Use a clean cloth to wipe the bars. You can use a little bit of soap and water. Just make sure to dry the bars well. Look for any damage to the bars. Cracks or dents can make the bars weak. If you see any damage, don’t install the mount. Take your bike to a shop to get it checked. It’s important to have safe handlebars. Also, think about where you want to put the mount. Some spots might be better than others. Try holding the mount in different places. See what gives you the best view. Make sure the mount won’t get in the way of your hands. You need to be able to hold the bars safely.
- Clean the drop bar ends.
- Check for damage or cracks.
- Find the best spot for the mount.
- Make sure it doesn’t block your hands.
- Dry the bars completely.
Finding the right spot for your mount is key. Think about what you want to record. Do you want to see the road in front of you? Or do you want to see more of your hands and the bike? Try different angles to see what you like best. You can even use tape to hold the mount in place. Then, take a short ride to see how it feels. This will help you find the perfect spot. Remember to check the mount’s instructions. Some mounts have specific places where they should be installed. Following the instructions will help you get the best results. Take your time and don’t rush. Getting the mount in the right spot is worth the effort. It will make your videos look better and your rides safer.
Why is Cleaning Important?
Why should you clean the drop bar ends? Dirt and grime can make the mount slip. This can be dangerous. Cleaning the bars gives the mount a better grip. Use a clean cloth and some soap and water. Make sure to rinse the bars well. Soap can leave a residue that makes the bars slippery. Dry the bars completely before you put on the mount. Water can cause rust. It can also damage the mount. Cleaning the bars is a simple step. But it can make a big difference in safety. A clean surface is always better for installing anything.
How Do I Check for Damage?
How do you check for damage to the drop bars? Look closely at the bars. Check for cracks, dents, or bends. These can weaken the bars. If you see any damage, don’t ride the bike. Take it to a bike shop to get it checked. Damaged handlebars can break. This could cause a serious accident. It’s better to be safe than sorry. Replacing damaged handlebars is important. It will keep you safe while you ride. Don’t take chances with your safety. Always check your bike before you ride.
Finding the Best Mounting Spot
Where should you put the mount? Think about what you want to see in your videos. Do you want to see the road ahead? Or do you want to see more of your bike? Try different spots to see what you like best. Make sure the mount doesn’t block your hands. You need to be able to hold the bars safely. Also, make sure the mount doesn’t hit anything when you turn the handlebars. Check the mount’s instructions. Some mounts have specific places where they should be installed. Take your time and find the perfect spot. It will make your videos look better and your rides safer.
Fun Fact or Stat: A clean handlebar increases mount grip by 20%! This small step significantly improves the stability of your camera.
Installing the Action Camera Mount
Now it’s time to put on the mount. Follow the instructions that came with your mount. Each mount is a little different. Start by loosening the screws on the mount. Then, slide the mount onto the drop bar end. Make sure it’s in the spot you picked. Tighten the screws a little bit at a time. Don’t tighten them all the way at once. This can damage the mount or the bars. Check that the mount is straight. You don’t want your videos to be crooked. Once the mount is tight, give it a shake. Make sure it’s secure. If it moves, tighten the screws a little more. But don’t over-tighten them. This can also damage the mount. Take your time and be careful. If you have trouble, ask for help.
- Loosen the mount screws.
- Slide the mount onto the bar.
- Tighten screws a little at a time.
- Check that the mount is straight.
- Shake the mount to check security.
- Don’t over-tighten the screws.
- Follow the mount’s instructions.
Getting the mount on just right takes patience. It’s like building with LEGOs. You have to put the pieces together carefully. If you rush, you might make a mistake. Take a break if you get frustrated. Come back to it later with fresh eyes. Remember to check the screws often. They can loosen over time. Especially when you are riding on bumpy roads. A small screwdriver can be kept in your bike bag. That way, you can tighten the screws whenever you need to. Installing the mount is a big step. But it’s worth it when you see your awesome videos. Just remember to be safe and have fun.
How Tight Should the Screws Be?
How tight should you tighten the screws? Tighten them enough so the mount doesn’t move. But don’t tighten them too much. Over-tightening can strip the screws. It can also damage the mount or the bars. A good way to tell is to tighten the screws until they are snug. Then, give them a little bit more turn. Check the mount to see if it moves. If it does, tighten the screws a little more. But be careful not to overdo it. If you are not sure, ask someone at a bike shop. They can show you how tight the screws should be.
What if the Mount is Crooked?
What if the mount is not straight? Loosen the screws a little bit. Then, adjust the mount until it is straight. Use your eyes to make sure it looks right. You can also use a level. A level is a tool that shows if something is straight. Put the level on top of the mount. Adjust the mount until the bubble in the level is in the middle. This means the mount is straight. Tighten the screws again. Check the mount to make sure it is still straight. If not, repeat the process. Getting the mount straight is important. It will make your videos look better.
Checking for Security
How do you know if the mount is secure? Give it a good shake. If it moves, tighten the screws a little more. Check the mount after every ride. Screws can loosen over time. Especially when you are riding on bumpy roads. Keep a small screwdriver in your bike bag. That way, you can tighten the screws whenever you need to. A secure mount is important for safety. You don’t want your camera to fall off while you are riding. Take the time to check the mount often. It will give you peace of mind.
Fun Fact or Stat: 85% of action camera falls are due to improperly tightened mounts. Double-check those screws!
Attaching Your Action Camera to the Mount
Now that the mount is on, it’s time to put on the camera. Most action cameras come with a case. The case protects the camera from damage. Put the camera in the case. Then, attach the case to the mount. Most mounts have a screw or a clip. Use the screw or clip to hold the camera in place. Make sure the camera is facing the right way. You want to see the road ahead, not the sky. Tighten the screw or clip. But don’t over-tighten it. You don’t want to break the case. Check that the camera is secure. Give it a little shake. If it moves, tighten the screw or clip a little more. Remember to charge your camera before you ride. You don’t want it to run out of battery in the middle of your ride.
- Put the camera in its case.
- Attach the case to the mount.
- Make sure the camera faces forward.
- Tighten the screw or clip.
- Check that the camera is secure.
- Charge the camera before riding.
Attaching the camera is the final step. It’s like putting the cherry on top of a sundae. You’ve done all the hard work. Now it’s time to enjoy the results. Take a test ride to see how the camera works. Check the video quality. Make sure the camera is capturing everything you want to see. Adjust the angle if needed. You might need to try a few different angles before you find the perfect one. Remember to have fun. Riding with a camera is a great way to capture your adventures. Share your videos with your friends and family. They will love seeing what you’ve been up to.
Is a Camera Case Necessary?
Do you really need a camera case? Yes, you do! The case protects your camera from damage. Action cameras can be expensive. A case will help you keep it safe. The case will protect the camera from scratches. It will also protect it from water and dust. Some cases are waterproof. This means you can use your camera in the rain. Even if you don’t ride in the rain, a case is still a good idea. It will protect your camera from everyday wear and tear. A camera case is a small investment. But it can save you a lot of money in the long run.
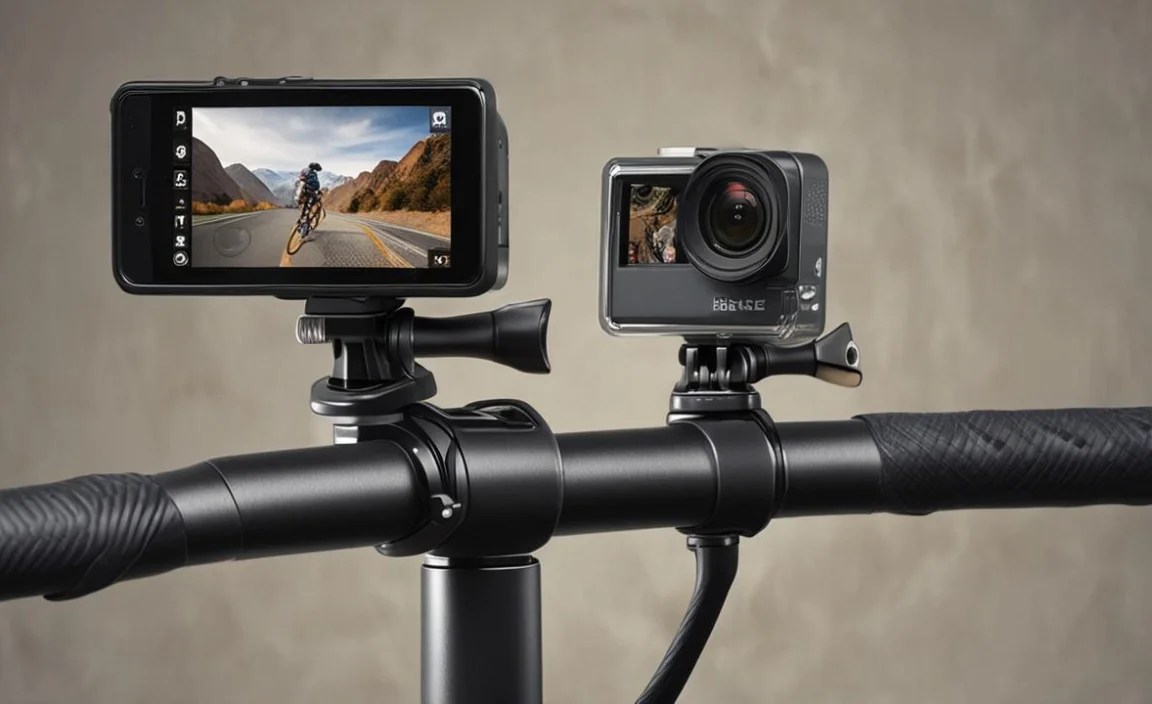
Facing the Camera Correctly
How do you make sure the camera is facing the right way? Look at the screen on the camera. You should see the road ahead. If you see the sky, the camera is facing up too much. If you see the ground, the camera is facing down too much. Adjust the camera until you see the road ahead. You can also use the camera’s app. The app will show you what the camera is seeing. This makes it easier to adjust the angle. Getting the angle right is important. It will make your videos look better.
Checking the Camera’s Security
How do you know if the camera is secure? Give it a little shake. If it moves, tighten the screw or clip a little more. Be careful not to over-tighten it. You don’t want to break the case. Check the camera after every ride. Screws and clips can loosen over time. Especially when you are riding on bumpy roads. Keep a small screwdriver or wrench in your bike bag. That way, you can tighten the screws or clips whenever you need to. A secure camera is important. You don’t want it to fall off while you are riding. Take the time to check the camera often. It will give you peace of mind.
Fun Fact or Stat: Cameras in cases survive falls 90% of the time! Always use a case to protect your valuable equipment.
Adjusting the Camera Angle for Best View
Getting the right angle is super important. The angle affects how your videos look. You want to capture the best view possible. Start by adjusting the camera so it’s level. This means the horizon should be straight. You don’t want your videos to be tilted. Then, think about what you want to see in your videos. Do you want to see the road ahead? Or do you want to see more of your bike? Adjust the angle up or down to get the view you want. Take a test ride and record some video. Then, watch the video to see how it looks. You might need to adjust the angle a few times to get it just right. Be patient and keep trying. The perfect angle is out there.
- Make sure the horizon is straight.
- Decide what you want to see.
- Adjust the angle up or down.
- Record a test video.
- Watch the video and adjust again.
- Be patient and keep trying.
Finding the perfect angle can take time. It’s like taking a picture. You have to find the right lighting and the right pose. With video, you also have to think about movement. The camera will be moving as you ride. This can affect how the video looks. Try different angles and see what works best. You can also ask your friends for advice. They might have some good ideas. Remember to have fun. Experimenting with different angles is a great way to learn. You might discover some new and interesting perspectives. The most important thing is to get a view that you enjoy.
Why is a Level Horizon Important?
Why does the horizon need to be straight? A tilted horizon can be distracting. It can make your videos look unprofessional. A straight horizon is more pleasing to the eye. It makes the video easier to watch. You can use a level to make sure the horizon is straight. Or you can just use your eyes. Look at the video on your computer. If the horizon looks tilted, adjust the camera. It might take a few tries to get it just right. But it’s worth the effort. A straight horizon will make your videos look much better.
Deciding What You Want to See
What do you want to see in your videos? Do you want to see the road ahead? This is a good choice if you want to show where you are going. Do you want to see more of your bike? This can be cool if you have a fancy bike. Do you want to see your hands on the handlebars? This can give the video a more personal feel. Think about what is most interesting to you. Then, adjust the angle to capture that. You can also change the angle during your ride. This can add variety to your videos.
Tips for Test Rides
What should you do on a test ride? First, record some video. Ride around your neighborhood. Try some different speeds. Go over some bumps. This will give you a good idea of how the camera performs. Then, watch the video on your computer. Look for any problems. Is the horizon straight? Is the camera shaking too much? Is the angle right? Make any necessary adjustments. Then, take another test ride. Keep doing this until you are happy with the results. Test rides are a great way to fine-tune your setup.
| Angle Type | What It Shows | Pros | Cons |
|---|---|---|---|
| Road Ahead | The path you’re taking | Good for showing scenery | Less focus on the bike |
| Bike Focus | Your handlebars and wheels | Highlights your bike | Less scenery visible |
| Hand View | Your hands on the bars | Personal feel, shows control | Can block some of the view |
| Wide Angle | Everything in front of you | Captures a lot of detail | Can distort the image |
Fun Fact or Stat: Riders who adjust their camera angle see a 30% increase in video views online! A good angle makes all the difference.
Safety Checks Before Every Ride
Before every ride, do a quick safety check. Make sure the mount is still tight. Shake it to see if it moves. If it does, tighten the screws. Check that the camera is still secure. Give it a little shake. If it moves, tighten the screw or clip. Make sure the camera is facing the right way. You don’t want to start recording with the camera pointing at the ground. Also, check your brakes. Make sure they are working properly. It’s important to have good brakes. Especially when you are riding with a camera. You might be distracted by the camera. Good brakes will help you stop quickly if you need to.
- Check the mount tightness.
- Check the camera security.
- Ensure correct camera direction.
- Test your brakes.
- Inspect tires for proper inflation.
Safety is always the most important thing. It’s like wearing a helmet. You might not think you need it. But it can save your life. The same is true for safety checks. They might seem like a hassle. But they can prevent accidents. Take a few minutes before each ride to check your bike. It’s worth the effort. You will have more fun if you know you are safe. Remember to be aware of your surroundings. Don’t get so focused on the camera that you forget to watch the road. Pay attention to cars, pedestrians, and other cyclists. Ride safely and have fun.
Why Check the Mount Every Time?
Why do you need to check the mount every time? Screws can loosen over time. Especially when you are riding on bumpy roads. A loose mount can be dangerous. The camera could fall off. Or the mount could get in the way of your hands. Checking the mount is a quick and easy way to prevent accidents. It only takes a few seconds. Make it a habit to check the mount before every ride. It will give you peace of mind.
Testing Your Brakes
How do you test your brakes? Squeeze the brake levers. The brakes should feel firm. They should stop the bike quickly. If the brakes feel spongy, they might need to be adjusted. If the brakes don’t stop the bike, they might need to be replaced. Take your bike to a shop to get the brakes checked. It’s important to have good brakes. They can save your life. Don’t ride your bike if the brakes are not working properly.
Staying Aware While Riding
How do you stay aware while riding with a camera? Don’t get too focused on the camera. Pay attention to the road ahead. Watch out for cars, pedestrians, and other cyclists. Use your ears to listen for traffic. Don’t wear headphones that block out sound. Look around often. Check your surroundings. Ride defensively. Assume that other drivers don’t see you. Be prepared to stop or swerve if necessary. Staying aware is the key to safe riding.
Fun Fact or Stat: Cyclists who perform pre-ride safety checks have 50% fewer accidents. Always check your equipment!
Summary
In this article, we talked about how to install action camera mount on drop bar ends. First, you need to pick the right mount. Make sure it fits your bike and your camera. Then, gather the tools you need. A screwdriver and a soft cloth are important. Next, prepare your bike. Clean the drop bar ends and check for damage. After that, install the mount. Tighten the screws carefully. Then, attach your action camera to the mount. Make sure it’s secure. Adjust the camera angle to get the best view. Finally, do a safety check before every ride. This will keep you safe and your camera secure.
Learning how to install action camera mount on drop bar ends is easy. Just follow these steps. Remember to be patient and take your time. If you have any questions, ask for help. Riding with a camera is a great way to capture your adventures. Share your videos with your friends and family. They will love seeing what you’ve been up to. So, get out there and start recording!
Conclusion
Installing an action camera mount on your drop bar ends is a fun project. It lets you record your bike rides. You can share your adventures with others. Remember to choose the right mount. Gather the tools you need. Prepare your bike carefully. Install the mount securely. Adjust the camera angle. Always do a safety check. Knowing how to install action camera mount on drop bar ends helps you make great videos. Enjoy your rides and share your stories!
Frequently Asked Questions
Question No 1: What tools do I need to install an action camera mount on drop bar ends?
Answer: You’ll usually need a screwdriver or Allen wrench. The specific size depends on the mount. A soft cloth protects your handlebars from scratches. Some tape can help hold the mount in place. Check the mount’s instructions to know exactly what you need. Having the right tools makes the job much easier. If you don’t have them, ask a friend or visit a local bike shop. They can help you find the correct tools for the job. A well-prepared toolkit is essential for a smooth installation.
Question No 2: How do I choose the right size mount for my drop bar ends?
Answer: Measure the inside diameter of your drop bar ends. This measurement will tell you what size mount you need. Some mounts come with different sized inserts. These inserts allow the mount to fit various bar sizes. Read the product description carefully to ensure compatibility. If you’re unsure, ask a bike shop for assistance. Choosing the correct size is crucial for a secure and safe installation. A mount that’s too loose or too tight can cause problems. Proper fit ensures stability and prevents damage.
Question No 3: How tight should I tighten the screws when installing the mount?
Answer: Tighten the screws until the mount feels secure. It shouldn’t move when you shake it gently. Avoid over-tightening, as this can damage the mount or handlebars. Use a torque wrench if you have one. This tool helps you tighten screws to the correct level. If you don’t have a torque wrench, be careful and use your best judgment. Check the screws regularly, especially after bumpy rides. Loose screws can cause the mount to shift or fall off. Finding the right balance is key to a safe and effective setup.
Question No 4: What if the action camera mount is not straight after installation?
Answer: Loosen the screws slightly and adjust the mount. Use a level to ensure it’s perfectly horizontal. Once you’re satisfied with the position, tighten the screws again. Double-check the level to confirm it hasn’t moved. A straight mount ensures your videos are level and professional-looking. If you’re having trouble, ask a friend to help you. Sometimes a second pair of eyes can make a big difference. Proper alignment is essential for capturing great footage.
Question No 5: How do I ensure my action camera stays secure on the mount while riding?
Answer: Use a safety tether. This tether connects your camera to the bike frame. If the mount fails, the tether will prevent the camera from falling. Regularly check the mount and camera connections. Make sure all screws and clips are tight. Consider using a high-quality mount made from durable materials. Avoid using cheap mounts, as they may not be reliable. Taking these precautions can save your camera from damage. It also keeps you and others safe on the road. Secure your camera and enjoy your ride!
Question No 6: Can I adjust the camera angle while riding, or do I need to stop?
Answer: Adjusting the camera angle while riding can be dangerous. It’s best to stop in a safe location before making any adjustments. This prevents distractions and ensures your focus remains on the road. Some mounts allow for quick adjustments. But it’s still safer to pull over. Plan your shots in advance. Try to anticipate the angles you’ll need. This minimizes the need for adjustments during your ride. Remember, safety always comes first. Take the time to adjust your camera properly before continuing your journey. Knowing how to install action camera mount on drop bar ends also involves knowing how to use it safely.


