
How to Attach Hose to Rear Shock: Easy Guide
Quick Summary:
Attaching a hose to your rear shock is simple with the right tools and a bit of know-how. First, identify the correct adapter for your shock. Then, thread the adapter onto the shock’s valve. Finally, securely connect the hose from your pump or nitrogen tank to the adapter. This ensures a tight seal for accurate pressure adjustments. Always double-check the connection before inflating.
Rear shocks are a vital part of your bike’s suspension system, and keeping them properly inflated is key for a smooth ride. But sometimes, getting the hose properly attached can be tricky. Maybe you’re struggling with leaky connections, or perhaps you’re unsure which adapter to use. It’s a common issue, but don’t worry – it’s easier than you think!
This guide will walk you through each step of attaching a hose to your rear shock, ensuring a secure, leak-free connection. We’ll cover everything from identifying the right tools to troubleshooting common problems. Let’s get started and make sure your shock is ready for the trail!
Understanding Rear Shock Hoses and Connections

Before diving into the how-to, let’s cover some basics. Knowing the different types of hoses and connections will make the process smoother and less confusing. Plus, understanding the components helps you troubleshoot if you run into any issues.
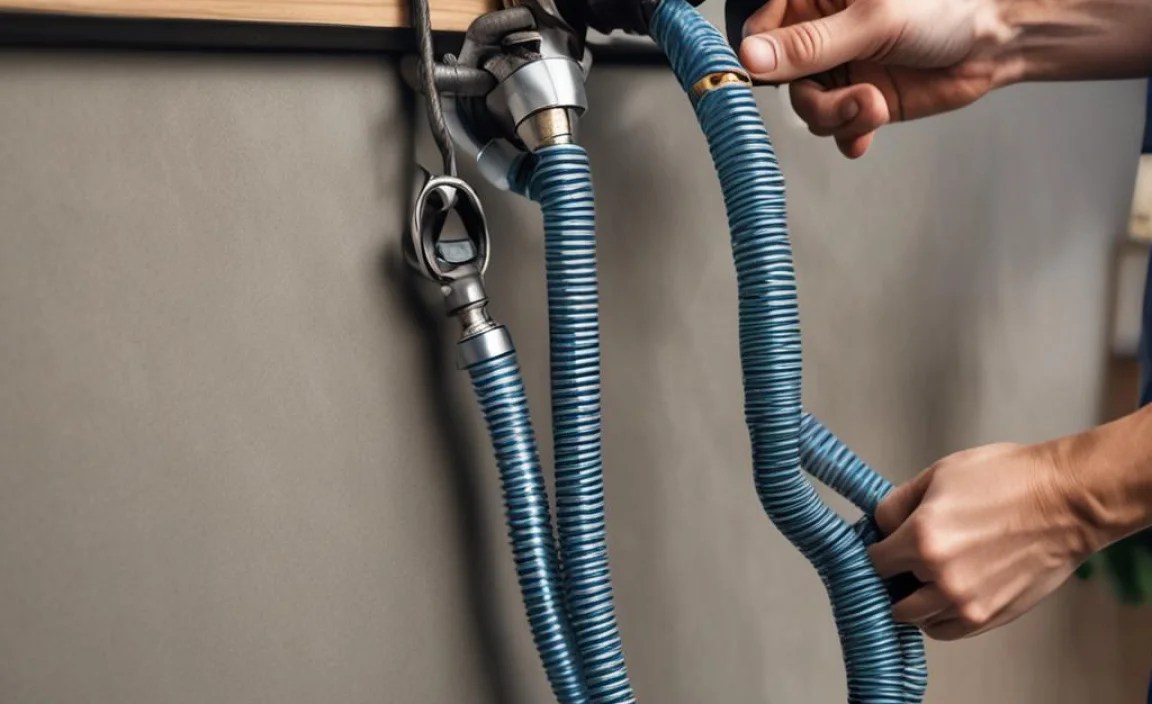
Types of Hoses
There are primarily two types of hoses you’ll encounter:
- Standard Schrader Valve Hoses: These are similar to the ones you use on car tires. They’re common and easy to use but can sometimes leak if not properly connected.
- Threaded Hoses: These screw onto the shock, providing a more secure and leak-free connection. They’re often preferred for high-pressure applications.
Types of Connections
Rear shocks typically use Schrader valves, but the connection method can vary:
- Direct Connection: The hose connects directly to the Schrader valve on the shock.
- Adapter Connection: An adapter is needed to bridge the gap between the hose and the shock’s valve. This is common on shocks with recessed or hard-to-reach valves.
Why a Secure Connection Matters
A secure connection is crucial for accurate pressure readings and adjustments. A leaky connection can lead to:
- Inaccurate Pressure Readings: You might think your shock is at the correct pressure when it’s not.
- Pressure Loss: Air leaks mean your shock won’t perform as it should, affecting your ride quality.
- Damage to the Shock: Repeated adjustments with poor connections can damage the valve over time.
Tools and Materials You’ll Need

Having the right tools on hand makes the job much easier and ensures you don’t damage your shock. Here’s a list of what you’ll need:
- Shock Pump: A high-pressure pump specifically designed for shocks. These pumps have precise gauges for accurate pressure adjustments.
- Appropriate Adapter (if needed): Some shocks require a special adapter to connect the hose. Check your shock manufacturer’s specifications.
- Clean Rag: To wipe down the valve and keep things clean.
- Valve Core Tool (optional): Useful for tightening or replacing the valve core if needed.
- Gloves (optional): To keep your hands clean.
Step-by-Step Guide to Attaching the Hose

Now, let’s get into the actual process. Follow these steps for a secure and leak-free connection.
Step 1: Prepare the Shock
Before you start, make sure the area around the shock valve is clean. Use a clean rag to wipe away any dirt or debris. This helps ensure a good seal.
Step 2: Identify the Valve Type
Most rear shocks use a Schrader valve. It looks just like the valve on your car tires. Some shocks, however, might have a recessed valve or require an adapter.
Step 3: Attach the Adapter (If Necessary)
If your shock requires an adapter, thread it onto the valve. Make sure it’s snug but not overly tight. Overtightening can damage the valve.
Step 4: Connect the Hose
Now, attach the hose from your shock pump or nitrogen tank to the valve (or the adapter, if you’re using one). There are two common types of connections:
- Schrader Valve Hose: Press the hose firmly onto the valve. Make sure it’s fully seated to prevent leaks.
- Threaded Hose: Screw the hose onto the valve or adapter. Tighten it until it’s snug.
Step 5: Ensure a Secure Seal
Before you start pumping, double-check that the connection is secure. Give the hose a gentle wiggle to see if there are any leaks. If you hear or feel air escaping, tighten the connection or reposition the hose.
Step 6: Inflate to the Desired Pressure
Once you’re confident in the connection, start pumping. Use the gauge on your shock pump to monitor the pressure. Refer to your bike or shock manufacturer’s recommendations for the correct pressure.
Step 7: Disconnect the Hose Carefully
After inflating to the desired pressure, disconnect the hose carefully. Some air loss is normal during disconnection, but it should be minimal. If you lose a lot of air, double-check your connection method for next time.
Troubleshooting Common Issues
Sometimes, things don’t go as planned. Here are some common issues and how to fix them.
Air Leaks
Problem: You hear or feel air escaping when you connect the hose.
Solution:
- Check the Connection: Make sure the hose is fully seated or properly threaded.
- Inspect the Valve: Look for any damage or debris on the valve. Clean it with a rag if necessary.
- Replace the Valve Core: If the valve core is damaged, use a valve core tool to replace it.
- Use Teflon Tape: For threaded connections, a bit of Teflon tape can help create a tighter seal.
Incorrect Pressure Readings
Problem: The pressure reading on the pump doesn’t seem accurate.
Solution:
- Calibrate the Pump: Some pumps can be calibrated. Check the manufacturer’s instructions.
- Try a Different Pump: If possible, use another pump to see if the reading is the same.
- Check the Gauge: Make sure the gauge is clean and not damaged.
Hose Won’t Connect
Problem: The hose won’t attach to the valve.
Solution:
- Check the Adapter: Make sure you’re using the correct adapter for your shock.
- Clean the Threads: If it’s a threaded connection, clean the threads on both the hose and the valve.
- Apply Lubricant: A small amount of silicone grease can help the hose thread more easily.
Tips for Maintaining Your Rear Shock

Regular maintenance keeps your rear shock in top condition and prolongs its lifespan.
- Clean Regularly: Wipe down the shock after each ride to remove dirt and grime.
- Check Pressure: Check the pressure before each ride to ensure it’s within the recommended range.
- Inspect for Damage: Look for any signs of damage, such as cracks or leaks.
- Service Periodically: Follow the manufacturer’s recommendations for servicing the shock. This typically involves replacing seals and oil.
Choosing the Right Shock Pump
A good shock pump is an essential tool for maintaining your rear shock. Here’s what to look for when choosing a pump.
- Precise Gauge: Look for a pump with a gauge that’s easy to read and accurate to within a few PSI.
- Bleed Valve: A bleed valve allows you to release small amounts of air to fine-tune the pressure.
- Durable Construction: Choose a pump made from high-quality materials that will last.
- Comfortable Handle: A comfortable handle makes pumping easier, especially at high pressures.
Understanding Shock Pressure and Sag
Setting the correct shock pressure is crucial for optimal performance. Here’s a quick guide to understanding shock pressure and sag.
What is Sag?
Sag is the amount the shock compresses when you’re sitting on the bike. It’s typically measured as a percentage of the total shock travel.
Why is Sag Important?
Proper sag ensures that the shock can absorb bumps and maintain traction. Too little sag, and the ride will be harsh. Too much sag, and the bike will feel sluggish.
How to Set Sag
- Find the Recommended Sag: Check your bike or shock manufacturer’s recommendations.
- Measure the Shock Travel: Measure the total travel of the shock.
- Calculate the Sag Amount: Multiply the total travel by the recommended sag percentage.
- Set the Pressure: Adjust the shock pressure until you achieve the correct sag amount.
Nitrogen vs. Air for Rear Shocks
While most rear shocks use air, some high-performance shocks use nitrogen. Here’s a comparison of the two.
| Feature | Air | Nitrogen |
|---|---|---|
| Cost | Lower | Higher |
| Availability | Easy to find | Requires specialized equipment |
| Performance | Good for most riders | More consistent performance in extreme conditions |
| Maintenance | Simple | More complex |
Rear Shock Maintenance Schedule
Here’s a sample maintenance schedule to keep your rear shock performing optimally. Adjust based on your riding frequency and conditions.
| Task | Frequency | Notes |
|---|---|---|
| Clean the shock | After every ride | Wipe down with a clean rag |
| Check shock pressure | Before every ride | Adjust as needed for optimal sag |
| Inspect for damage | Monthly | Look for cracks, leaks, or wear |
| Service the shock | Annually or every 100 hours of riding | Replace seals and oil |
DIY vs. Professional Servicing
Deciding whether to service your rear shock yourself or take it to a professional depends on your skills and comfort level.
DIY Servicing
Pros:
- Lower cost
- Convenience
- Learning experience
Cons:
- Requires specialized tools
- Can be time-consuming
- Risk of damaging the shock if not done correctly
Professional Servicing
Pros:
- Expertise and experience
- Access to specialized tools
- Warranty on the work
Cons:
- Higher cost
- Inconvenience of taking the bike to a shop
FAQ: Attaching a Hose to Your Rear Shock
1. What type of pump do I need for a rear shock?
You need a high-pressure shock pump. These pumps are designed to deliver small volumes of air at high pressures, and they have precise gauges for accurate pressure adjustments.
2. How do I know what pressure to put in my rear shock?
Check your bike or shock manufacturer’s recommendations. The correct pressure depends on your weight, riding style, and the bike’s suspension design. Start with the recommended pressure and adjust as needed to achieve the correct sag.
3. Why is my shock pump leaking air?
Air leaks can be caused by a loose connection, a damaged valve, or a faulty pump. Check the connection first, and make sure the hose is fully seated. If the valve is damaged, replace the valve core. If the pump is faulty, consider replacing it.
4. Do I need an adapter to connect the hose to my rear shock?
Some shocks require an adapter, especially if the valve is recessed or hard to reach. Check your shock manufacturer’s specifications to see if an adapter is needed.
5. How often should I check the pressure in my rear shock?
It’s a good idea to check the pressure before each ride. Rear shocks can lose pressure over time, so regular checks ensure optimal performance.
6. What is sag, and why is it important?
Sag is the amount the shock compresses when you’re sitting on the bike. It’s important because it ensures that the shock can absorb bumps and maintain traction. Proper sag improves ride quality and handling.
7. Can I use a regular tire pump for my rear shock?
No, you should not use a regular tire pump for your rear shock. Tire pumps deliver large volumes of air at low pressures, which is not suitable for shocks. Using a tire pump can damage the shock or make it difficult to achieve the correct pressure.
Conclusion
Attaching a hose to your rear shock doesn’t have to be a daunting task. With the right tools and a bit of patience, you can ensure a secure, leak-free connection and keep your suspension performing at its best. Remember to clean the valve, use the correct adapter if needed, and double-check the connection before inflating. Regular maintenance and attention to detail will keep your shock in top condition, ensuring a smooth and enjoyable ride. So, grab your shock pump and get ready to dial in your suspension for the ultimate riding experience!


