
Hand Air Pump Bicycle Pump Parts Diagram: Easy Guide
Quick Summary: Understanding the parts of your hand air pump is key to keeping your tires properly inflated! This guide breaks down each component, from the handle and barrel to the valves and seals. Learn how they work together and how to maintain them, so you can keep your pump in top shape and your tires ready for any ride.
Ever struggled with a bike pump that just won’t inflate your tires properly? It’s a common frustration for cyclists. But don’t worry, understanding the parts of your hand air pump and how they work is easier than you think. Knowing the different components will help you troubleshoot problems, perform basic maintenance, and keep your tires inflated for smooth, safe rides. Let’s dive in and explore the inner workings of your trusty bicycle pump!
Understanding Your Hand Air Pump: A Parts Diagram and Guide

Your hand air pump is a simple yet effective tool. By understanding its components, you can keep it working smoothly and efficiently. Let’s break down the main parts and their functions.
Key Components of a Hand Air Pump
Here’s a breakdown of the main parts you’ll find in most hand air pumps:
- Handle: The part you grip to operate the pump. Ergonomic handles make pumping easier and more comfortable.
- Barrel (Cylinder): The main body of the pump, where air is compressed.
- Piston: A movable component inside the barrel that compresses the air.
- Piston Rod: Connects the handle to the piston, transferring the pumping motion.
- Base: Provides stability for the pump during use.
- Hose: Connects the pump to the tire valve.
- Valve Head (Chuck): Attaches to the tire valve (Presta or Schrader) to create an airtight seal.
- Seals (O-rings): Rubber rings that create airtight seals between moving parts.
- Check Valve: A one-way valve that allows air to flow into the tire but prevents it from escaping back into the pump.
Hand Air Pump Parts Diagram
While specific designs vary, this diagram shows the general arrangement of parts in a typical hand air pump.
Detailed Look at Hand Air Pump Components

Let’s explore each component in more detail:
1. Handle and Piston Rod
The handle is your point of contact with the pump. A comfortable, ergonomic handle reduces hand fatigue, especially when inflating tires to higher pressures. The piston rod connects the handle to the piston. It must be strong and durable to withstand repeated use.
2. Barrel (Cylinder) and Piston
The barrel is where the magic happens. The piston moves inside the barrel, compressing air with each stroke. The barrel needs to be smooth and precisely manufactured to ensure a good seal with the piston.
3. Base
The base provides a stable platform while you pump. A wide, sturdy base prevents the pump from tipping over, making inflation easier and safer.
4. Hose and Valve Head (Chuck)
The hose connects the pump to your tire valve. High-quality hoses are flexible and durable. The valve head, or chuck, is the part that attaches to the valve. Many pumps have dual-head chucks that can accommodate both Presta and Schrader valves.
Presta vs. Schrader Valves
- Presta Valves: Narrower and often found on road bikes and higher-end bicycles. They require a special adapter or a pump head designed for Presta valves.
- Schrader Valves: Similar to car tire valves, wider and more common on mountain bikes, hybrid bikes, and kids’ bikes.
5. Seals (O-rings)
Seals, often O-rings, are critical for creating airtight seals between moving parts, especially the piston and the barrel. Over time, these seals can dry out, crack, or wear down, leading to air leaks and reduced pumping efficiency. Regular maintenance and replacement of worn seals are essential.
6. Check Valve
The check valve is a one-way valve that prevents air from escaping back into the pump on the return stroke. This ensures that air only flows into the tire.
How a Hand Air Pump Works: A Step-by-Step Explanation

Now that we’ve covered the parts, let’s see how they all work together:
- Initial Stroke: As you pull up on the handle, the piston moves up inside the barrel, creating a vacuum.
- Air Intake: Air is drawn into the barrel through an intake valve.
- Compression Stroke: When you push down on the handle, the piston moves down, compressing the air inside the barrel.
- Air Delivery: The compressed air is forced through the check valve and into the tire via the hose and valve head.
- Repeat: This process is repeated until the tire reaches the desired pressure.
Maintaining Your Hand Air Pump: Keeping It in Top Shape

Regular maintenance is crucial for keeping your hand air pump working efficiently. Here’s what you need to do:
1. Cleaning
Keep the pump clean and free of dirt and debris. Wipe down the exterior with a damp cloth regularly.
2. Lubrication
Lubricate the piston and seals periodically with a silicone-based lubricant. This helps to keep the pump working smoothly and prevents the seals from drying out. Avoid using petroleum-based lubricants, as they can damage rubber seals.
3. Seal Replacement
Inspect the seals regularly for wear and tear. Replace worn or damaged seals as needed. Most pump manufacturers sell replacement seal kits.
4. Hose Inspection
Check the hose for cracks or leaks. Replace the hose if it’s damaged.
5. Valve Head Maintenance
Keep the valve head clean and free of debris. Make sure the chuck is properly tightened to the hose.
Troubleshooting Common Hand Air Pump Problems
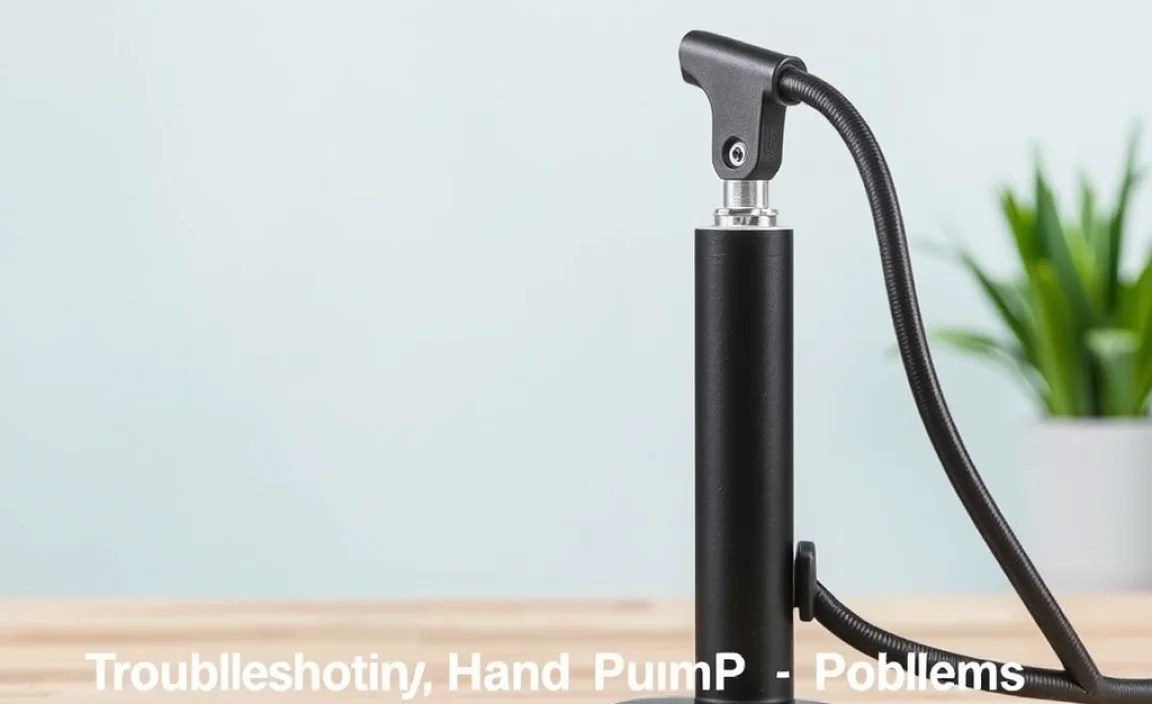
Even with regular maintenance, you might encounter problems with your hand air pump. Here are some common issues and how to fix them:
| Problem | Possible Cause | Solution |
|---|---|---|
| Pump won’t inflate tire | Leaky seals, clogged valve head, faulty check valve | Replace seals, clean valve head, replace check valve |
| Air leaking from hose | Cracked or damaged hose | Replace hose |
| Difficult to pump | Dry piston or seals | Lubricate piston and seals |
| Valve head won’t attach properly | Incorrect valve head for tire valve, damaged valve head | Use correct valve head, replace valve head |
| Pump not building pressure | Worn piston ring or seal | Replace piston ring or seal |
Choosing the Right Hand Air Pump
With so many hand air pumps on the market, choosing the right one can be overwhelming. Here are some factors to consider:
- Type of Bike: Road bikes often require pumps that can reach higher pressures (100+ PSI). Mountain bikes typically require lower pressures but higher volumes.
- Valve Type: Make sure the pump is compatible with your tire valves (Presta or Schrader). Some pumps have dual-head chucks that work with both.
- Size and Portability: Consider the size and weight of the pump if you plan to carry it with you on rides. Mini-pumps are compact and lightweight but may require more effort to inflate tires.
- Pressure Gauge: A built-in pressure gauge is helpful for accurately inflating tires to the desired pressure.
- Build Quality: Look for a pump made from durable materials like aluminum or steel.
Essential Tools for Hand Air Pump Maintenance
Having the right tools makes pump maintenance much easier. Here are some essential tools to keep on hand:
- Seal Kit: A set of replacement seals for your pump model.
- Silicone Lubricant: For lubricating the piston and seals.
- Wrenches: For tightening and loosening bolts and nuts.
- Screwdrivers: For removing and installing screws.
- Pliers: For gripping and manipulating small parts.
- Rag: For cleaning the pump.
Step-by-Step Guide to Replacing Pump Seals
Replacing the seals on your hand air pump is a straightforward process. Here’s a step-by-step guide:
- Disassemble the Pump: Carefully disassemble the pump, taking note of the order in which the parts are assembled.
- Locate the Seals: Identify the seals that need to be replaced. These are typically located on the piston and around the valve head.
- Remove Old Seals: Use a small tool, such as a pick or screwdriver, to carefully remove the old seals.
- Clean the Components: Clean the parts where the seals were located to remove any dirt or debris.
- Install New Seals: Lubricate the new seals with silicone lubricant and carefully install them in their proper locations.
- Reassemble the Pump: Reassemble the pump in the reverse order of disassembly.
- Test the Pump: Test the pump to make sure it’s working properly and that there are no air leaks.
Hand Air Pump vs. Floor Pump: Which Is Right for You?
Hand air pumps are great for portability and quick top-ups on the go, but floor pumps offer more efficiency and power for home use. Here’s a comparison:
| Feature | Hand Air Pump | Floor Pump |
|---|---|---|
| Portability | Excellent | Poor |
| Inflation Speed | Slower | Faster |
| Maximum Pressure | Varies, often lower | Typically higher |
| Effort Required | More | Less |
| Best Use | On-the-go inflation, quick top-ups | Home use, efficient inflation |
| Cost | Lower | Higher |
FAQ: Hand Air Pump Basics
What is the difference between Presta and Schrader valves?
Presta valves are narrow and typically found on road bikes, requiring a special adapter or pump head. Schrader valves are wider, similar to car tires, and common on mountain and hybrid bikes.
How often should I lubricate my hand air pump?
Lubricate your pump every few months, or whenever you notice it becoming harder to pump. Use a silicone-based lubricant.
Why is my pump not building pressure?
This is often due to worn seals. Inspect and replace the seals on the piston and valve head.
Can I use a car tire inflator on my bicycle?
Yes, if your bike has Schrader valves. However, be careful not to overinflate, as car tire inflators can deliver high pressure quickly. For Presta valves you will need an adapter.
What PSI should I inflate my tires to?
Check the sidewall of your tire for the recommended PSI range. This will vary depending on the tire and your riding style. Using a pump with a gauge can help you accurately reach the desired pressure.
How do I know if my pump seals need replacing?
If your pump is losing pressure, requires more effort to pump, or if you see visible cracks or damage on the seals, it’s time to replace them.
What type of lubricant should I use on my bike pump?
Always use a silicone-based lubricant. Avoid petroleum-based products, as they can damage the rubber seals.
External Resources
For more information on bicycle maintenance and repair, check out these resources:
Understanding the parts of your hand air pump and how to maintain them will keep you rolling smoothly. By following the tips in this guide, you can keep your pump in top condition and ensure your tires are always properly inflated. Happy riding!


